


V Rising’s survival take on Diablo with a vampire spin is loved by many gamers. But it’s not without problems: players are reporting that they’re experiencing regular and constant stuttering in the game with no good reason.
If this is also you, don’t worry, here’s a list of potential fixes that have helped many forum gamers with the V Rising stuttering on PC problem. Read on and see if they do wonders to fix the stutters for you as well.
Try these fixes for the V Rising stuttering on PC problem
You don’t have to try all the methods below, simply work your way down the list until you find the one that does the trick to fix the V Rising stuttering on PC problem for you.
- Disable memory-intensive background programs
- Clean reinstall the GPU driver
- Run your computer in Ultimate Performance Mode
- Run V Rising on the dedicated graphics card and in high performance mode
- Set the CPU priority to high
- On the hardware front
1. Disable memory-intensive background programs
V Rising could be quite memory-demanding, according to some forum gamers. So if there are too many irrelevant applications running in the background, your RAM and CPU resources will be eaten up by a large chunk. V Rising will then strive to occupy more CPU and RAM resources so as to run smoothly, and thus with the stuttering issue. So before you start gaming, make sure to close all unneeded applications.
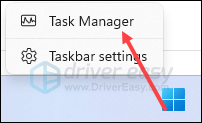
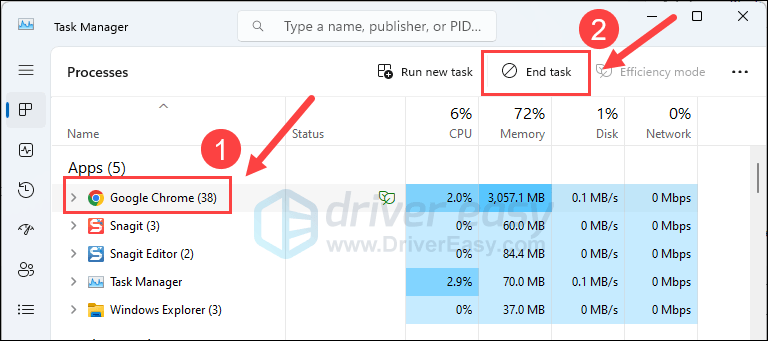
- Right-click the Windows taskbar and select Task Manager.
- Select each resource-hogging application and click End Task to close them one by one.
Then run V Rising again and see if the stutters are gone. If the problem remains, please move on to the next fix below.
2. Clean reinstall the GPU driver
Another very common reason for game stutters is an outdated or faulty graphics card driver, and V Rising is no exception. In this case, it’s recommended that you do a clean reinstallation of the display card driver. To do so, DDU (Display Driver Uninstaller) is usually recommended, as it can do a pretty good job removing all the older or faulty display driver files on your computer.
To do a clean reinstallation of the display card driver with DDU:
- Download and search for the execution file of the display card driver from the website of your GPU manufacturer:
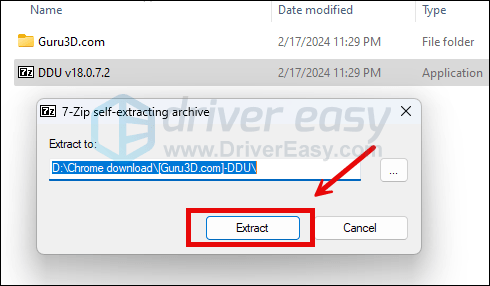
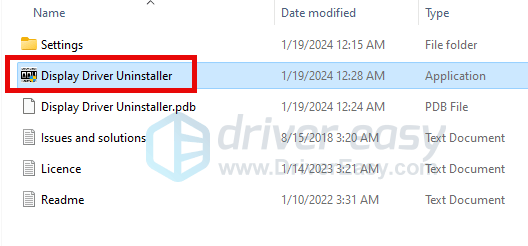
- Download DDU from the official download page. Then unzip the folder, and double-click the DDU file to further extract the execution file.
- Boot your computer into Safe Mode as instructed here: Start Safe Mode using the System Configuration tool
- When in Safe Mode, go to the folder where you unzip the DDU execution file. Double-click to run Display Driver Uninstaller.
- Select GPU and your GPU manufacturer on the right side. Then click Clean and restart.
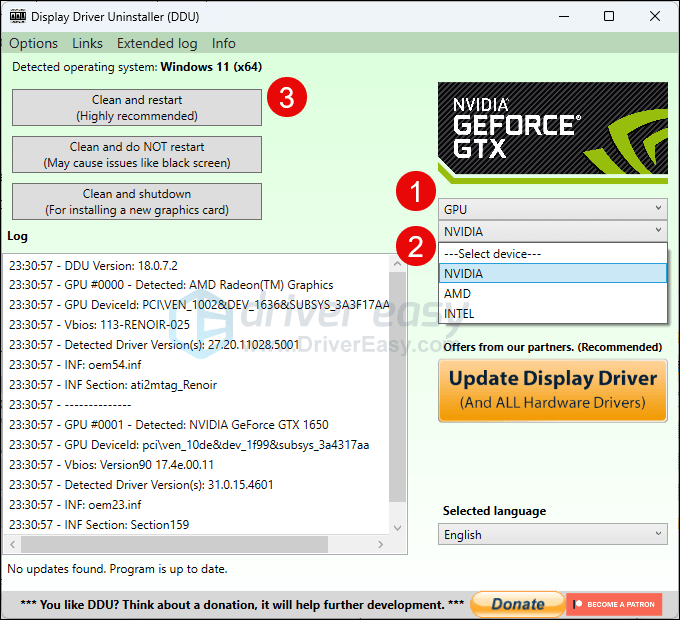
- Your computer should restart when the old driver files for your graphics card are cleaned.
- Double-click the setup file for the display card driver you’ve downloaded from step 1 to run the driver installation.
- Restart your computer afterward to see if Helldivers 2 still crashes.
If you don’t know what driver to download in the very first place, or the time or patience to do all the above, you can do it automatically with Driver Easy. Driver Easy will automatically recognize your system and find the correct drivers for it. You don’t need to know exactly what system your computer is running, you don’t need to be troubled by the wrong driver you would be downloading, and you don’t need to worry about making a mistake when installing. Driver Easy handles it all.
You can update your drivers automatically with either the FREE or the Pro version of Driver Easy. But with the Pro version it takes just 2 steps:
- Download and install Driver Easy.
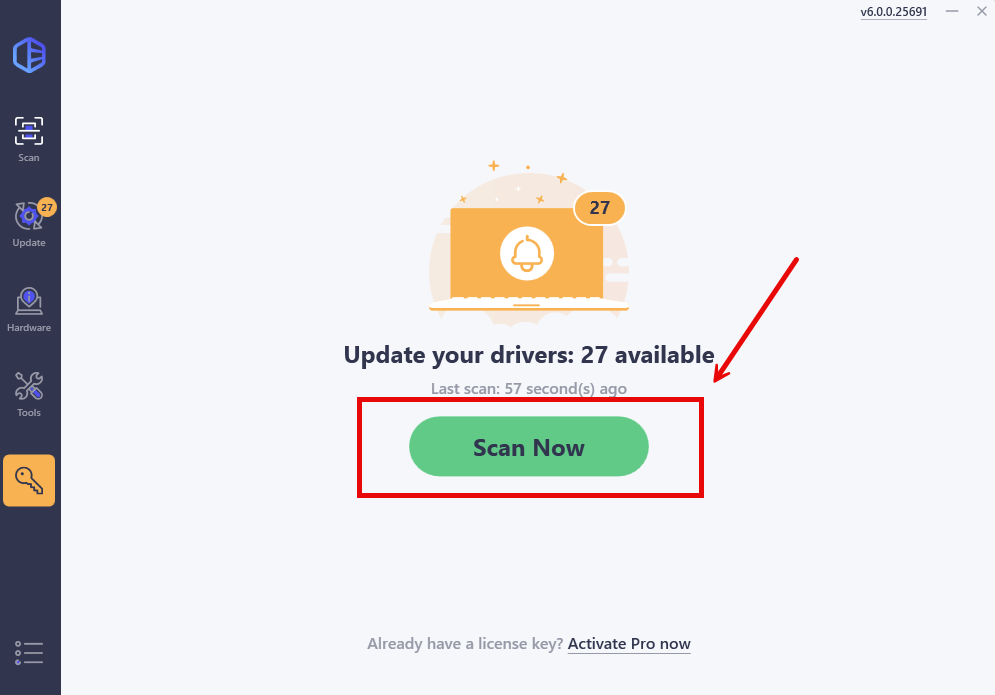
- Run Driver Easy and click the Scan Now button. Driver Easy will then scan your computer and detect any problem drivers.
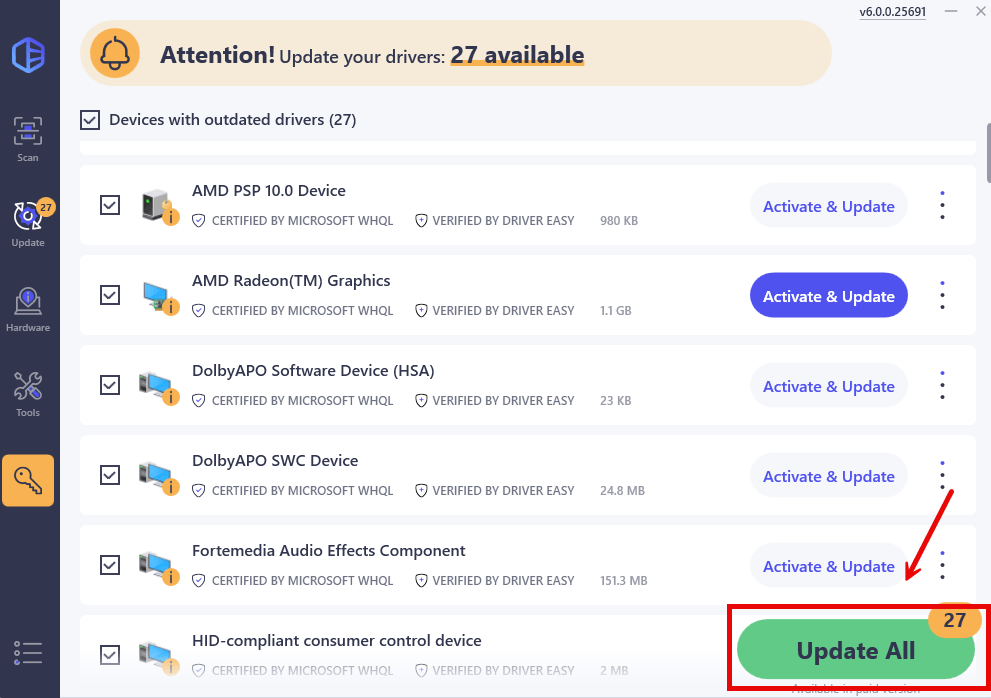
- Click Update All to automatically download and install the correct version of all the drivers that are missing or out of date on your system. (This requires the Pro version which comes with full support and a 30-day money-back guarantee. You’ll be prompted to upgrade when you click Update All. If you’re not ready to buy the Pro version, Driver Easy offers a 7-day free trial which includes access to all the Pro features such as high-speed download and one-click install. You won’t be charged anything until your 7-day trial has ended.)
- Restart your computer for the changes to take effect.
Launch V Rising again and see if the latest graphics driver helps to stop the stutters. If this fix doesn’t work for you, try the next fix, below.
3. Run your computer in Ultimate Performance Mode
By default, Windows runs on the Balanced Mode, which strikes a fine balance between PC performance and battery usage, which is the optimal choice for laptop users. But if a graphics-intensive or heavy process game is running, and you still stick to the balanced mode, your gaming performance suffers, and therefore with problems like the game crashing or stuttering problem.
When you’re sure that your computer is fully powered and has a strong PSU, you can try the following to see if running it in the Ultimate Performance Mode helps V Rising to run smoothly without stutters.
To do so:
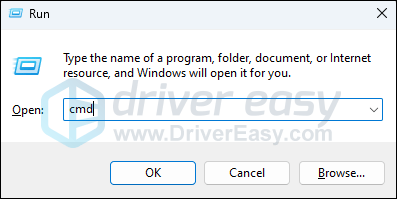
- On your keyboard, press the Windows logo key and R at the same time to open the Run dialog. Type cmd and press Ctrl, Shift and Enter at the same time to run Command Prompt as administrator.
- You’ll be prompted for permission. Click Yes to open the Command Prompt.
- In the black command prompt window, copy and paste this command:
powercfg -duplicatescheme e9a42b02-d5df-448d-aa00-03f14749eb61and hit Enter: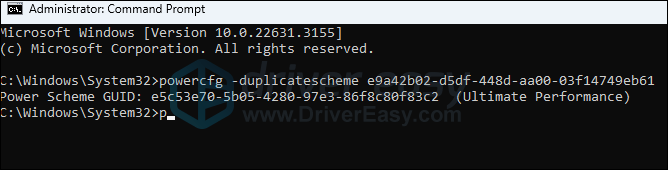
- On your keyboard, press the Windows logo key and R at the same time, then type powercfg.cpl and press Enter.

- In the pop-up window, expand Show additional plans and select Ultimate Performance.
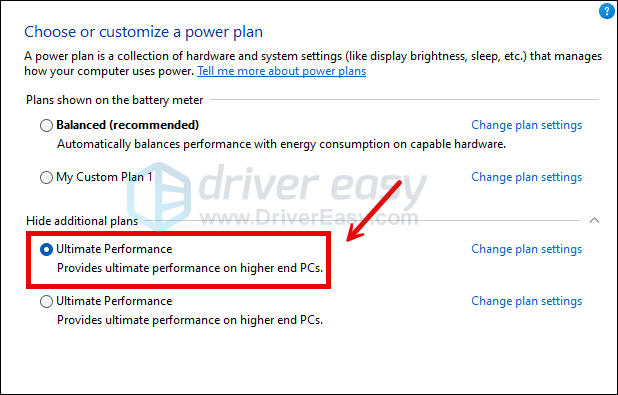
When the Ultimate Performance power plan is set, try to launch V Rising again to see if the stutters stop. If not, please select back Balanced (recommended) as your power plan and move on to the next fix.
4. Run V Rising on the dedicated graphics card and in high performance mode
When V Rising stutters on your computer, you may also want to check the Windows graphics settings to make sure that they’re set correctly. This includes running V Rising with the dedicated graphics card, and in the High Performance mode. To do so:
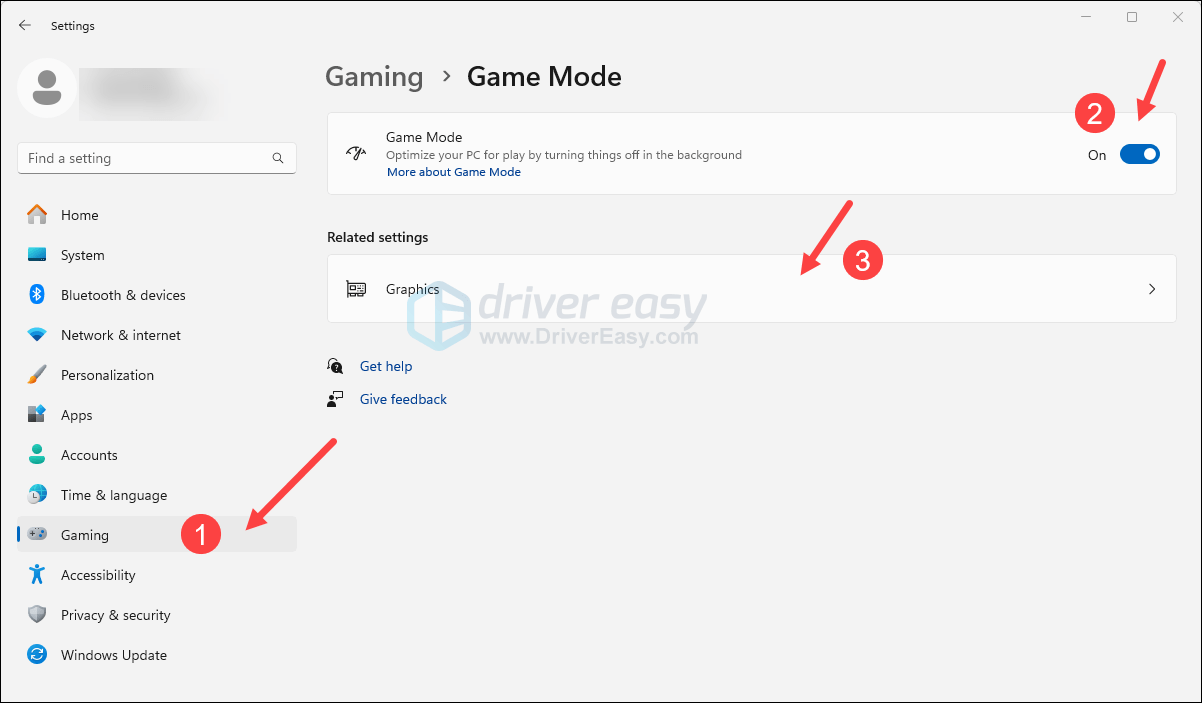
- On your keyboard, press the Windows key and the I key at the same time to open Settings.
- Select Gaming, and make sure that the toggle for Game Mode is set to On. Then click the Graphics tab.
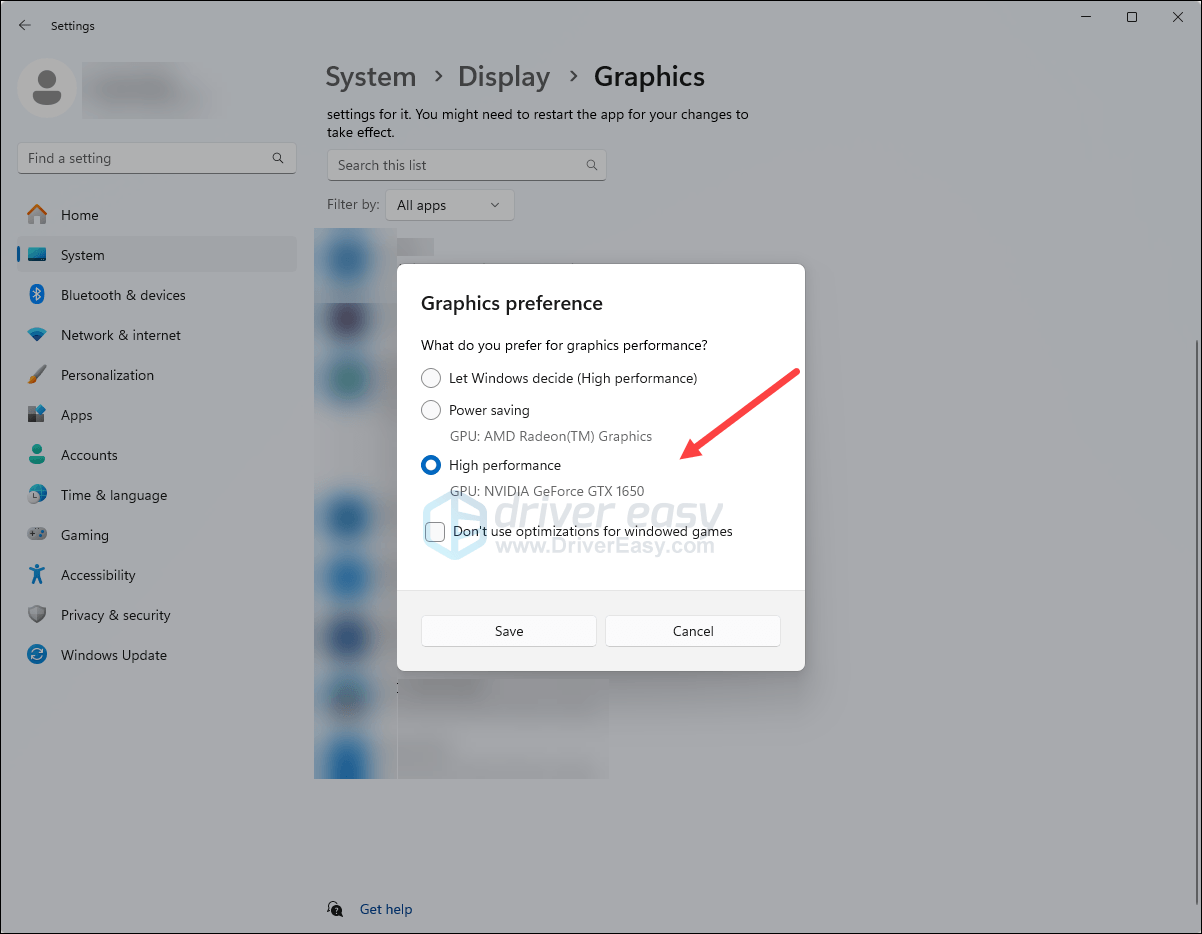
- Select V Rising or Steam from the list of apps, and select High performance.
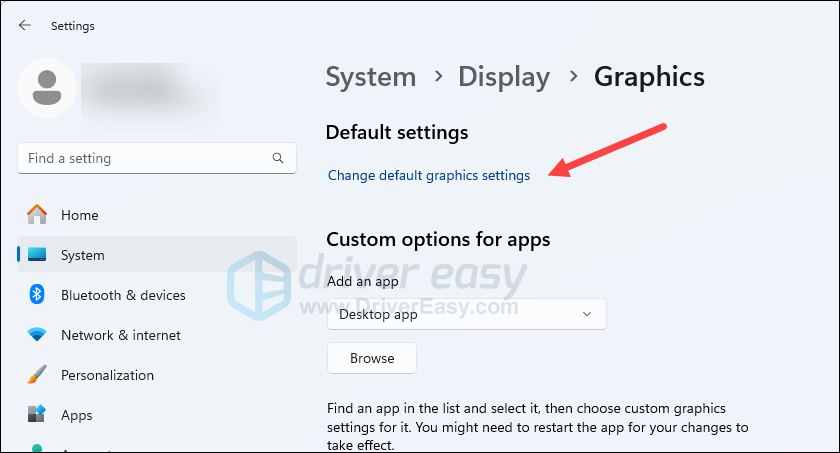
- Then click Change default graphics settings.
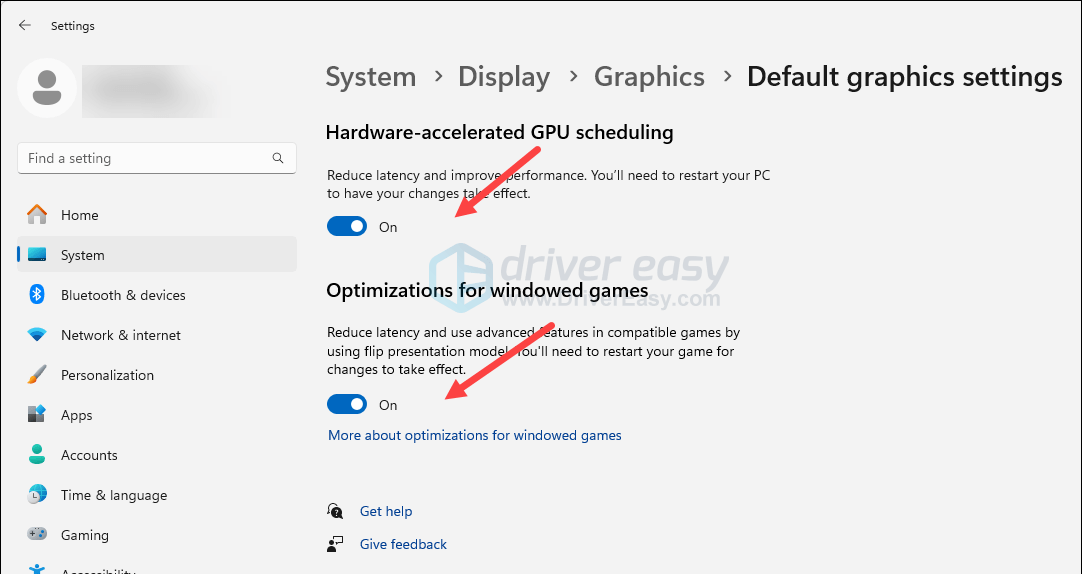
- Make sure that the toggles for Hardware-accelerated GPU scheduling and Optimizations for windowed games are both set to On.
Try to launch V Rising again to see if it stops stuttering. If the problem remains, please move on to the next fix, below.
5. Set the CPU priority to high
If V Rising stutters frequently on your computer, you can try to run it in high priority mode, which fixes the stutters for some gamers. To do so:
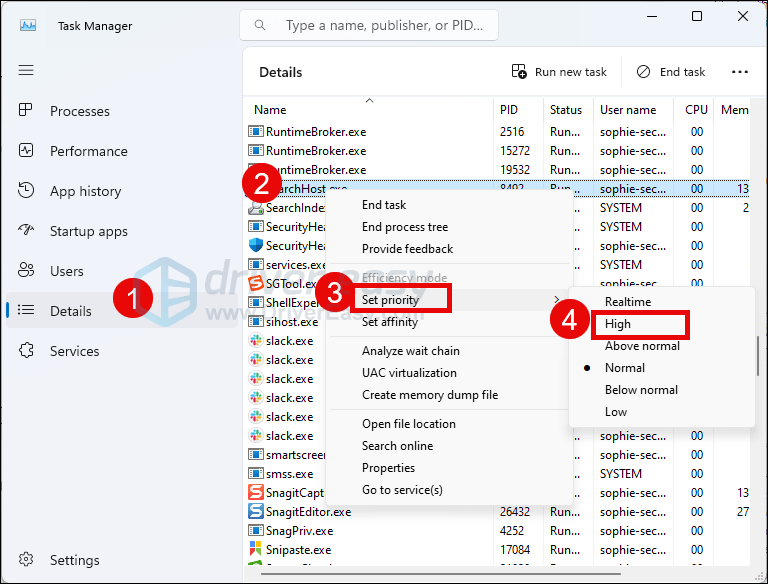
- Right-click the Windows taskbar and select Task Manager.
- Go to the Details window, right-click V Rising from the list, then click Set priority and High.
When you finish doing the above setting, run V Rising again and see if it still stutters. If so, please move on to the next fix, below.
6. On the hardware front
If none of the above fixes helps, at this stage, you should look at the hardware front. For instance, make sure that your CPU and RAM sticks are still running good. Here are some places you can get started:
6.1 Don’t overclock your CPU or GPU
Even though overclocking the CPU and GPU can usually boost your gaming and graphics performance, which is tempting if you’re playing games like V Rising, there are chances that doing so could cause instability, overheating, and damage to your PC components, especially if it’s done improperly or excessively.
So if you’re overclocking your computer in BIOS or via software programs like MSI Afterburner or Intel Extreme Tuning Utility (Intel XTU), please stop doing it now. Just restore the CPU and GPU settings to default, and then try to launch V Rising again to see if it stops stuttering.
If you’re not overclocking your GPU or CPU, but V Rising still crashes, please move on.
6.2 Make sure your computer is not overheating
If your V Rising crashes a lot without any error notification or message beforehand, you should check to see if your computer is overheated.
Free tools like AIDA64, HWInfo, or CoreTemp can help you monitor your computer’s CPU, GPU, and other hardware components’ temperatures. To see if the overheated computer is the culprit to your V Rising’s stuttering problem, please:
- Install one of the tools mentioned above.
- Leave it on when you play V Rising.
- Refer to this post: How to Know Your CPU Overheating and How to Fix It to tell if your computer is overheated with the readings on the tool, and then decide what to do if it’s really running too hot.
When you’ve ensured that your computer is not running too hot when V Rising is on but it still stutters, please move on to the next fix below.
6.3 Make sure that your memory stick(s) is in good shape
Similar to one of the possible causes mentioned above, V Rising stuttering could also relate to memory problems. According to some forum users, a broken memory stick was the culprit to the stuttering problem in V Rising, while for some, switching to memory sticks with bigger space helps to stop the stuttering in game.
So if none of the previous potential fixes can help to stop the stuttering in V Rising for you, you may need to run a memory check to make sure that your RAM is still in good shape. A good place to start would be the built-in Windows Memory Diagnostic tool.
To run the tool:
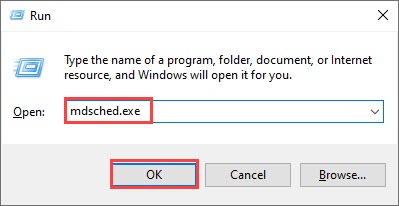
- Press the Windows logo key and R on your keyboard to invoke the Run box.
- Type mdsched.exe, then click OK.
- Click Restart now and check for problems (recommended).
IMPORTANT: Make sure to save all your work before restarting.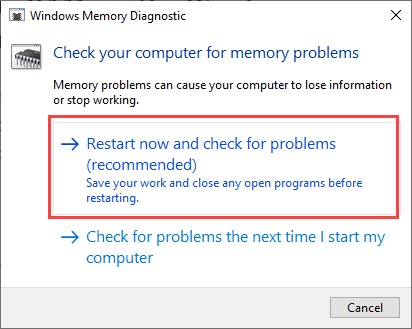
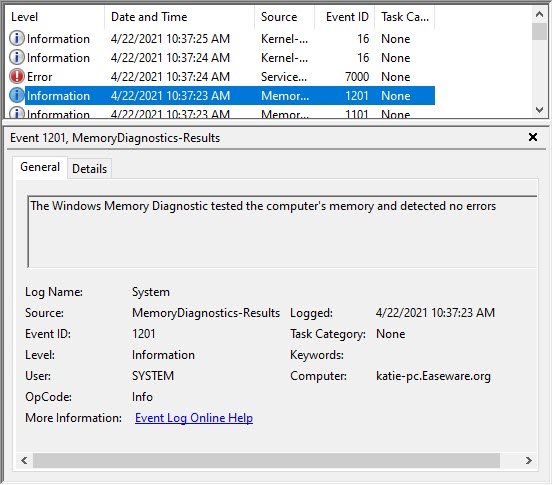
- Windows will run diagnosis automatically, which can take a few minutes. When it’s finished, your PC will reboot.
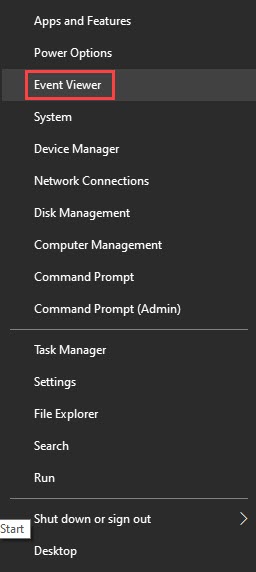
- The results will be shown on your desktop. If you don’t see any notification, right-click the Start menu then click Event Viewer.
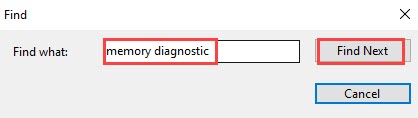
- Click Windows Logs >> System >> Find.
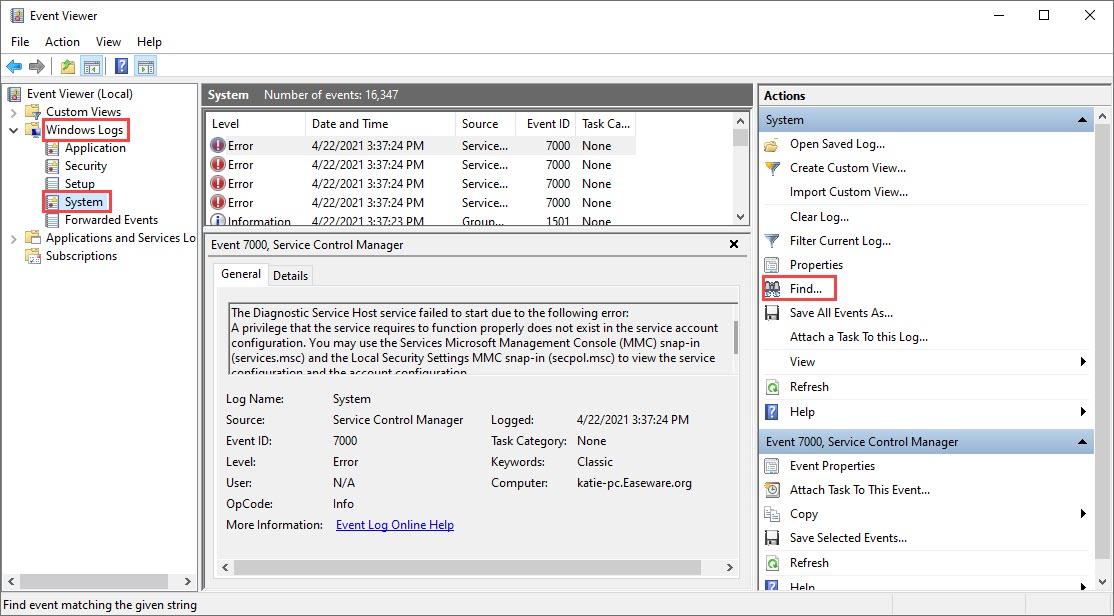
- Type memory diagnostic, then click Find Next.
- If you see “no errors”, your RAM is functioning well and is not the culprit to the blue screen of death error in Helldivers 2. Then please move on to the next method.
If you do see an error, you may consider replacing your RAM sticks. You will need to check if your device is still under warranty or consult your machine’s manufacturer for assistance if you’re not tech-savvy enough to do this on your own.
Thanks for reading the post on how to fix stuttering in V Rising. If you have more suggestions that you’d like to share, please feel free to leave a comment below.