


If you’re having trouble getting your File Explorer to run on Windows 10, no worries. This post provides the right solutions for you. Read on and follow the easy-doing steps with images below.
1: Change display settings
2: Check for possible faulty programs
3: Restart in task manager
4: Clear history cache and create new path
5: Disable Windows Search
Note that File Explorer in Windows 7 is called Windows Explorer. The fixes here also suit for Windows 7 Windows Explorer not working properly as well even though the images are shown in Windows 10.
1: Change display settings
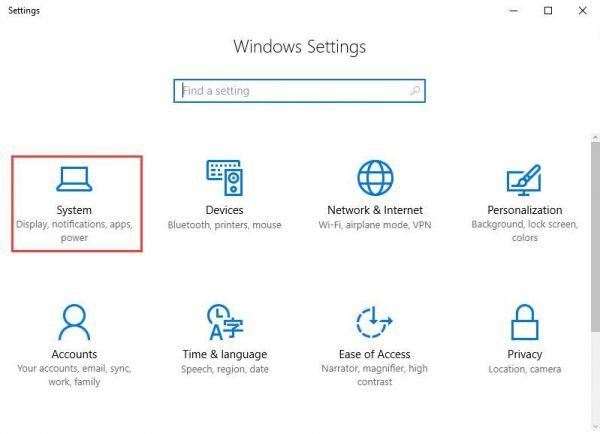
1) Follow the path: Start button > Settings > System.
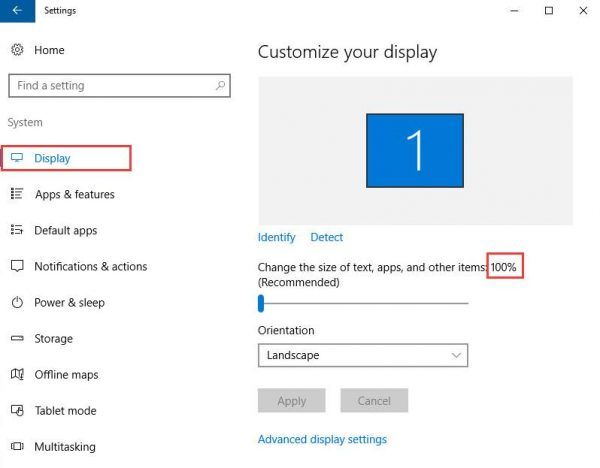
2) On Display panel, change the size of your text to 100%, 125%, 200% etc. Don’t set it to 175% thought, 175% is reported to be the cause of this problem.
Check to see if you can access to File Explorer now.
2: Check for possible faulty programs
Some say that it is the antivirus program AVG that triggered this error. Once shut down from Task Manager, File Explorer is back.
You should do the same as well. Check to see if there are something unusual happen when you lost access to File Explorer. For example, see if you can spot icon disappearance or situation similar to this.
3: Restart in task manager
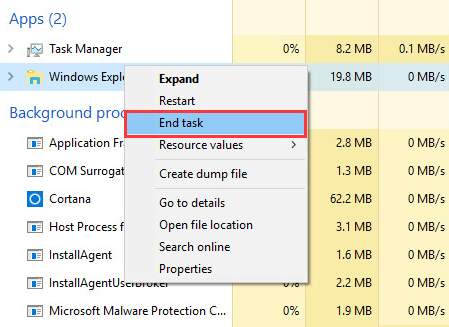
1) Press Ctrl + Shift + Esc to start Task Manager. Then locate Windows Explorer.

2) Right click Windows Explorer and choose End task.
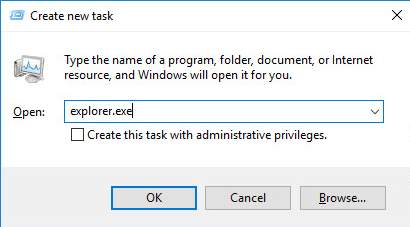
3) On top of the Task Manager window, click File option and choose Run new task.
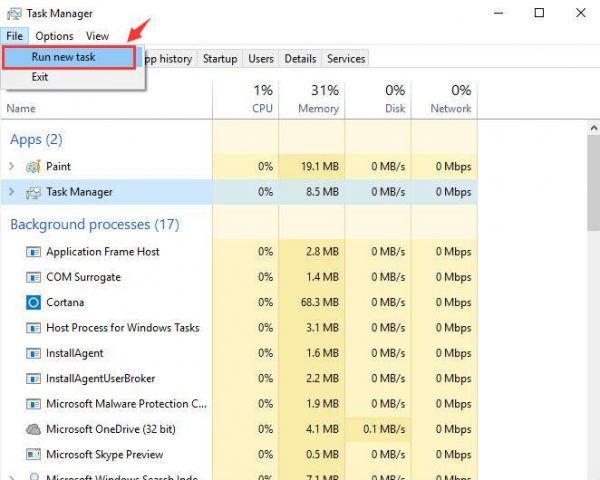
4) Type explorer.exe in the box and then hit Enter.
4: Clear history cache and create new path
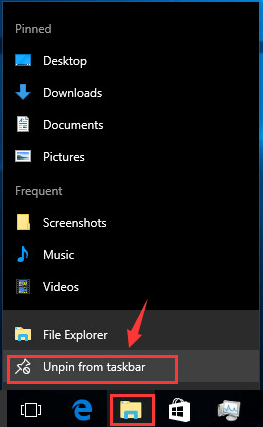
1) Right click the File Explorer icon on the task bar, then choose Unpin from taskbar.
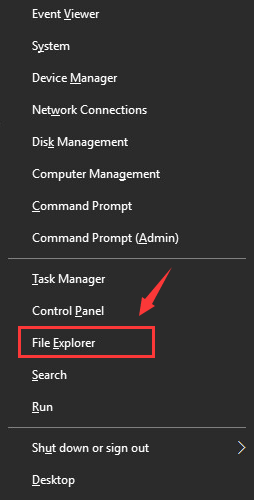
2) On your keyboard, press Windows key and X at the same time, then select File Explorer from the list.
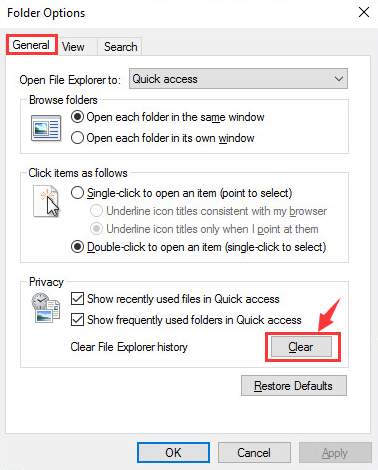
3) Right click the Quick Access link and select Options.

4) Under General tab, choose Clear under Privacy category. This will help you clear the File Explorer history.
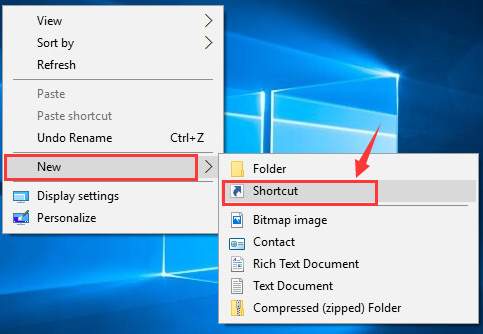
5) Right click on the blank spot on the desktop and choose New > Shortcut.
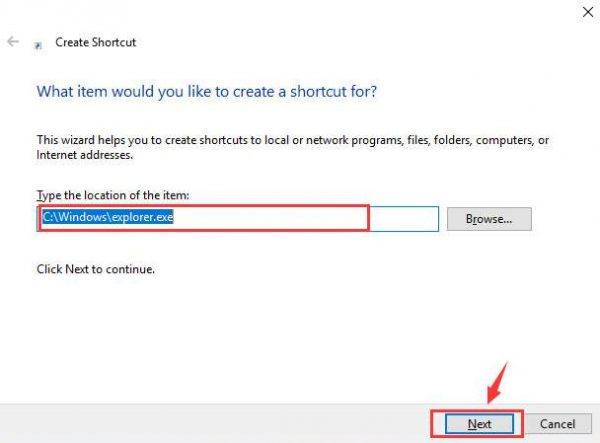
6) Then type in the following address: C:\Windows\explorer.exe and click Next.
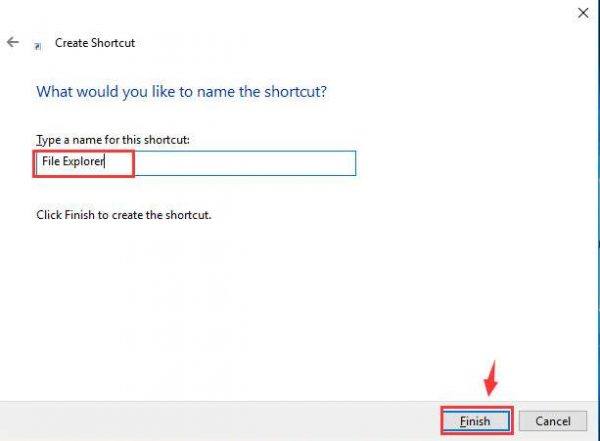
7) Rename the file to File Explorer and click Finish.
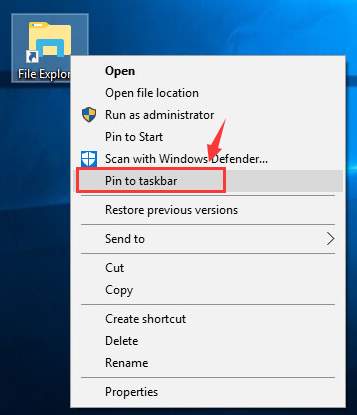
8) Right click the newly created shot cut and choose Pin to task bar.
This should help you fix the problem.
5: Disable Windows Search
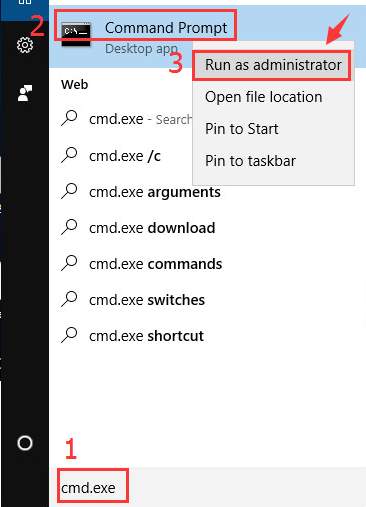
1) Type cmd.exe in the search box. From the list of choice, right click Command Prompt and choose Run as administrator.
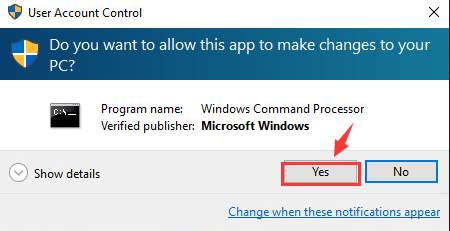
Click Yes at the UAC window prompt.
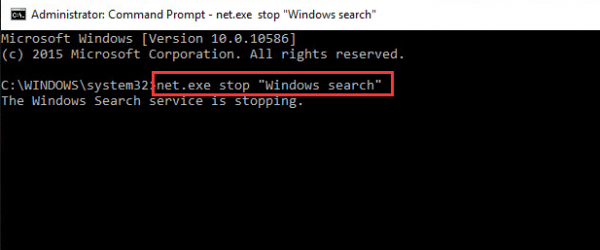
2) In the Command Prompt window, type in the following command:
net.exe stop "Windows search"
Then hit Enter.
If you would like to stop Windows search permanently, please do the following:
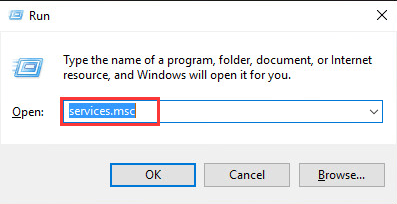
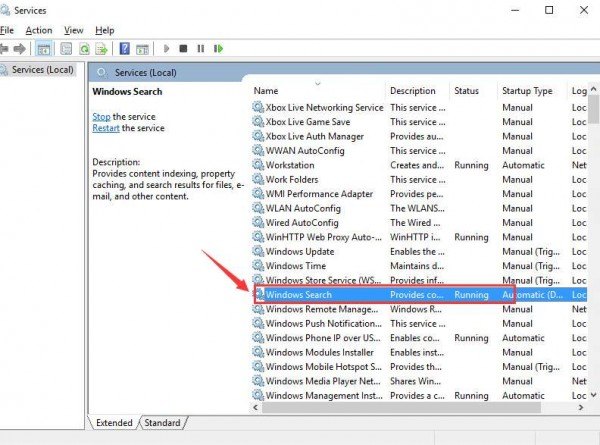
a) Press Windows key + R at the same time, and type in services.msc.
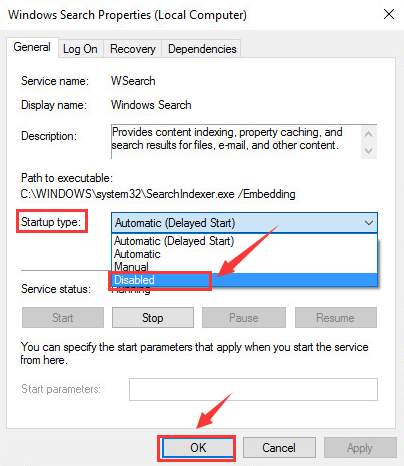
b) Locate Windows Search option, double click it to enter its Properties window.
c) Change the Startup type to Disabled. Then click OK to save the change.
If things still haven’t gotten any better, you might need to consider perform a clean refresh of your Windows 10. If you want to have more information as to how to refresh Windows 10, you can refer to this post here.