


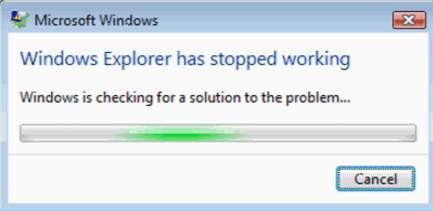
If you run into “Windows Explorer has stopped working” in Windows 7, don’t worry. You can fix the issue with one of the solutions below.
When you meet the issue, try the solutions below and then the error should resolve.
Solution 1: Copy file “explorer.exe” to another location
This fast and painless solution may work like a charm for you.
First, navigate to this folder: C:\Windows, and inside this folder, find the file “explorer.exe“. (Navigate navigate to the drive where Windows is installed on. In this case, Windows is installed on C:\.)
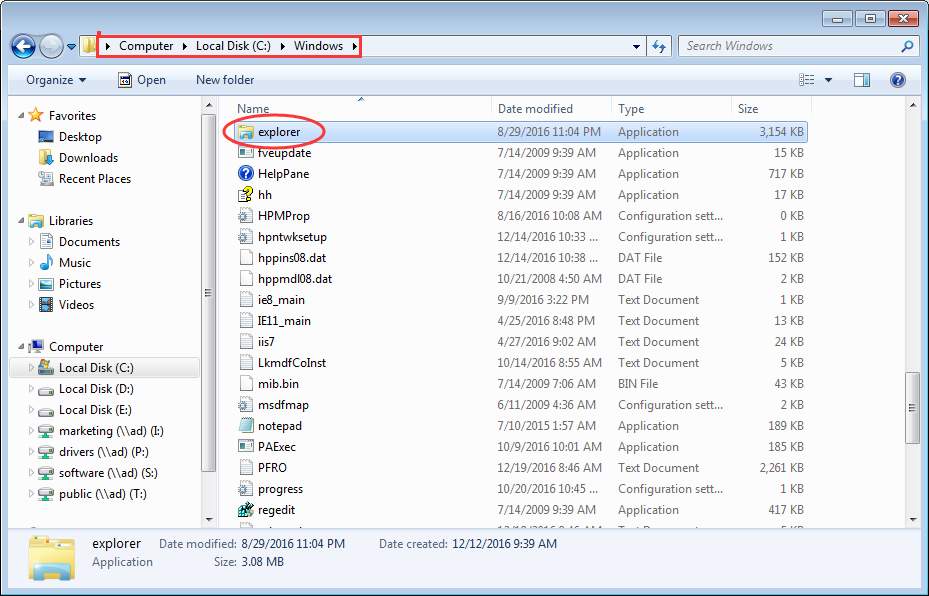
Then copy and paste the file to folder: C:\Windows\System32. After that, check to see if the problem is resolved.

Solution 2: Change Settings for Files and Folders
Windows Explorer would stop working if some of the image files are corrupted. To fix this problem, you can try to change some settings for handling these files.
Follow these steps:
(Note: This solution requires you to perform the instructions in Windows Explorer, you can use this solution when Windows Explorer works. If you can’t open Windows Explorer at all, skip this solution.)
1. Open Windows Explorer.
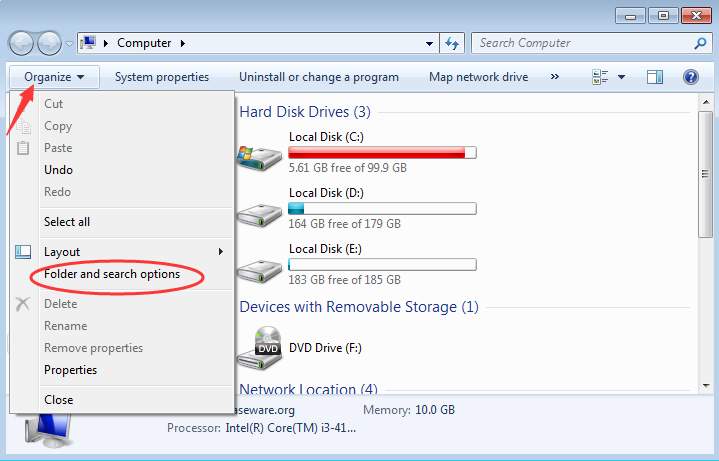
2. Click Organize in top left corner, and on drop-down menu, select Folder and search options.
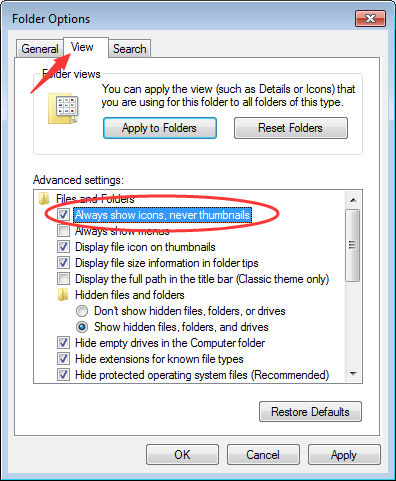
3. Select the View tab. Ensure the option “Always show icons, never thumbnails“ is ticked as below.
Solution 3: Use System File Checker to Scan and Check your Files
The issue caused could be due to corrupted system file. So to fix the issue, try to check and fix the corrupted system file.
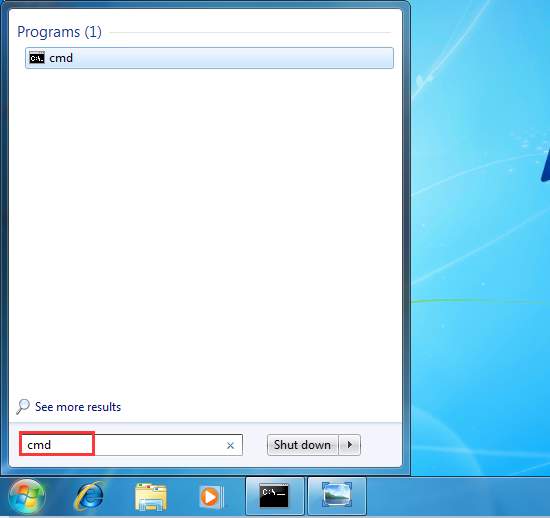
1. Click the Start menu button and type cmd in the search box.
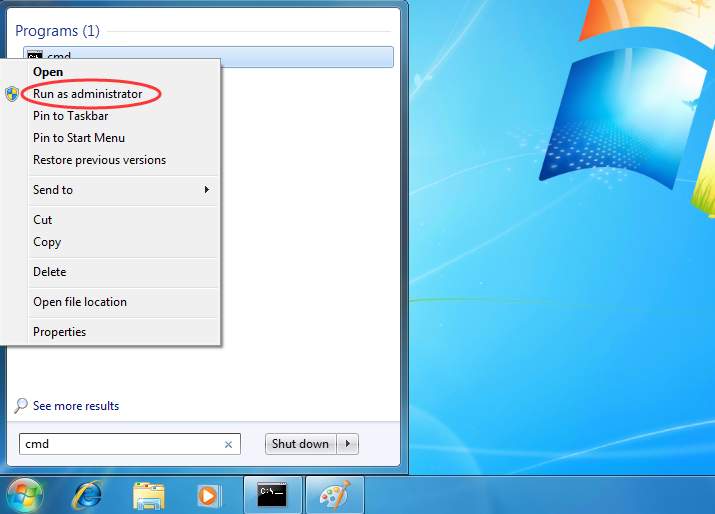
2. Right-click on cmd on the pop-up menu and select Run as administrator.
3. Type sfc /scannow and press the Enter key on your keyboard. As you can see on the screen, the process will take some time until the verification 100% completes.

4. Check to see if the problem is resolved.
Solution 4: Perform a Clean Boot
First, reboot PC in Safe Mode and see if the issue exists.
If the problem also exists in Safe Mode, follow below steps to perform a clean boot to find out the root cause of the issue.
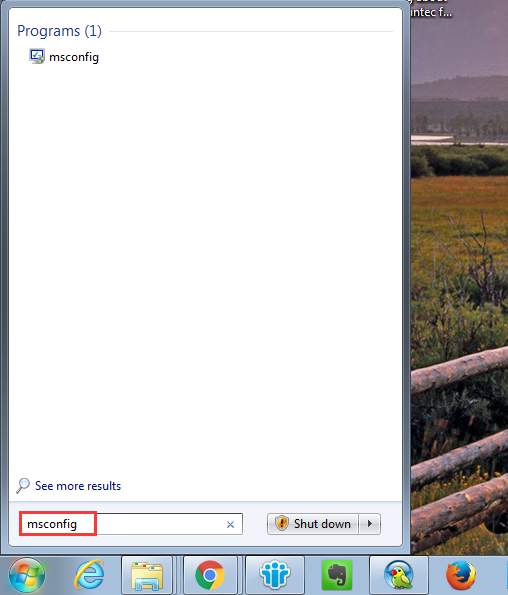
1. Click the Start menu button and type msconfig in the search box.
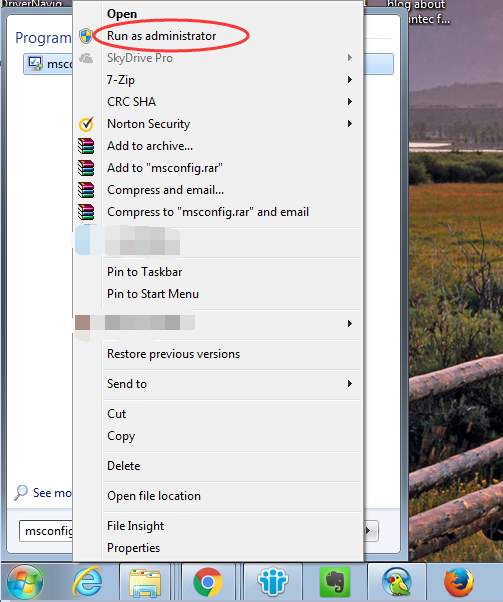
2. Right-click on the msconfig and select Run as administrator. This is to start System Configuration utility.
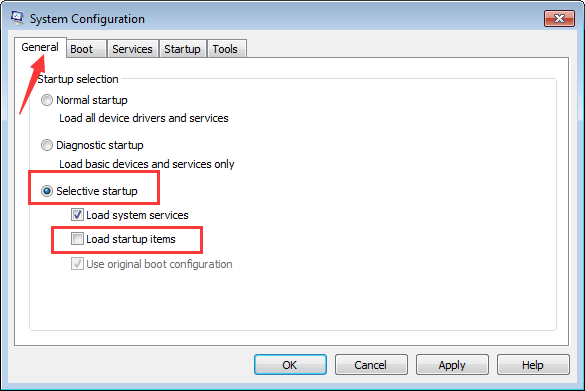
3. Under the General tab, select Selective startup and uncheck the box next to Load startup items.
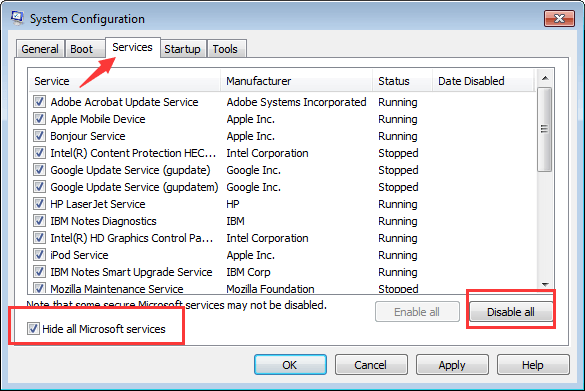
4. Go to Services tab, check the box next to Hide all Microsoft services and click the Disable all button.
5. Click OK.
6. Restart your PC in Normal Mode and see if the issue persists.
If the issue is resolved, it mostly is caused by third party software. Then find out which specific software is causing the issue.
Refer to the steps above to enable those disabled services. It is recommended that you enable several services at a time then reboot your PC. Keep doing this until you find a group which are causing the problem. Then check the suspect services one by one until you figure out which one is causing the problem.
After figuring out the problem software, uninstall and reinstall it and see if the issue resolves. If the issue persists, you might need to uninstall the software.
After you are done with the troubleshooting, remember to reset the computer to start as usual:
1. Click the Start menu button and type msconfig in the search box.
2. Right-click on the msconfig and select Run as administrator. This is to start System Configuration utility.
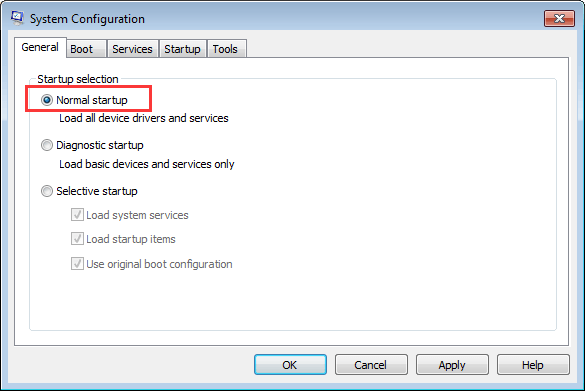
3. Under the General tab, click Normal startup option and click the OK button.
4. Reboot your PC.
Solution 5: Run Virus Scan
If you have installed antivirus software, use it to perform a full scan and see if your computer is infected by virus or malware.
Hope the solutions above would help you fix the Windows Explorer has stopped working issue. If you have any questions, ideas or suggestions, feel free to leave a comment below.