If you’re on Windows 10 and notice that your PC is somehow running very slowly, which is rather strange because you’re only running very few programs.
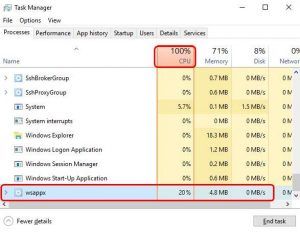
Then you check Task Manager, hoping to find out why. And you see wsappx hogging much of your CPU or Disk usage. In some cases, you will see wsappx (2) or wsappx (3), with the 2 or 3 indicating the processes listed under this category.
Now you may have new questions: what is this wsappx?
What is wsappx?
wsappx process is actually a part of Windows 10 system. It’s what Windows Store and Universal Windows Platform (UWP) relies on.
In other words, wsappx process mainly focuses on the operating, installing, deleting and updating applications in Windows Store. If you are done installing or updating all Windows Store apps, you can get it disabled to save yourself some CPU or Disk usage.
Here is more detail information (you can skip to the fixes if you are not interested):
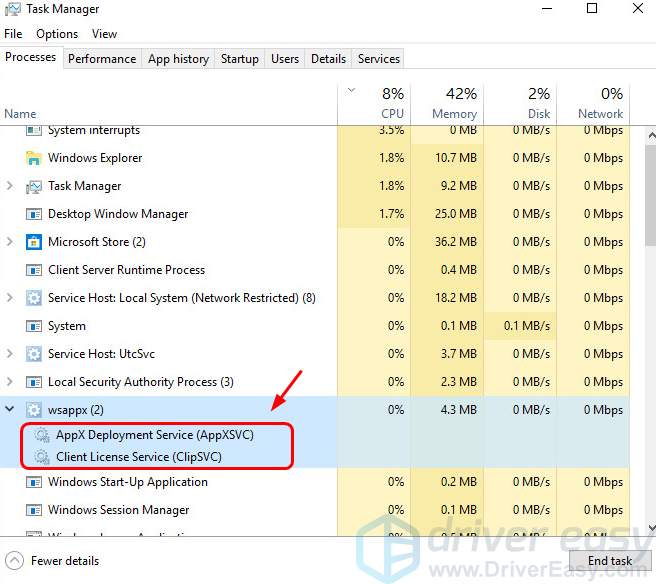
As mentioned, you may see wsappx (2) or wsappx (3) in your Task Manager, depending on your operating system. If you click to expand the wsappx category, you may one or more items as shown in the screen shot:
If you’re on Windows 8, you may also see Windows Store Service (WSService) as well.
AppX Deployment Service (AppXSVC)
provides infrastructure support for deploying Store applications. This service is started on demand and if disabled Store applications will not be deployed to the system, and may not function properly.
Client License Service
provides infrastructure support for the Microsoft Store. This service is started on demand and if disabled applications bought using Windows Store will not behave correctly.
How to fix high Disk and CPU usage caused by wsappx?
Disk or CPU running at nearly 100% is not a good sign. It means that there is very little space left for you to perform other programs. Everything slows down and your computer could be unresponsive.
From what we know, this is a common problem in Windows. Unfortunately, there is not yet an absolute solution that is bound to work.
We have found you some of the most effective fixes and you may want to try them one by one, until you locate the right fix.
1. Update Device Drivers
2. Disable Windows Store
3. Check for Virus
4. Perform a Disk Check
Method 1. Update Device Drivers
In many cases, high CPU or Disk usage in system is related to incompatible or faulty device drivers. So, it’s worth a try to update your device drivers.
- Search on Google the name of your PC vendor, then go to their support web page. Type in your computer model, see if new device drivers are available for download.
- When you download the needed device drivers, follow the setup instruction to get them installed. You may need to restart your PC a couple of times.
If you don’t have the time, patience or computer skills to update your drivers manually, you can do it automatically with Driver Easy.
Driver Easy will automatically recognize your system and find the correct drivers for it. You don’t need to know exactly what system your computer is running, you don’t need to risk downloading and installing the wrong driver, and you don’t need to worry about making a mistake when installing.
- Download and install Driver Easy.
- Run Driver Easy and click the Scan Now button. Driver Easy will then scan your computer and detect any problem drivers.
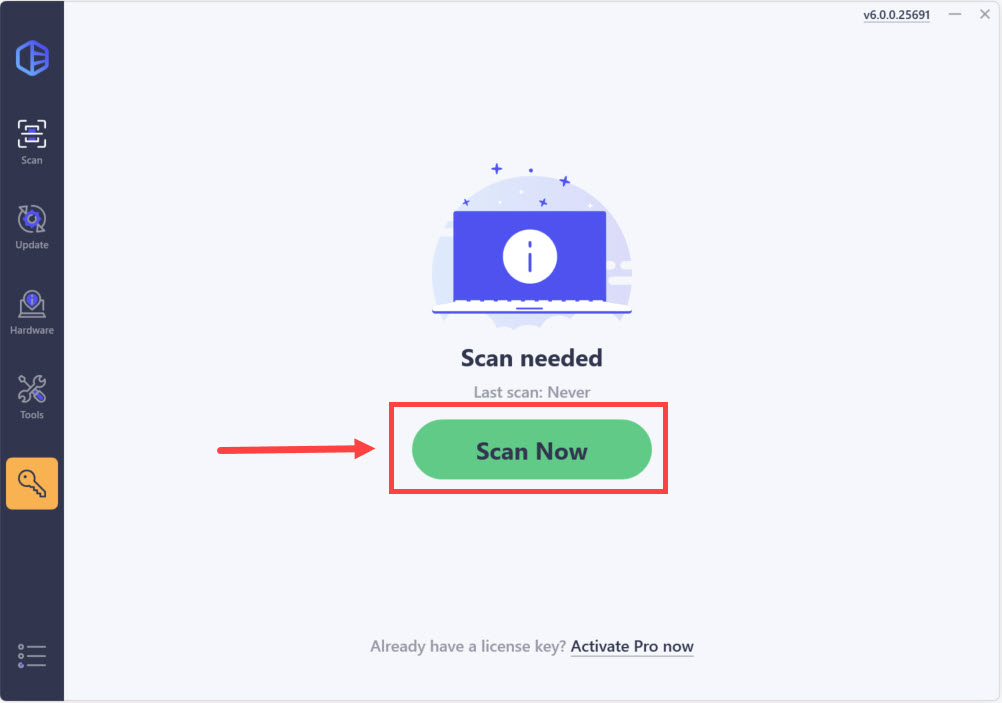
- Click Update All to automatically download and install the correct version of all the drivers that are missing or out of date on your system.
(This requires the Pro version which comes with full support and a 30-day money-back guarantee. You’ll be prompted to upgrade when you click Update All. If you’re not ready to buy the Pro version, Driver Easy offers a 7-day free trial which includes access to all the Pro features such as high-speed download and one-click install. You won’t be charged anything until your 7-day trial has ended.)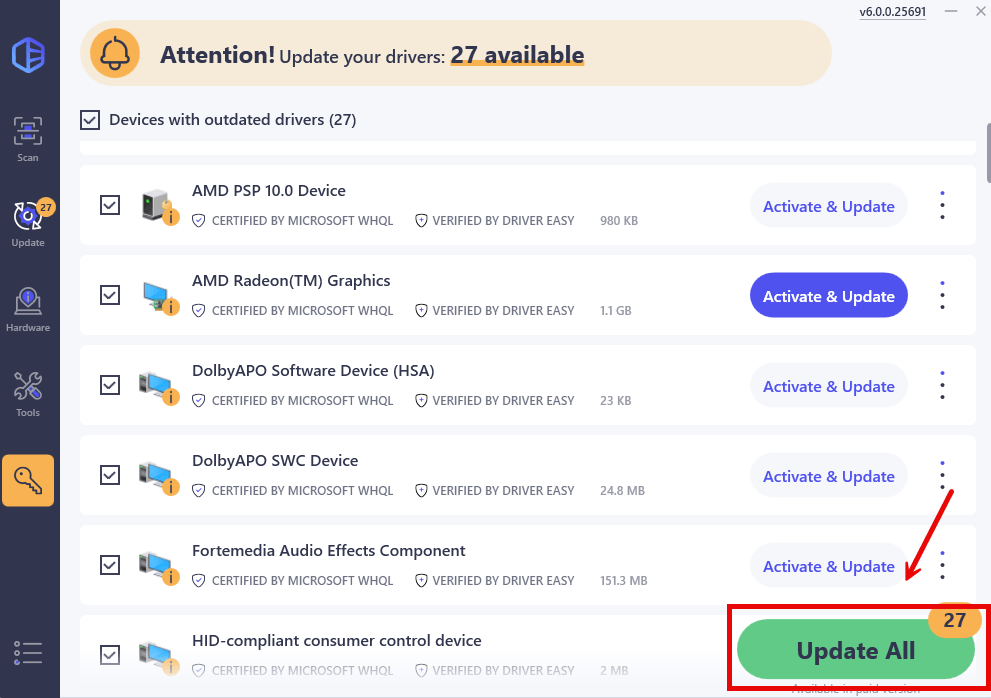
- Restart your computer for the changes to take effect.
Method 2. Disable Windows Store
If you expand wsapps, you will probably see two or three services listed under:
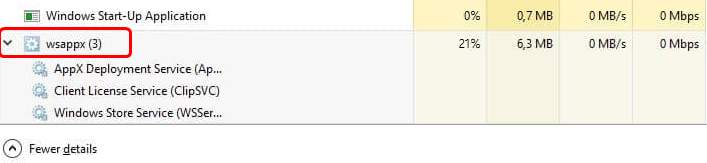
As you can see, one of them is Windows Store Service (WSService).
Some mentioned that disabling Windows Store via Local Group Policy helps to ease the almost 100% disk usage problem. Let’s see how to do it:
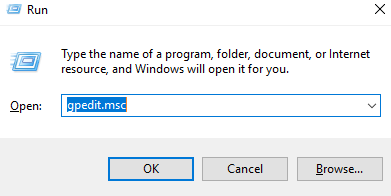
- On your keyboard, press the Windows logo key and R at the same time, and then type in gpedit.msc and press Enter.
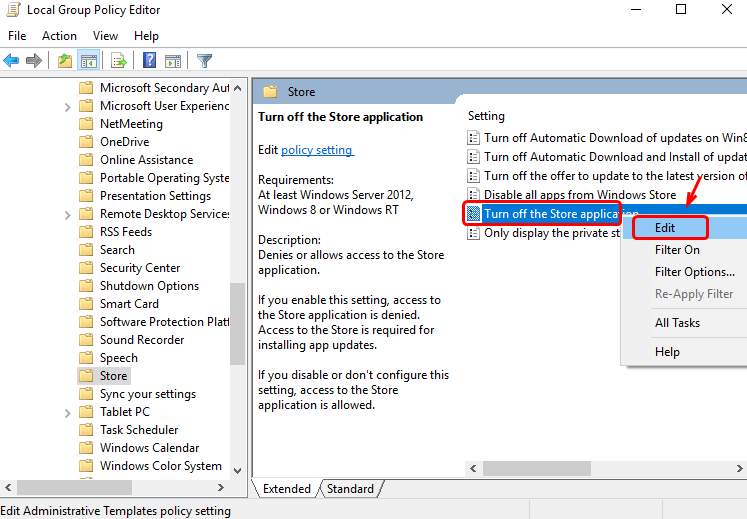
- Follow the path: Local Computer Policy >> Computer Configuration >> Administrative Templates >> Windows Components >> Store.
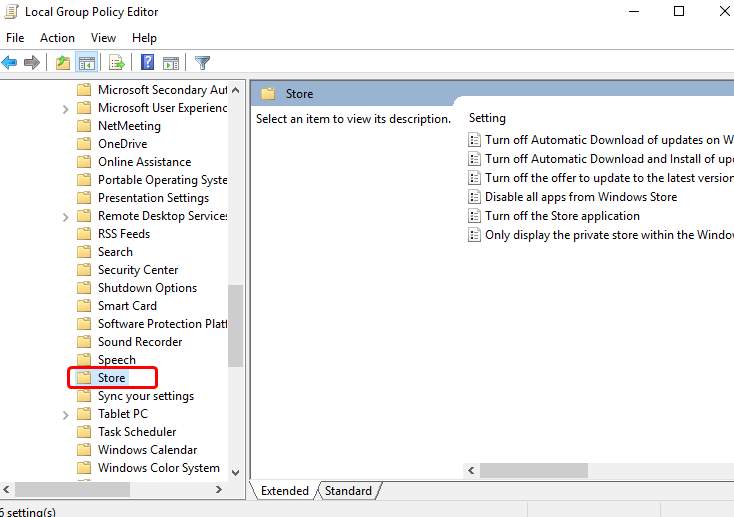
- Right-click Turn off the Store application and click Edit.
- Change the status to Enabled. Click Apply and OK to save and exit.
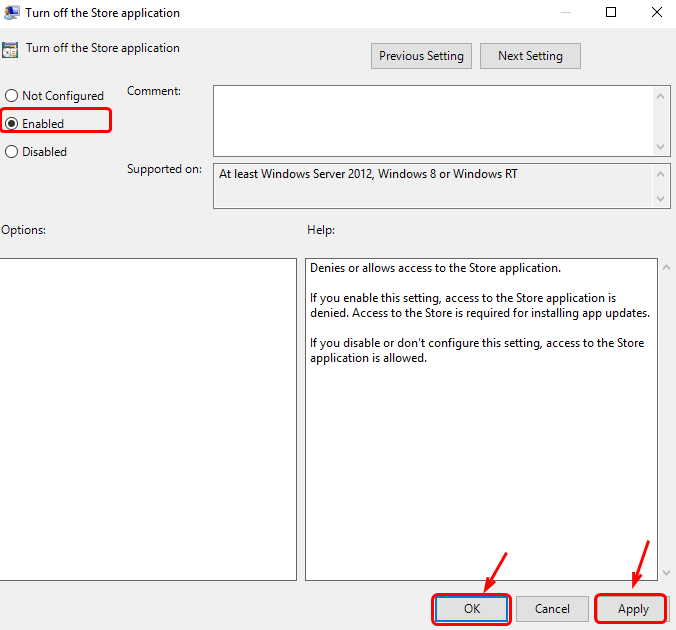
- Restart your computer so the change can take effect.
If the problem remains, move on methods below.
Method 3. Check for Virus
In certain cases, this problem is caused by viruses or malware infection. If you haven’t fully scanned your system with an antivirus program, do it now.
When the full scan finishes, remove any superstitious programs from your PC. Then restart your computer to see if there is any change.
If the problem remains, move on to next method.
Method 4. Perform a Disk Check
For those who only got this problem very recently, performing a disk check should be taken into account.
Note that disk checks could take some time to finish. If you don’t want it at the start, you can skip it. But you need to reschedule it again if you need it.
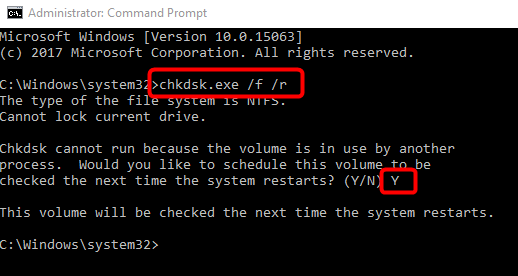
- On your keyboard, press the Windows key. Type cmd, right-click Command Prompt and select Run as administrator.
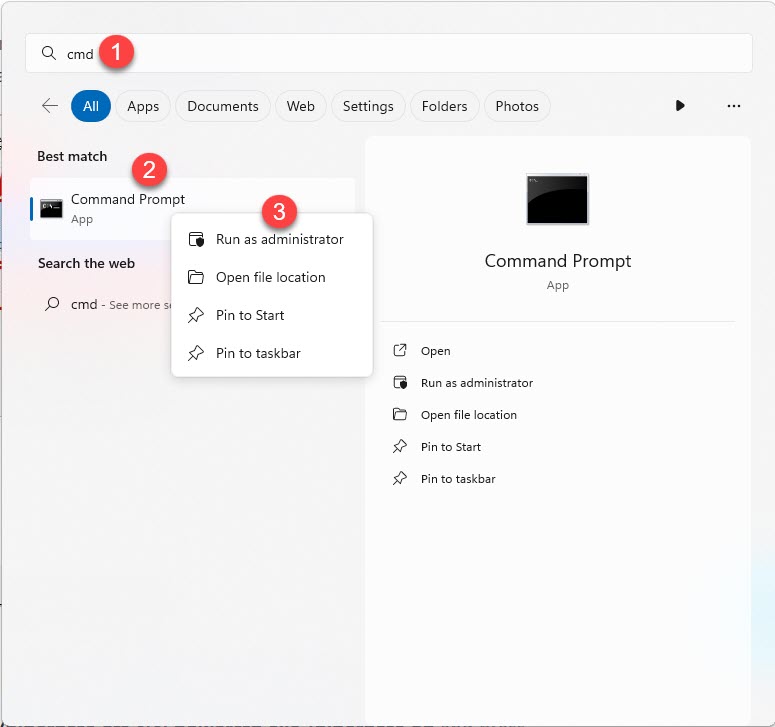
- Click Yes at the User Account Control prompt.

- Type in this command:
chkdsk.exe /f /r. Press Enter on your keyboard, then type Y to confirm that you’d like to perform the disk check the next time you restart your computer.