


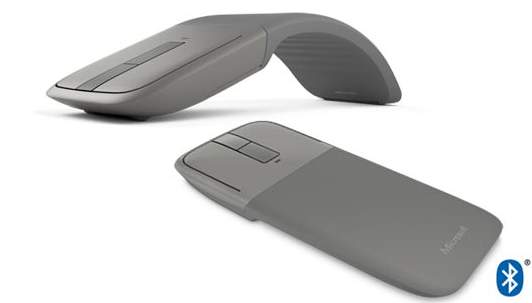
If your arch Bluetooth mouse suddenly stops working after Windows 10 Creators Update, you should roll your mouse driver back to its previous version first. This is one of the first things you should do.
If you have already done it, but your problem remains, please click here to see how to restore your Windows 10 to its previous build.
If you don’t want to restore your Windows 10 Creators Update just yet, try the methods below to fix the problem by yourself easily.
Fix 1: Troubleshoot Possible Error
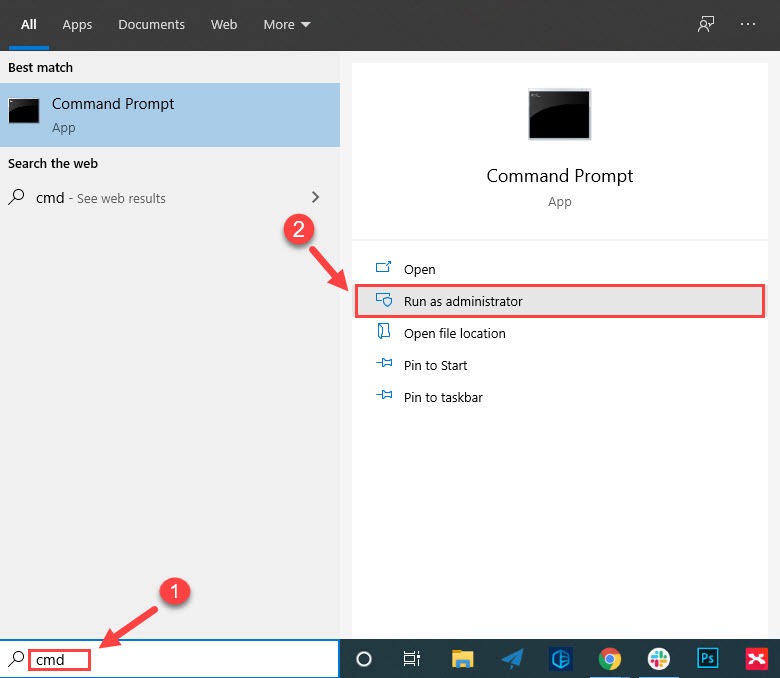
1) Type cmd in the Windows Search bar and select Run as administrator.
2) Copy & paste the following command line into the Command Prompt window and press Enter.
msdt.exe -id DeviceDiagnostic
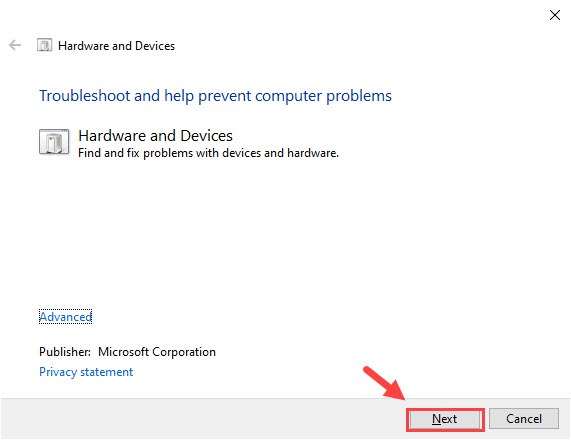
3) Click Next in the popped-up window and the troubleshooter will start detecting hardware problems automatically.
4) Wait for the troubleshooting process to finish. Then follow its instructions to try and fix your Arc mouse not working problem.
Fix 2: Modify Power Management Settings
NOTE: The following method works only on Bluetooth Arch mouse.
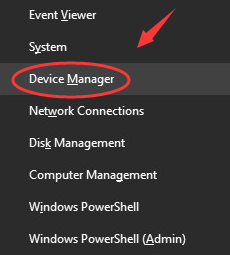
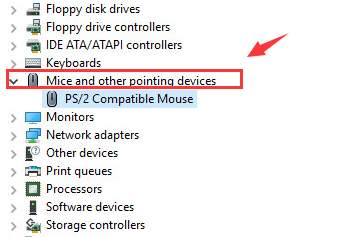
1) Press Windows key and X at the same time, then choose Device Manager.
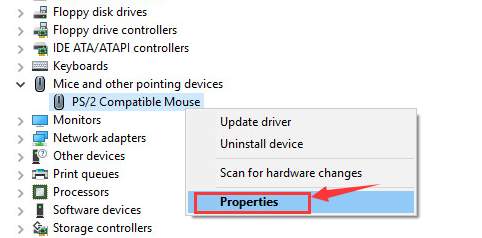
2) Expand the category Mice and other pointing devices.
3) Right click the device name and choose Properties.
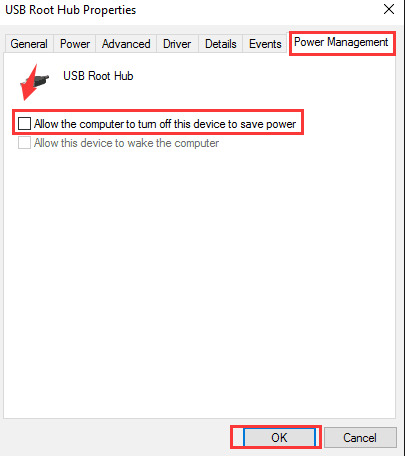
4) Go to Power Management tab, and make sure the Allow the computer to turn off his device to save power option is unchecked and then click OK.
5) Reboot your computer. See if this problem occurs again.
Fix 3: Update Your Mouse Driver
When it comes to updating mouse driver, you can always choose from download and update drivers by yourself or do it automatically.
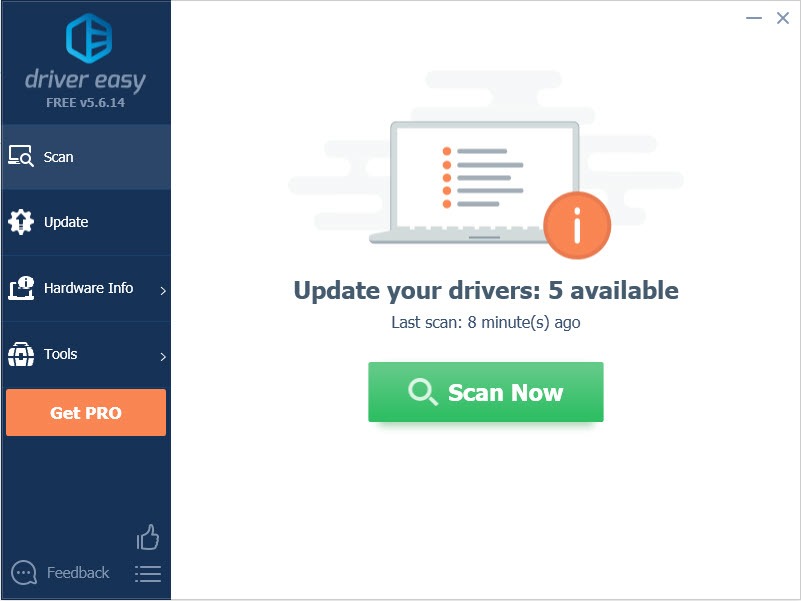
If you don’t have the time, patience or computer skills to update your drivers manually, you can do it automatically with Driver Easy.
Driver Easy will automatically recognize your system and find the correct drivers for it. You don’t need to know exactly what system your computer is running, you don’t need to risk downloading and installing the wrong driver, and you don’t need to worry about making a mistake when installing.
You can update your drivers automatically with either the FREE or the Pro version of Driver Easy. But with the Pro version it takes just 2 clicks (and you get full support and a 30-day money back guarantee):
1) Download and install Driver Easy.
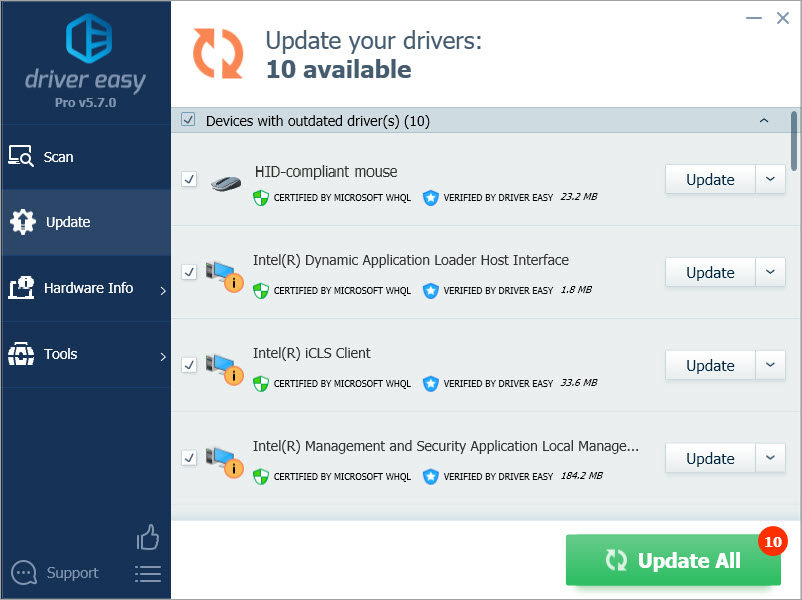
2) Run Driver Easy and click Scan Now button. Driver Easy will then scan your computer and detect any problem drivers.
3) Click the Update button next to a flagged driver to automatically download and install the correct version of this driver (you can do this with the FREE version).
Or click Update All to automatically download and install the correct version of all the drivers that are missing or out of date on your system (this requires the Pro version – you’ll be prompted to upgrade when you click Update All).
Fix 4: Restore Your Computer
As mentioned earlier, it is suggested by tech support from Microsoft that users should perform a system restore to get this problem fixed. To some extent, Microsoft has admitted that this problem is one of the bugs in Windows 10 Creators Update.
To see more detailed information as to how to restore your Windows 10 to its previous build, please visit the post below: