


Try theses fixes:
Fix 1: Check your hardware settings Fix 2: Update your video driver Fix 3: Uninstall your display adapter Fix 4: Roll your Windows back to a previous work-fine pointFix 1: Check your hardware settings
Sometimes this error could be caused by some small mistakes. Before we try some extra solutions, please check the cables connects your computer and extra monitor all are plugged into the correct ports, like VGA, HDMI, and make sure the connections not loosely.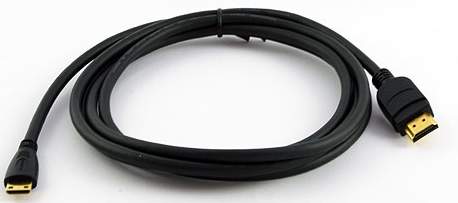
Fix 2: Update your video driver
Commonly, this error is caused by an incompatible video driver. Especially right after you upgrade or update your Windows operating system. You can easily solve it through updating your video driver. There’re two ways you can get the right compatible video driver for your computer: manually or automatically. Manually: You can update your video driver manually by going to the manufacturer’s website for your video card, like Intel, NVIDIA, AMD, and searching for the most recent correct driver. Be sure to choose only drivers that are compatible with your variant of Windows version. Automatically: If you’re not confident playing around with drivers manually, or if you want to do it much faster, you can, instead, do it automatically with Driver Easy. Driver Easy will automatically recognize your system and find the correct driver for your exact video card, and it download and install the driver correctly: 1) Download and install Driver Easy. 2) Run Driver Easy and click Scan Now. Driver Easy will then scan your computer and detect any problem drivers.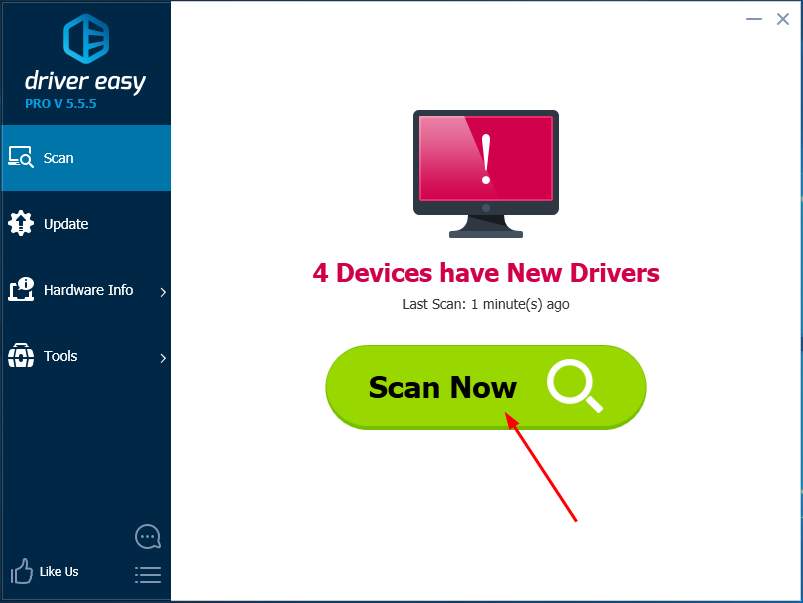 3) With the Free version: Click the Update button next to the flagged video driver to automatically download and install the correct version of that driver.
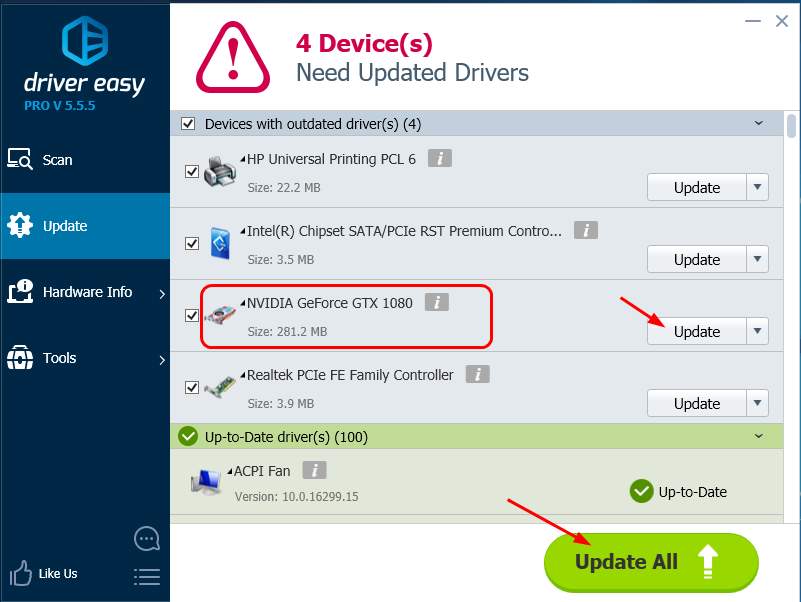
With the Pro version (full support and a 30-day money back guarantee): Click Update All to automatically download and install the correct version of all the drivers that are missing or out of date on your system.
3) With the Free version: Click the Update button next to the flagged video driver to automatically download and install the correct version of that driver.
With the Pro version (full support and a 30-day money back guarantee): Click Update All to automatically download and install the correct version of all the drivers that are missing or out of date on your system.
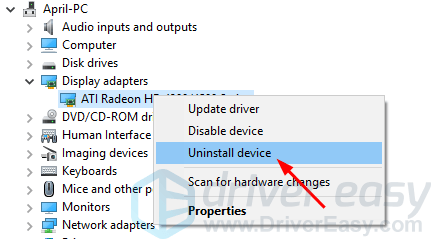
Fix 3: Uninstall your display adapter
If unfortunately, the latest video driver doesn’t help you, don’t feel frustrated. Go on to uninstall your display adapter through these: 1) On your keyboard, press the Windows logo key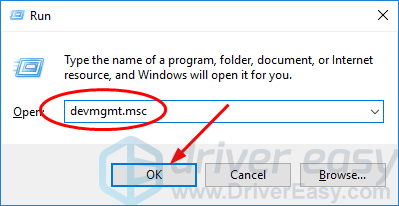

Fix 4: Roll your Windows back to a previous work-fine point
The last recommended solution to solve this project not working error, you can try to perform a system restore on your Windows. System restore can take your Windows back to the work-fine point. We have a step-by-step guide to do system restore for Windows 10, you can give it a shot to solve your problem. Or you also can use Driver Easy to do system restore.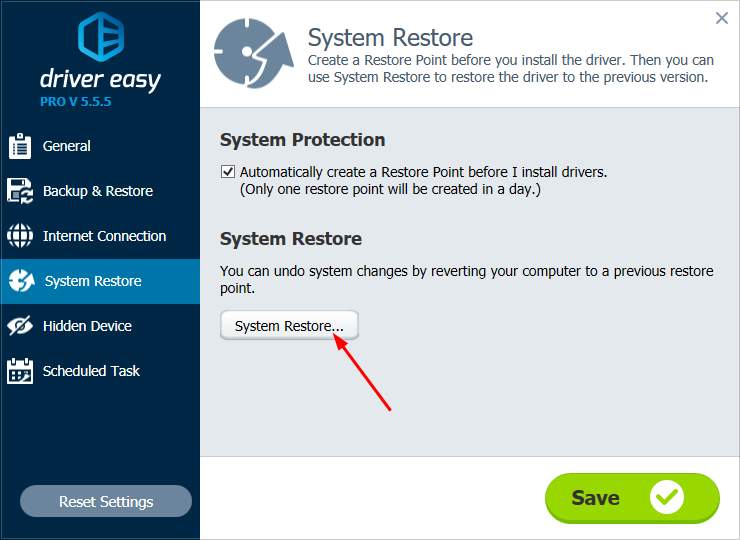
23
23 people found this helpful
0 Comments
Most Voted