


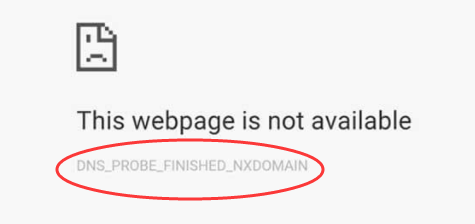
The DNS_PROBE_FINISHED_NXDOMAIN error is very confusing, but it’s usually quite easy to fix. This may be the first time you’ve seen it, but it’s actually one of Chrome’s most common DNS errors (learn more about DNS and why this error occurs…). You should be able to fix it with one of the easy methods below.
Try these fixes to resolve the “dns probe finished nxdomain” error?
- Restart DNS Client service
- Change DNS server
- Use a VPN
- Disable the VPN temporarily
- Disable antivirus software temporarily
- Release & renew IP address
Method 1: Restart DNS Client service
The DNS Client service resolves and caches DNS domain names enabled by default on Windows 10. Mostly, restarting the service would resolve the problem.
Follow these steps:
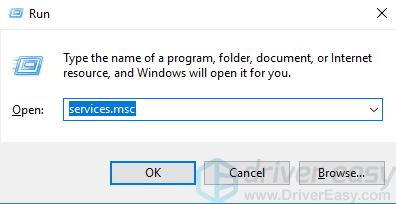
1) On your keyboard, press Win+R (Windows logo key and R key) at the same time to invoke a Run command.
2) Type services.msc and press Enter.
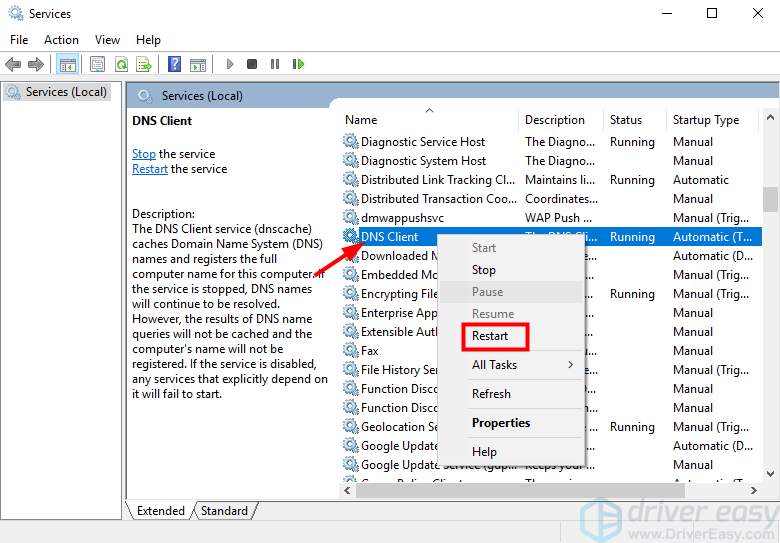
3) On your keyboard, press the D key to faster locate DNS Client item. Right-click on it and click Restart.
4) Close the browser and try again to visit the webpage.
Method 2: Change DNS Server
The problem can be caused by DNS itself, particularly if you’re using the ISP’s (Internet Service Provider) default DNS or the router’s DNS. A cheaper router may cause DNS problem. To fix the problem, you can change your current DNS to Google’s public DNS (8.8.8.8 and 8.8.4.4).
You may want to check what your current DNS is (if not, skip this part):
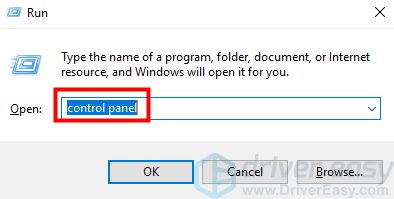
1) On your keyboard, press the Windows logo key and R key at the same time to invoke the Run command.
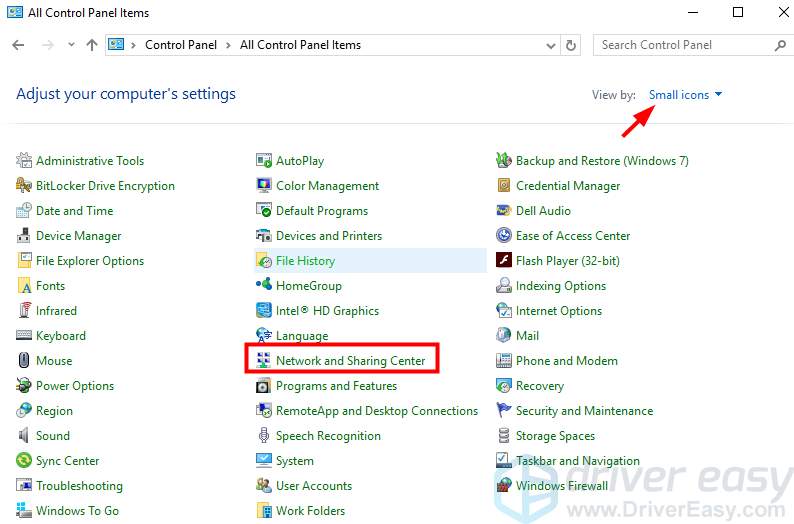
2) Type control panel and press Enter.
3) View by Small icons and click Network and Sharing Center.
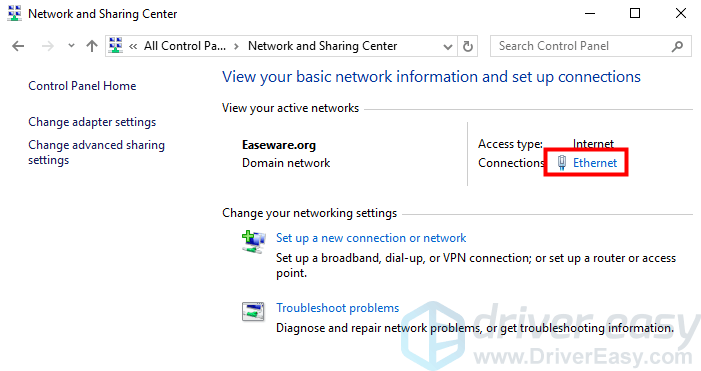
3) Click Ethernet.
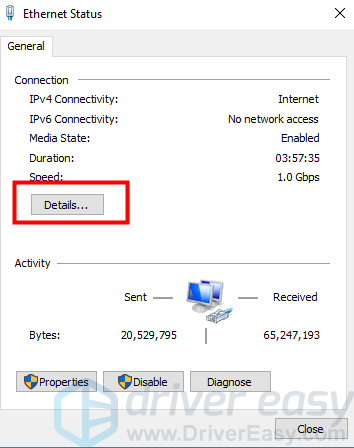
4) Click the Details button.
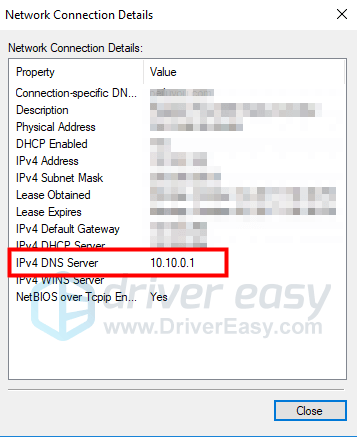
5) See the IPv4 DNS Server.
How to change your current DNS to Google’s public DNS
Follow steps below to change the current DNS to Google’s public DNS:
1) On your keyboard, press the Windows logo key and R key at the same time to invoke the Run command.
2) Type control panel and press Enter.
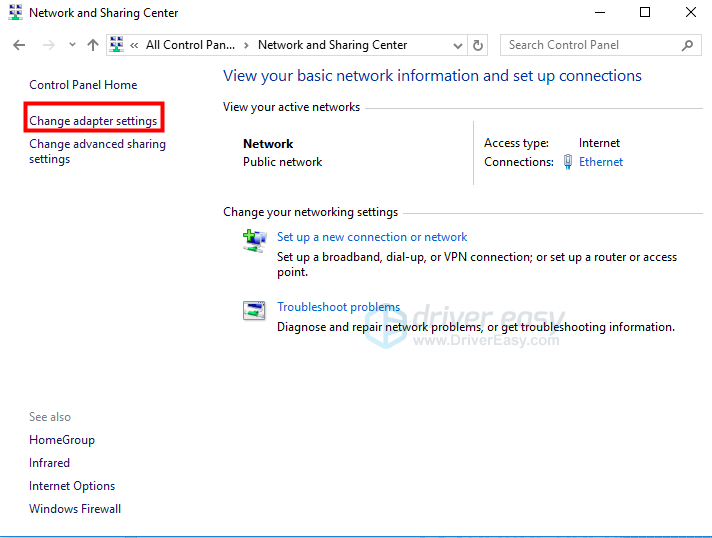
3) View by Small icons and click Network and Sharing Center.

3) Click Change adapter settings.
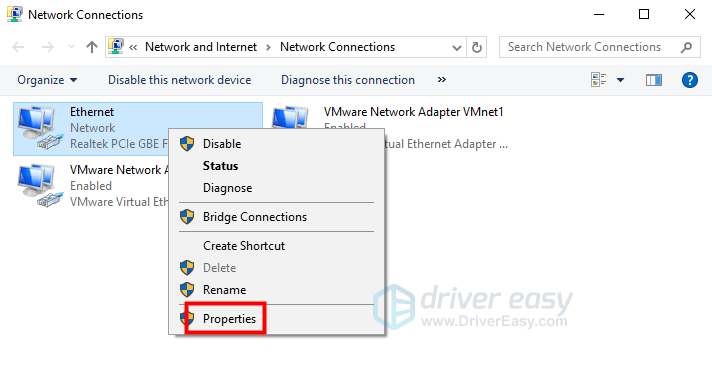
4) Right-click the network that you’re using and click Properties.
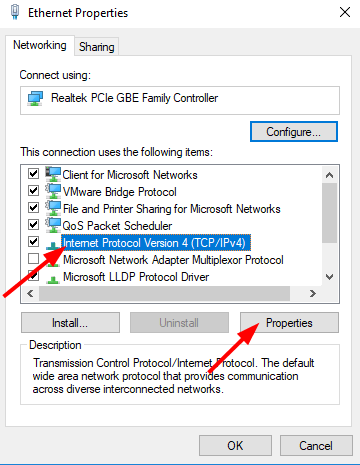
5) Highlight item Internet Protocol Version 4 (TCP/IPv4) and click Properties.
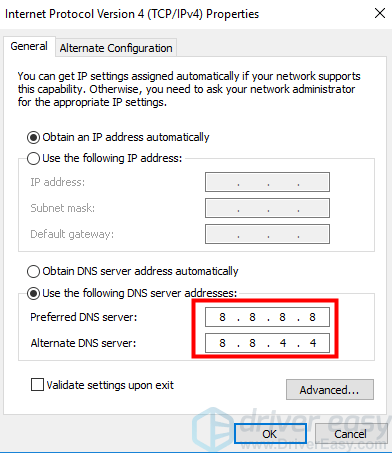
6) Under “Use the following DNS server addresses”, set Preferred DNS server as 8.8.8.8 and set Alternate DNS server as 8.8.4.4. Then click OK. See below image:
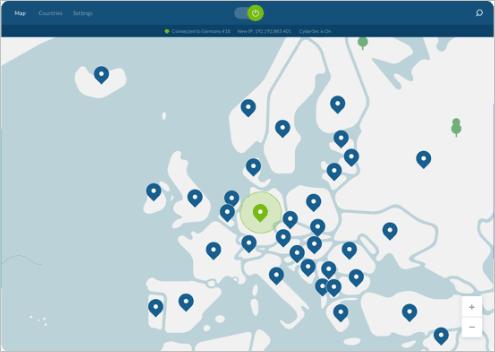
Method 3: Use a VPN
If you’re not using a VPN, when you try to connect to the internet, the ethernet’s DNS will be used by default. If the ethernet’s DNS is having problems, you may encounter the DNS_PROBE_FINISHED_NXDOMAIN problem. In this case, to resolve the problem, you can use a VPN. If you use a VPN, when you try to connect to the internet, the VPN’s DNS will be used instead of the ethernet’s DNS.
It’s recommended to use a VPN with good reputation. If you’re not sure what product you can trust, you can use NordVPN, so you don’t need to spend much time on further searching.
1) Download NordVPN to your computer (You can get a 75% discount if you purchase the product right now.).
2) Run NordVPN and open it.
3) Connect to a server by choosing a country you want to connect to.
Method 4: Disable the VPN temporarily
If you’re using a VPN, if the VPN’s DNS is having the problem, you can encounter the DNS_PROBE_FINISHED_NXDOMAIN problem. In this case, you can disable the VPN temporarily and see if the problem is resolved.
When the VPN is disabled, the ethernet’s DNS will be used. If there is no problem with the ethernet’s DNS, the problem will be resolved.
Method 5: Disable antivirus software or firewall temporarily
Some antivirus software or the firewall may block the DNS. If you’re using antivirus software or the firewall is enabled, disable them temporarily and check to see if the problem is resolved.
IMPORTANT: Be extra careful about the websites you visit when the antivirus software or the firewall is disabled, as some virus can harm your computer easily without protection. After you tried this method, it’s recommended you enable the VPN or the firewall again.
Method 6: Release & Renew IP Address
If you visited the website before, the IP address probably is stored in DNS cache. This is in order to reduce bandwidth and return time. When you try to visit a website, the DNS first looks for the IP address in DNS cache. If the cache is outdated or corrupt, this error may occur. So to resolve the problem, you can try to flush the cache and renew the IP address.
Follow these steps:
1) On your keyboard, press Windows logo key and R key at the same time to invoke a run command.
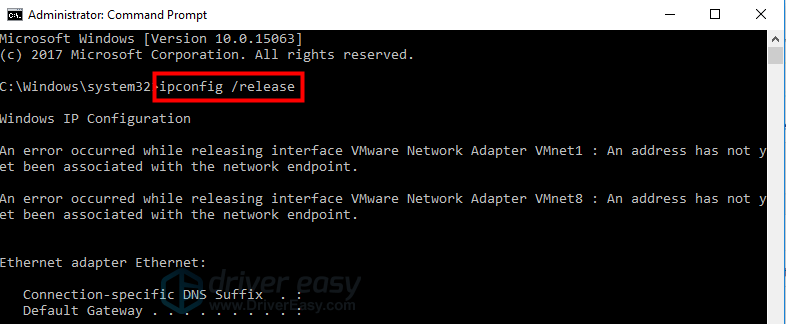
2) Type cmd then press Ctrl+Shift+Enter to open an administrator Command Prompt. (Don’t just press Enter or click OK as it won’t open the command prompt in administrator mode.).
3) Type ipconfig /release and press Enter on your keyboard. This is to release the IP address.
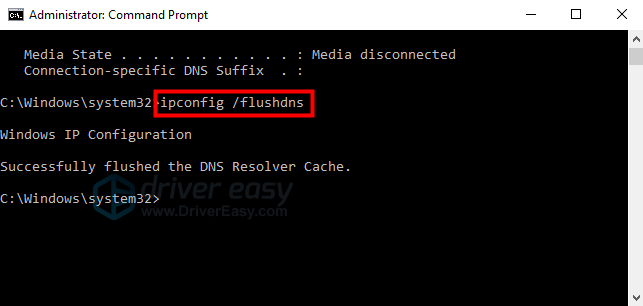
4) Then type ipconfig /flushdns and press Enter on your keyboard. This is to clear the DNS cache.
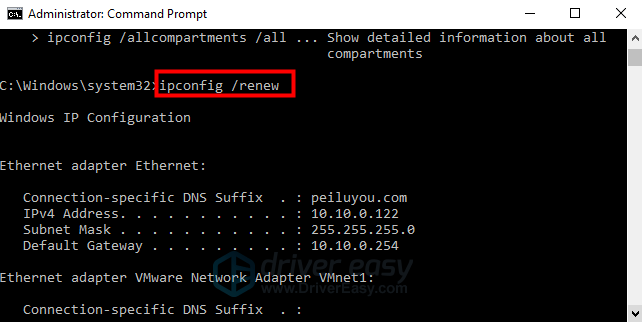
5) Then type ipconfig /renew and press Enter on your keyboard. This is to renew the IP address.
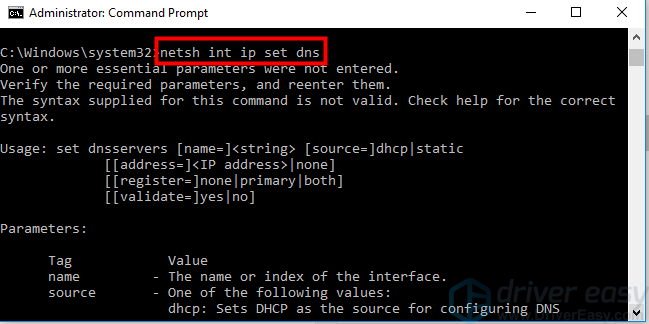
6)Type netsh int ip set dns and press Enter on your keyboard. This is to reset IP settings.
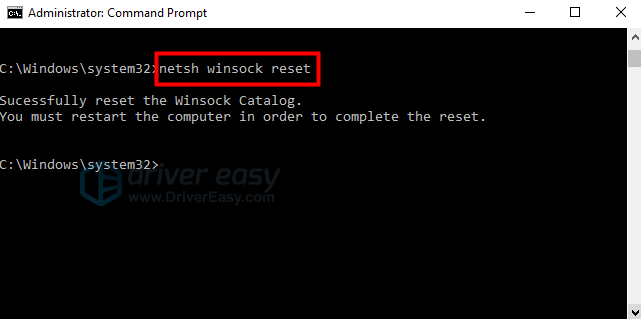
7) Type netsh winsock reset and press Enter on your keyboard. This is to reset Winsock Catalog.
8) Restart your PC and check to see if the problem is resolved.
What is DNS and why does this error occur?
DNS is a short term for Domain Name System, which is responsible for matching the IP (Internet Protocol) address with a domain name. Usually, we use the domain name to visit a website (for example, google.com). But actually, it’s the IP address that allows us to visit the website successfully. Each domain name has a valid IP address (for example, one of google.com’s IP addresses is 74.125.224.72). We use the domain name instead of the IP address because the domain name is easier for us to remember.
Every time when you type the domain name into your browser, the DNS will look for the IP address of the domain name and return the result to you. If the DNS find the IP address, you’ll visit the website successfully. If DNS fails to look for the IP address, you may receive DNS errors like “DNS_PROBE_FINISHED_NXDOMAIN”.

