


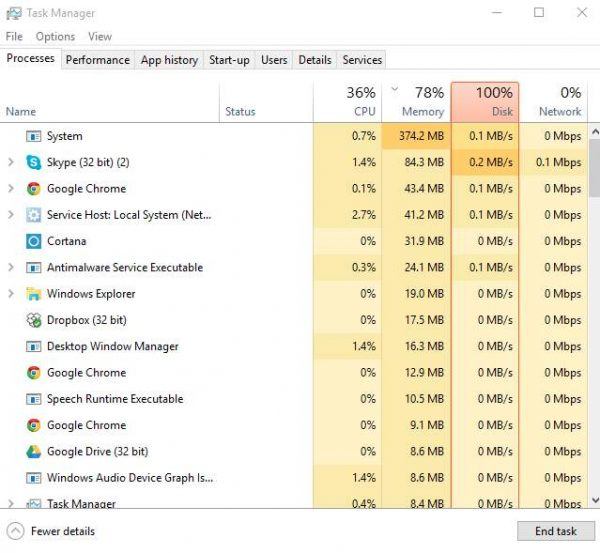
If you are bothering by the high usage of disk in your Windows 10 PC, and you find that this issue is caused by WPR_initiated_DiagTrackAotLogger_WPR System Collector.etl, we will show you how to fix it today.
Windows 10 users have long been complaining about the unusual high disk usage, which could go up to 100% even when their computers are not running any programs.
Before going along with the options below, it is suggested that you take a look at the following posts that could be helpful:
Windows 10 100% Disk Usage [Solved]
System and compressed memory high CPU usage in task manager on Windows 10 [Solved]
[Solved] svchost.exe (netsvcx) high disk usage on Windows 10
If the above posts are not helpful enough, continue reading.
First follow the instructions below to check whether your unexceptional high disk usage is caused by WPR_initiated_DiagTrackAotLogger_WPR System Collector.etl:
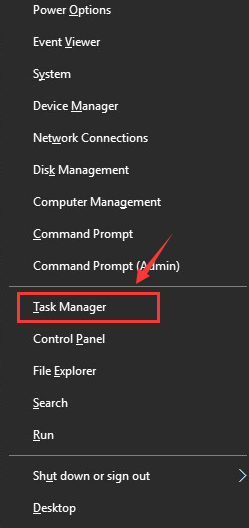
1) Press Windows key and X at the same time, then choose Task Manager from the list of choice.
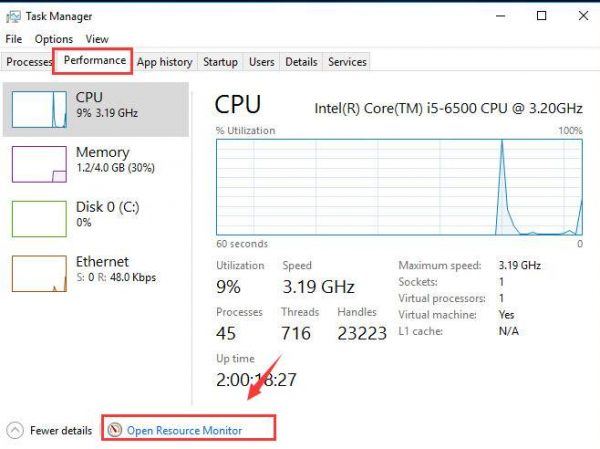
2) Go to Performance tab, then choose Open Resource Monitor.
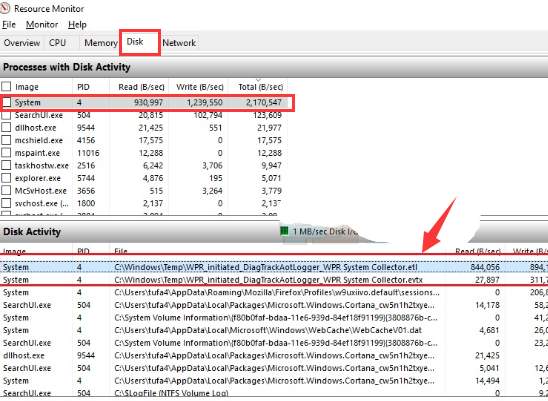
3) Go to Disk tab, select System option, then expand Disk Activity section to check the activities of the disk. If you see
WPR_initiated_DiagTrackAotLogger_WPR System Collector.etl
and/or
WPR_initiated_DiagTrackAotLogger_WPR System Collector.evtx
are occupying very high disk usage, please follow the steps below to get your PC fixed.

Option One: From Command Prompt
Option Two: From Service Console
Option Three: Use WPR -cancel
Option One: From Command Prompt
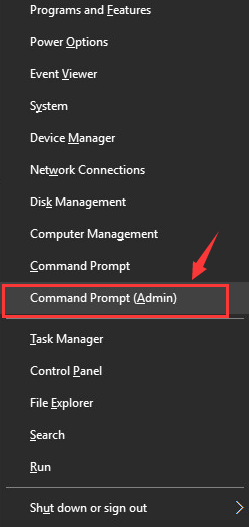
1) Press Windows key and X at the same time, then choose Command Prompt (Admin) option from the list of choice.
 \
\
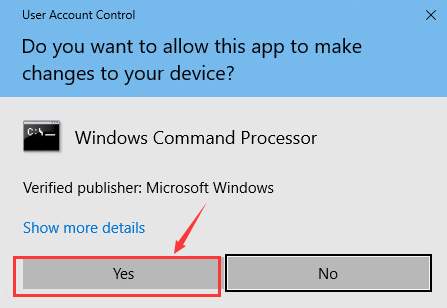
When prompted with administrator permission, press Yes to continue.
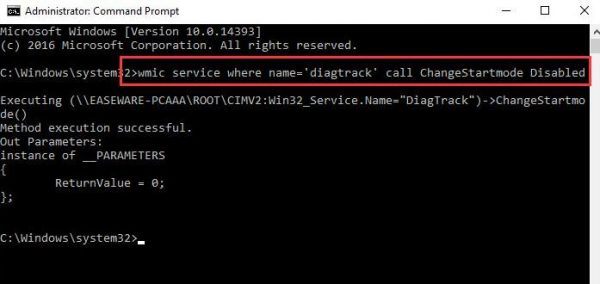
2) Then type in the following command:
wmic service where name=’diagtrack’ call ChangeStartmode Disabled
When you are sure that you have made no typo, hit Enter. You will be seeing the result as the screen shot below.
Option Two: From Service Console
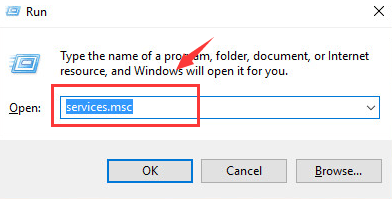
1) Press Windows key and R at the same time, then type in services.msc and hit Enter.
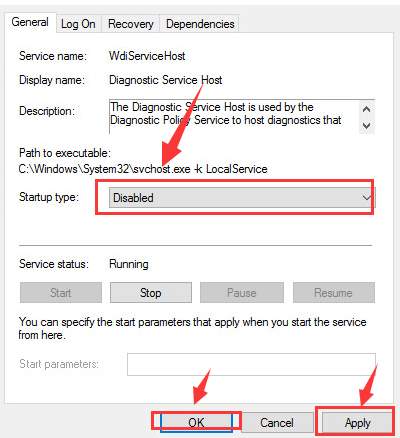
2) Press key D and faster locate the Diagnostics Tracking Service option. Double click it.
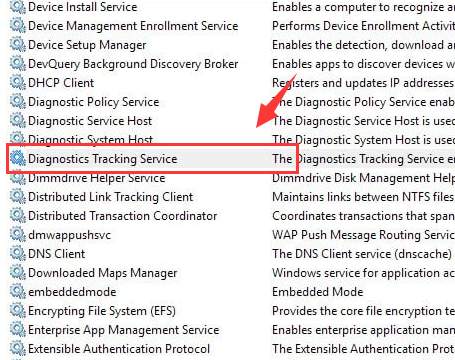
3) Change the Startup type to Disabled. Then hit Apply and OK to save the change.
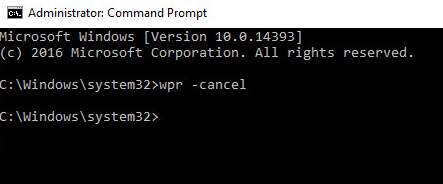
Option Three: Use WPR -cancel
1) Press Windows key and X at the same time. Then choose Command Prompt (Admin) from the list of choice.
\
When prompted with administrator permission, press Yes to continue.
2) Type in command: wpr -cancel and hit Enter.
2
2 people found this helpful
3 Comments
Most Voted