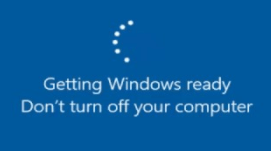
Many Windows 10 or 8 users are experiencing an issue with their operating system. They are frequently stuck on a loading screen with a message saying “Getting Windows ready. Don’t turn off your computer.” The issue occurs when they are trying to turn on, turn off or restart their computer. Usually, they can’t get around this screen by simply restarting their computer.
This is an annoying issue. And trying to fix it can be just as annoying, because you’ll spend a lot of time reading suggestions on the Internet, and most won’t work.
But don’t worry. The following are a few methods that have helped many users get out of the “Getting Windows ready” screen.
Try these fixes
You don’t have to try them all; just work your way down the list until you find the one that works for you.
- Wait for some long time
- Power reset your computer
- Run System File Checker
- Reinstall your Windows
- Pro Tip: Update your drivers
Method 1: Wait for some long time
When your computer shows you the screen of “Getting Windows ready”, your system may be downloading and installing files or dealing with some tasks in the background. It may take some time for your system to finish these jobs. So if you want your computer to boot normally, the first thing you can try is to wait. Wait until the system completes its tasks and you will get out of the screen.
But if you have waited for a reasonable amount of time, say about 2 ~ 3 hours, and you still can’t see the screen disappear, then you should try something else.
Method 2: Power reset your computer
Power resetting can clear all information in your computer memory without damaging your data. It is helpful for fixing those corruption issues on your computer and get you out of the loop of “Getting Windows ready”.
To power reset your computer:
1) Turn off your computer.
2) Unplug all peripheral devices (USB flash drive, external hard drive, headphone, etc) from your computer.
3) Unplug the power cable from your computer.
4) Unplug the battery from the battery compartment of your laptop (only if you are using a laptop and your laptop battery is removable).
5) Press and hold the power button on your computer for 30 seconds. (Your computer should stay off afterward.)
6) Plug the power (and the battery) back to your computer.
7) Turn on your computer. You won’t see the screen this time if this method works for you.
Method 3: Run System File Checker
The System File Checker utility is a Windows built-in tool for Windows users to scan for and restore corrupted system files. You may not be able to stop the “Getting Windows ready” screen showing up because there are corrupted files on your computer. You can try running System File Checker and see if this can help you fix these corruption issues.
NOTE: You will need a Windows installation media (USB installation drive or installation DVD) for your system at hand before you can follow the steps below.
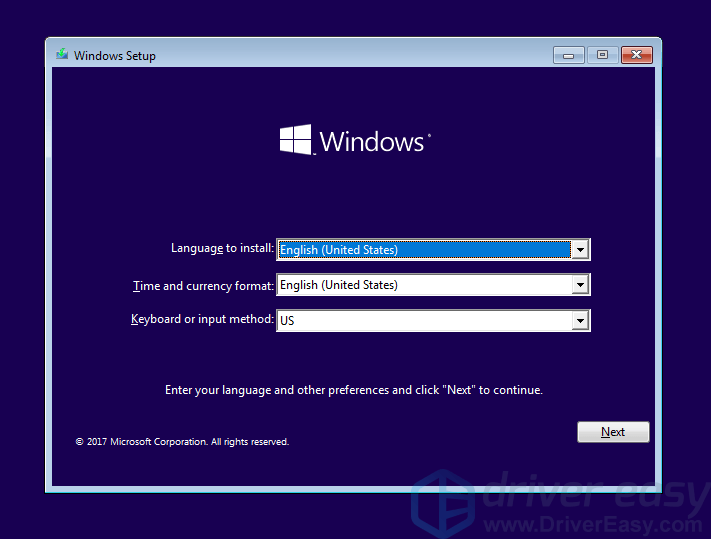
- Boot from your Windows media
Plug your Windows installation media into your computer and boot from it.

- Select a locale
Select your language and location. Then click Next.
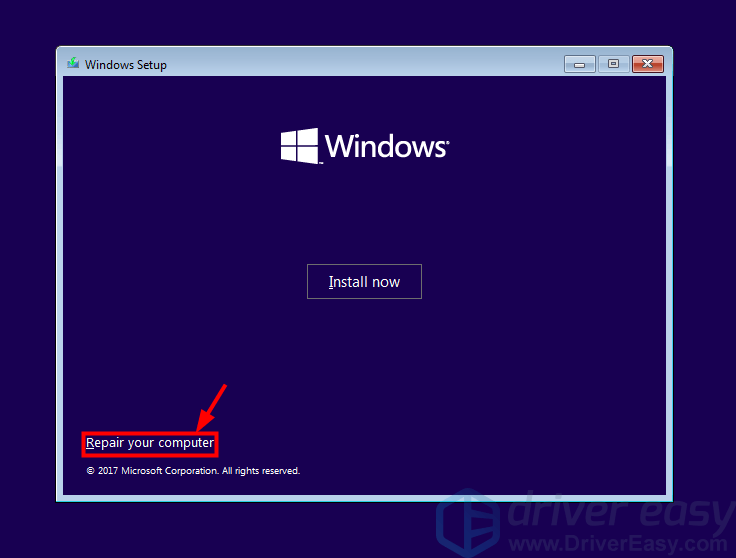
- Go to WinRE
Click Repair your computer.
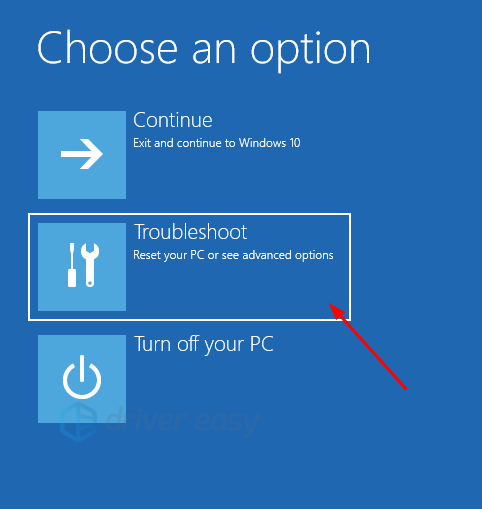
- See the advanced options
Select Troubleshoot.
- Open Command Prompt
Select Command Prompt.

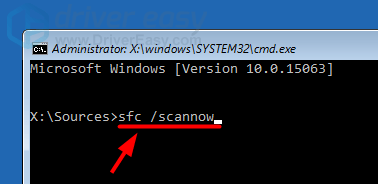
- Run System File Checker
Type “sfc /scannow” and press Enter on your keyboard.
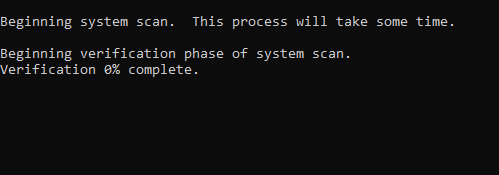
- Wait for the process to be complete
Wait for the process to be complete.
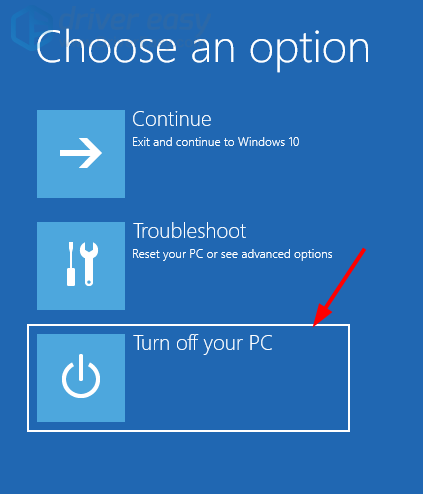
- Turn off your computer
Close Command Prompt. Then select Turn off your PC.
- Verify if this fix works
Turn on your computer. Then check to see if the error disappears.
Method 4: Reinstall your Windows
If none of the methods above can help you, your system may have got issues that can’t be fixed. In this case, you may need to reinstall your Windows system. To do so, you can put your Windows installation media into your computer and follow the on-screen instructions to complete the reinstallation. Then you can check to see if you have got rid of the issue. (Note that this will erase your data on the partition where you have put your operating system.)
Pro Tip: Update your drivers
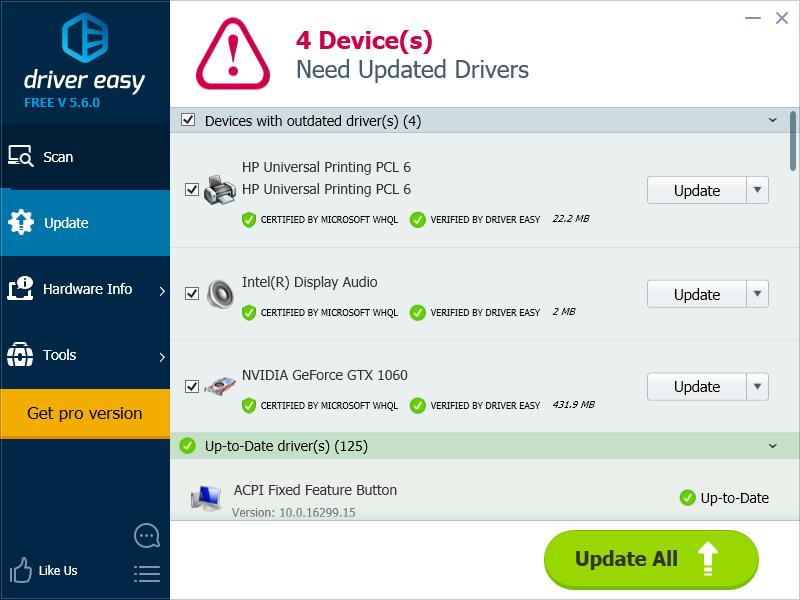
This issue may be caused by wrong or outdated drivers on your computer. After your computer recovers, you can try updating all your device drivers to prevent this issue from happening again and keep your computer healthy. In fact, you can update your drivers automatically and quickly with Driver Easy.
Driver Easy will automatically recognize your system and find the correct drivers for it. You don’t need to know exactly what system your computer is running, you don’t need to risk downloading and installing the wrong driver, and you don’t need to worry about making a mistake when installing.
You can update your drivers automatically with either the FREE or the Pro version of Driver Easy. But with the Pro version it takes just 2 steps (and you get full support and a 30-day money back guarantee):
1) Download and install Driver Easy.
2) Run Driver Easy and click the Scan Now button. Driver Easy will then scan your computer and detect any problem drivers.

3) Click the Update button next to each driver to automatically download and install the correct version of this driver (you can do this with the FREE version). Or click Update All to automatically download and install the correct version of all the drivers that are missing or out of date on your system (this requires the Pro version – you’ll be prompted to upgrade when you click Update All).