



We’ve all been there. You were just trying to keep your PC up to date by installing the latest graphics, audio, or chipset drivers. But after the restart, you’re greeted with a black screen, a Blue Screen of Death (BSOD), or an endless loading loop.
Take a deep breath. This usually happens when a newly installed driver is incompatible with your current Windows build or conflicts with existing software. Your personal files and hardware are likely perfectly safe in this case.
In this guide, we’ll walk you through how to force Windows into recovery mode and fix the issue from the inside out.
Before you start: Enter Windows Recovery Environment or Safe Mode
If Windows cannot start normally, you’ll need to access the Windows Recovery Environment (WinRE) to perform the troubleshooting below.
Windows may enter WinRE automatically after several failed startup attempts. Turn your PC on and off 3 times to trigger it.
Alternatively, you can press the OEM hotkeys during booting to access WinRE. Different computer brands use specific keys:
– ASUS: While the computer isn’t powered on yet, press and hold the F9 key, then press the Power button. If F9 doesn’t work, use F12.
– HP: Repeatedly tap F11 during boot.
– Acer: Press Alt and F10 at the same time after powering on your computer.
– Dell: Tap F12 repeatedly during boot.
– Lenovo: Press F11 repeatedly during boot.
– MSI: Press F3 repeatedly during the boot process.
How to fix Windows can’t boot after a driver update
Here are 4 practical fixes to help you restore Windows. You can usually fix the issue by reversing your driver update or performing a System Restore or Startup Repair. If those fail, consider resetting or reinstalling your PC as a last resort.
- Boot into Safe Mode and roll back or uninstall the problematic driver
- Perform a System Restore
- Run Startup Repair
- Reset or reinstall Windows
Method 1: Boot into Safe Mode and roll back or uninstall the problematic driver
If your Windows starts to malfunction after installing or updating a driver, rolling back the driver is the most targeted fix because it reverses the recent change without affecting other system components. Enter Safe Mode first. This loads Windows with only the bare minimum, generic drivers, which prevents the “bad” driver from loading and crashing your system.
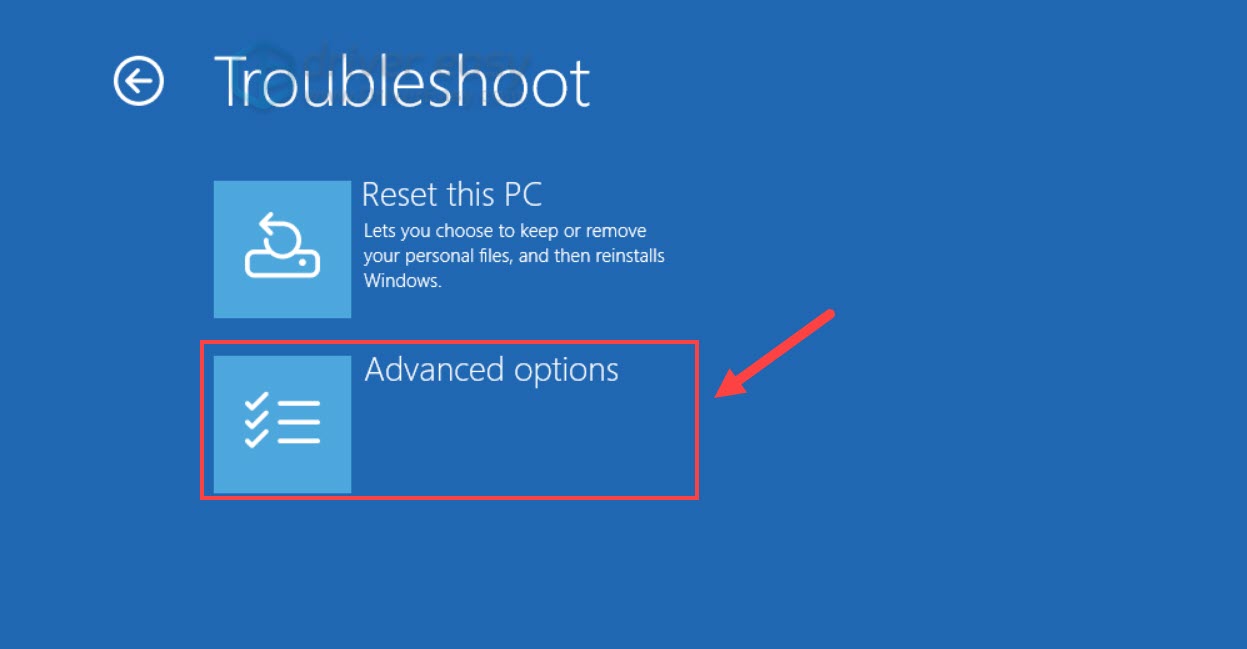
- From the blue WinRE screen, select Troubleshoot.
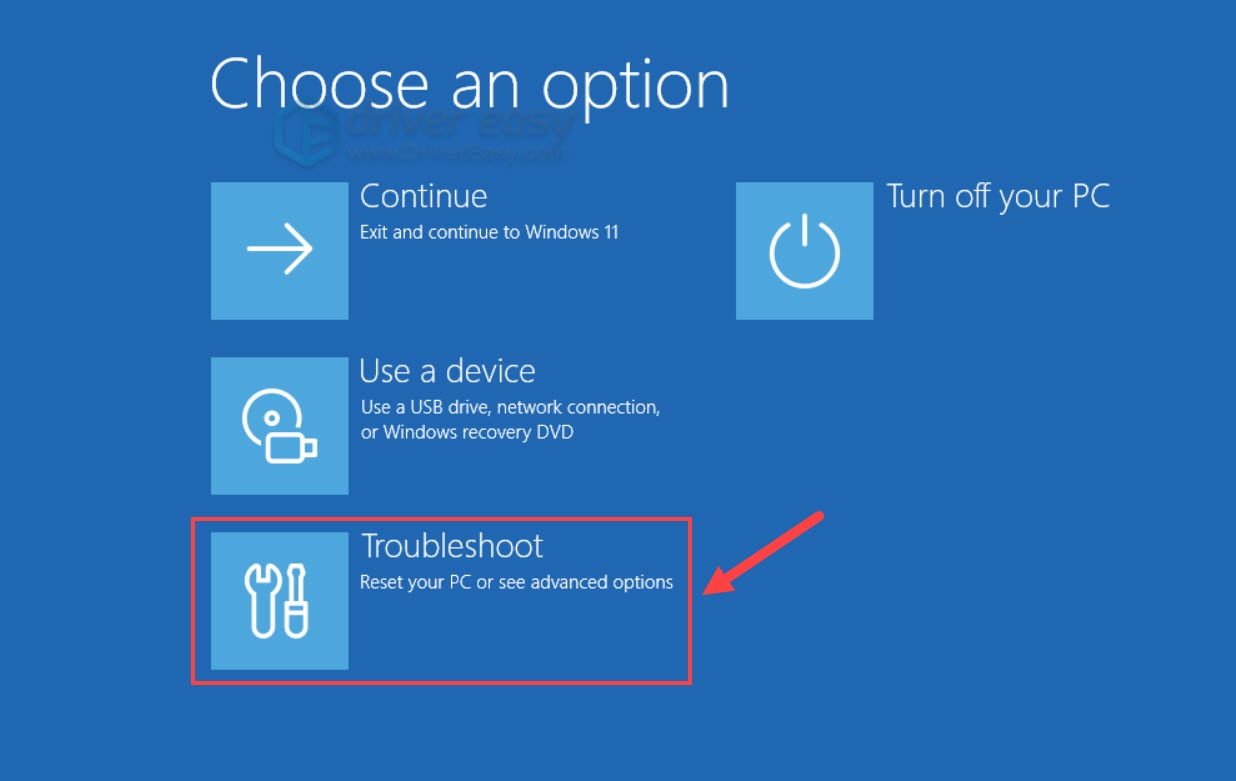
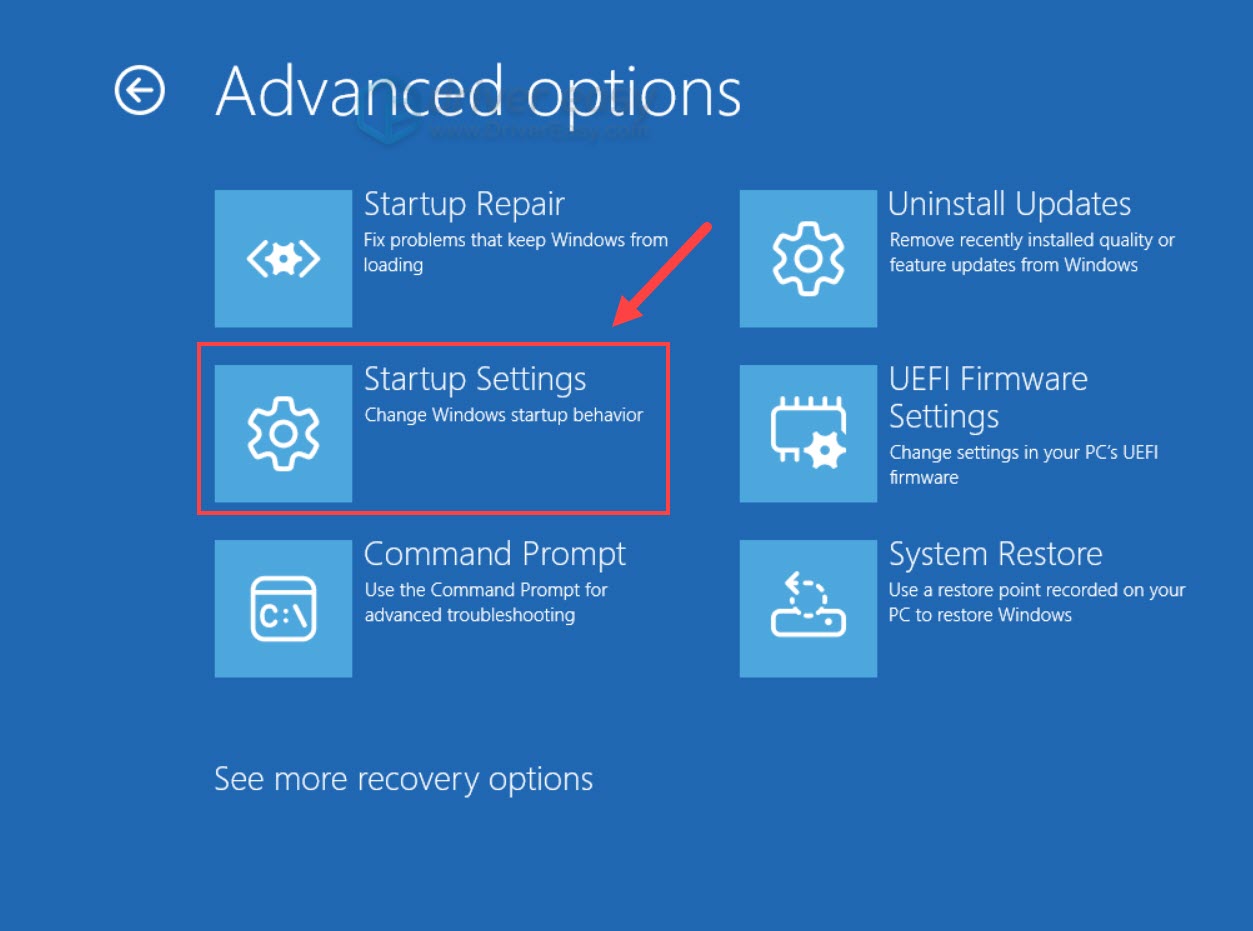
- Click Advanced options.
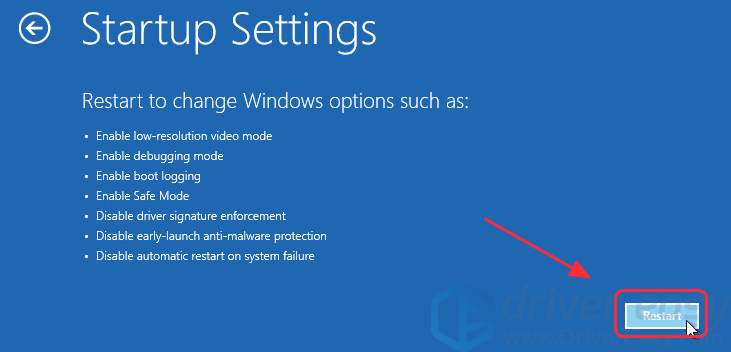
- Click Startup Settings.
- Click Restart.
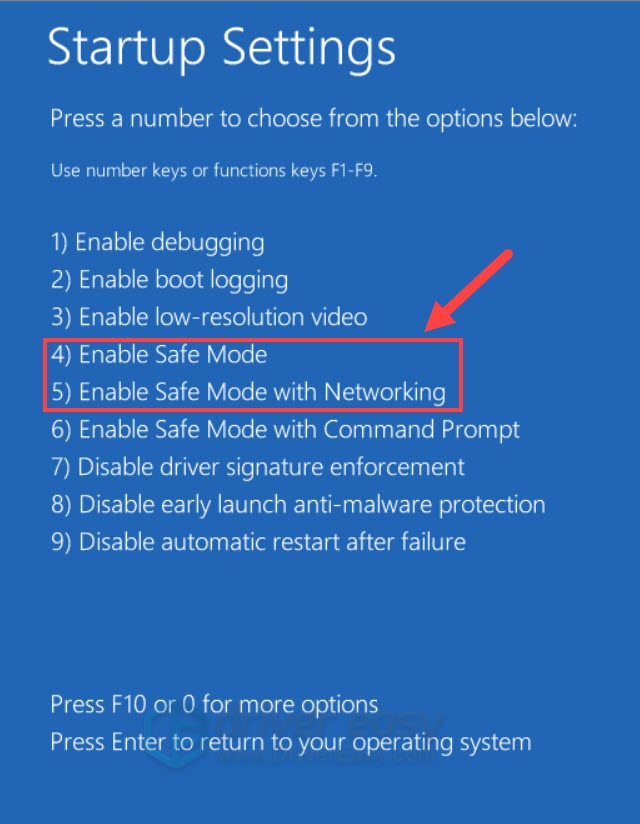
- On your keyboard, press the number 4 or F4 key to enter Safe Mode without internet access or the number 5 or F5 key to enter Safe Mode with internet access.
On Windows 7, you could press the F8 key as your computer was booting to access the Advanced Boot Options menu. From there, you could access Safe Mode.
Once you are in Safe Mode (it will look a bit low-resolution, which is perfectly normal in Safe Mode), try to roll back or uninstall the problematic driver.
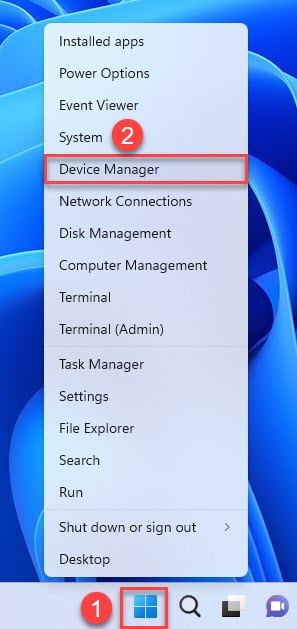
- Right-click the Start button and select Device Manager.
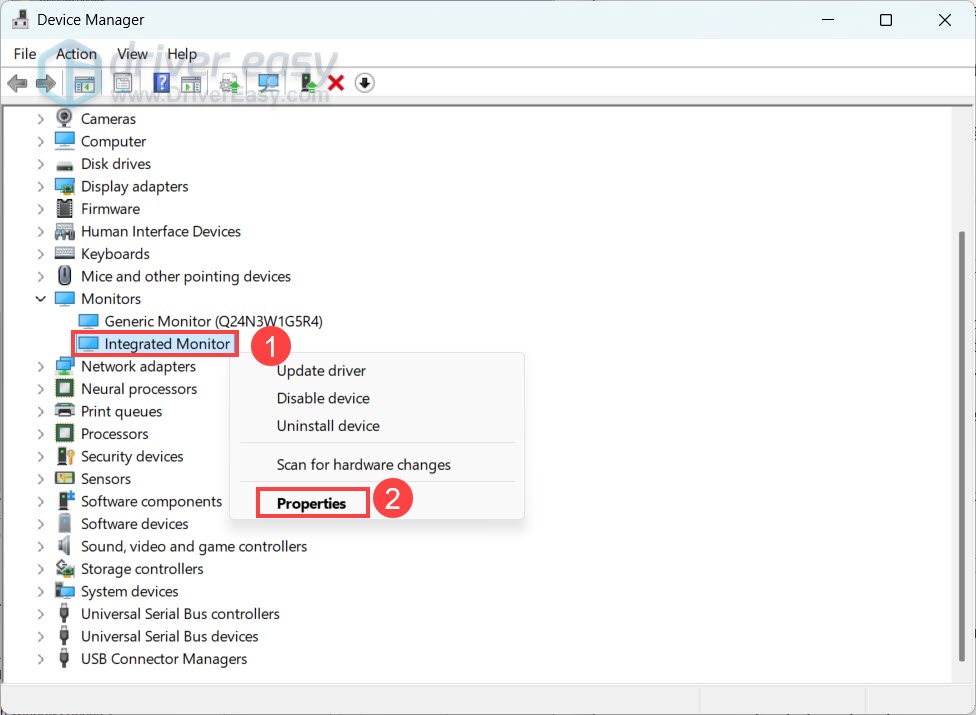
- Expand the category of the driver you recently updated (for example, Display adapters for a graphics card).
- Right-click the specific device and select Properties.
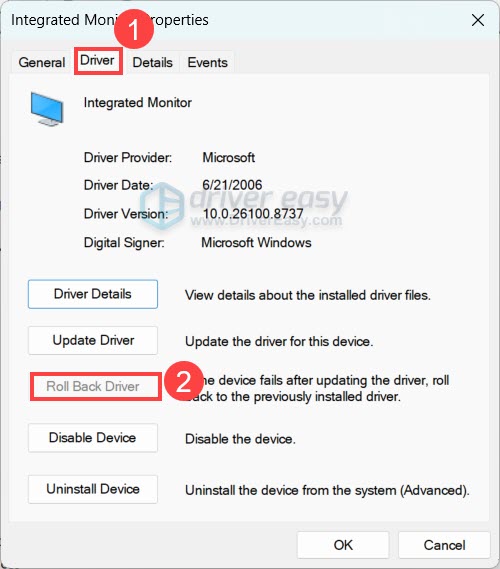
- Go to the Driver tab at the top, and click Roll Back Driver. Follow the prompts to revert to the previous version.
If the Roll Back Driver button is grayed out, right-click the device and select Uninstall device.
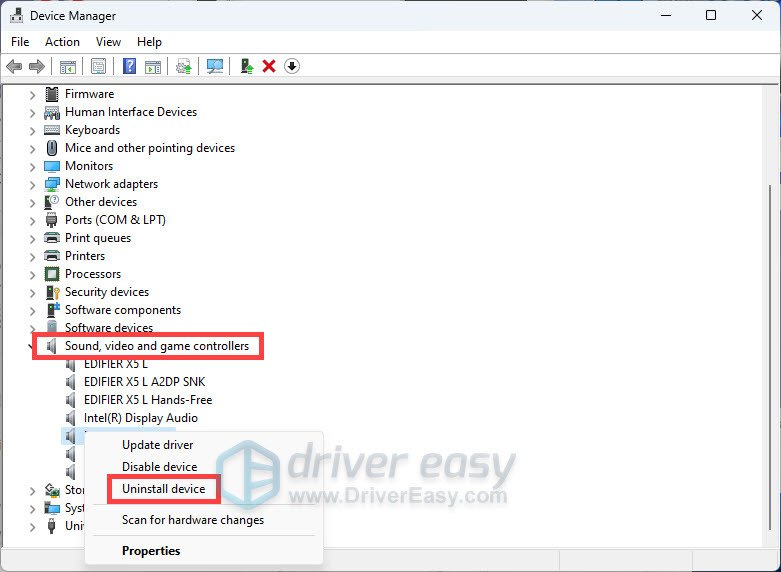
Check Attempt to remove the driver for this device (or Delete the driver software for this device), and click Uninstall to confirm removal.
Restart your PC. It should exit Safe Mode and boot straight to your login screen. If your computer runs normally, you can check your PC or hardware manufacturer’s website for a newer or another compatible driver version. You can also use Driver Easy to scan your system and manage your drivers easily. You can update, uninstall, roll back drivers, or switch between different driver versions all in one convenient place.
Method 2: Perform a System Restore
If you have System Restore enabled, this is usually the magic bullet. It acts like a time machine, reverting your system files and drivers to a state before the bad update happened—without affecting your personal documents or photos.
- On the blue WinRE screen, select Troubleshoot > Advanced options.
- Select System Restore.
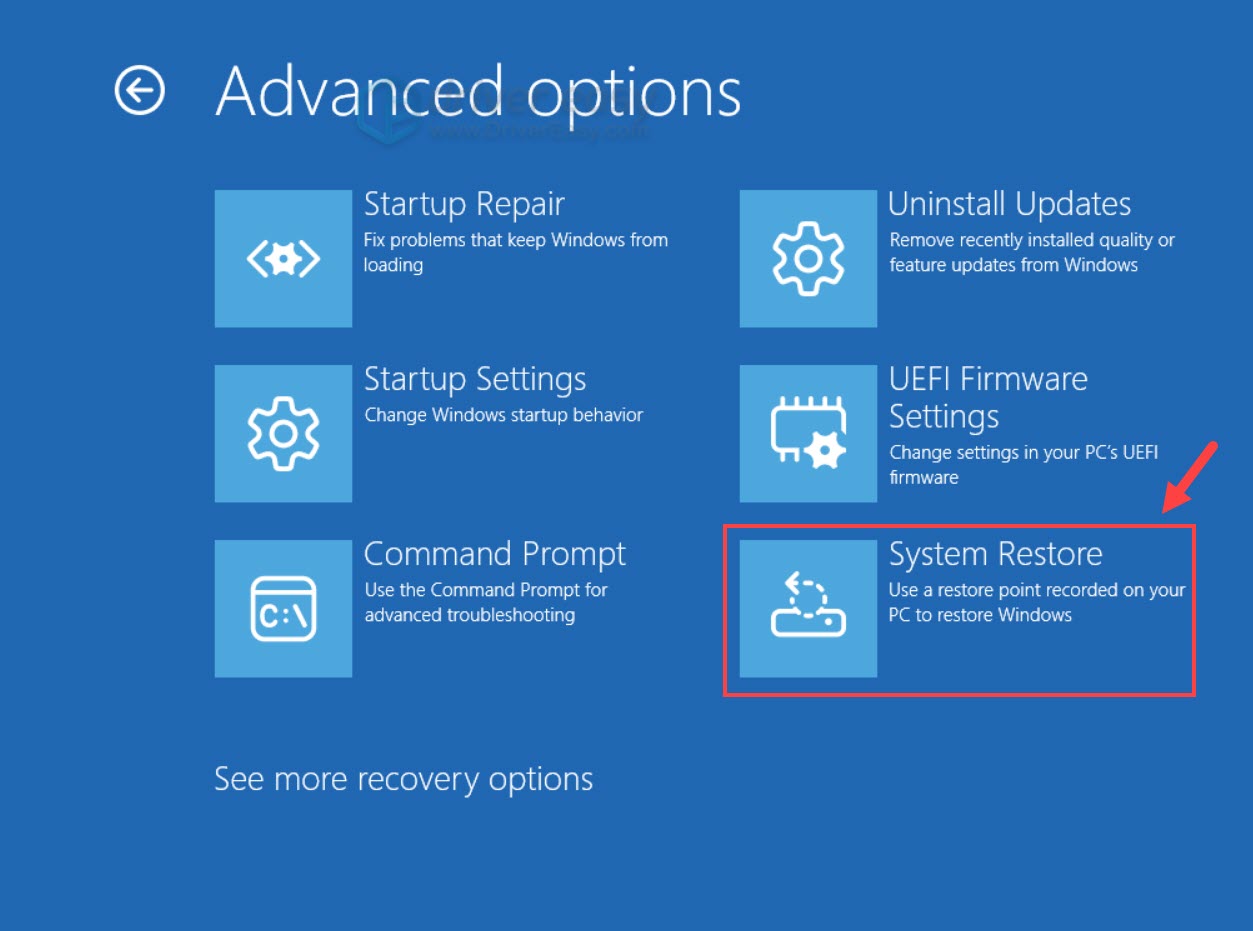
- Windows will ask you to select your account and enter your password.
- A window will pop up. Click Next. You will see a list of recent restore points. Look for one dated right before you updated the driver. Select that restore point, click Next, and then Finish.
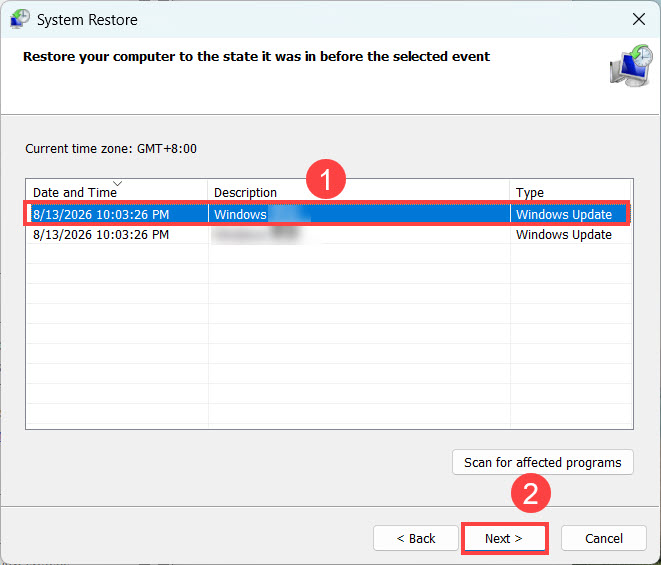
Wait patiently for the restoration process. It might take 15 minutes or even more. Once it’s done, restart your PC. Usually, this is enough to get you back to your desktop smoothly.
Windows 11 24H2 and later: Try Point-in-time restore
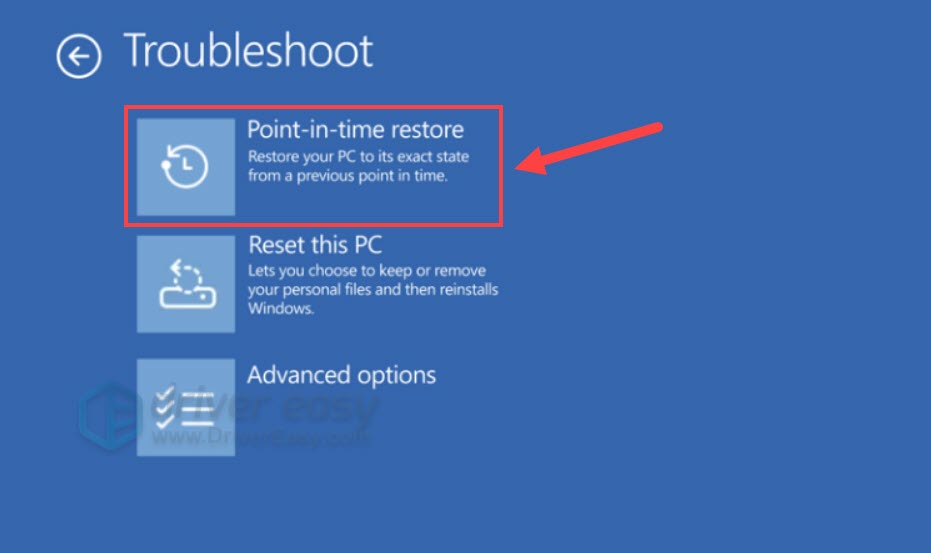
On supported versions of Windows 11, you can also try Point-in-time restore. This feature can restore the PC to an earlier point in time and is particularly useful when Windows cannot start. However, personal files, apps, and settings after the selected restore point will be deleted.
You can find it under: Troubleshoot > Point-in-time restore. If you don’t have this feature displayed, it may be disabled. Try to run a System Restore instead.
Method 3: Run Startup Repair
If Windows still won’t boot after restoring or removing the problematic driver, try Startup Repair.
Startup Repair checks for common problems that prevent Windows from starting and attempts to repair them automatically.
- From the blue WinRE screen, select Troubleshoot.
- Click Advanced options.
- Select Startup Repair.
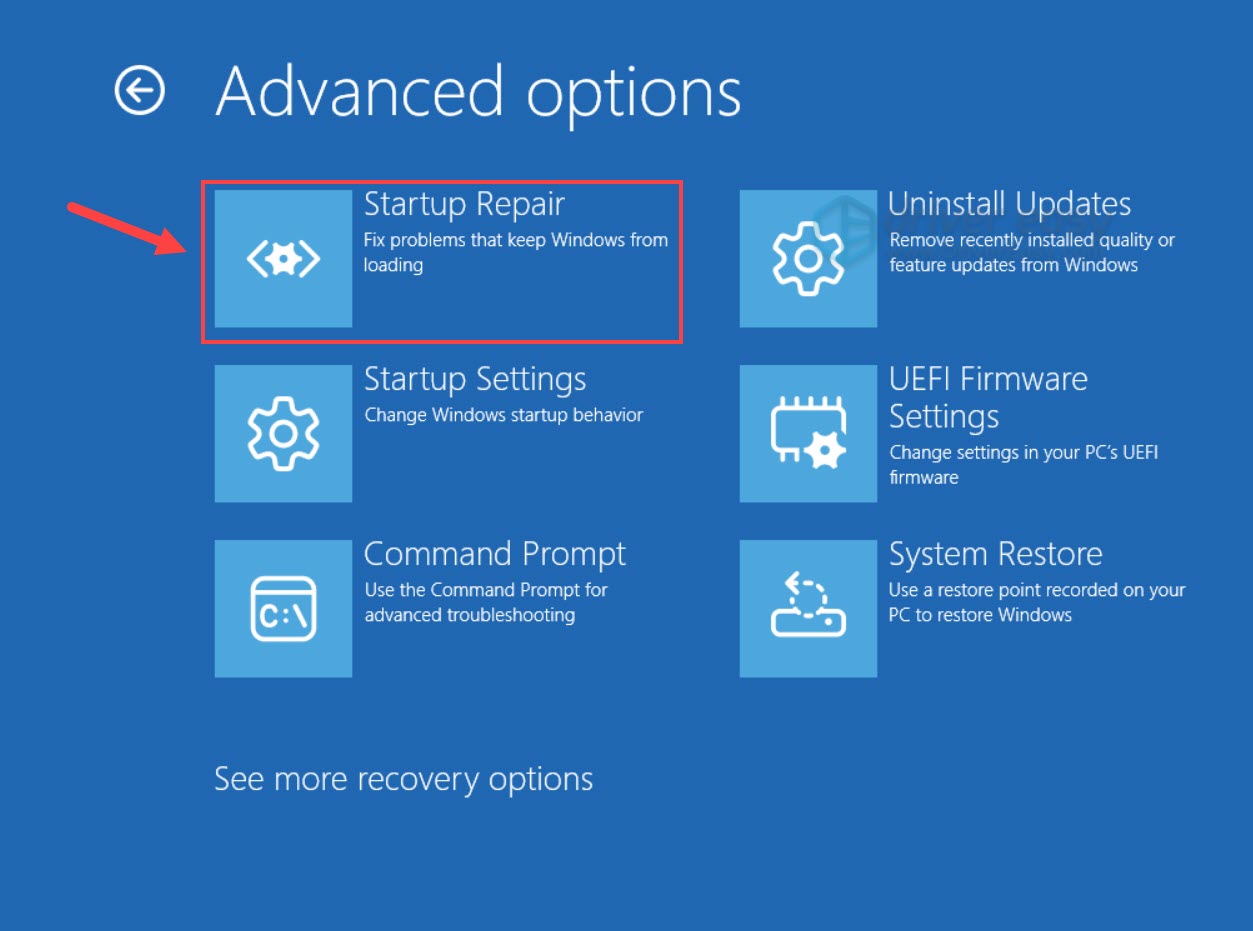
Follow the on-screen instructions and wait for Windows to complete the repair. When the repair is finished, restart your PC and check whether Windows starts normally.
Method 4: Reset or Reinstall Windows
If none of the fixes above work, you may need to reset or reinstall Windows. Before proceeding, back up important files if possible. Depending on the recovery option you choose, installed applications, settings, and personal files may be removed.
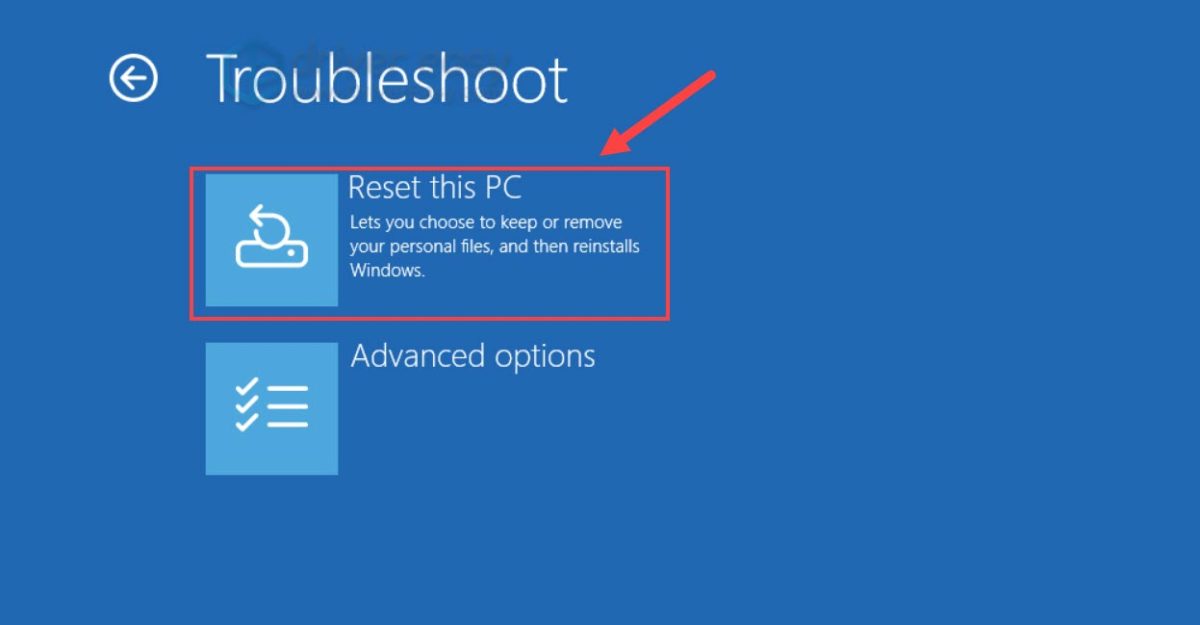
From the Windows Recovery Environment, select Troubleshoot > Reset this PC.
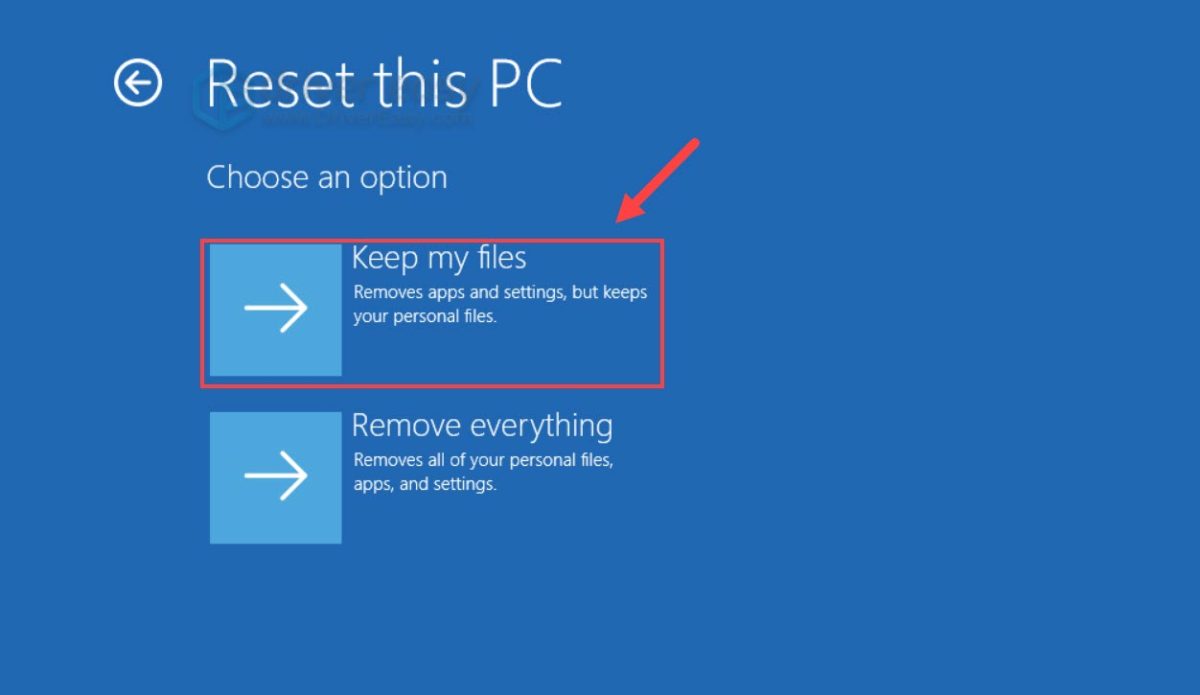
Choose Keep my files. (Do NOT select “Remove everything” unless you want a complete wipe). Then choose the recovery option that best fits your situation: Cloud download (requires internet) or Local reinstall. Follow the on-screen instructions to let Windows rebuild itself.
A clean Windows installation should generally be considered a last resort.
If Windows stops booting after a driver update, start by rolling back or uninstalling the recently updated driver. Once you’re back in Windows, avoid reinstalling the same driver version right away. Instead, check for a newer or an older known-stable version. If you’re not sure which drivers need updating or which version is right for your system, Driver Easy can help.
Does this article resolve your problem? If you have any questions or suggestions, feel free to leave a comment below.