


 If you want to share a cool video that you just shot with your iPhone via emails or messages with your friends and family, or upload it to YouTube, but only want to share the very cool bits, you can use the Photos app to make it happen.
The Photos app has the built-in video editing feature. If you want to trim your video, but third-party software such as iMovie might be overkill to do just the video trimming, Photos is good enough for you.
Don’t judge an app simply just by its name, the Photos app is actually more than an app containing all your photos and videos. With the Photos app, you can easily change the start and stop time to make your videos shorter and easier to view.
How to trim a video clip on iPhone?
Now, let’s get down to real business. To trim your video on iPhone is actually a piece of cake: just follow the steps below and you’ll see how fat you can grasp this skill.
Note that the interface might be different on different versions of iOS. The following screenshots are done on iOS 11.21.
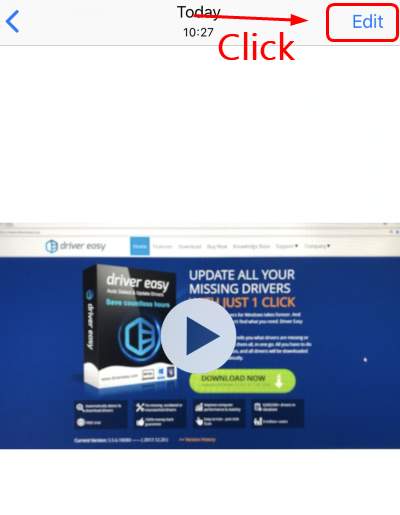
1) On your iPhone, tap to open the Photos app.
2) Tap the video thumbnail of the video clip you want to edit, and later share. Click the Edit button on the top right corner.
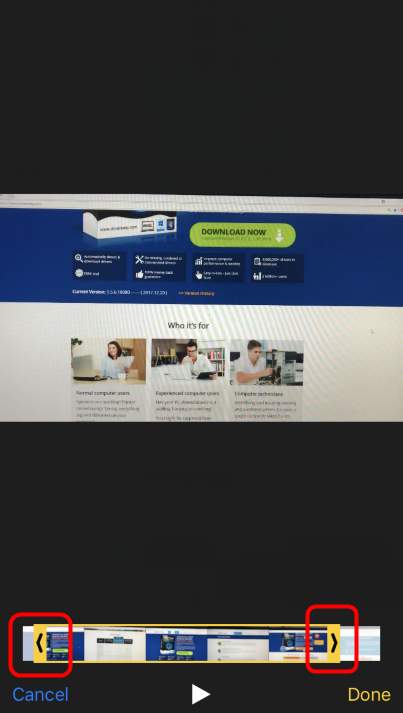
3) You’ll see the handles on the both ends.
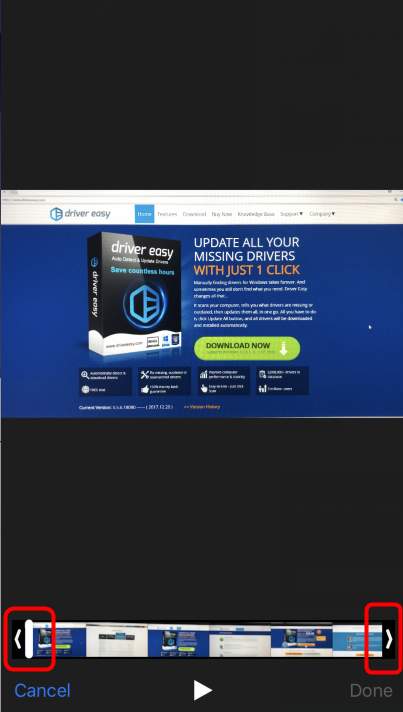
4) Try to drag them back and forth until you find the ideal length for your video clip. The bar handles will become yellow indicating your changes. If you’re not sure whether to leave or cut certain part, long press the bar handles, and you will be able to see the detail footage.
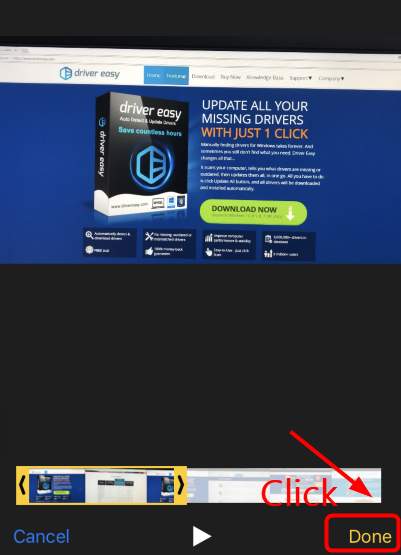
5) When you finish the trimming of your video, click the Done button at the corner.
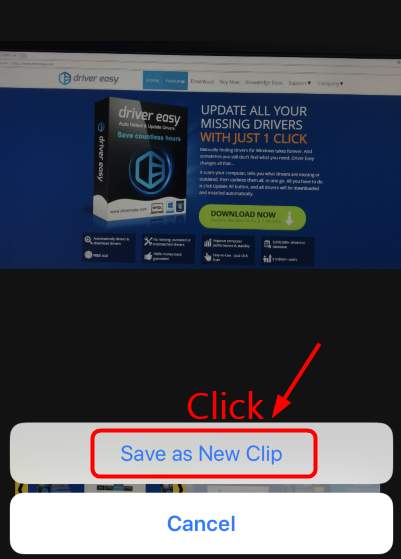
6) Click Save as New Clip to save your changes.
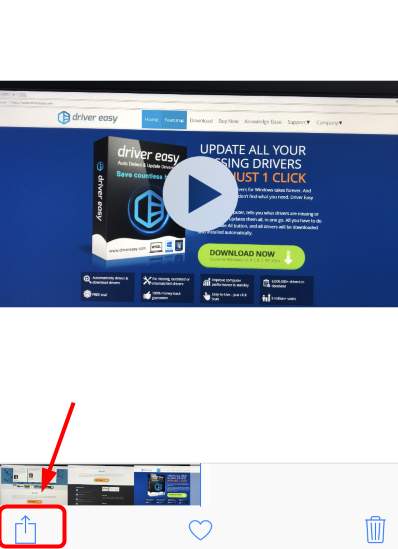
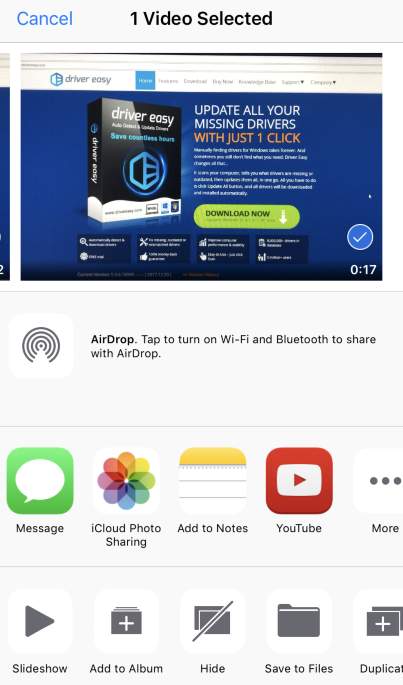
7) If you want to share the video, click the share button at the left corner.
8) Select the platform you want to share on, and tada, your unique video is done and shared!
Feel free to let us know if you need more assistance in editing your video on your iPhone. We’d love to help out.