


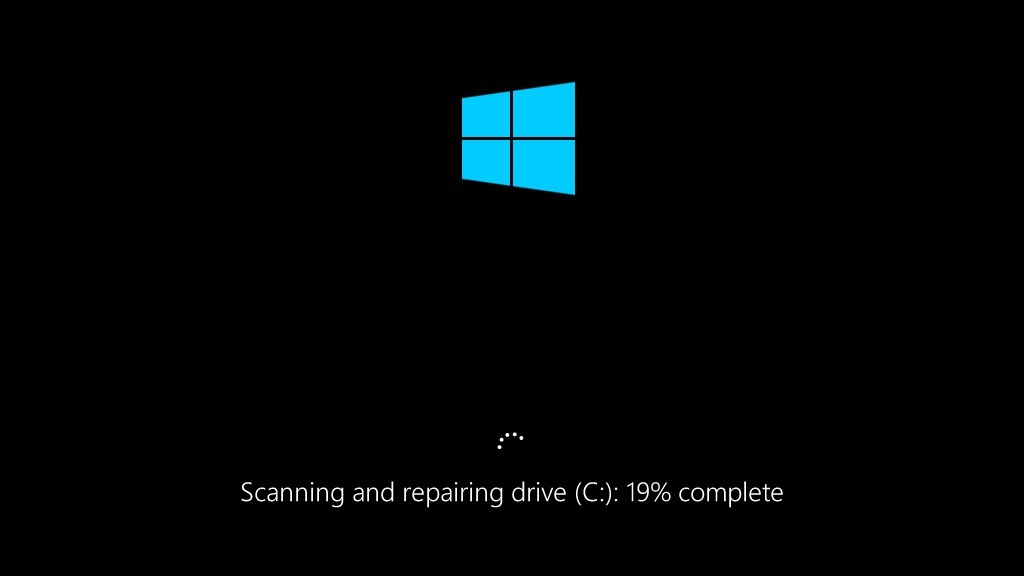
Some Windows 10 users recently have reported that Windows was scanning and repairing drive on booting, and the process stuck for minutes or even hours. And some users have reported that every time they power on PC, they get this message. If you also get this error on your Windows 10, don’t worry. You can fix it with the methods in this post, as they have helped other users with this problem.
Why Windows is scanning and repairing drive on booting?
If your computer didn’t turn off properly without warning (the reason could be a power failure, a forced shutdown, etc.), when you start the machine next time, you probably get this message.
When Windows is running, the hard disk and the RAM (Random Access Memory) are writing and reading data. Computer shutting down unexpectedly can cause you to loose the data stored in RAM. It even can cause the hard disk damage. So when you boot your computer next time, Windows will scan the drive automatically and try to repair the issues that might occur due to computer shutting down suddenly.
IMPORTANT: It’s always recommended not to force to turn off the computer when it’s being used, as this may cause you to loose the data whatever you’re working on.
How you can stop Windows scanning and repairing drive?
The scanning and repairing process can take a long time. You may see it stuck there longer than you expect. If you don’t need to use Windows urgently, you can wait until the process is done. If you don’t have the patience or time to wait so long, you can bypass the auto-scanning and use other methods to scan and repair the drive manually. And if you get this message during every startup, it’s recommended you follow the instructions too.
There are four methods to get rid of this annoying process. Two methods work on Windows 10 Normal Mode, and two methods work when you can’t boot into Windows successfully. You can choose the method depending on your case.
Methods apply to Normal Mode:
Method 1: Use Windows Error checking tool
Method 2: Check the drive status
Methods work when Windows doesn’t boot successfully:
Method 3: Run CHKDSK command in Safe Mode
Method 4: Run Repair-Volume -DriveLetter command in Safe Mode
Method 1: Use Windows Error checking tool
You can use the Windows Error checking tool in drive Properties to scan and repair the drive issues.
Follow these steps:
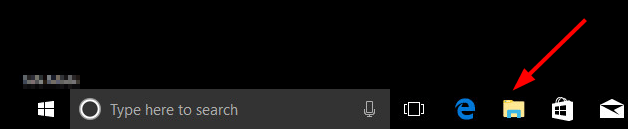
1) Click the File Explore at the task bar.
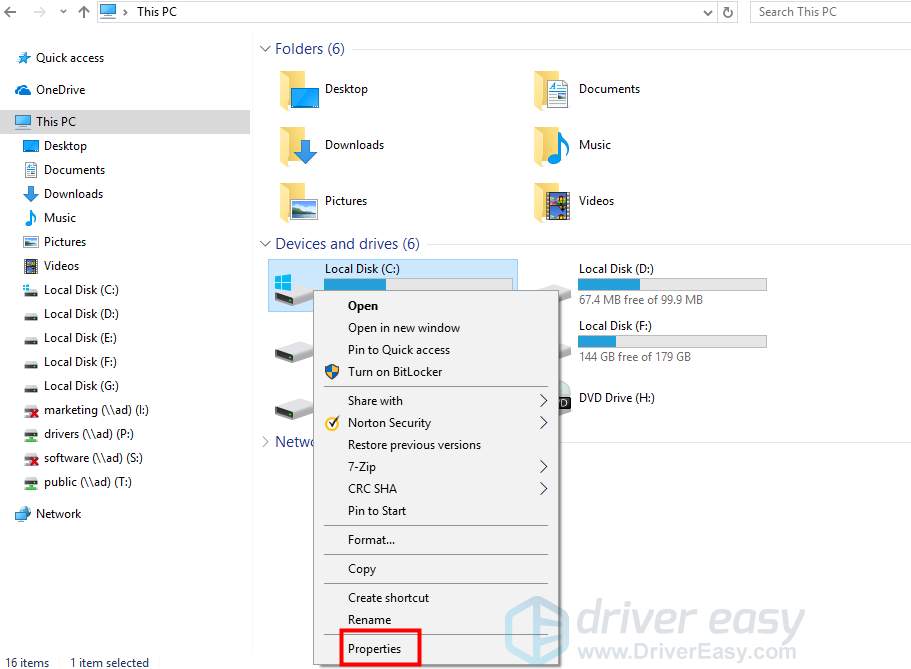
2) Click This PC then expand Devices and drives.

3) Right-click the drive that Windows is scanning and repairing. You can tell it from the scanning screen. For example, if you see “Scanning and repairing drive (C:)” on the screen, right-click (C): drive then click Properties.
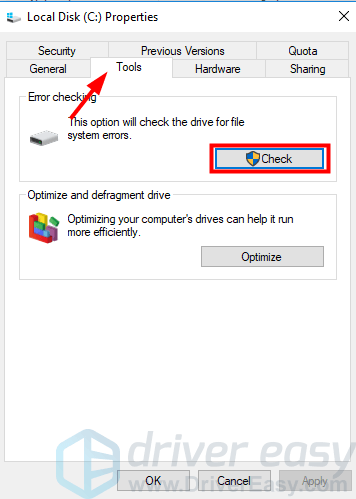
4) Go to Tools tab and click the Check button under Error checking.
5)
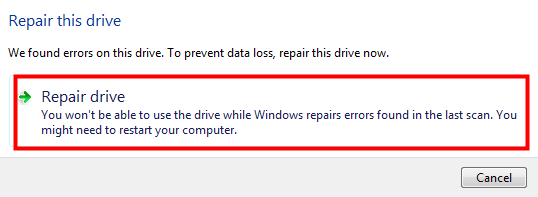
If Windows found errors on this drive, you’ll see the following screen pop up. Click Repair drive to scan the drive.
If no errors are found, the following screen prompts. Click Scan drive anyway. Then Windows will scan and repair the drive.

6) Reboot your PC and check to see if the issue is resolved.
Method 2: Check the drive status
If there are problems with the drive, Windows will detect it and allows you to scan and repair it. You can fix the issue by checking the drive status. To do so:
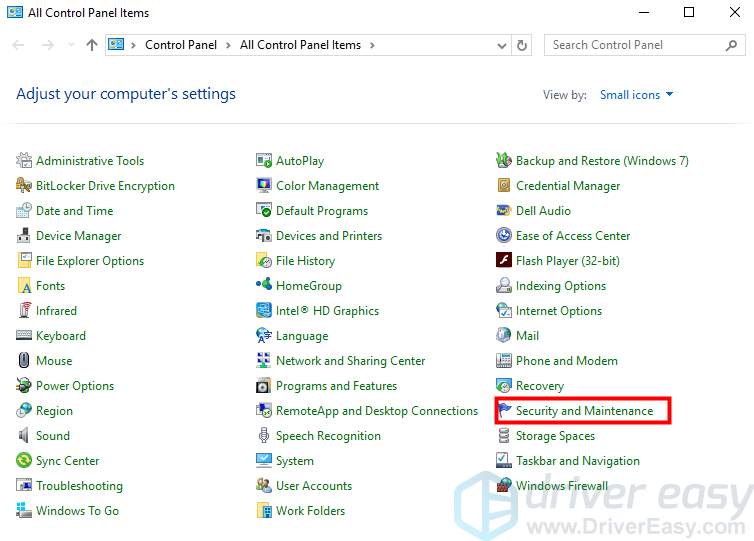
1) Open Control Panel.
2) View by Small icons, click Security and Maintenance.
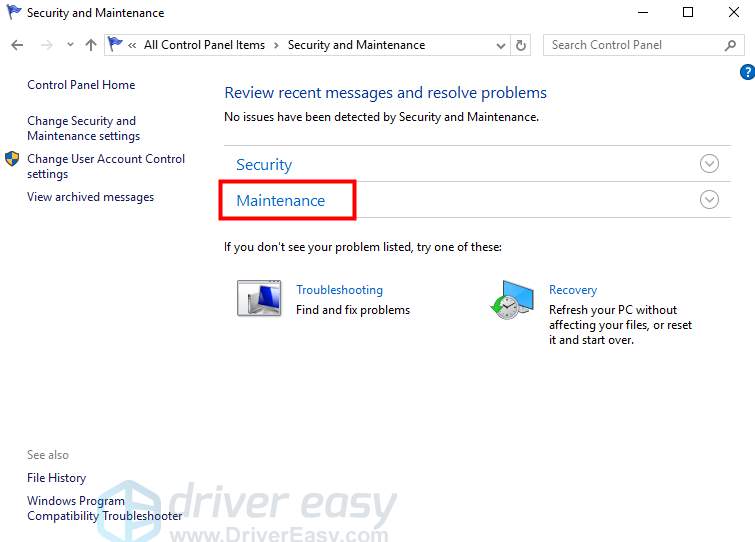
3) Click Maintenance.
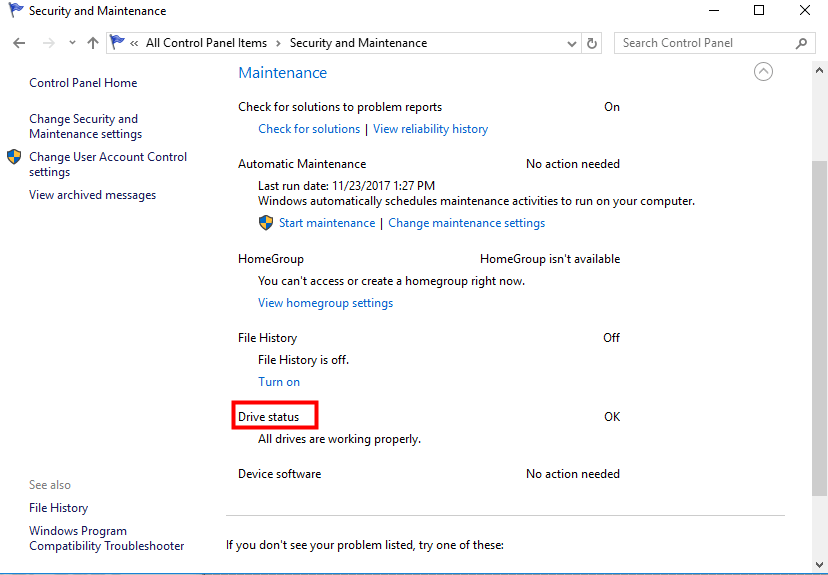
4) Under Drive status, you may see issues listed here and a link that allows you to click to repair the drive. Click the link.
Method 3: Run CHKDSK command in Safe Mode
CHKDSK is a useful command that you can use to check the drive for system file errors and fix the errors. If you can’t boot into Windows successfully, use this command in Safe Mode.
Follow steps below:
1) Start Windows 10 in Safe Mode.
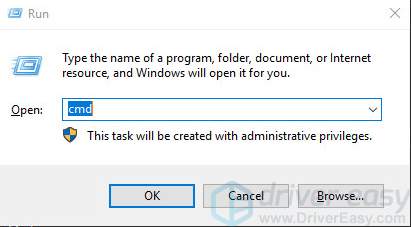
2) On your keyboard, type Windows logo key and R key at the same time to invoke the run command.
3) Type cmd and press Shift+Ctrl+Enter to open command prompt in administrator mode. (Do not click OK or just press Enter key as that won’t allow you to open command prompt in administrator mode.)
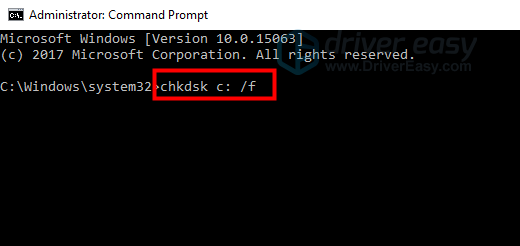
4) Type the following command line and press Enter key on your keyboard.
Note: The letter x means the drive that you want to scan and repair for. If you want to scan and repair C:, replace x with c.
chkdsk x: /f
Screenshot for your reference:
5) After the scanning and repairing process is done, restart your PC and check too see if the problem is resolved.
Method 4: Run Repair-Volume -DriveLetter command in Safe Mode
This method is to use PowerShell to run command Repair-Volume -DriveLetter to scan and fix the hard disk errors. Follow steps below:
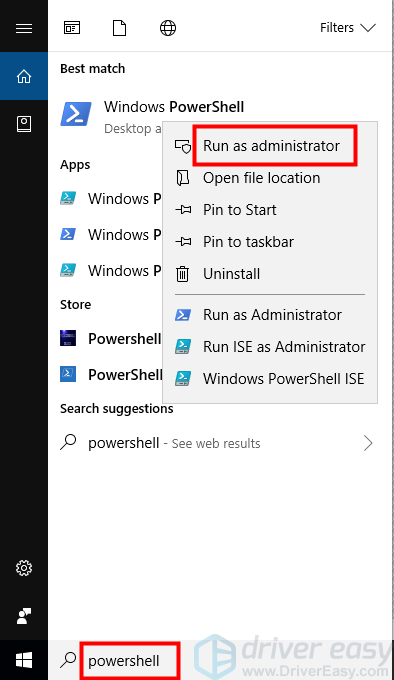
1) Start Windows 10 in Safe Mode.
2) Type powershell in the search box to bring up the menu. Right-click Windows PowerShell and click Run as administrator to open PowerShell in administrator mode.
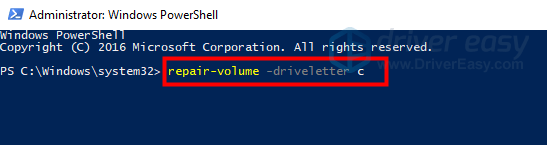
3) Type the following command line and press Enter key on your keyboard.
Note: The letter x means the drive that you wish to scan and repair for. If you’re intend to repair C: drive, replace it with c.
repair-volume -driveletter x
Screenshot for your reference:
4) After the process completes, restart your PC and check to see if the problem is resolved.
How to recover your data
If your files are missing or corrupted due to this issue, you can use a recovery software to recover the data easily. It’s recommended you find a program with good reputation. If you don’t know such software yet, you can use Stellar Phoenix Windows Data Recovery so you don’t need to spend further time on searching.
Stellar Phoenix Windows Data Recovery is a known data recovery software around the world. With the friendly user interface, you can use it to recover any deleted, lost and corrupted data of your drive with just a few clicks.
Hopefully the methods in this post help you fix the problem. If you have any questions, please comment below. We’re happy to hear of any suggestions and ideas.
References: