


Zoom is a convenient app for online conferences and screen sharing is one of its essential features. However, many users complain Zoom share screen isn’t working from time to time, either giving an error code 105035 or causing a black screen. If you’re facing the same problem, here are 4 simple fixes to help you out.
Fixes to try:
You don’t need to try them all; just work your way down the list until you find the one that does the trick.
Fix 1 – Adjust Zoom settings
The Zoom share screen not working issue is possibly caused by the improper app settings. You could try the settings as follow and see how things go.
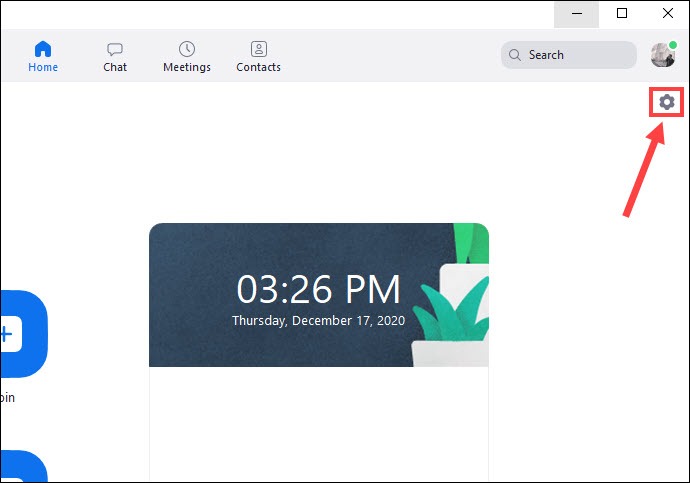
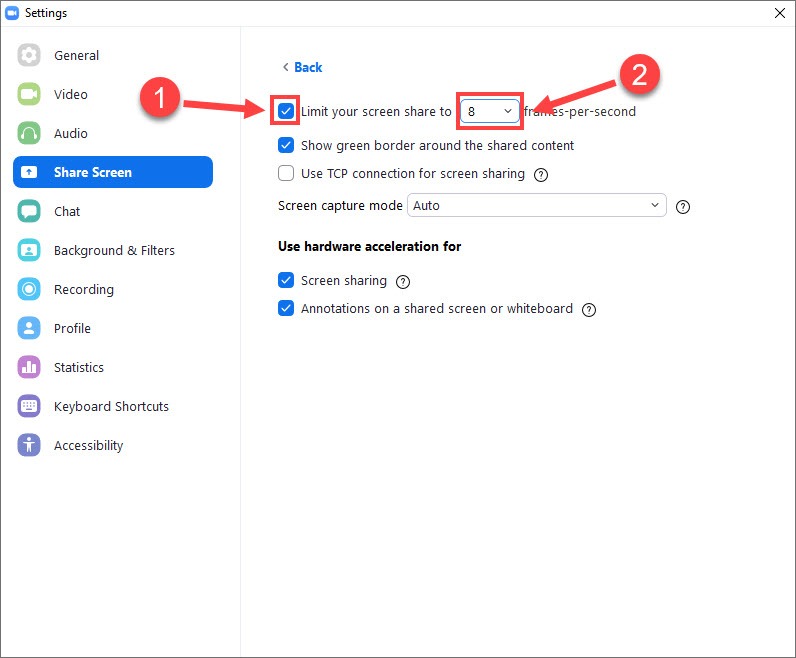
- Launch Zoom and click the gear icon at the upper right corner.
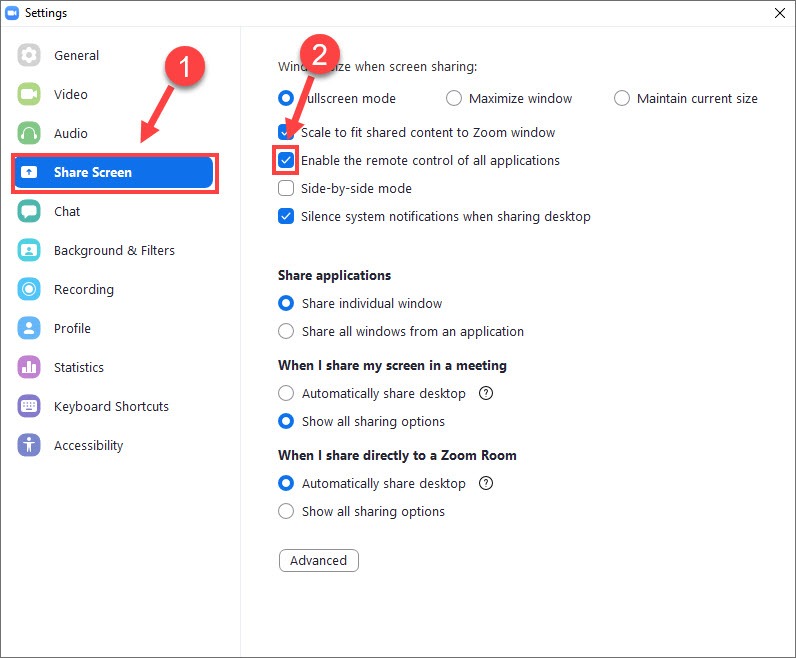
- Select the Share Screen tab. Then, tick Enable the remote control of all applications. (If you can’t check this option, right-click your Zoom app on the desktop and click Run as administrator.)
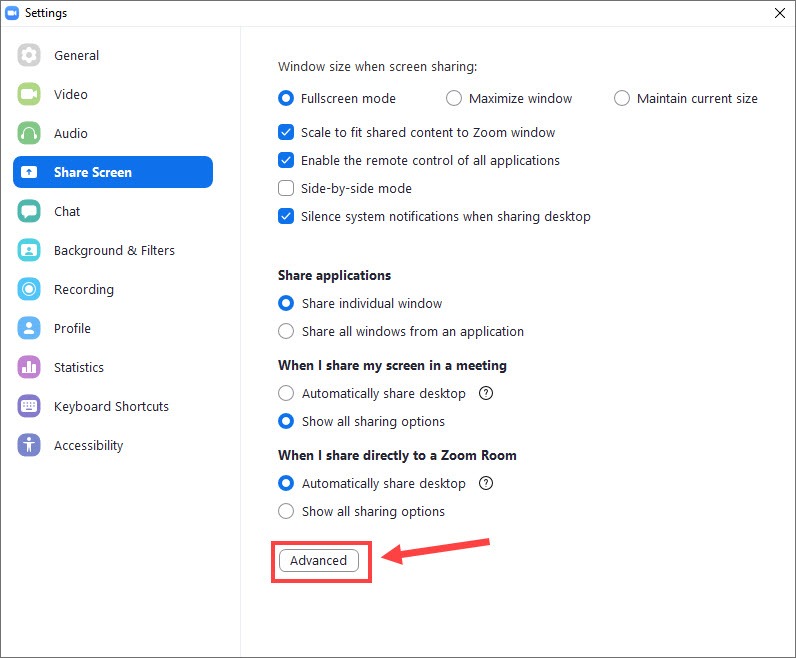
- Click Advanced.
- Tick the box next to Limit your screen share to frames-per-second and choose a value below 10 from the drop-down menu.
Quit Settings and start the share screen to test. If the issue persists, move on to the next fix below.
Fix 2 – Update your graphics driver
If Zoom share screen doesn’t work as intended and a black screen displays, it’s likely that your graphics driver is faulty or outdated. So you should update the graphics driver to fix your problem.
You can download the most recent driver straight from the GPU manufacturer’s website and install it manually. But if you don’t have the time, patience or skills to update the driver manually, you can do it automatically with Driver Easy.
Driver Easy will automatically recognize your system and find the correct drivers for it. You don’t need to know exactly what system your computer is running, you don’t need to be troubled by the wrong driver you would be downloading, and you don’t need to worry about making a mistake when installing.
You can update your drivers automatically with either the FREE or the Pro version of Driver Easy. But with the Pro version it takes just 2 steps (and you get full support and a 30-day money back guarantee):
- Download and install Driver Easy.
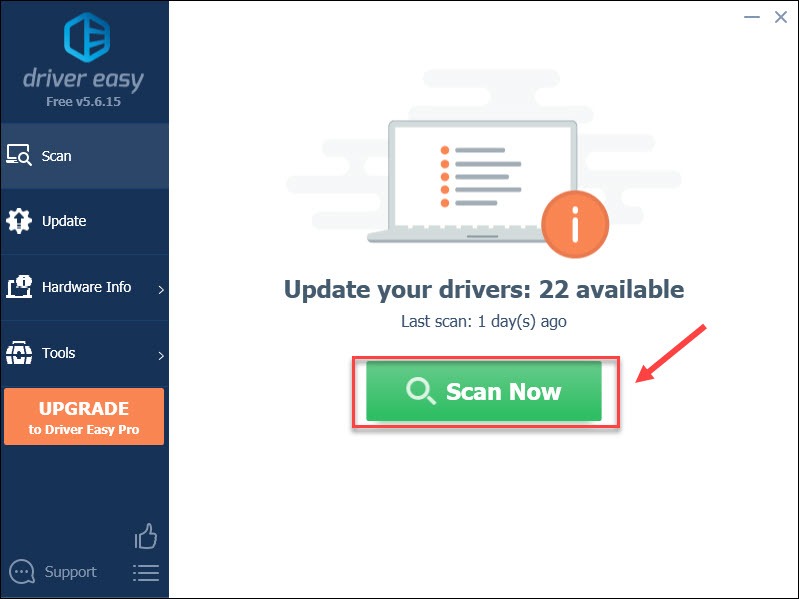
- Run Driver Easy and click the Scan Now button. Driver Easy will then scan your computer and detect any problem drivers.
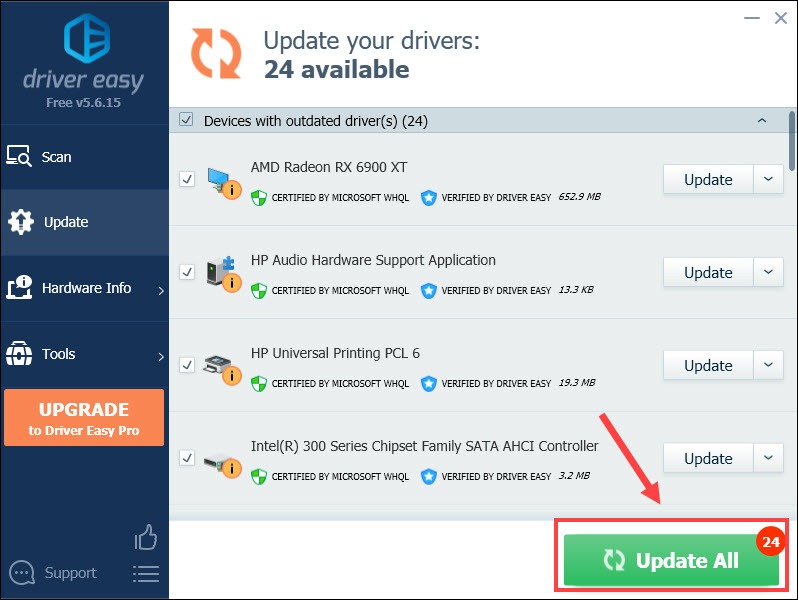
- Click Update All to automatically download and install the correct version of all the drivers that are missing or out of date on your system (this requires the Pro version – you’ll be prompted to upgrade when you click Update All).
If you need assistance, please contact Driver Easy’s support team at support@drivereasy.com.
Driver update is a solid fix for most program glitches. But if this fails to get your Zoom share screen back to working, check out the next fix then.
Fix 3 – Modify the graphics card settings
This is not a common case but your graphics card with automatic switching might trigger the black screen during Zoom screen sharing. NVIDIA graphics card users can follow the steps below to disable auto GPU switching.
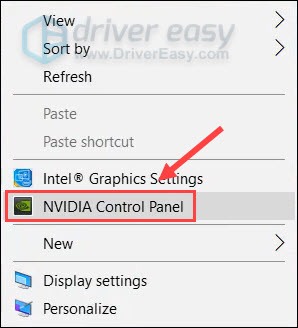
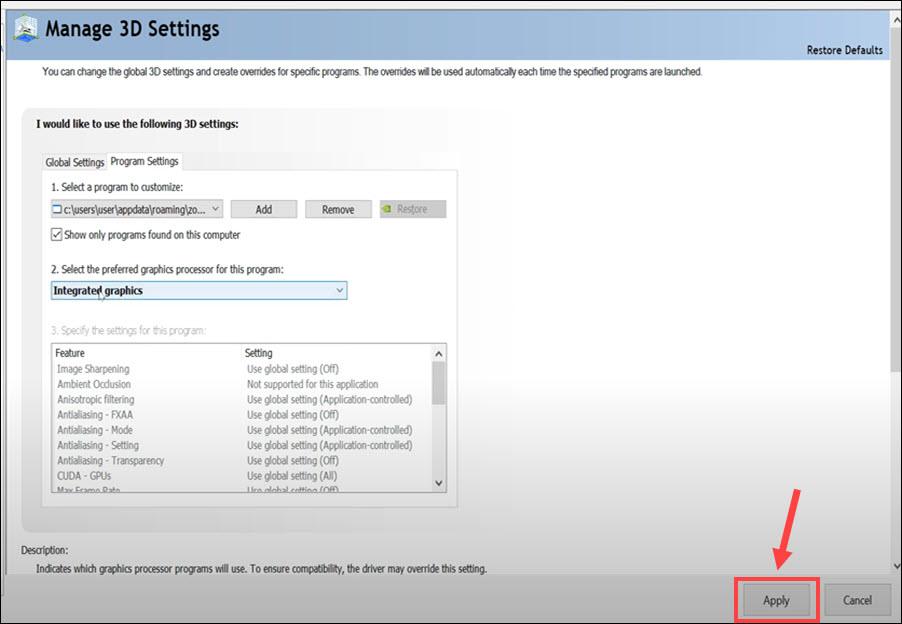
- Right-click any empty space on your desktop and click NVIDIA Control Panel.
- Select Manage 3D settings from the left pane.

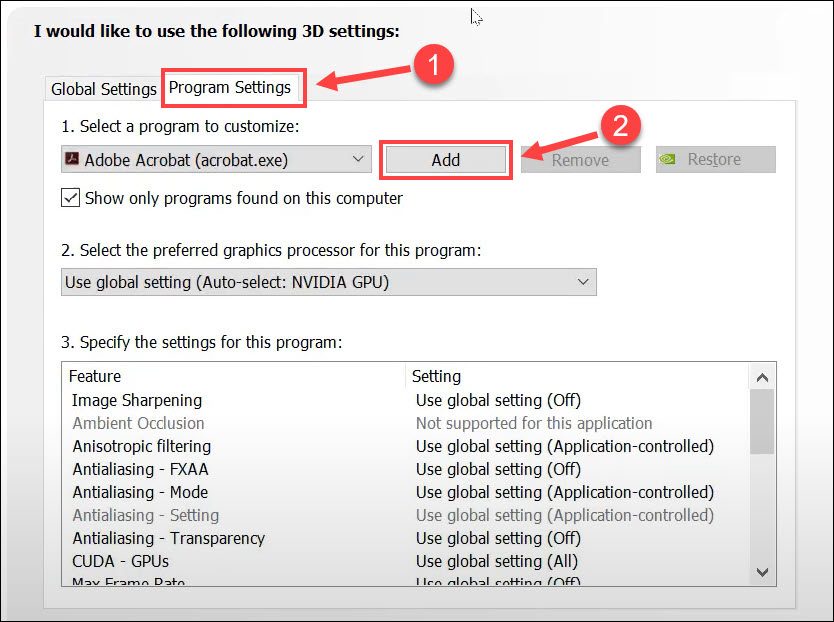
- Click Program Settings. Then, click the Add button.
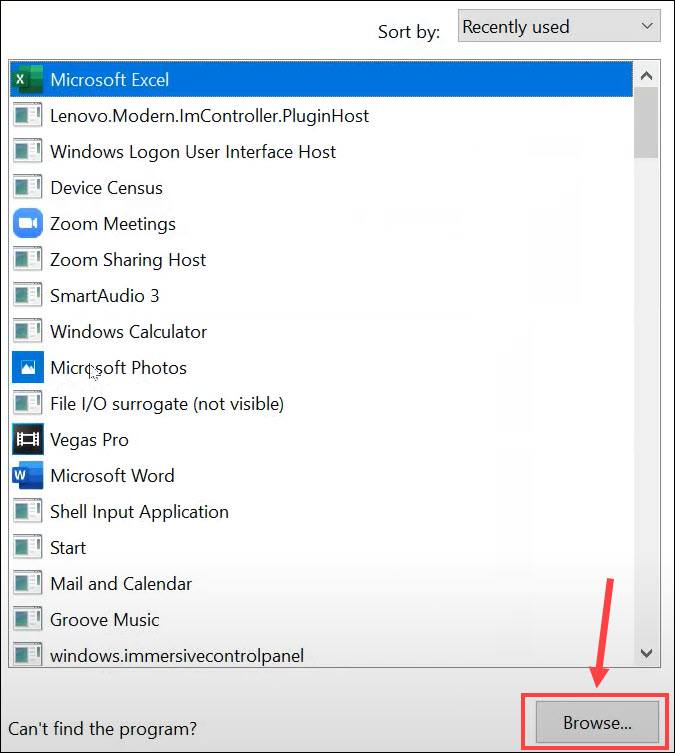
- Click Browse.
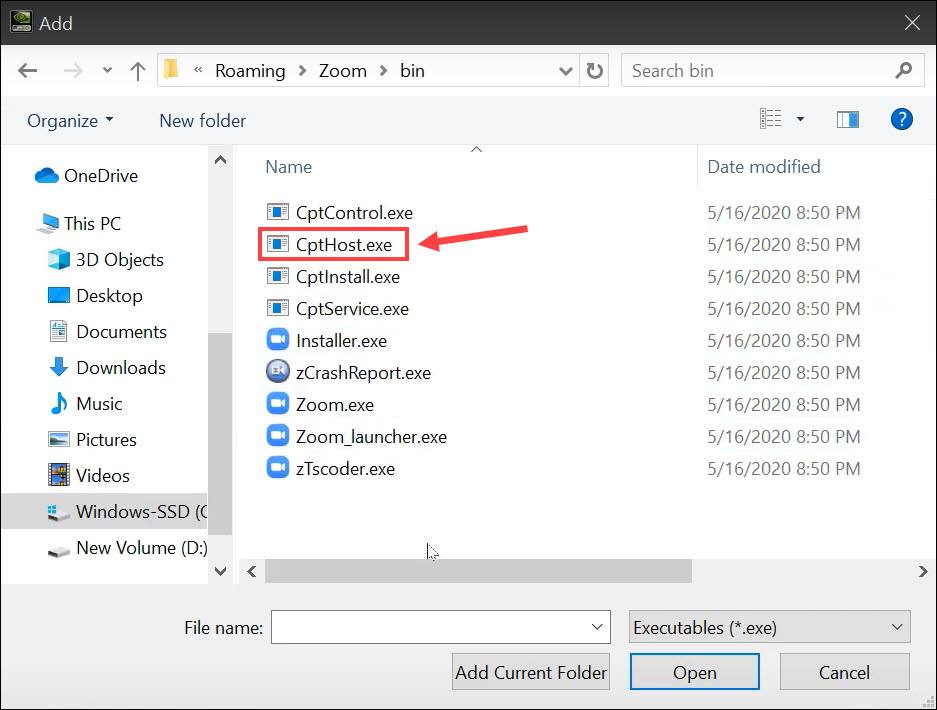
- Navigate to Zoom’s installation directory, which is usually located at C:/>Users>YOURUSERNAME>AppData>Roaming>Zoom. Then, open the bin folder and double-click CptHost.exe to add this file.
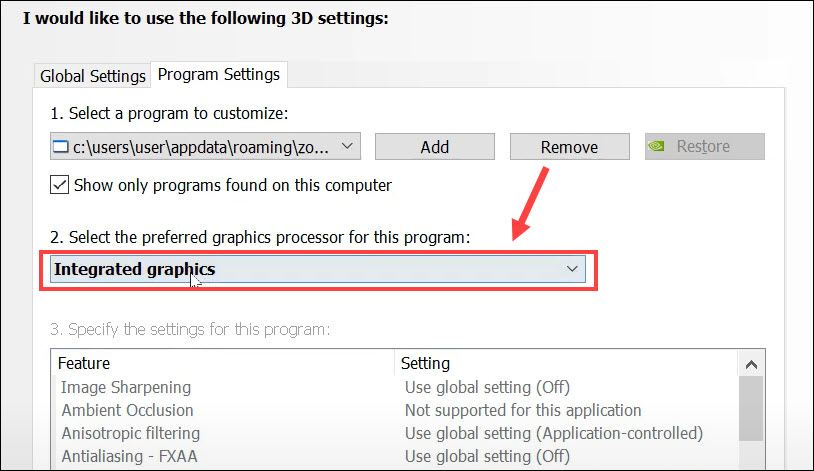
- Select Integrated graphics under Select the preferred graphics processor for this program.
- Click Apply and close the application.
Restart your PC for the changes to take effect. Then open Zoom to check if the share screen goes back to normal.
Still no luck? There’s the last fix to try.
Fix 4 – Reinstall Zoom
If none of the methods above help, consider reinstalling Zoom, just in case of any bugs or issues with your previous installation. Here’s how:
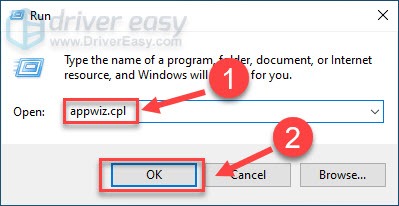
- On your keyboard, press the Windows logo key and R at the same time to invoke the Run command. Then, type appwiz.cpl and click OK.
- Right-click Zoom and click Uninstall.
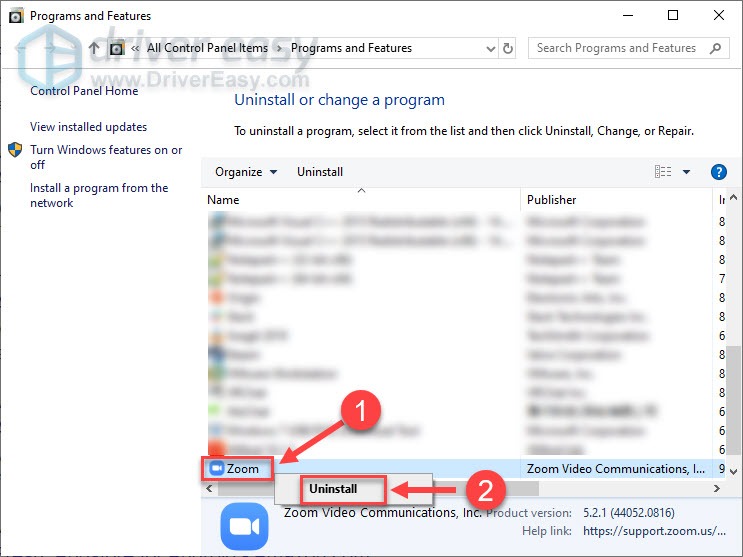
- Follow the on-screen instructions to uninstall Zoom completely.
- Download Zoom from its official Download Center.
Now a fresh copy of the Zoom app is installed to your PC and you should be able to use the share screen normally.
Hopefully this post helps. If you have any questions or suggestions, please feel free to leave a comment below.