


Quick Guide
If you’re in a hurry, here’s how to download & install the correct version of drivers with one click!

Want to reinstall your Wi-Fi driver on your Windows PC? If so, you’ve come to the right place! After reading this article, you should be able to reinstall your Wi-Fi driver easily and quickly!
If you’re having wireless performance or connectivity issues, it is a good choice to reinstall the driver for your wireless network adapter. By reinstalling your Wi-Fi driver, you can fix many unexpected network issues.
Follow these steps
- Uninstall the driver for your wireless network adapter in Device Manager
- Reinstall the driver for your wireless network adapter
- Bonus tip: How to update your network driver automatically
Step 1: Uninstall the driver for your wireless network adapter in Device Manager
Before making changes, create a restore point manually, so that you can always roll back your system to the previous status.
- How to Create Restore Point in Windows 7
- How to Create a Restore Point in Windows 8 & 8.1
- How to Create Restore Point in Windows 10
You can uninstall the driver for your wireless network adapter in Device Manager. Here is how to do it:
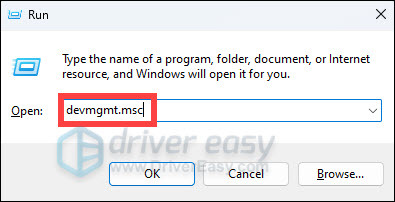
- On your keyboard, press the Windows logo + R keys simultaneously to open the Run box.
- Type devmgmt.msc and hit Enter.
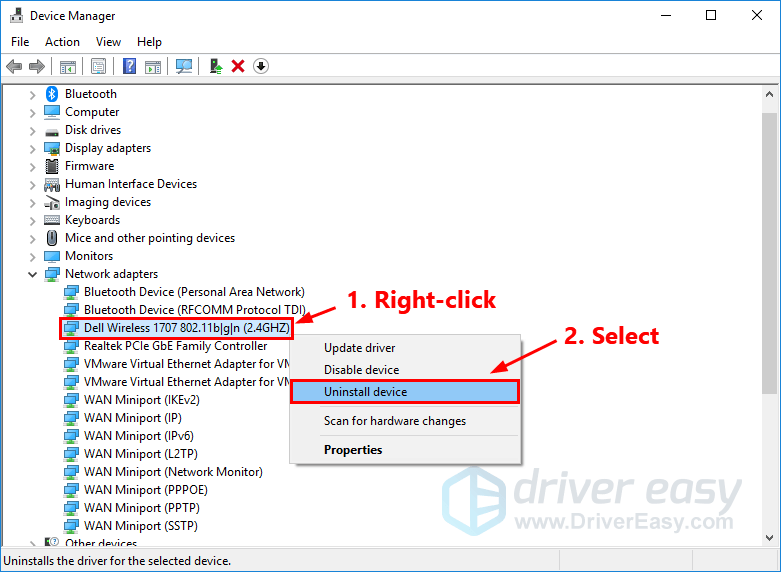
- In Device Manager, right-click on the name of your wireless network adapter and select Uninstall device to uninstall the driver for your wireless network adapter.
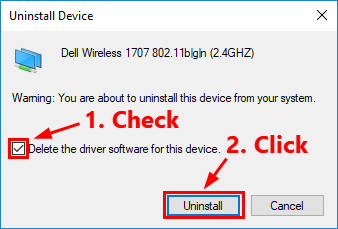
- Check the box next to Delete the driver software for this device and click Uninstall.
When it is finished, your wireless network adapter will disappear from the list of Network adapters.
Step 2: Reinstall the driver for your wireless network adapter
The reinstallation steps will vary depending on whether you have an Internet connection or not.
Have internet access
If you still have Internet connection, or you connect your computer with a cable, it is pretty easy to reinstall the driver for your wireless network adapter. Here is how to do it:
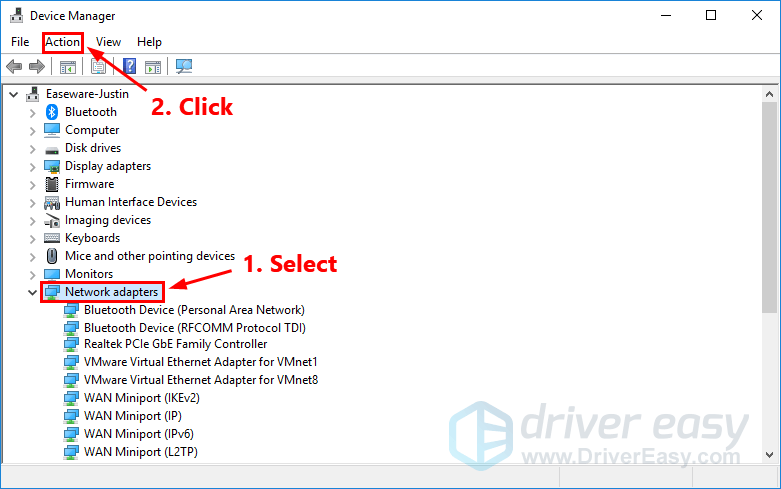
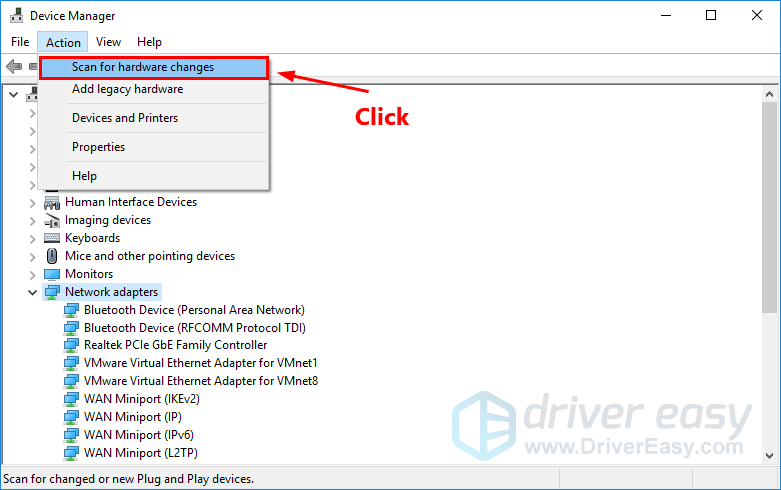
- In Device Manager, select Network adapters. Then click Action.
- Click Scan for hardware changes. Then Windows will detect the missing driver for your wireless network adapter and reinstall it automatically.
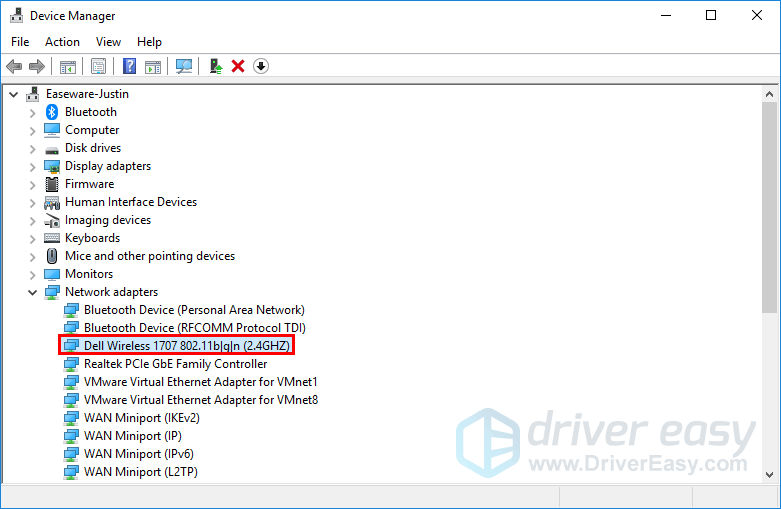
- Double-click Network adapters. Normally, your wireless network adapter will reappear in the list, which suggests the driver for your wireless network adapter has been reinstalled.
What to do if the network adapter is still missing?
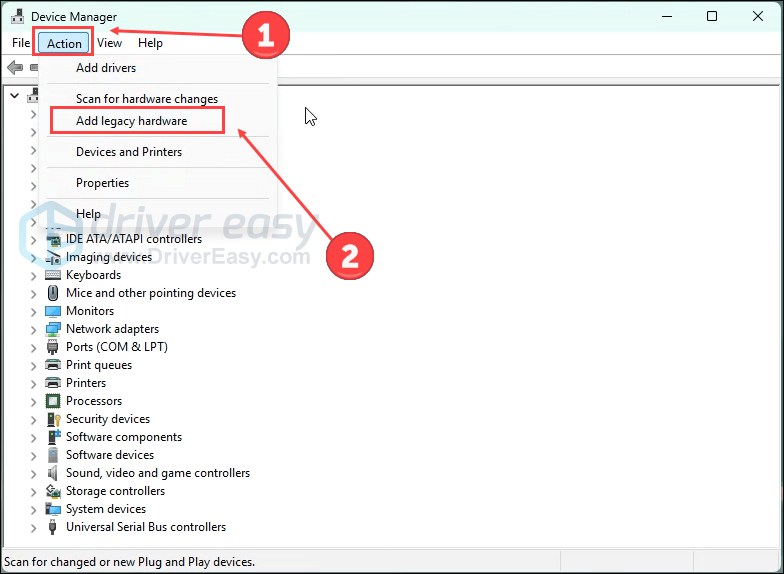
Try to add legacy hardware to get it back.
- Open Device Manager.
- Click the first line to highlight it.
- On the menu bar, click Action > Add legacy hardware > Next.
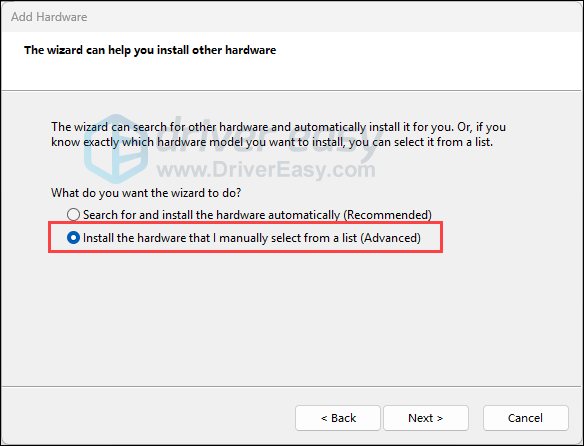
- Select Install the hardware that I manually select from a list (Advanced), and click Next.
- Select the Network adapters category from the list then click Next.
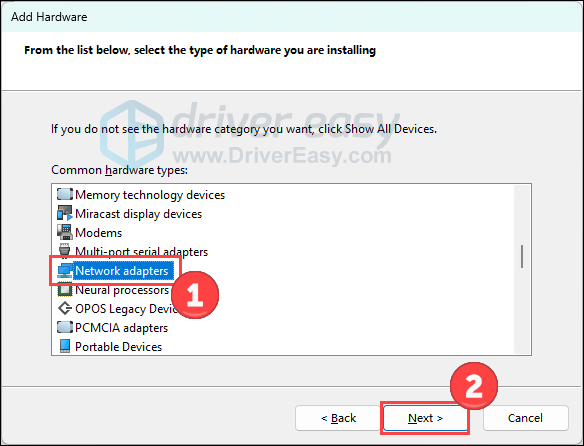
- On the left-side panel, select the manufacturer (e.g., Dell/Realtek) and on the right-side panel, select the driver.
- Then click Next and Next to install the driver.
- Restart your computer afterward.
Still not working? Use the restore point you created to restore your system.
Have no Internet access
If you don’t have an Internet connection after uninstalling the WiFi driver, things get a little bit complicated. But don’t worry! We can solve this.
You need to prepare another computer with Internet access and install Driver Easy on both computers. Then follow the steps in this post to complete it: Driver Easy Offline Scan.
Bonus tip: How to update your network driver automatically
Sometimes, reinstalling the driver for your wireless network adapter may not resolve the Wi-Fi connectivity issues. To fix these issues, you need to update the driver for your wireless network adapter.
If you don’t have the time, patience or computer skills to update your network driver manually, you can, instead, do it automatically with Driver Easy.
You don’t need to know exactly what system your computer is running, you don’t need to risk downloading and installing the wrong driver, and you don’t need to worry about making a mistake when installing. Driver Easy handles it all.
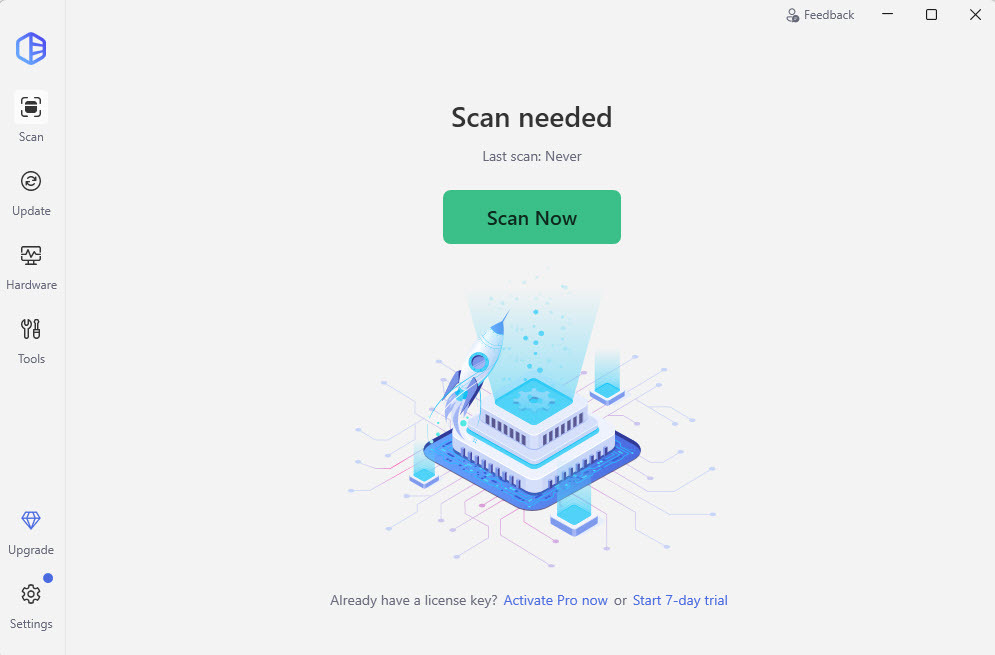
- Download and install Driver Easy.
- Run Driver Easy and click the Scan Now button. Driver Easy will then scan your computer and detect any problem drivers.
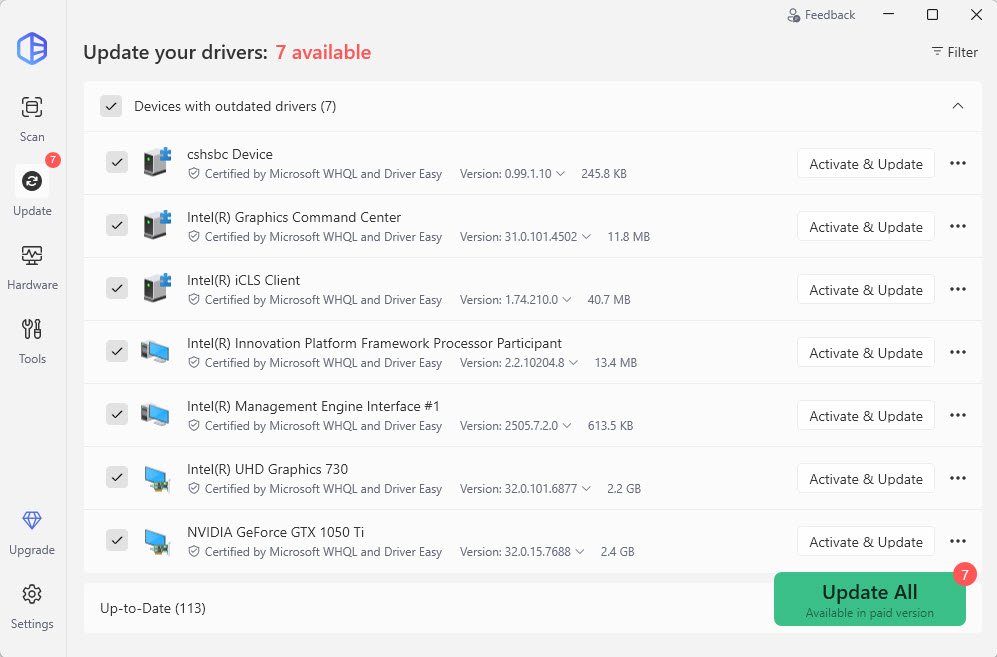
- Click Update All to automatically download and install the correct version of all the drivers that are missing or out of date on your system (This requires the Pro version – you’ll be prompted to upgrade when you click Update All. You get full support and a 30-day money back guarantee).
If you have any questions or suggestions, please leave us a comment below.