


Many users are reporting that they’re having microphone issues with their HyperX Cloud Stinger headset and can’t talk to other people. If you’re also experiencing HyperX Cloud Stinger mic not working, don’t worry. You should be able to fix the problem quite easily using one of the solutions we’ve listed below.
Try these fixes
- 1. Check the physical connections
- 2. Allow access to your headset microphone
- 3. Check your microphone settings
- 4. Update your audio drivers
- 5. Close other apps that have access to your headset microphone
- 6. Check your HyperX Cloud Stinger in your game apps
- 7. Perform Windows Update
- 8. Contact the manufacturer for troubleshooting
1. Check the physical connections
Your HyperX cloud Stinger might be accidentally muted or not connected correctly. It’s worth checking the mute settings and the connectors of your headset to make sure they’re seated properly.
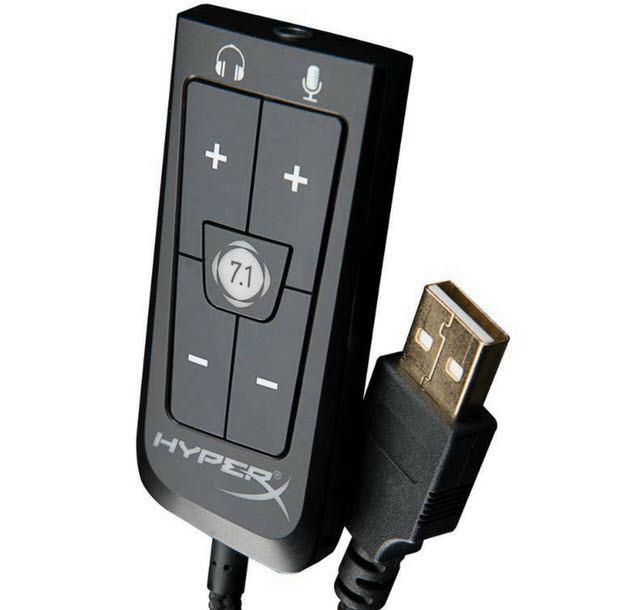
- Make sure you use the included extension cable (splitter) with separate headphone and microphone jacks to connect Stinger to your PC headphone output and input ports.
- Check if all your connections are rightly plugged in, including the extension cable connections. For the microphone, ensure it’s plugged in all the way and not hanging loosely.
- Check the volume knob on the right ear and make sure the mic is not muted or the volumes are not too low.
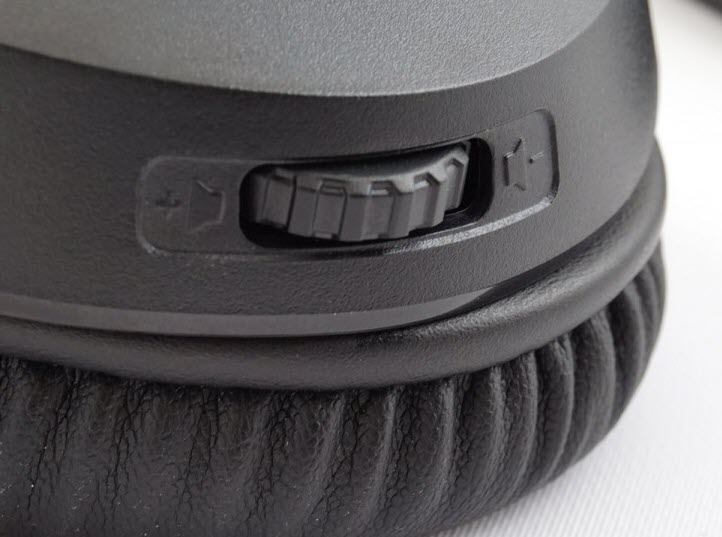
- If you’re using the controller box of your headset, make sure the mute switch hasn’t been activated.
Is the mic working now? If unfortunately not, you can try the next fix, below.
2. Allow access to your headset microphone
I’m a Windows 10 user
I’m a Mac user
To allow apps to access your Microphone on Windows 10
If you others hear your voice when you’re in the middle of a game or meeting, first make sure this app can access your microphone. Here’s how:
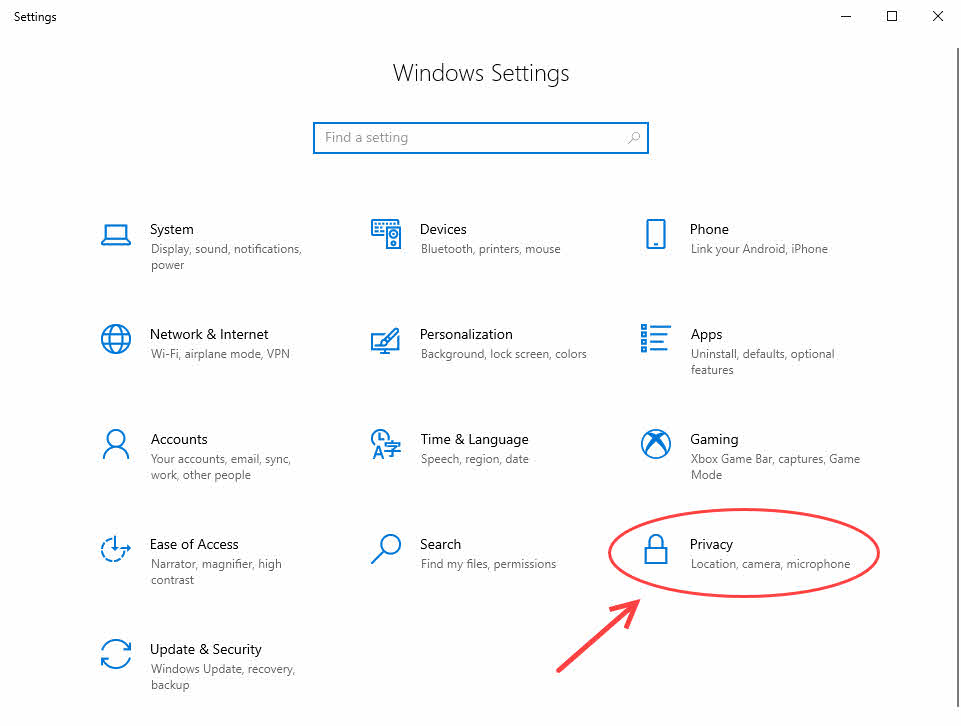
- Click the Start menu button, and select the Settings icon.
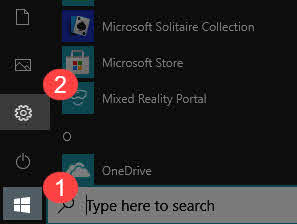
- Select Privacy.
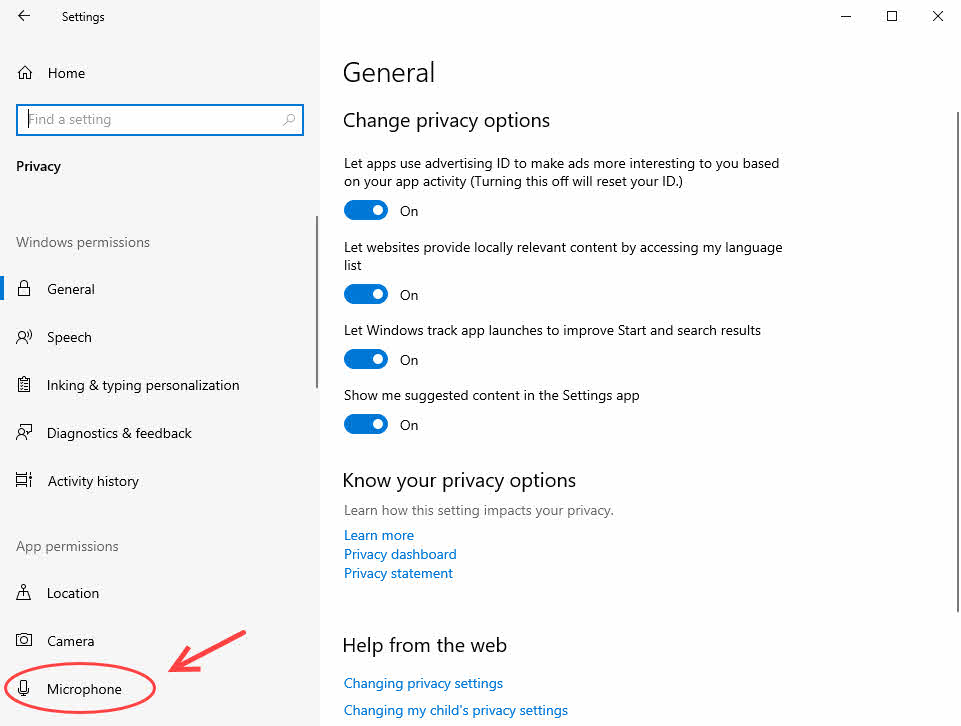
- Click Microphone from the left pane.
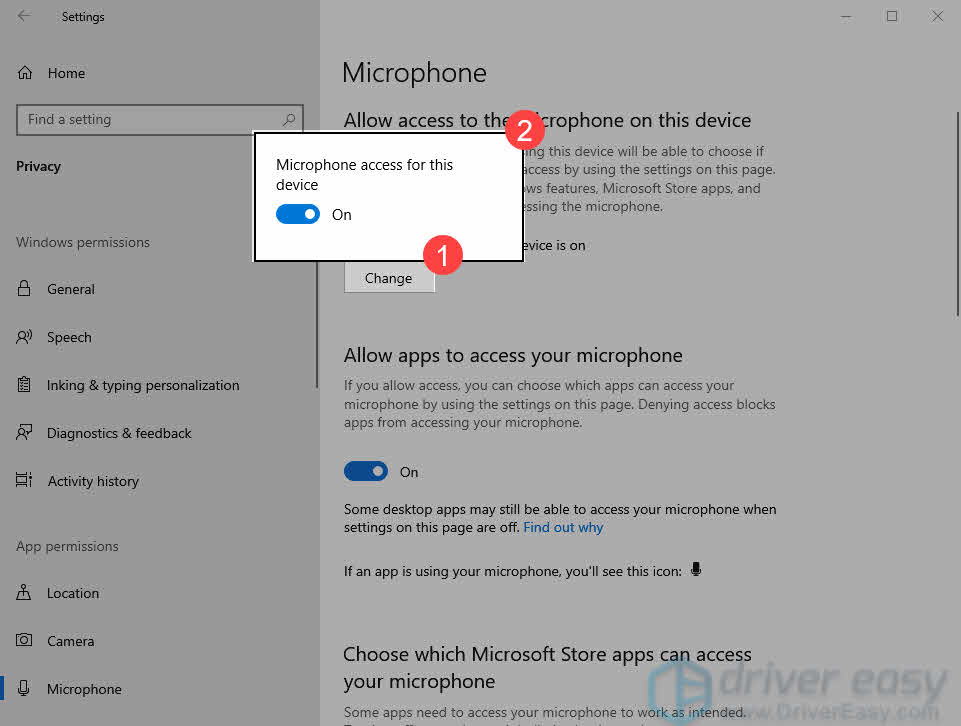
- Click the Change button, and make sure the Microphone for this device option is On.
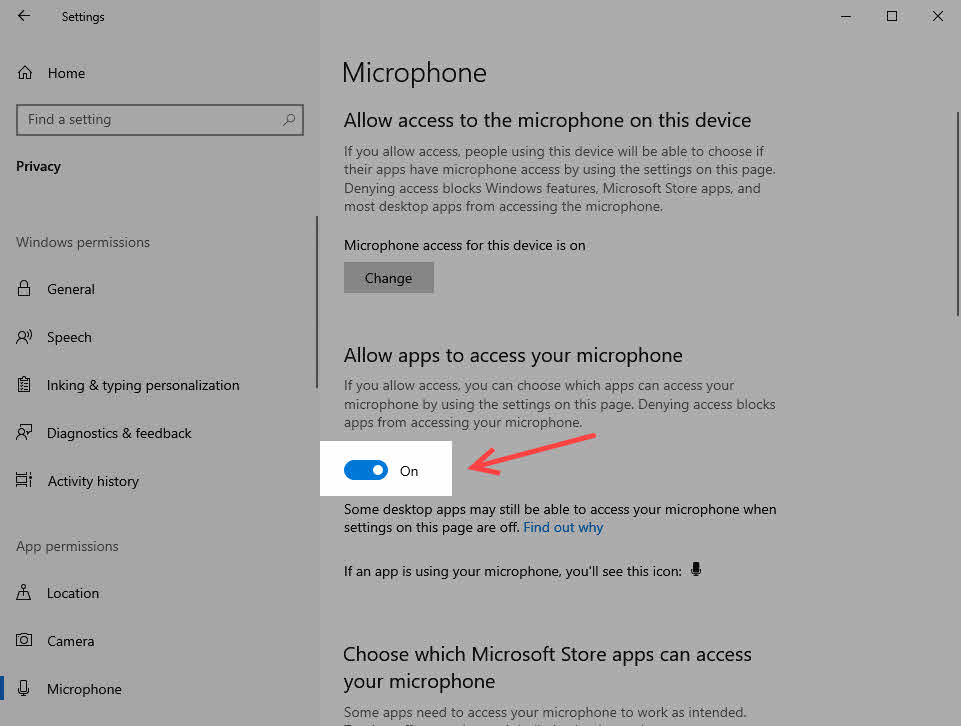
- Scroll down and make sure the Allow apps to access your microphone is On.
- Also, make sure the app you’re using now is turned on.
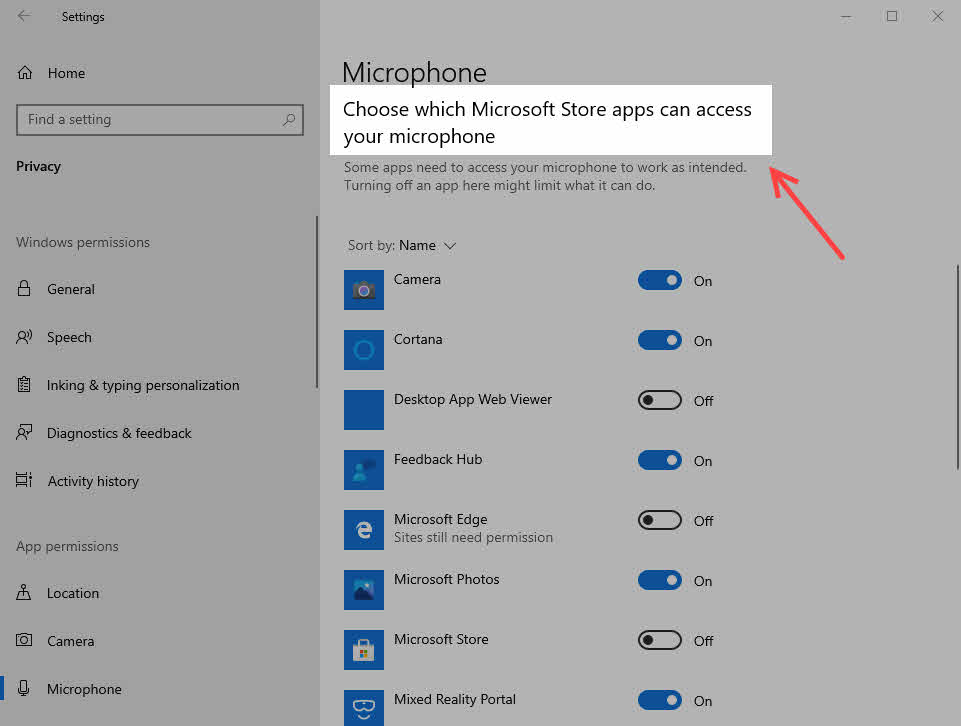
- Now check if HyperX Cloud Stinger’s microphone is working. If you have granted all the permissions to the microphone but you still can’t be heard, you can try the next fix.
To allow apps to access your Microphone on a Mac
- Choose Apple menu
 > System Preferences, click Sound, then click Input.
(Note: The options that appear depend on your Mac model and the audio devices plugged into your Mac.) - Select your headphone in the list of sound input devices and adjust the volume to make sure it can record your voice.

- Then go to System Preferences > Security and Privacy > Privacy, and select Microphone from the sidebar. You should see a list of apps that have requested access to your microphone. Make sure you have approved the app you want to use the microphone with.
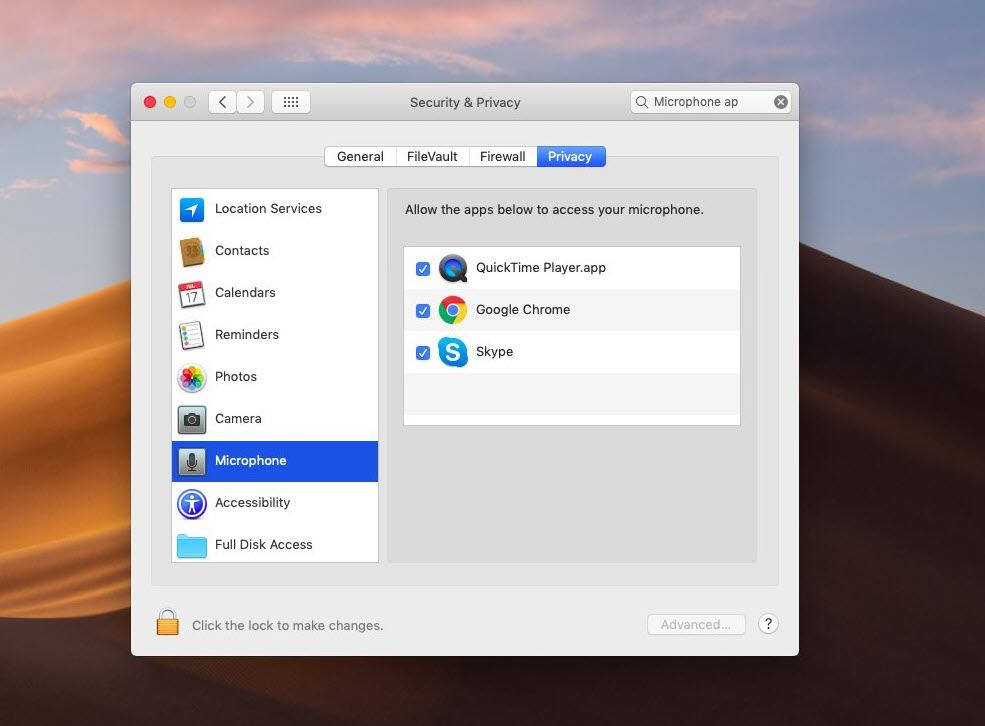
If you can talk to Siri but this app still isn’t working, check the app’s preferences to see if there are separate settings for input devices. But if everything works just fine in other apps, you can try reinstalling this app.
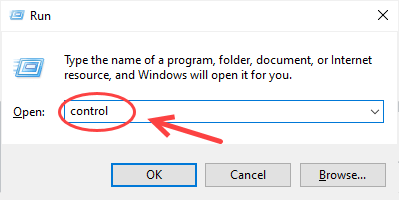
3. Check your microphone settings
Another common cause of microphone problems is that you may have disabled your headset microphone, or not set it as the default input device. To check if this is the source of the problem, please check these things:
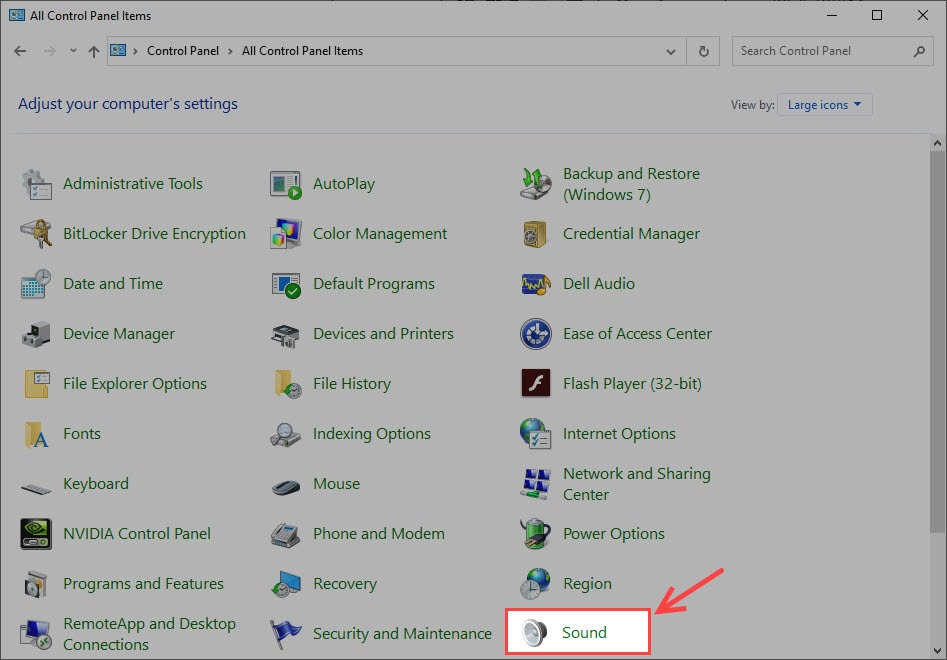
- On your keyboard, press the Windows logo key and R at the same time to open the Run box. Then type control and press Enter.
- In Control Panel, expand View by and select Large icons from the drop-down menu.
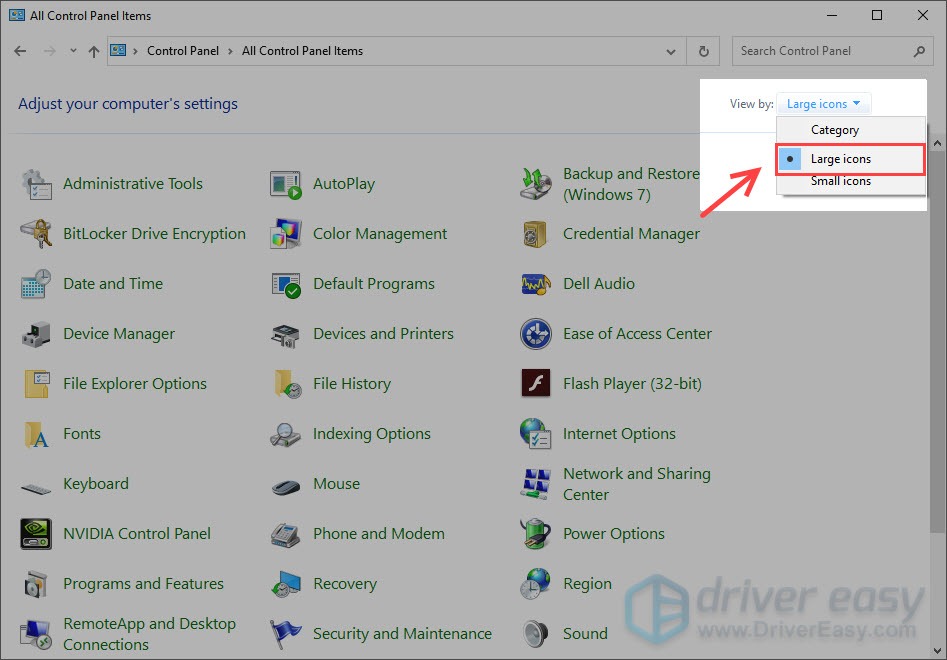
- Select Sound.
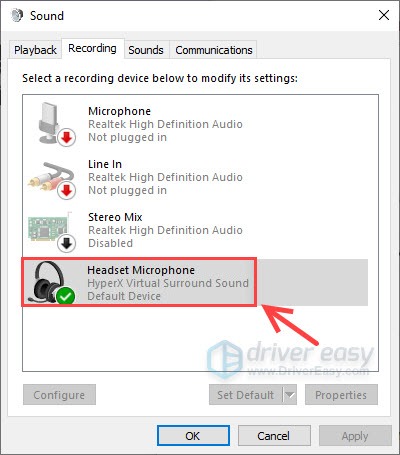
- Select the Recording tab, then right-click on any empty place inside the device list and tick Show Disabled Devices.

- Make sure your HyperX headset is enabled and set as the default device. If not, right-click your headphone to Enable it and Set as Default Device.
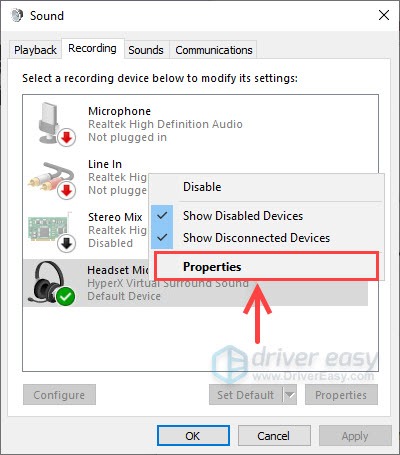
- Right click Headset Microphone and click Properties.
- Click the Levels tab, then drag the volume slider towards the largest value.
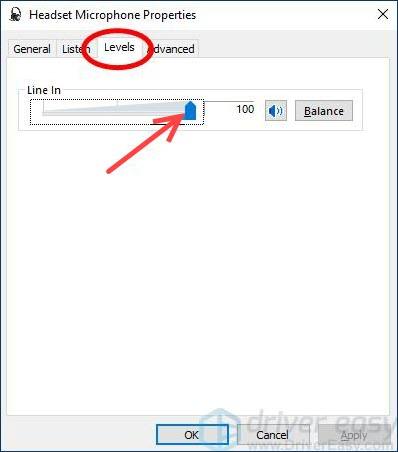
- Click OK to apply the changes, then click OK from the last opened window.
Your HyperX headphone should now be enabled now. Test if the mic is working. If so, congratulations! But if not, don’t worry, since we have a few more fixes.
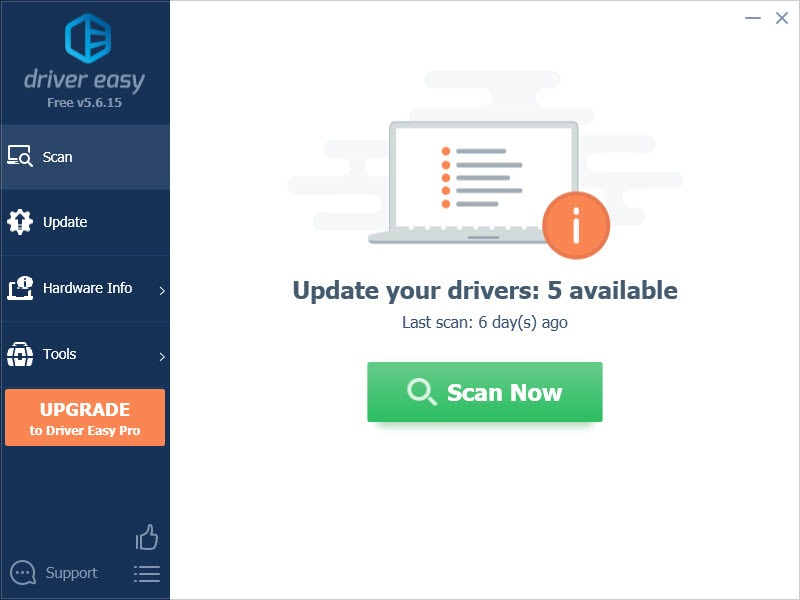
4. Update your audio drivers
Another common cause of HyperX Cloud Stinger mic not working is the outdated or corrupt audio driver. HyperX Gaming keeps improving the firmware and drivers to enable better compatibility on PC, PS4, Xbox, etc.
To fix the mic not working on your PC, you should update the driver. If you don’t have the time, patience, or skills to update the driver manually, you can do it automatically with Driver Easy.
Driver Easy will automatically recognize your system and find the correct drivers for it. You don’t need to know exactly what system your computer is running, you don’t need to be troubled by the wrong driver you would be downloading, and you don’t need to worry about making a mistake when installing. Driver Easy handles it all.
You can update your drivers automatically with either the FREE or the Pro version of Driver Easy. But with the Pro version it takes just 2 steps (and you get full support and a 30-day money back guarantee):
- Download and install Driver Easy.
- Unplug your HyperX Cloud Stinger. Run Driver Easy and click the Scan Now button. Driver Easy will scan your computer and detect any problem drivers.
- Click the Update button next to your sound device or your headset to download the latest and correct driver for it.
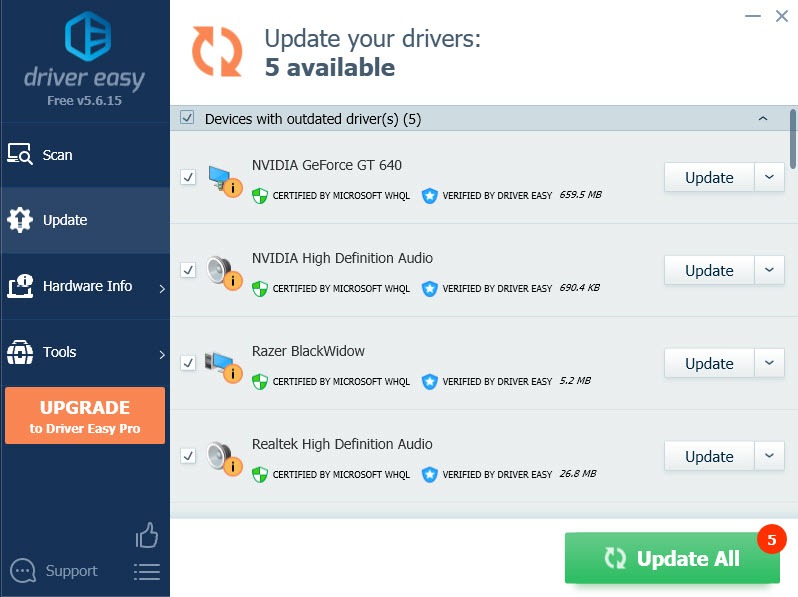
You can also click the Update All button at the bottom right to automatically update all outdated or missing drivers on your computer. (This requires the Pro version, which comes with full technical support and a 30-day money back guarantee. You ’ll be prompted to upgrade when you click Update All.) - Once the update is complete, restart your computer for it to take full effect and reinsert the headset.
Now test your HyperX Cloud Stinger’s microphone by recording your voice and playing your recording.
5. Close other apps that have access to your headset microphone
If you have any audio software, especially that of your audio adapter, or you have third-party software such as Realtek software, disable these and make sure your operating system has the default control over your headphone.
Also, shut down all other programs that utilize the headset microphone, including some communications apps such as Discord, Skype, Zoon, etc. VOIP (Voice Over IP) apps can play with your microphone settings on their own accord and prevent it from working properly.
6. Check your HyperX Cloud Stinger in your game apps
Sometimes the culprit may not be on your audio or control box settings, but in the game or app, you use instead. Check the audio settings in the game, or in the app, then confirm whether this will make your HyperX Cloud Stinger mic work again.
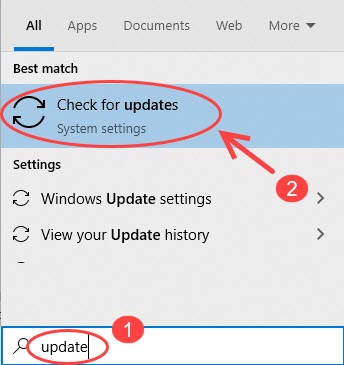
7. Perform Windows Update
Microsoft keeps releasing new updates constantly; usually, you would want to have the latest update for security and compatibility fixes. If you haven’t installed the latest update, be sure to do it for this might fix your problem.
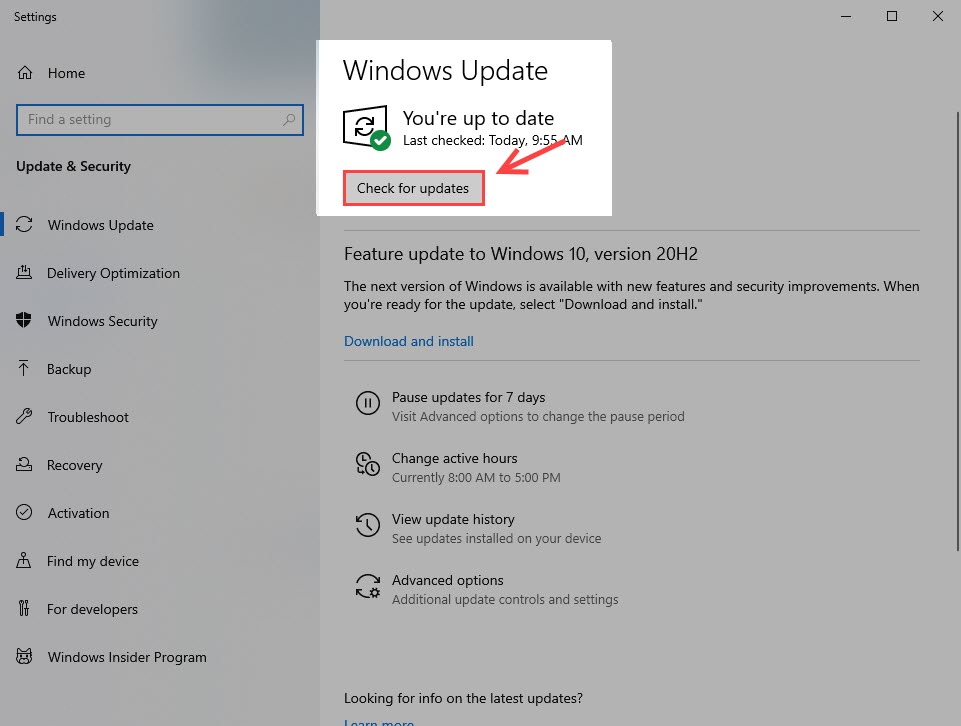
- In the Windows search bar, type update and select Check for updates.
- Click Check for updates. If there is an update, make sure it is downloaded and installed.
8. Contact the manufacturer for troubleshooting
If you can’t bring your microphone back to work by following the workarounds above, it’s quicker to ask the manufacturer for help.
Contact Kingston technical support and select your HYperX product. You can either email or call technical support at 800-810-1972 or 400-810-1972.
Hopefully, you have solved the HyperX Cloud Stinger mic not working issue. Feel free to leave us a comment if you have any questions or want to share your experience with others.