


Some users report that they have no way to access a file out of nowhere. When they check search around on their computers for the possible things that could go wrong, they find that some RAID Volume in their Disk Management is lost, be it RAID-0 or RAID-5, and they can only see an unformatted drive called D:. And when they check the status in CMOS setup of RAID (in BIOS settings), it shows Failed.

You might wonder, the data in my computer is all gone for good now. Stop the worries now, there is always a way out, and lucky for you, you can solve the problem while keep your data by yourself.
What is RAID?
Resolution to the problem
RAID (Redundant Array of Independent Disks) was designed to combine multiple, less-expensive drives into a single, higher-capacity and faster volume. It provides failover protection that allows you to have access to your data and array when a drive fails. The different number comes behind RAID stands for different levels in the market, such as RAID 0, RAID 1 and RAID 5. You may also see RAID 6, or RAID 10, or 5+1, as well as many other levels, but 0, 1, and 5 are the most commonly seen ones.
To make it easier to understand, RAID is a gadget installed in your computer that helps you faster distribute and extract data, while provide backup for your data in case of any hardware failure (it does not provide protection against data lost to malware, theft, or natural disaster though).
Basically speaking, the solution is to recreate the RAID. The following is how you can do it.
Note: This guide only works if the RAID that has failed is NOT your primary boot volume. Some steps in Windows will be required. If it is your boot volume, some alternative steps for the Windows portion will need to be found.
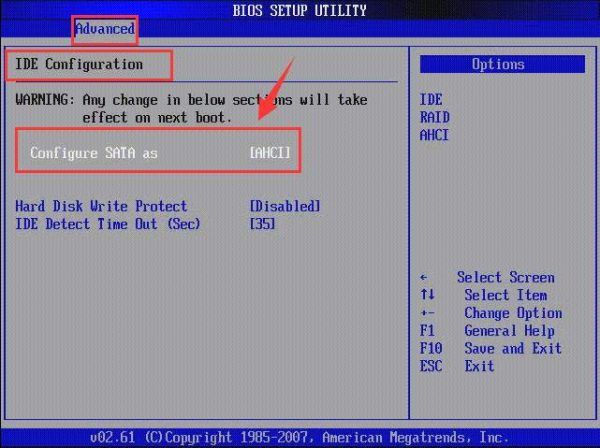
1) Enter BIOS settings first. In BIOS SETUP Utility dialog, use the arrow keys to select the options that you want. In BIOS SETUP Utility dialogue, select Advanced > IDE Configuration> Configure SATA as.
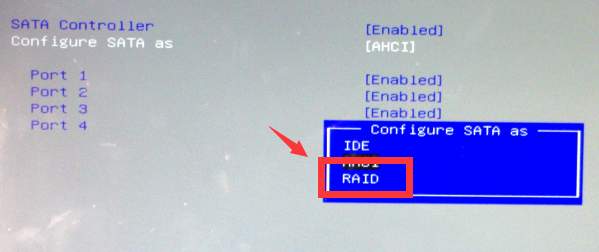
2) In the SATA Options menu, select RAID to create an Intel Matrix RAID.
3) Press F10 to save your change. Exit the BIOS Utility.
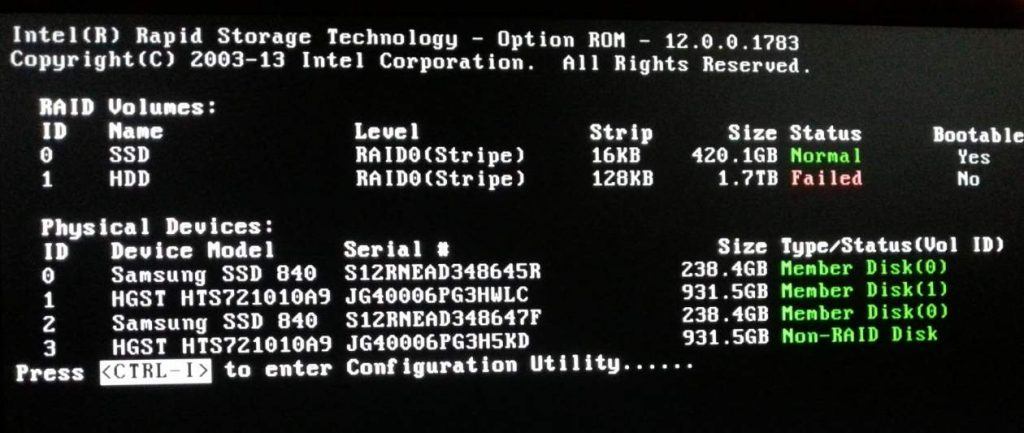
4) Reboot your computer. Press CTRL-I when prompted during the boot process to enter the Intel Matrix Storage Manager option ROM utility.
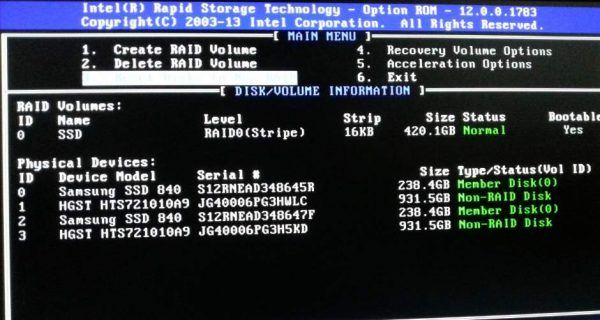
5) As you can see from the screen hot here, the disks is now a Non-RAID Disk as marked out in the red box, which is incorrect in our situation.
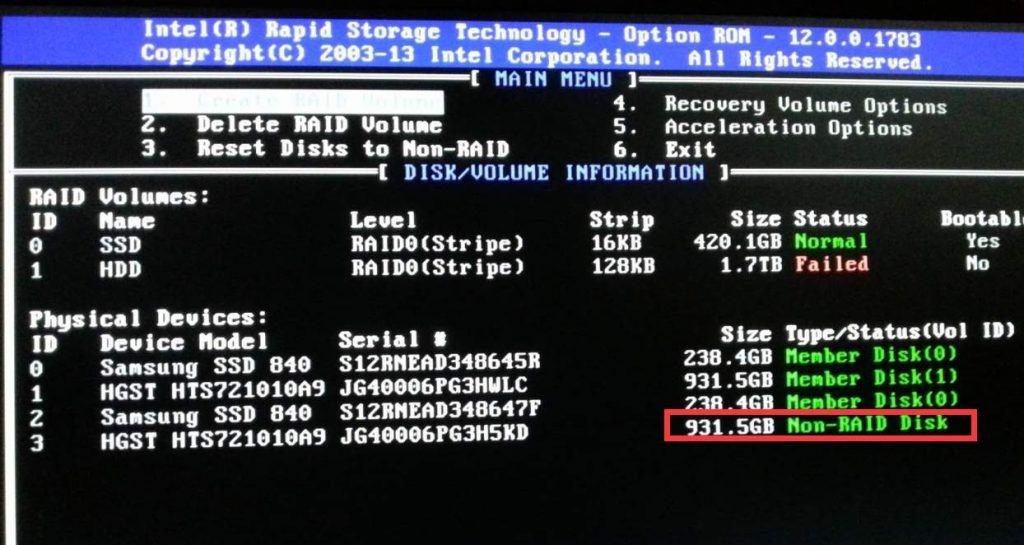
6) Use you arrow key to select option 3. Reset Disks to Non-RAID.

7) Then select the other disk of the failed RAID-group.
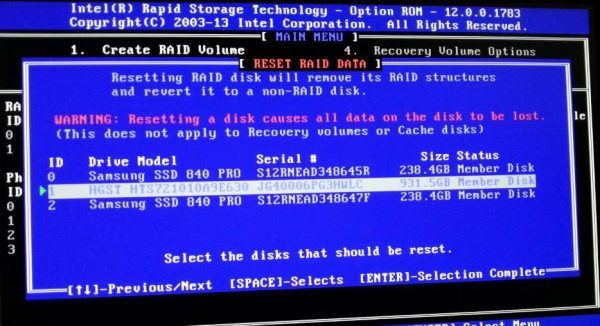
8) When selected, hit Y and then hit Enter according to the notification.

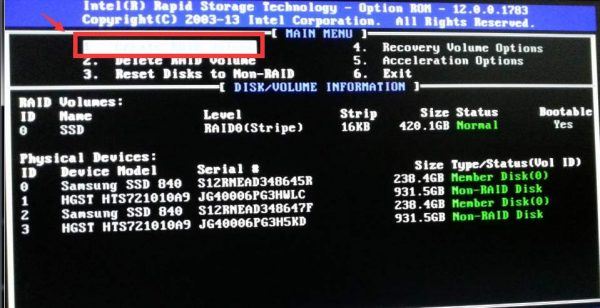
9) Now we have the disks both as Non-RAID Disks and we can start reconstructing the RAID configuration.
Note: This will NOT overwrite any data on disks except for the RAID configuration area (which was empty before already).
10) Select option 1. Create RAID Volume.
11) Select the intended Disks.
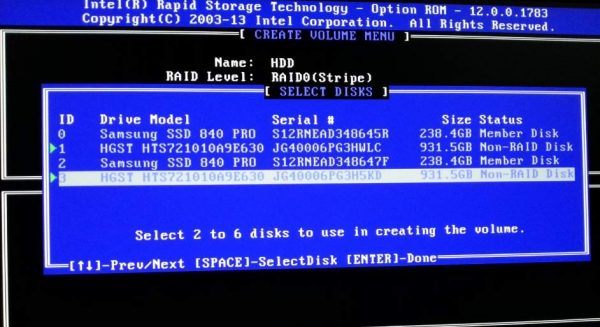
12) Re-Create the RAID using the SAME settings as the original RAID that you are trying to recover. Disks must be in the same order as before, and the strip size must be the same as before.
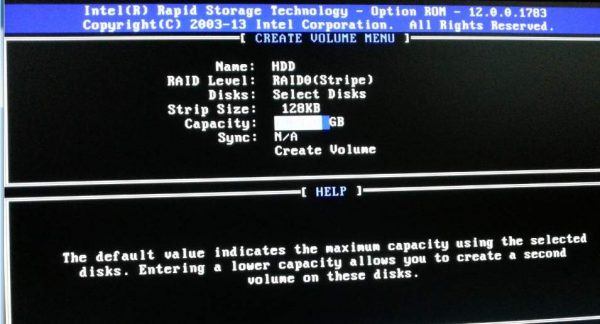
It is usually suggested that you create the RAID volumes slightly smaller than the actual capacity of the current disks instead of using the full capacity.
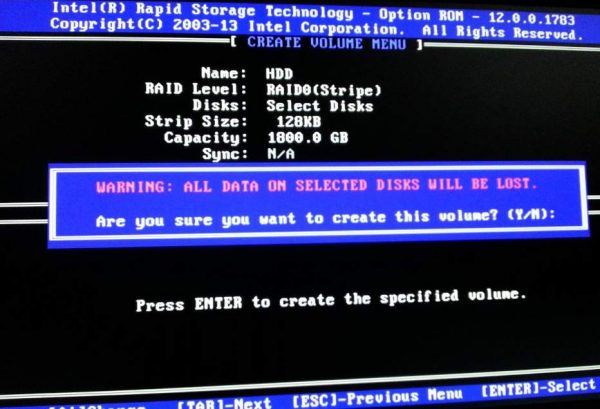
13) Press Y to continue creating the new RAID after you fill in the correct values.
14) The RAID will go back to Normal and we can boot into Windows now. But this is not the end.
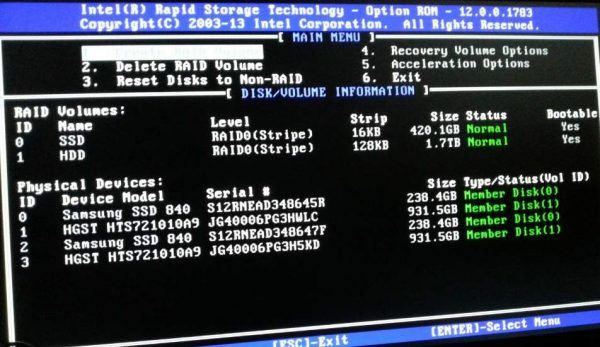
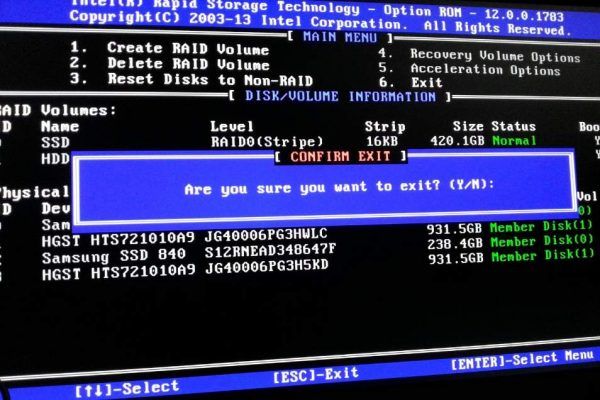
15) Exit the configuration as per the instruction on your screen.
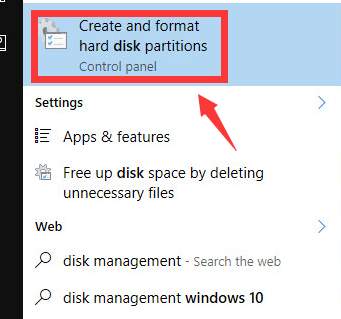
16) Reboot your computer into normal mode. Type disk management in search box in Start panel, then choose Create and format hard disk partitions.
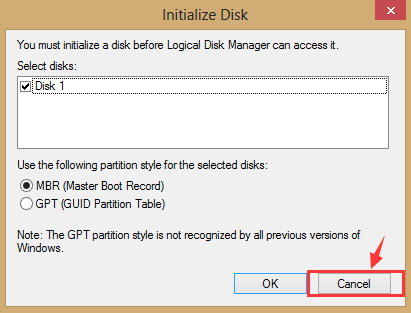
If you see the following notification, hit Cancel, NEVER initialize your disk.
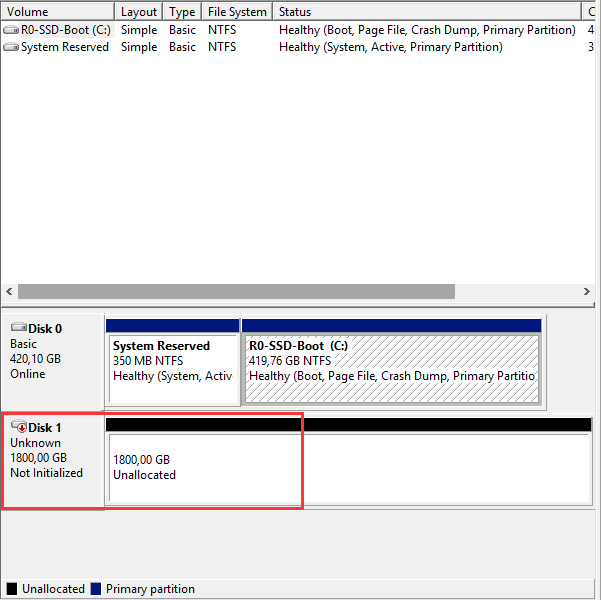
17) We can see the restored RAID volume, but Windows believes it to be empty with no partition information found.
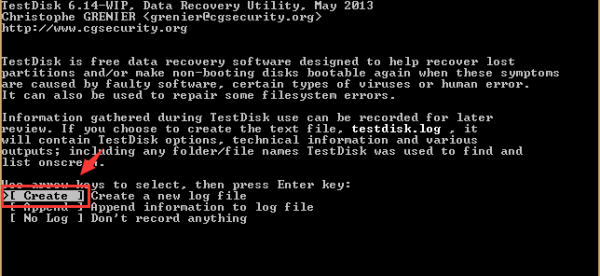
18) We are using a small tool called TestDisk. Download this tool and install it as instructed on your computer.
19) When starts, it will prompt the following interface, choose Create.
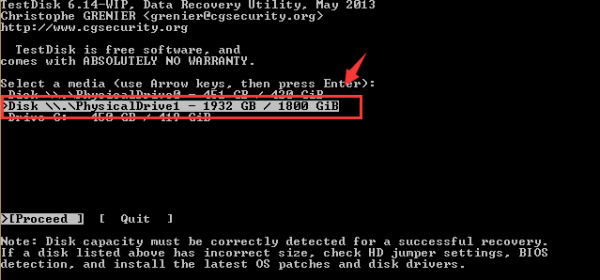
20) Select from the list the correct volume to recover your information from. Then hit Enter.
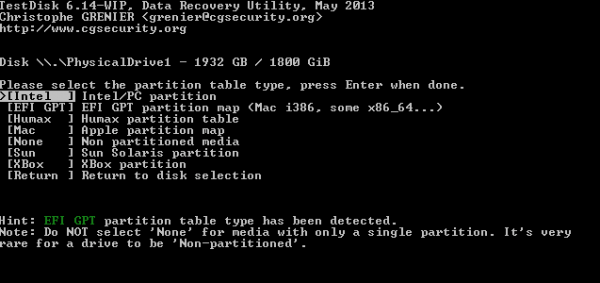
21) Select the type of partition that you had created on your volume.
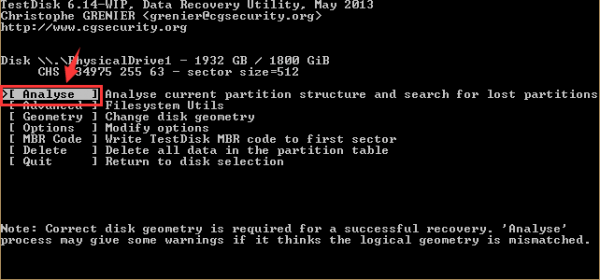
22) Then choose Analyse for it to help you analyse for the lost partition.
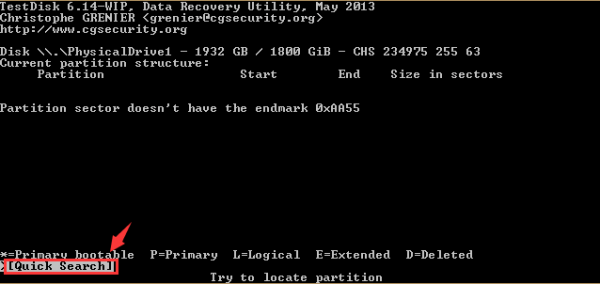
23) Select Quick Search.
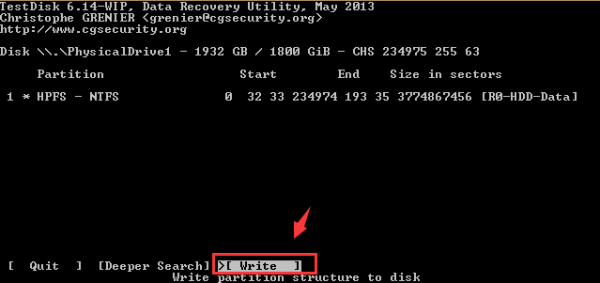
24) Wait for a few seconds for it to find our partition, then select the partition and hit Enter.

25) When you see this screen, click Write to write the found partition information back to disk.
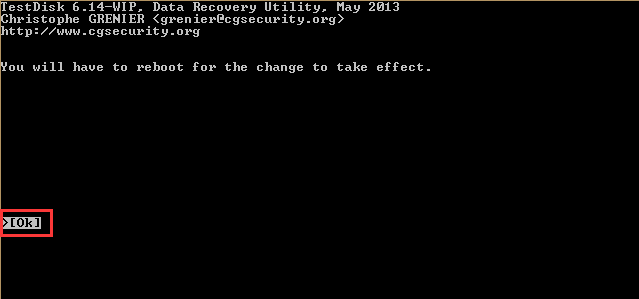
26) Press Y to confirm and continue.

27) Press Enter to confirm the reboot of your PC.
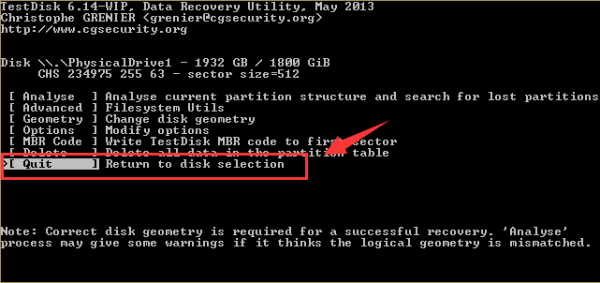
28) Choose Quit option.
29) After the reboot, check to see if you have your files and other data back to your disk drive.
The screenshots included from step 1 to step 15 are originally from this blog. Here we extend our very special thanks to the author,Quindor, for providing images that have pointed readers in the right direction in troubleshooting the Intel RAID Failed/ Broken on Windows issue.