


If your laptop keeps disconnecting from your WiFi network, you’re not the only one! Many laptop users are reporting that their Internet connection breaks frequently when their laptop is connected to a wireless network.
This is very annoying. It’s very inconvenient that you can’t connect your laptop to WiFi. But don’t worry, your issue can be fixed…
Try these fixes!
The following are a few methods that have helped many laptop users. You may not have to try them all; just work your way down the list until you find the one that works for you.
- Restart your computer and network devices
- Disable your network adapter power saving setting
- Update your network driver
- Change Scan Valid Interval
- Repair corrupted system files
Method 1: Restart your laptop and network devices
When your laptop keeps dropping out from your wireless network, the first thing you should try is to restart your laptop and router/modem. This helps you reset your network settings and fix your network issues.
To do so:
1) Shut down your laptop, then disconnect the power cable from it.
2) Turn off your router/modem, and then unplug the power cable from them.
3) Leave all your devices for about one minute.
4) Plug the power cables to your laptop and your router/modem.
5) Turn on your router/modem, then your laptop.
Now try connecting your laptop to your wireless network. Hopefully, this fixes your disconnecting issue. But if not, don’t worry. There are still three fixes you can try.
Method 2: Disable your network adapter power saving setting
Your wireless network issue may occur because your system turns off your wireless network adapter to save power. You should disable this setting to see if this fixes your issue.
To check your network adapter power saving setting:
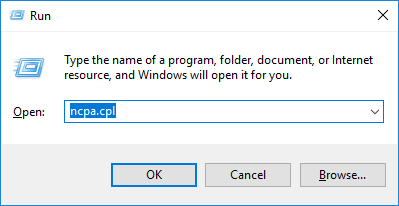
1) On your laptop, press the Windows logo key and R on your keyboard to open the Run box. Then type “ncpa.cpl” and press Enter.
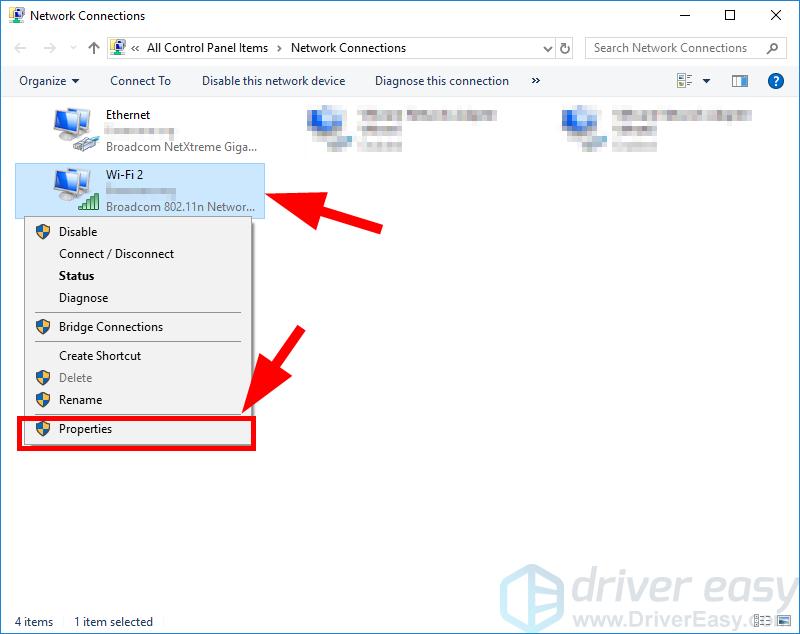
2) Right-click your Wireless/WiFi network adapter, then click Properties.
3) Click the Configure button.

4) Select the Power Management tab, make sure Allow the computer to turn off this device to save power is not checked, and then click OK.

Hopefully, this fixes your wireless connection issue. But if not, you may need to try other fixes listed below.
Method 3: Update your network driver
Intermittent Wi-Fi disconnections can often be attributed to outdated or incorrect network drivers. Updating your network driver can help stabilize your connection.
You can try updating your network driver through Windows Update or Device Manager.
Or you can do it automatically with Driver Easy. It’s a handy driver updater tool that automatically detects any missing or outdated device drivers, then downloads and installs the latest versions for your system.
If your laptop has internet access, proceed with the following steps.
If your laptop lacks internet access, however, follow the instructions on this guide to utilize the Offline scan feature.
1) Download and install Driver Easy.
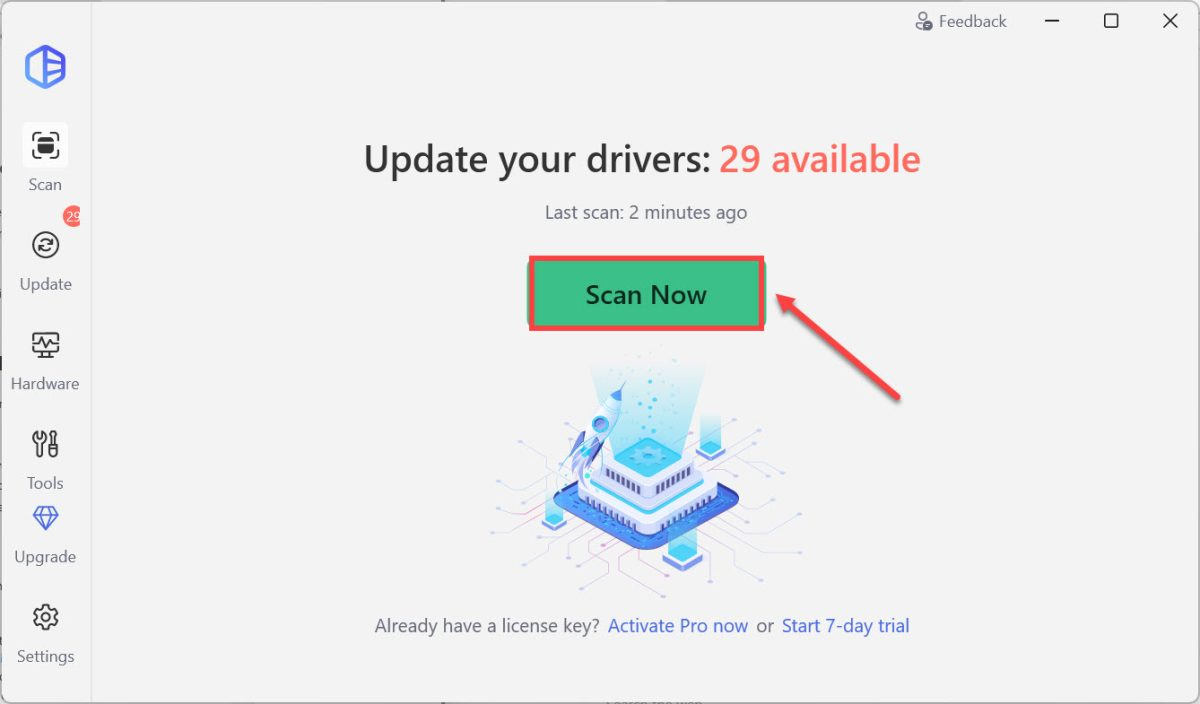
2) Run Driver Easy and click the Scan Now button. Driver Easy will then scan your computer and detect any problem drivers.
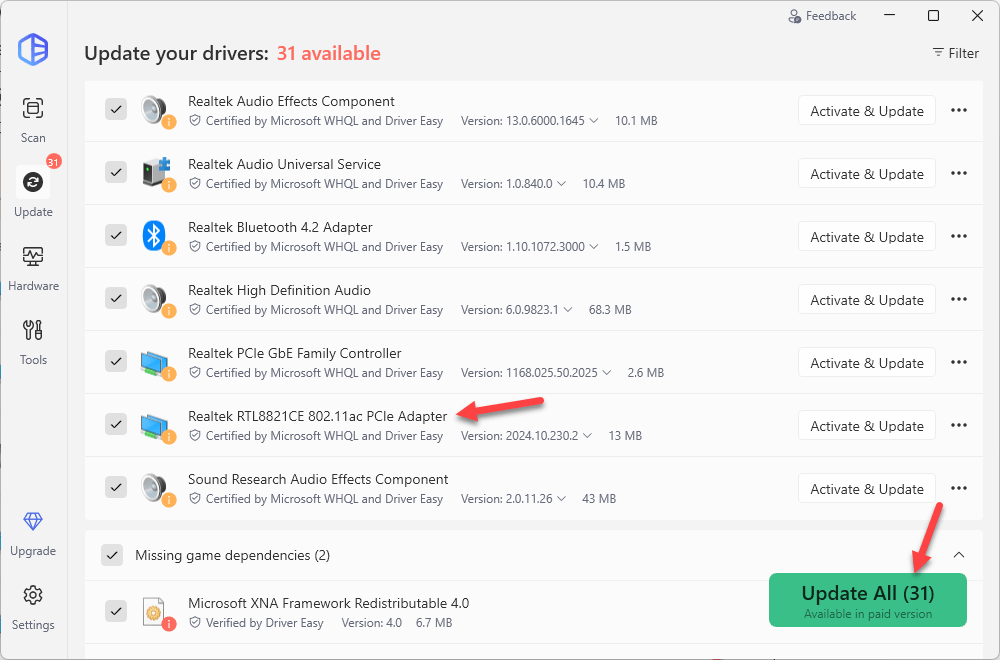
3) Check if your WiFi driver is flagged in the scan results. If it is, click Activate & Update to start a 7-day free trial or upgrade to Driver Easy Pro. Either option will automatically download and install the latest drivers for you.
Method 4: Change Scan Valid Interval
You can also increase your Scan Valid Interval to fix your wireless network issue.
To increase your Scan Valid Interval:
1) On your laptop, press the Windows logo key and R on your keyboard to open the Run box. Then type “ncpa.cpl” and press Enter.
2) Right click your Wireless/WiFi network adapter, then click Properties.
3) Click the Configure button.
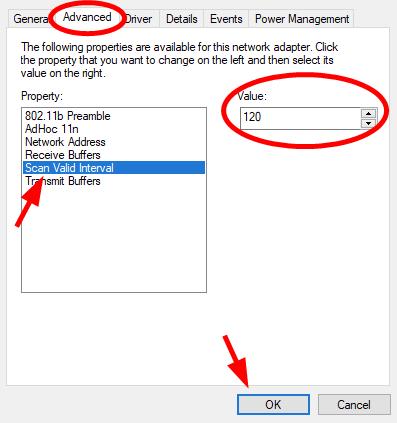
4) Select the Advanced tab, then click Scan Valid Interval. Change its value to 120, and click OK.
Method 5: Repair corrupted system files
Missing, corrupt, or damaged system files may be the culprit for this WiFi disconnecting error. To eliminate this issue as a possible cause, you can try the below to repair possible system file issues.
System File Checker (SFC) is a handy feature in Windows that helps scan your system files and repair missing or corrupted system files(including those related to BSOD). To run the SFC scan:
1) On your keyboard, press the Windows logo key and type cmd. Then right-click on Command Prompt and click Run as administrator.
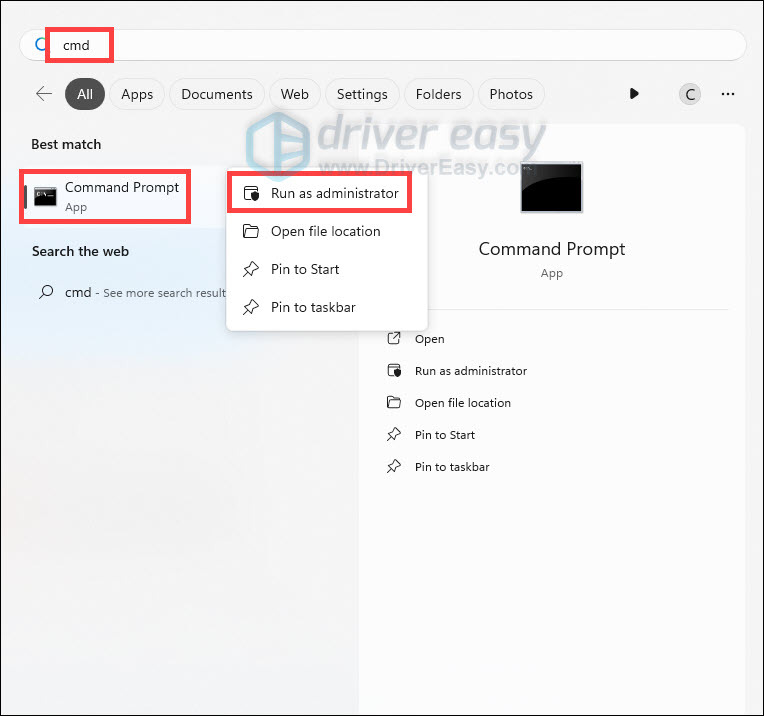
2) Click Yes when prompted to confirm.
3) In the command prompt window, type sfc /scannow and press Enter.
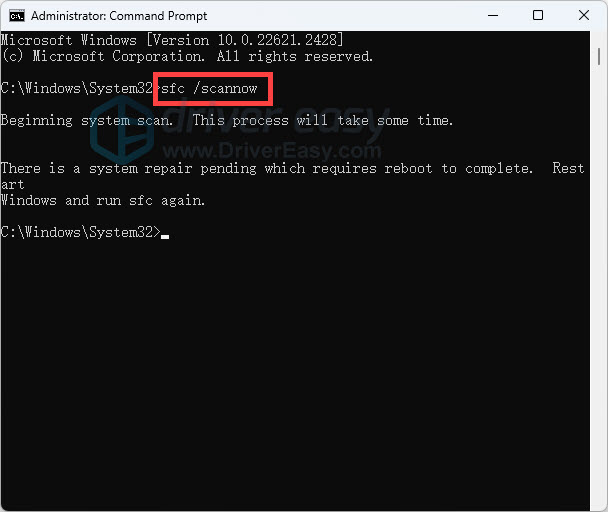
It’ll take some time for the SFC to replace the corrupted system files with new ones if it detects any, so please be patient.
4) Restart your computer for the changes to take effect.
5) Check your computer to see if the problem has been fixed.
So that’s our full guide on how to troubleshoot the issue of WiFi keeps disconnecting. If your issue persists, we and the community are here to help! And it will be helpful if you provide the following information:
- Your operating system
- Any hardware/software changes you have made
- Any troubleshooting steps you’ve tried
- Any error message or code you get while connecting to a network

