


If you find your ASUS keyboard backlight not working, please rest assured that you’re not alone. Just follow this tutorial step by step and you’ll easily get the problem fixed.
2 Ways to fix the ASUS keyboard backlight not working
Here are two ways that have proved useful to other ASUS users. You don’t have to try them all; just work your way from the top down until you find the one that works for you.
Way 1: Start the HControl.exe program
Way 2: Download and install the latest drivers
Way 1: Start the HControl.exe program
Before you try this fix, make sure that you have installed the ATK package in your ASUS notebook. The ATK package, containing drivers that control your hotkeys, backlight and some other optional functionality, is usually pre-installed in every new ASUS laptop. And the HControl.exe program we need to start is also within this ATK package. In most cases you can navigate to HControl.exe through the following path:
C:\Program Files (x86)\ASUS\ATK Package\ATK Hotkey\Hcontrol.exe
Just copy this path and paste it to the address bar of your File Explorer. After finding HControl.exe, you should double-click on it to execute the program.

Then, on your keyboard, press Fn and F4 at the same time to test if the backlight of your keyboard can be turned on.
There’s also a chance that your ATK package has not been pre-installed on the laptop. If so, move on to Way 2.
If this fix doesn’t work for you, please proceed to the next fix below.
Way 2: Download and install the latest drivers
As reported by some users, they couldn’t turn on the keyboard backlight after updating their operating system. If that’s when you encounter the issue, you should download and install the latest drivers (including ATK Package drivers and Smart Gesture drivers) that control the backlight function of your notebook.
There are mainly two options for you to download and install the drivers.
Option 1 – Manually – You’ll need some computer skills and patience to update your drivers this way, because you need to find exactly the right drivers online, download it and install it step by step.
OR
Option 2 – Automatically (Recommended) – This is the quickest and easiest option. It’s all done with just a couple of mouse clicks – easy even if you’re a computer newbie.
Option 1 – Update the drivers manually
To update the drivers manually, you should perform the following procedure:
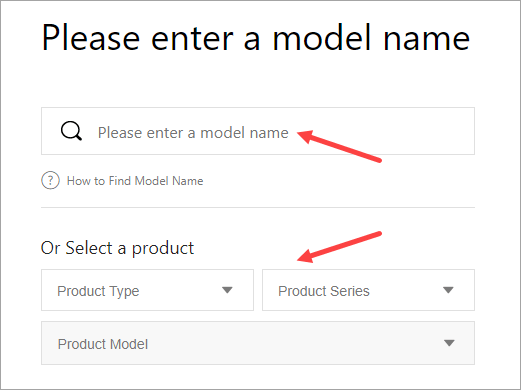
- Find your way to the download center of ASUS, or you can simply click here.
- On the pop-up page, enter the model name of your laptop to search for its drivers. If you don’t know its exact model, then try to select a product from the given list. After that, hit Enter on your keyboard.
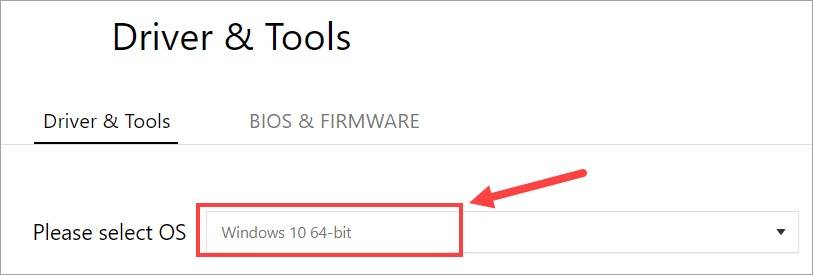
- On the next page, select your Windows version. Then you’ll be greeted with a list of drivers and programs available for download.
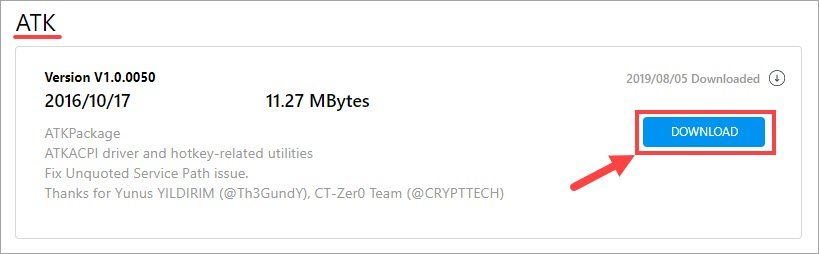
- Scroll through the list until you find the following two drivers: Smart Gesture driver and ATK Package driver. Then, click on the DOWNLOAD button next to each driver.
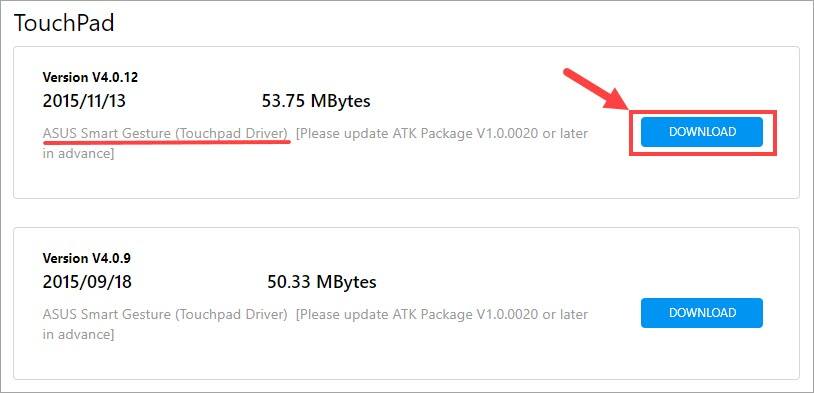
- Wait till the download process is complete. The two downloaded files are compressed, so you need to extract them to a desired location.
- Open the extracted folders of the two drivers. Find Setup.exe in their folders respectively and click on it. Then, follow the onscreen instructions to install the drivers.
- When everything’s done, restart your computer for the changes to take effect. Then check to see if your keyboard backlight can be turned on properly (press Fn+F4 on your keyboard to enable the backlight).
Option 2 – Automatically update the drivers
Downloading and installing the drivers manually can be somewhat time-consuming and error-prone. So if you don’t have the time, patience or computer skills to update your Insignia drivers manually, you can do it automatically with Driver Easy.
Driver Easy will automatically recognize your system and find the correct drivers for it. You don’t need to know exactly what system your computer is running, you don’t need to risk downloading and installing the wrong driver, and you don’t need to worry about making a mistake when installing. Driver Easy takes care of everything.
You can update your drivers automatically with either the FREE or the Pro version of Driver Easy. But with the Pro version it takes just 2 clicks (and you get full support and a 30-day money back guarantee):
- Download and install Driver Easy.
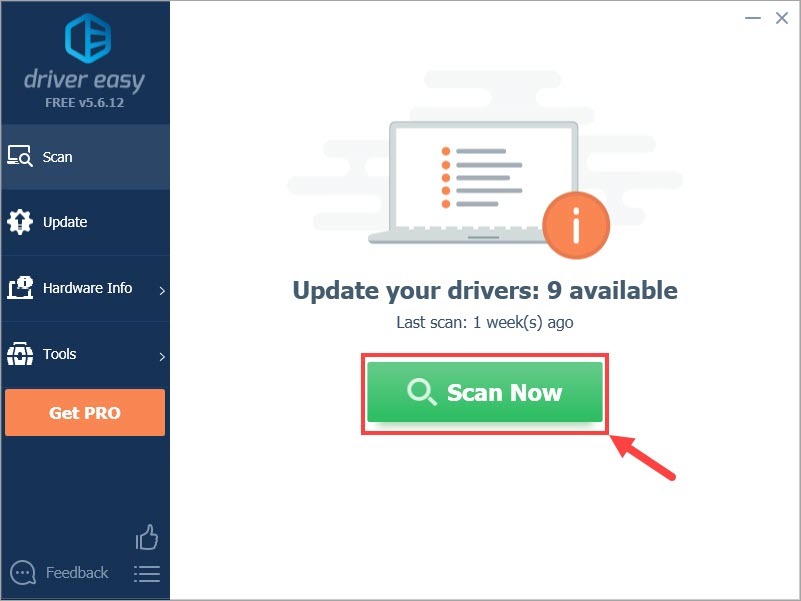
- Run Driver Easy and click the Scan Now button. Driver Easy will then scan your computer and detect any problem drivers.
- Click Update All to automatically download and install the correct version of all the drivers that are missing or out of date on your system (this requires the Pro version – you’ll be prompted to upgrade when you click Update All). Or if you just want to update the ATK Package driver for now, simply click the Update button next to it.

Note: you can do it for free if you like, but it’s partly manual.
Hopefully you find this post useful. Please feel free to leave a comment below if you have any further questions or ideas. Thanks for reading!