


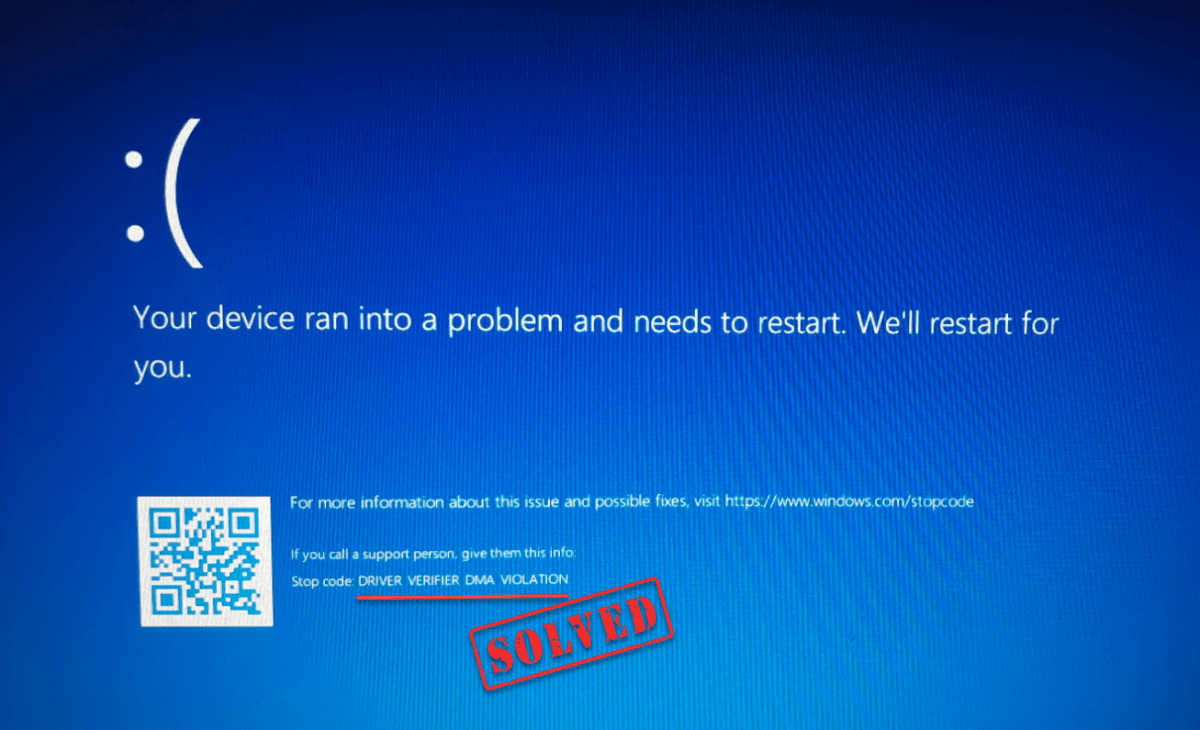
Getting overwhelmed by the DRIVER VERIFIER DMA VIOLATION stop code? You’re not alone! This post covers everything you need to know about the error, including its contributing factors and the troubleshooting steps you can follow.
Table of contents
What It Means and What Causes It
The DRIVER VERIFIER DMA VIOLATION stop code is a Blue Screen of Death (BSoD) error that happens when the Driver Verifier tool catches a device driver trying to perform an illegal Direct Memory Access (DMA) operation. DMA is a crucial function that allows hardware components to access your computer’s memory directly without needing the CPU to get involved. The “violation” means a driver has attempted this process incorrectly.
This error is most often caused by:
- Outdated or Problematic Drivers: This is the most common reason. A driver may have a bug that causes it to mismanage DMA operations.
- Enabled Driver Verifier: The tool itself, designed to find driver issues, can be the direct cause of the blue screen, especially if it’s too sensitive.
- Faulty or Incompatible Hardware: Issues with your RAM, motherboard, or a peripheral device can interfere with DMA operations.
- Corrupted System Files: The driver might be fine, but the Windows files it relies on could be damaged.
How to Fix This Stop Code
Before you begin, if you can’t boot into Windows normally because of the error, you should first try booting into Safe Mode. This will load a minimal set of drivers and services, which may allow you to perform the troubleshooting steps without the system crashing. Once you are in Safe Mode, you can proceed with the fixes below.
1. Disable Driver Verifier
When troubleshooting the DRIVER VERIFIER DMA VIOLATION error, the first thing to check is the Driver Verifier utility itself. This tool is designed to deliberately stress-test your drivers to expose bugs that would otherwise be difficult to find. If you or a program previously enabled it, it might be the direct cause of the blue screen, even if the driver itself isn’t fundamentally broken. By disabling Driver Verifier, you can immediately see if the error goes away. If it does, you’ll know that the problem was caused by a specific driver that the utility flagged.
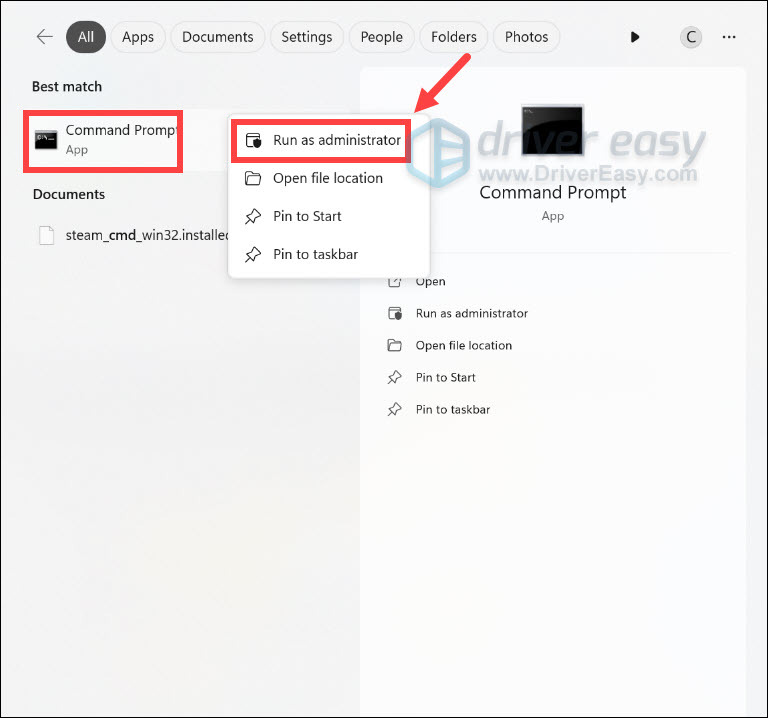
- Open Command Prompt as an administrator. You can do this by searching for cmd in the Start menu, right-clicking on Command Prompt, and selecting Run as administrator.
- Type or paste verifier /reset and press Enter.
If it returns “The operation completes successfully. “, it means that the Driver Verifier has been disabled. You can close the window and restart your device to check if the stop code still occurs.
If it returns “No settings were changed. “, however, it indicates that Driver Verifier was not enabled in the first place and the issue is not with an enabled Driver Verifier. In this case, you should try other fixes below.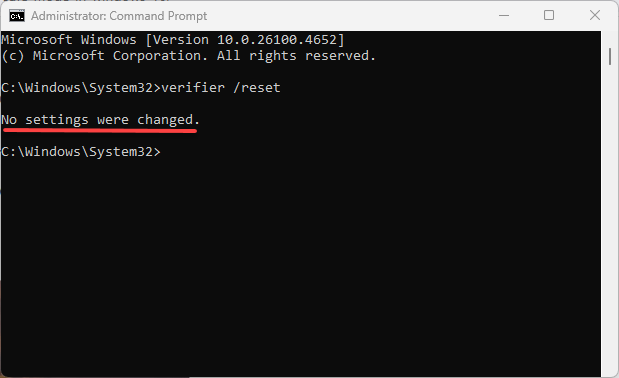
2. Update or Roll Back Your Drivers
A “DRIVER VERIFIER DMA VIOLATION” is a dreaded error that often points to an outdated, corrupt, or incompatible driver. When a driver tries to perform a Direct Memory Access (DMA) operation in a way that doesn’t follow the rules set by the operating system, it can lead to system instability and trigger this blue screen error. Resolving this issue often comes down to making sure your drivers are in top shape.
You can do this either manually or automatically with an updater tool.
Option 1 – Update Your Drivers Manually
Manually updating or rolling back a driver can be a bit of a chore. You have to go into Windows’ Device Manager and check each device one by one, which can be time-consuming. However, it’s a solid way to pinpoint and fix a single problematic driver.
- How to Update:
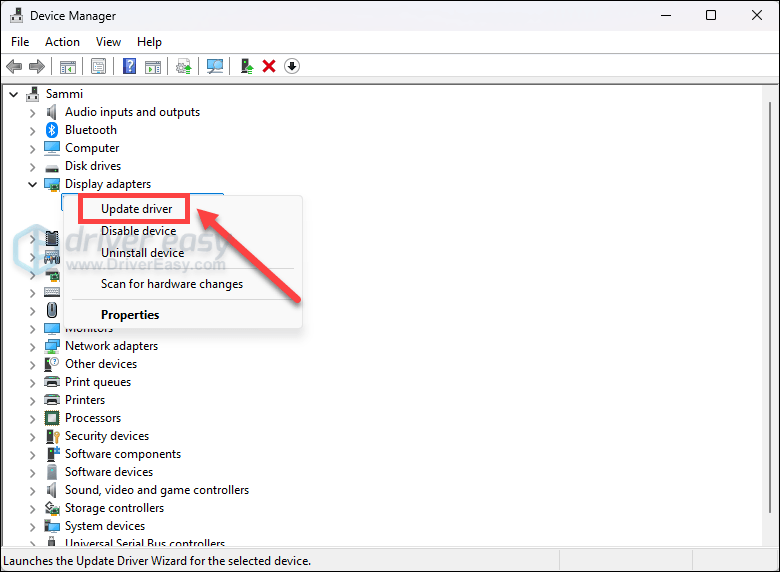
- Press the Windows key + X and select Device Manager from the menu.
- Expand the categories to find the device you suspect is causing the problem. Devices with a yellow exclamation mark are usually the culprits.
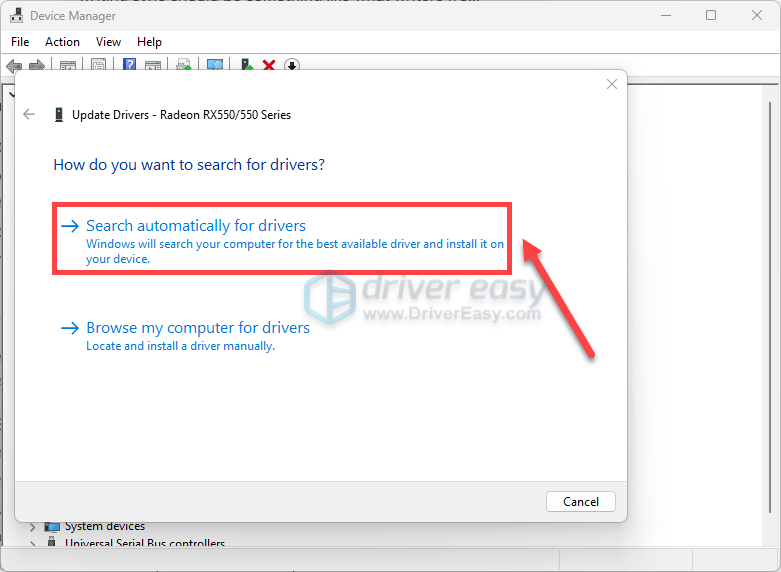
- Right-click the device and select Update driver.
- Choose Search automatically for drivers. Windows will attempt to find a newer driver online.
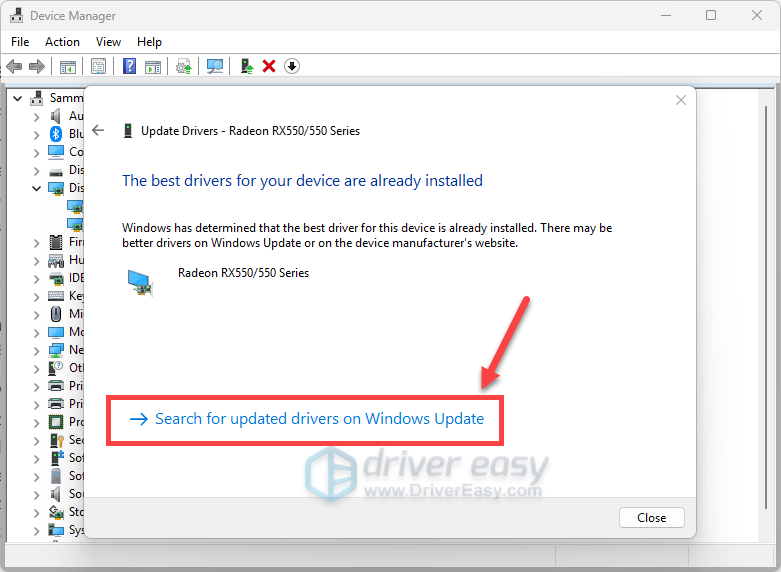
- If you’re told that The best drivers for your device are already installed, you can click Search for updated drivers on Windows Update. Then follow the on-screen instructions to download and install all the updates.
- How to Roll Back: If you recently updated a driver and the error started happening, the new driver may be the issue. In this case, rolling back to the previous version is your best bet.
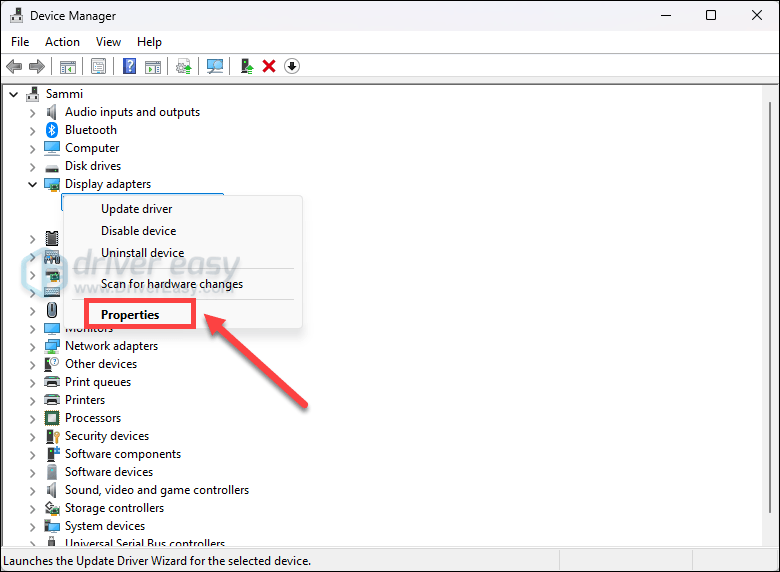
- In Device Manager, right-click the problematic device and select Properties.
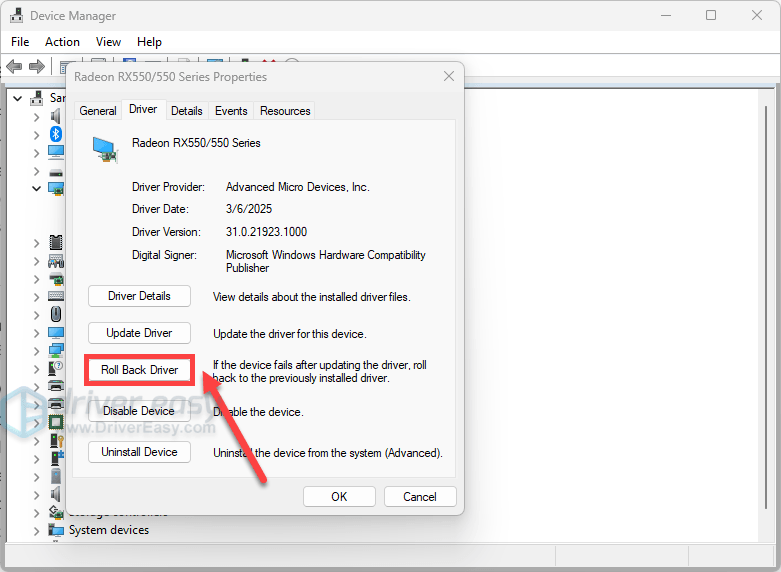
- Go to the Driver tab and click the Roll Back Driver button. Follow the on-screen instructions. Note that this option might be greyed out if there is no previous driver to roll back to.
- In Device Manager, right-click the problematic device and select Properties.
Option 2 – Update Your Drivers Automatically with Driver Easy
For a quicker fix, consider using a specialized driver updater tool like Driver Easy. It simplifies the entire process, eliminating the tedious work of manually searching for and updating drivers.
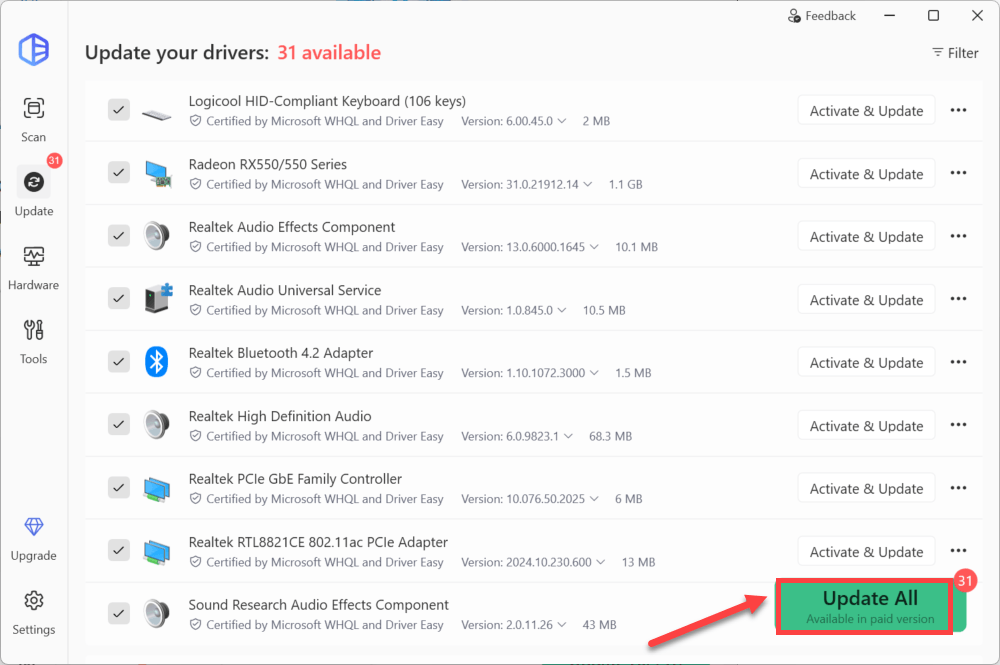
With one click, Driver Easy scans your PC to find every missing, outdated, or incorrect driver. It doesn’t just target the driver causing the DRIVER VERIFIER DMA VIOLATION; it updates all your drivers at once, ensuring your system runs smoothly and securely.
- Download and install Driver Easy.
- Run Driver Easy and click the Scan Now button. Driver Easy will then scan your computer and detect any problem drivers.
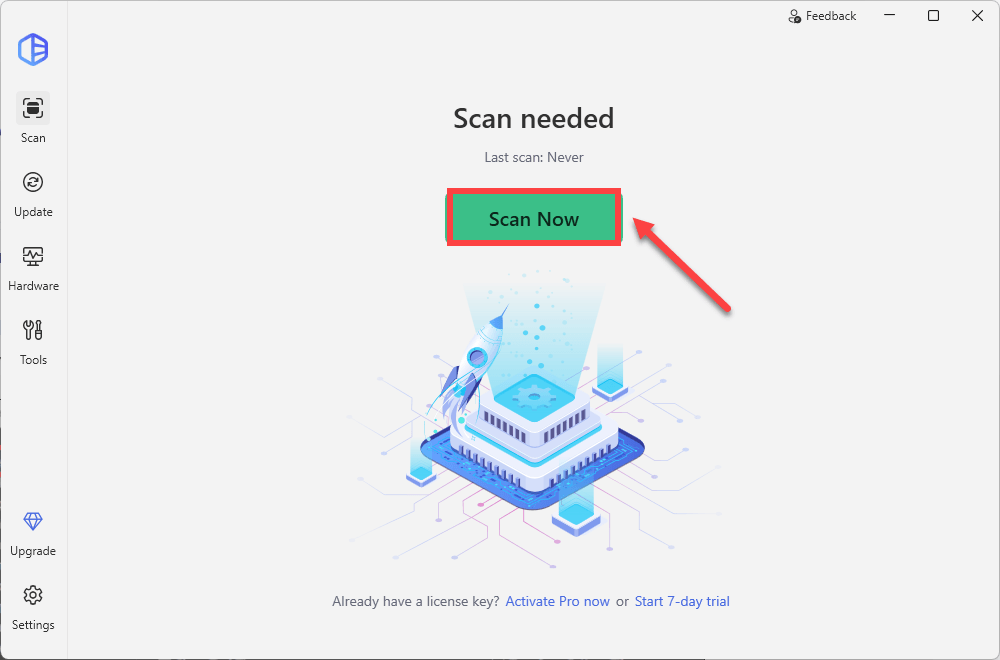
- Click Activate & Update next to your flagged device to start a 7-day free trial or upgrade to Driver Easy Pro. Or you can click Update All to update all drivers. Either option will automatically download and install the latest drivers for you.
- Restart your computer for the changes to take effect.
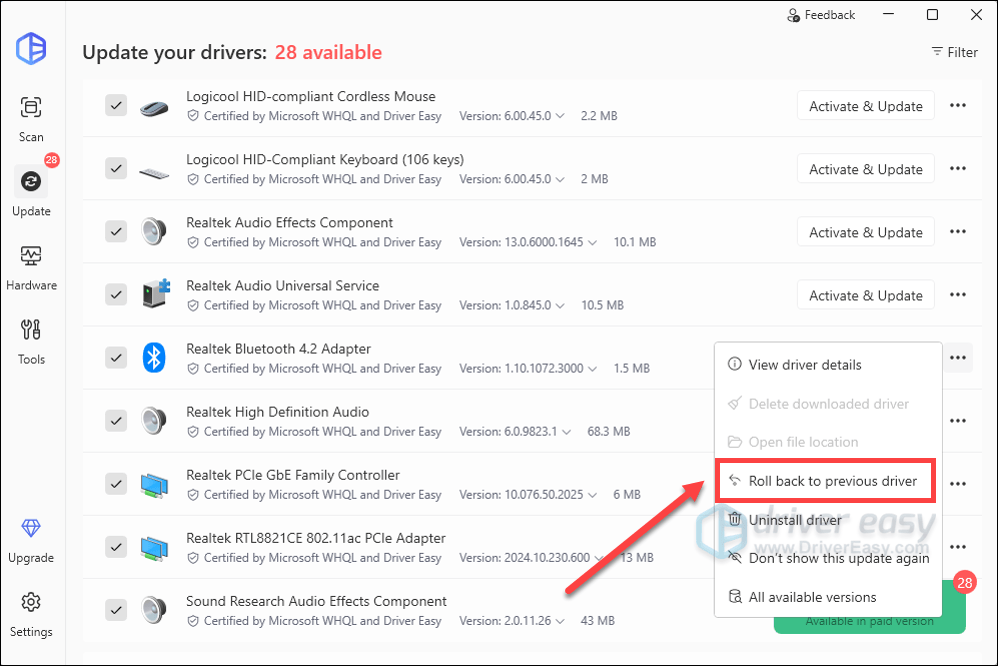
- To roll back a driver, simply right-click on the three dots and select Roll back to previous driver.
If your issue persists, try the next fix below.
3. Check for Faulty Hardware
The DMA violation error often points to an issue with how a device accesses your system’s memory. This could be due to a hardware problem. Faulty RAM, a failing hard drive, or a conflicting external device can all trigger this error.
How to Do It:
- Disconnect External Devices: Unplug any unnecessary external peripherals like USB drives, printers, or headsets. Restart your PC to see if the error persists.
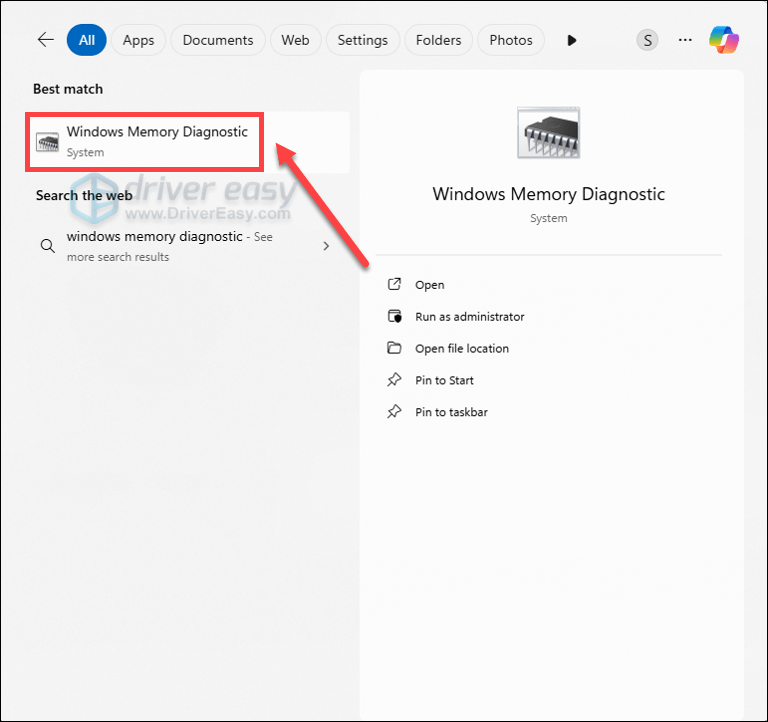
- Run a Memory Diagnostic: Open the Start menu, type Windows Memory Diagnostic and press Enter. Follow the prompts to restart your computer and run the tool, which will scan your RAM for errors. This can take some time.
- Inspect Your Hardware: If you are comfortable doing so, open your computer case and ensure all components, especially your RAM sticks and graphics card, are seated properly.
4. Run System File Scans
Sometimes, the DRIVER VERIFIER DMA VIOLATION error is caused by damage to the critical Windows system files that the driver depends on. A corrupted system file can prevent a driver from executing a valid DMA operation correctly, which then triggers the blue screen error. Running system file scans is essential for finding and fixing these corrupt files.
- Open Command Prompt as an administrator. You can do this by searching for cmd in the Start menu, right-clicking on Command Prompt, and selecting Run as administrator.
- Type or paste
DISM.exe /Online /Cleanup-image /Restorehealth(note the space before each “/”), and then press Enter. (Note: This step may take a few minutes to start and complete.)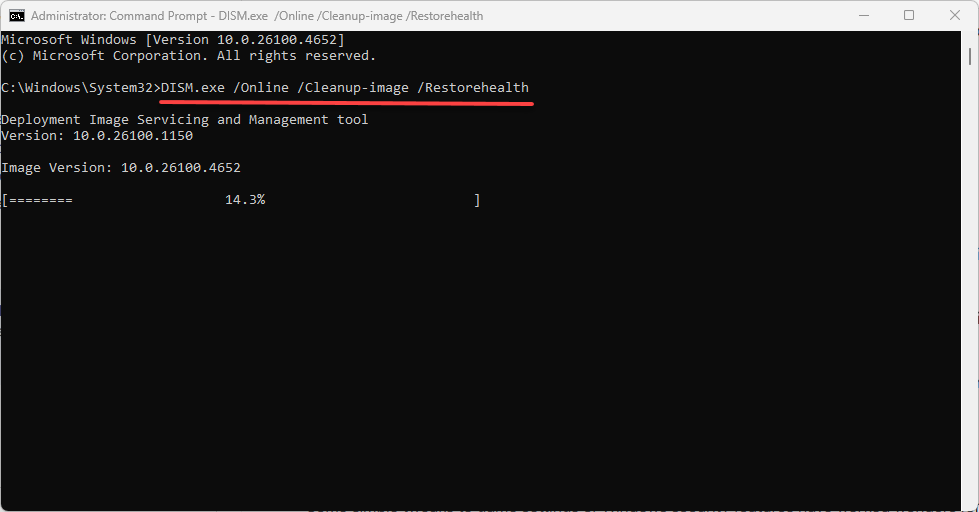
- After you see a message that says “The operation completed successfully,” type or paste
sfc /scannow(note the space between “sfc” and “/”) and press Enter. - After you see a message that says, “Verification 100% complete,” type exit and press Enter.
If your issue persists, proceed to the next fix below.
5. Update BIOS/UEFI Firmware
An outdated BIOS or UEFI firmware can cause compatibility issues between your hardware and Windows, which in turn can lead to driver errors. Updating your firmware can resolve these conflicts. To do this, follow the instructions on this post.
If you’ve tried all the fixes above and the error still persists, the issue may be more complex. At this point, seeking professional help is the best next step. When you contact a hardware technician or your PC manufacturer’s support team, providing the dump files will greatly assist them in diagnosing the problem. You can usually find these files in the C:\Windows\Minidump directory.