


If you find your chrome becomes slower than usual, don’t worry, you’re not alone. Many users are reporting this annoying issue.
The good news is you can fix it on your own. You should be able to fix the Chrome slow issue easily with the fixes we list below.
Try these fixes:
You may not have to try them all. Just work your way down the list until you find the one that works.
- Update Google Chrome
- Run a malware check
- Uninstall unnecessary Chrome apps and extensions
- Close aren’t using tabs and processes
- Turn on network action predictions
- Clear browsing data
- Reset Chrome to the default settings
- Update your network driver
Fix 1: Update Google Chrome
In order to speed up your Google Chrome, keeping the app updated is important. If your Chrome is out of date, it may not respond as you need. Here is how to update Chrome:
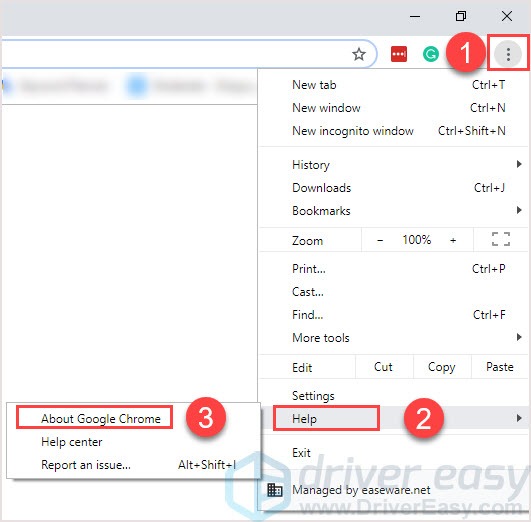
- On your Google Chrome, click the three dots button in the upper-right corner.
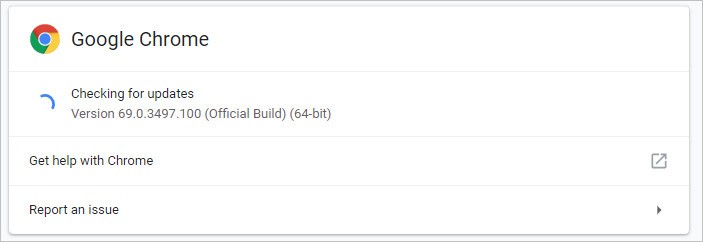
- Select Help > About google Chrome.
- Wait until your Chrome updates itself to the latest version.
- Launch your Chrome.
Fix 2: Run a malware check
If your computer is affected by malware, the speed of your Chrome might be slowed down. So you need to run a malware check to avoid malware becoming a barrier to Chrome. Here’s how:
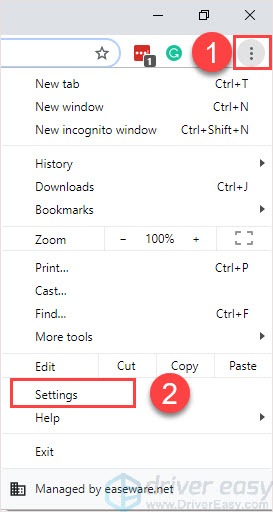
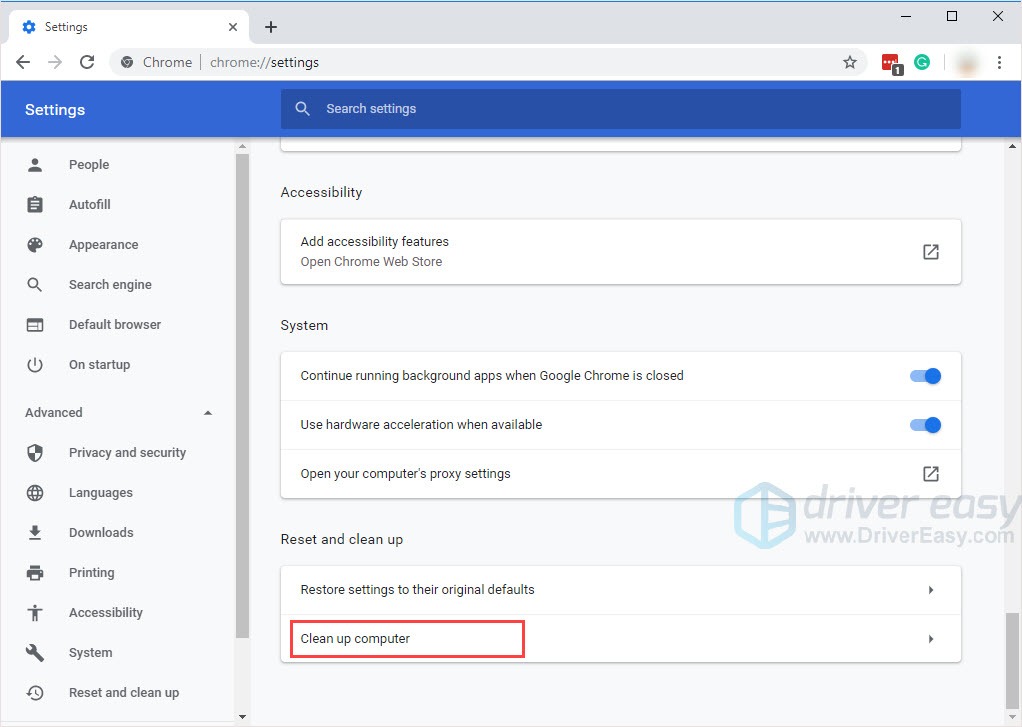
- On your Chrome, click the three dots button in the upper-right corner then select Settings.
- In the opening page, scroll down then click Advanced.
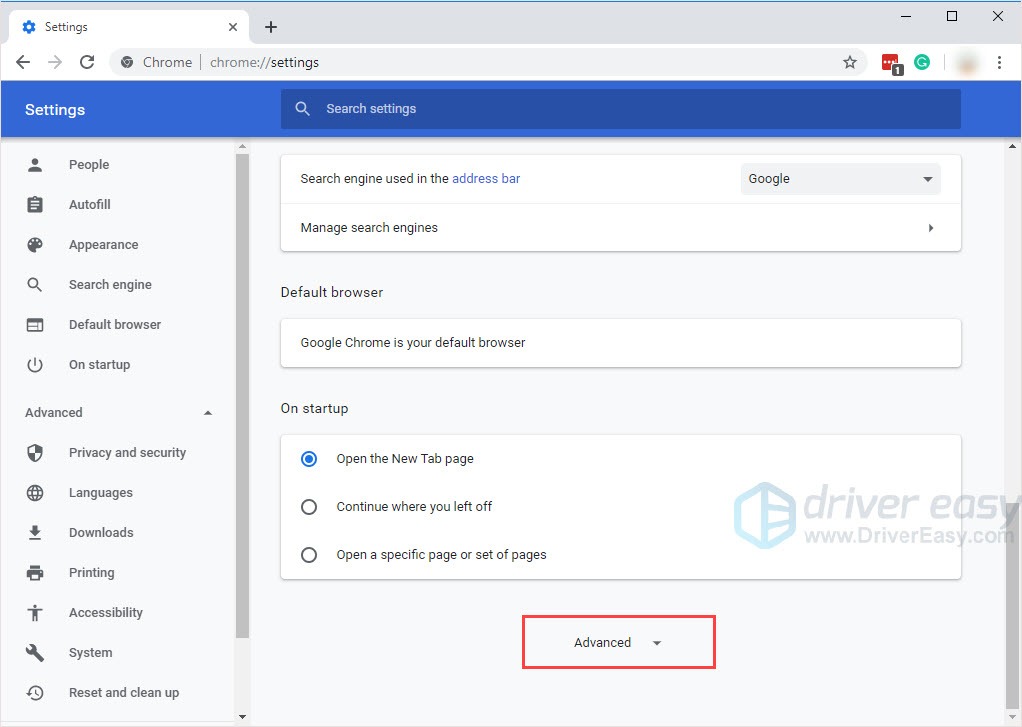
- Under Reset and clean up section, click Clean up computer.
- Click Find to check for harmful software.
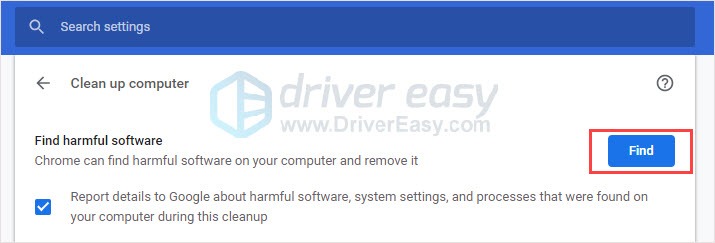
- Click Remove if you’re asked to remove unwanted software.
Fix 3: Uninstall unnecessary Chrome apps and extensions
The apps and extensions on your Chrome can also consume lots of resources when you’re surfing the Internet on Chrome. Try disabling the apps and extensions you don’t need any more to see if this issue persists.
Here is how:
- On your Google Chrome, click the three dots button in the upper-right corner.
- Select More tools > Extensions.
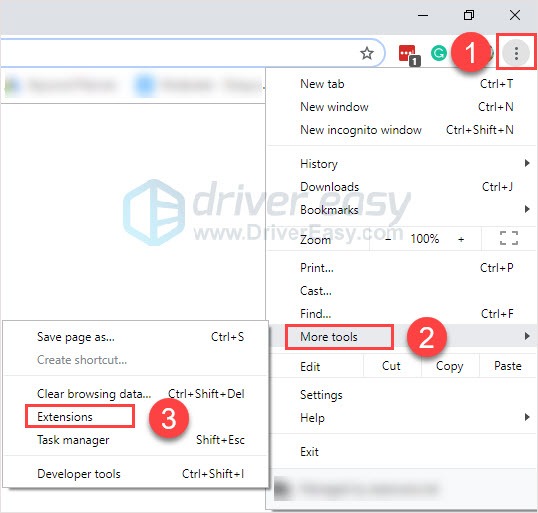
- Turn off the toggle on the lower-right corner of the Chrome apps and extensions you don’t need any more to disable them.

After disabling some Chrome apps and extensions, hopefully you should notice a difference in speed on your Chrome. If this fix fails to speed up Chrome, don’t worry, there are more fixes for your to try.
Fix 4: Close aren’t using tabs and processes
If you’ve opened too many tabs on your Chrome, obviously these tabs will slow down your speed. Because each tab opens its own process on your PC. These tabs will consume lots of resources, which will drag your Chrome speed. You can also close other background processes to release resources so that your Chrome speed would raise up.
By doing this, follow the steps below:
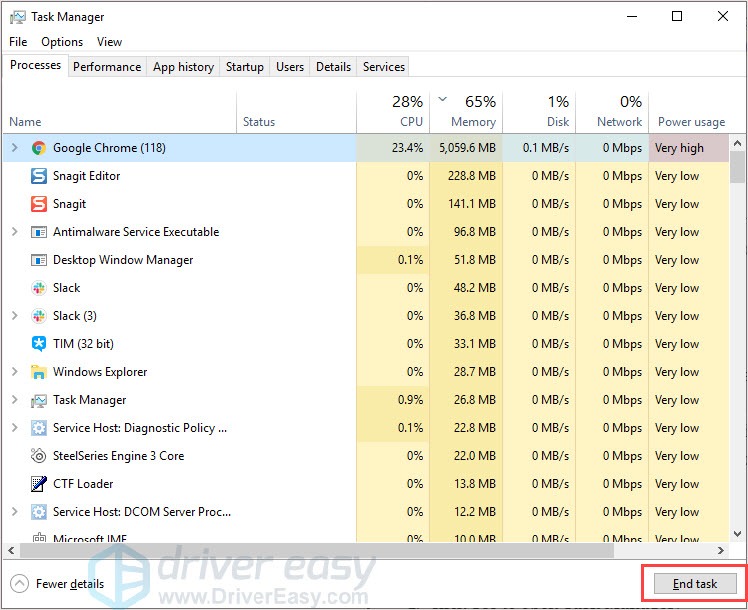
- Press Ctrl + Shift + Esc at the same time to open the Task Manager.
- Choose the app you want to close and click End task.
Fix 5: Turn on network action predictions
The prediction service on your Chrome is a feature that allows Chrome to predict your actions ahead of time so that it can speed up the page load times. Check if you enabled this feature, if not, follow the instructions below to enable it:
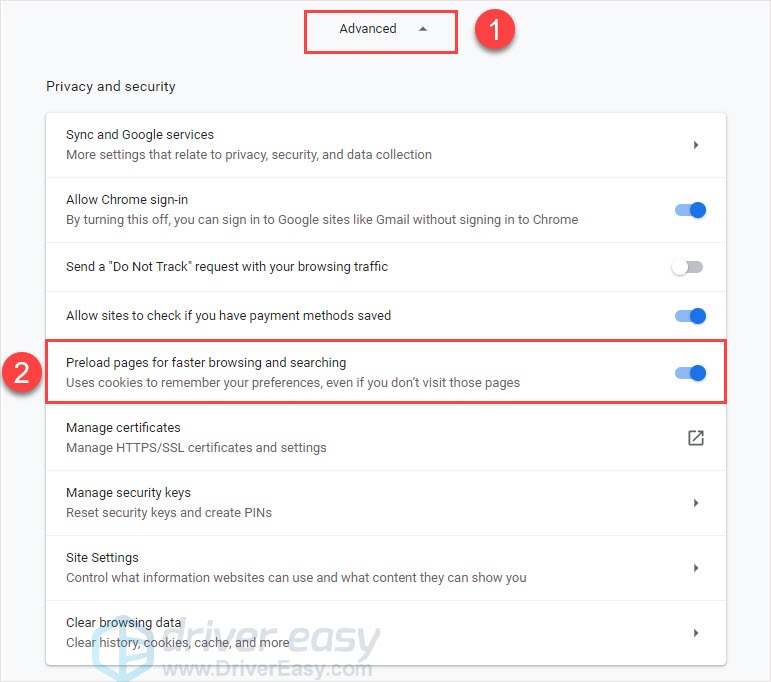
- On your Google Chrome, click the three dots button in the upper-right corner and click Settings.
- Scroll down to the bottom and click Advanced. Turn on Preload pages for faster browsing and searching.
Fix 6: Clear browsing data
To much cache and history data could affect the Chrome speed. So it is suggested that you clear the cache and browsing data to speed up your Chrome.
Here is how to do it:
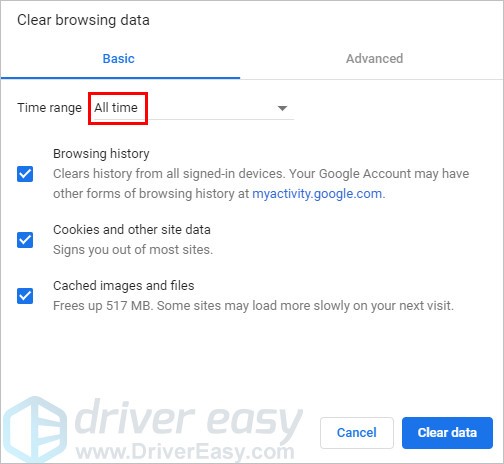
- In the Chrome address bar, copy and paste chrome://settings/clearBrowserData. Then press Enter.
- Set the time range to cover from when you started to use your browser till now.
Fix 7: Reset Chrome to the default settings
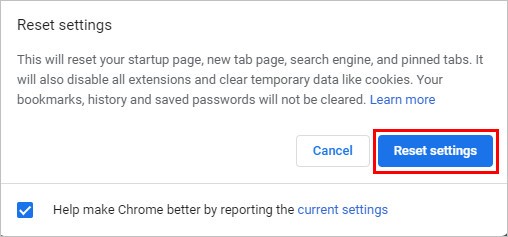
This method is like a combination for Fix 3 and Fix 5. It will clear temporary data and disable all extensions. But your bookmarks, history and saved passwords won’t be cleared.
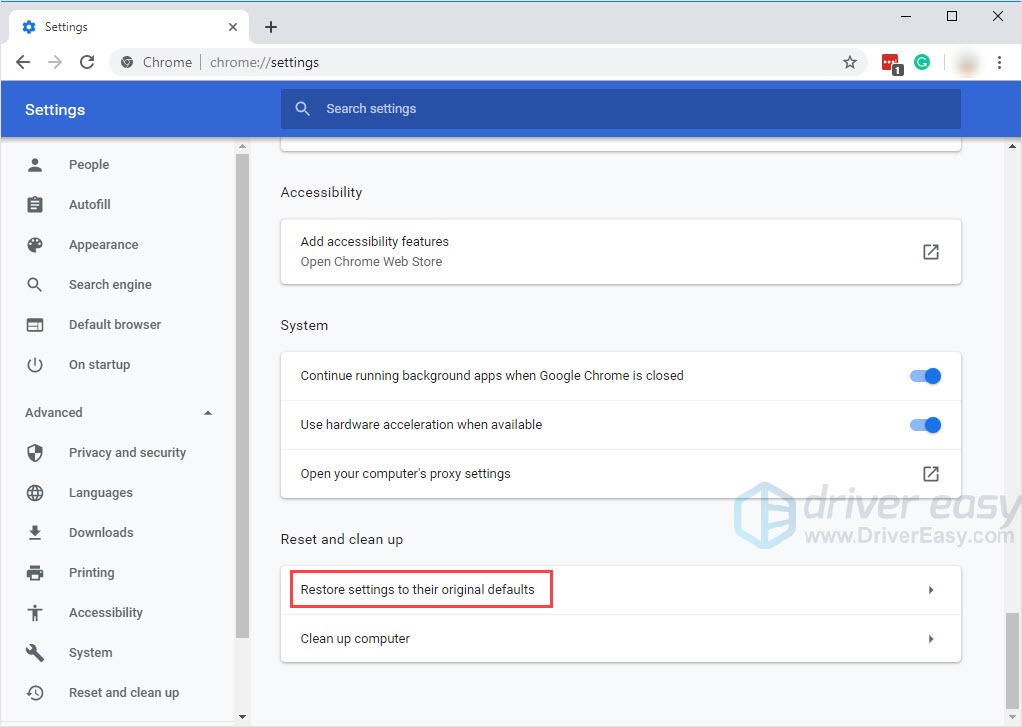
- On your Google Chrome, click the three dots button in the upper-right corner and click Settings.
- Scroll down to the bottom and click Advanced.
- Under Reset and clean up section, click Restore settings to their original defaults.
- Click Reset settings.
Fix 8: Update your network driver
If the network driver on your PC is missing or outdated, it may also cause the Chrome slow issue. To speed up Chrome, you need to keep your network driver up to date.
There are two ways to update your drivers:
Option 1 – Manually – You’ll need some computer skills and patience to update your drivers this way, because you need to find exactly the right the driver online, download it and install it step by step.
OR
Option 2 – Automatically (Recommended) – This is the quickest and easiest option. It’s all done with just a couple of mouse clicks – easy even if you’re a computer newbie.
Option 1 – Download and install the driver manually
To get the latest driver, you need to go to the manufacturer website, find the drivers corresponding with your specific flavor of Windows version (for example, Windows 32 bit) and download the driver manually.
Once you’ve downloaded the correct drivers for your system, double-click on the downloaded file and follow the on-screen instructions to install the driver.
Option 2 – Automatically update network drivers
If you don’t have the time, patience or computer skills to update your drivers manually, you can do it automatically with Driver Easy.
Driver Easy will automatically recognize your system and find the correct drivers for it. You don’t need to know exactly what system your computer is running, you don’t need to risk downloading and installing the wrong driver, and you don’t need to worry about making a mistake when installing.
You can update your drivers automatically with either the FREE or the Pro version of Driver Easy. But with the Pro version it takes just 2 clicks (and you get full support and a 30-day money back guarantee):
- Download and install Driver Easy.
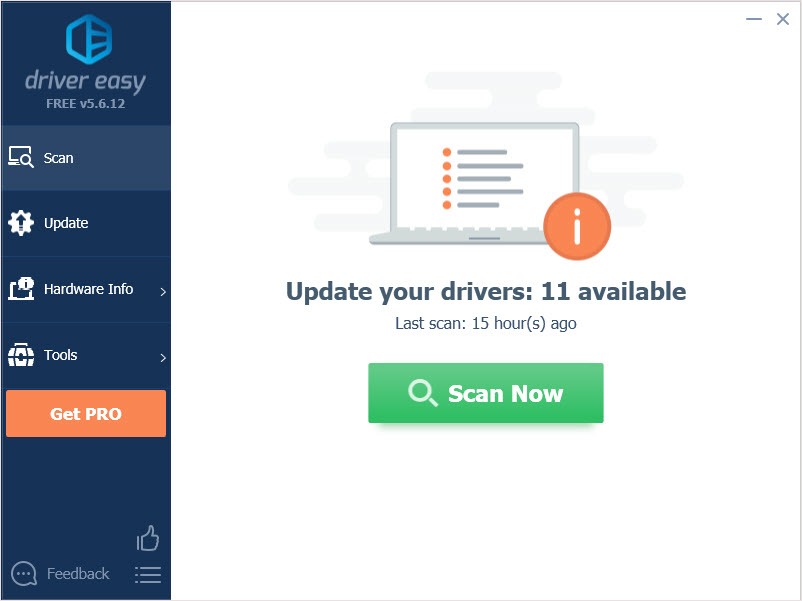
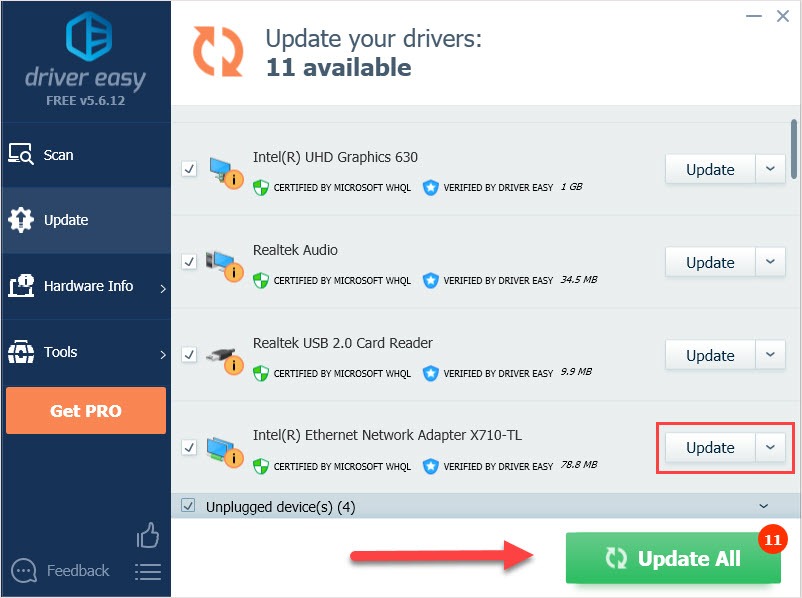
- Run Driver Easy and click Scan Now button. Driver Easy will then scan your computer and detect any problem drivers.
- Click the Update button next to the driver to automatically download and install the correct version of this driver (you can do this with Free version). Or click Update All to automatically download and install the correct version of all the drivers that are missing or out of date on your system (this requires the Pro version – you’ll be prompted to upgrade when you click Update All).
- Reboot your computer and run Fortnite to check the black screen issue will appear or not.
Hopefully one of the fixes above can help you resolve your problem. Please leave your comment below if you have any questions.
