


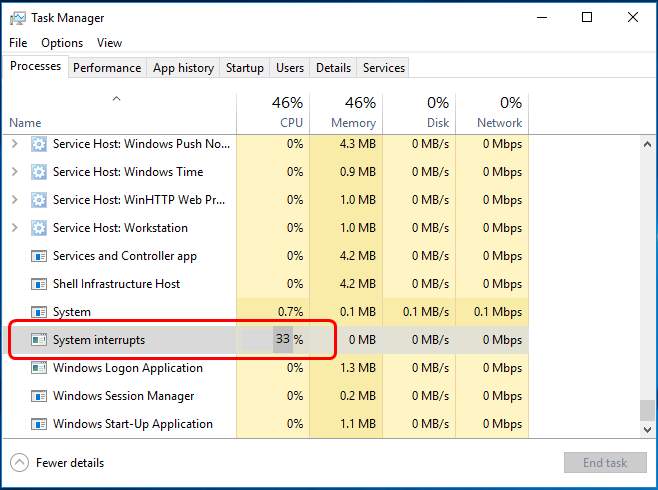
Find System interrupts process hogging CPU on your Windows shows like the image below?
The good news is that it can be fixed quickly and easily.
What is System interrupts?
System interrupts are an official part of the Windows operating system. It manages the communication between your computer hardware and system. You can find it shown as a process in Task Manager. That’s used to display the CPU usage of all hardware interrupts.
If you find System interrupts keep taking up over 20% of CPU usage, it means there’s some error with your hardware or the driver. Go with the following solutions to fix it.
Fixes for System interrupts high CPU
Solution 1: Quick & Easy
First of all, try to restart your Windows 10/11 computer. No kidding! A complete reboot can always fix a lot of weird issues. Thus be sure to try it at first as it’s easy enough to take.
Solution 2: Update your device drivers
If your device driver misbehaves, then the error may also occur. So you can update your drivers to try to fix the issue.
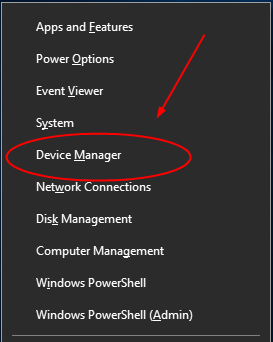
- Press the Windows logo key + X key to open the quick access menu. Then click Device Manager to open it.
- Expand any dialog and right-click on your device to choose Update driver. Choose Update driver and click Search automatically for updated driver software.
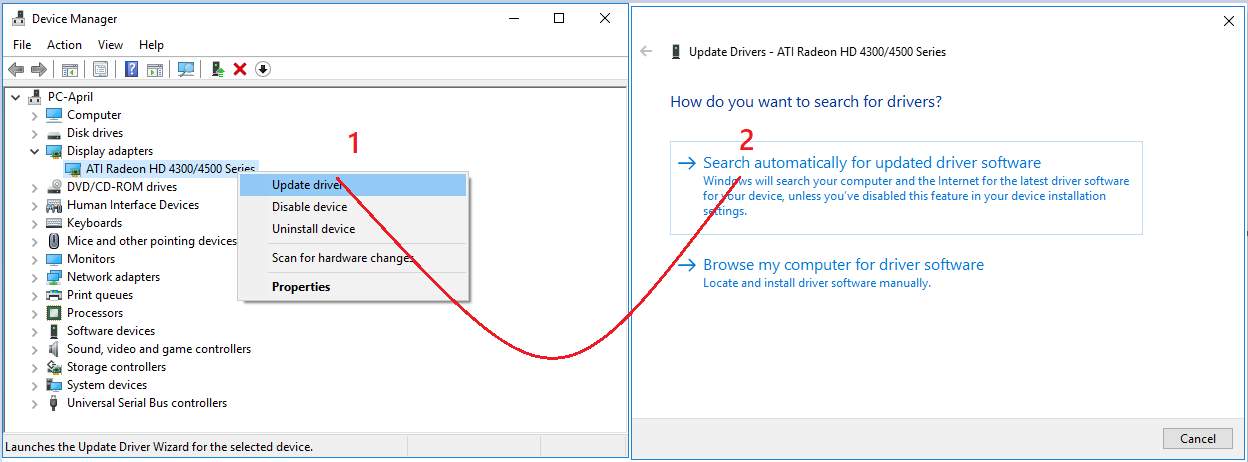
- Then Windows will start to detect the update for your device.
After updating one device, check for updates on your other devices with the same steps.
Note: If you check the updates one by one, it could be very tedious and really time-consuming. Let Driver Easy help you! Instead of checking after each, it can scan out all of your missing, corrupted and outdated drivers in less than 1 minute!
Driver Easy will automatically recognize your system and find the correct drivers for it. You don’t need to know exactly what system your computer is running, you don’t need to risk downloading and installing the wrong driver, and you don’t need to worry about making mistakes when installing.
You can update your drivers automatically with either the 7 days free trial or the Pro version of Driver Easy. It takes just 2 clicks, and you get full support and a 30-day money-back guarantee with the Pro version:
- Download and install Driver Easy.
- Run Driver Easy and click the Scan Now button. Driver Easy will then scan your computer and detect any problem drivers.

- Click the Activate & Update button next to the flagged device to automatically download and install the correct version of this driver.
Or click Update All to automatically download and install the correct version of all the drivers that are missing or out of date on your system (You’ll need the Pro version for this – when you select Update All, you’ll get a prompt to upgrade. If you’re not prepared to purchase the Pro version yet, Driver Easy provides a 7-day trial at no cost, granting access to all Pro features like fast downloads and easy installation. No charges will occur until after your 7-day trial period ends.)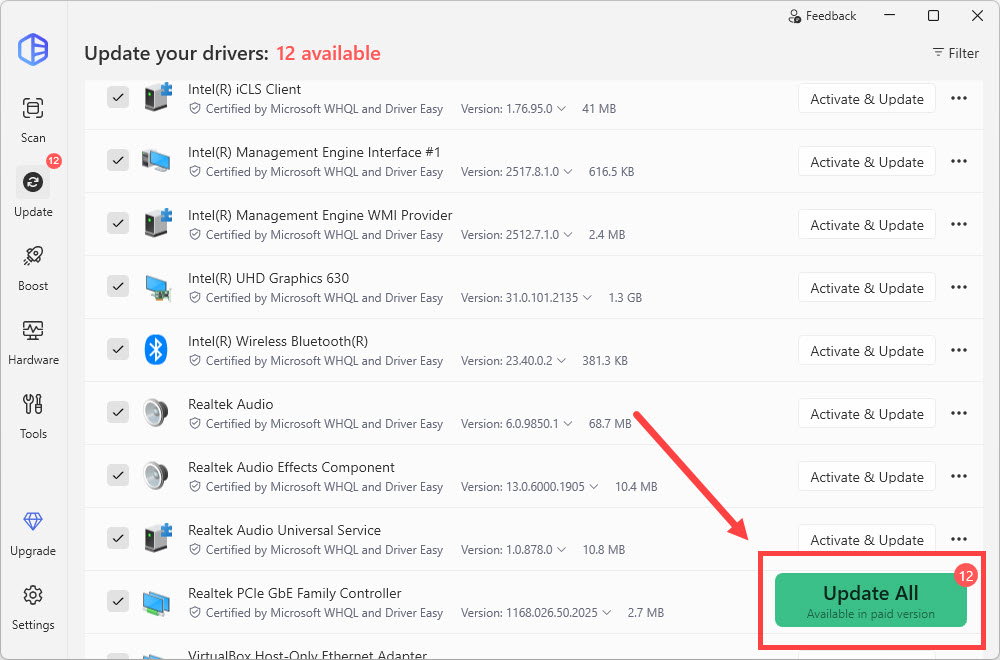
- After updating, restart your computer to take effect.
If updating the driver didn’t help you, go on to follow other solutions:
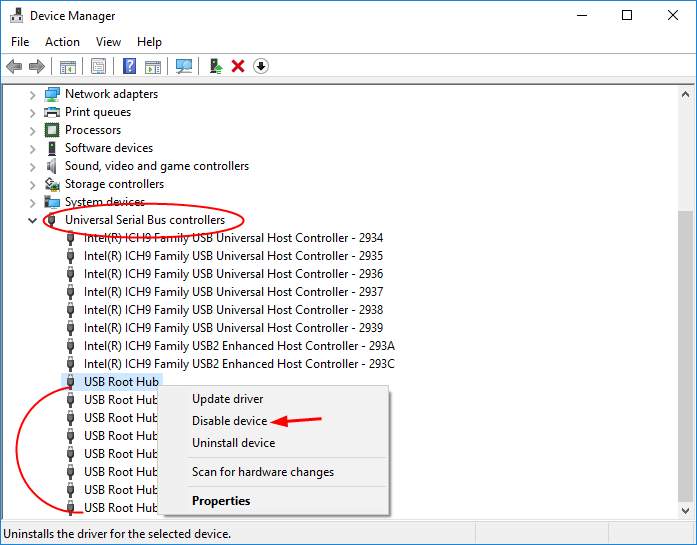
Solution 3: Disable USB Root Hubs
USB hardware can also cause System interrupts and high CPU issues. You can disable USB Root Hubs in Device Manager to fix it.
- Press the Windows logo key + X key to open the quick access menu. Then click Device Manager to open it.
- Expand the Universal Serial Bus controllers ccategory. Then right-click on each USB Root Hub except the ones for your keyboard and mouse. Choose Disable device.
- After disabling your USB Root Hubs, check if the CPU usage comes down.
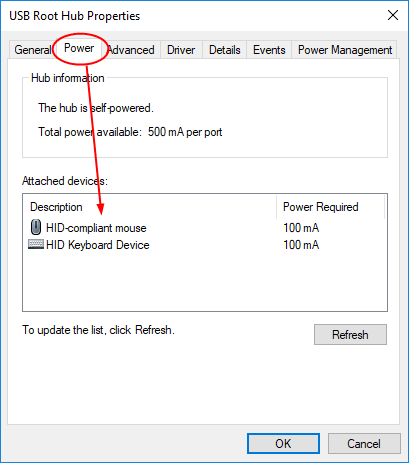
To check which USB Root Hub is for your keyboard and mouse:
Right-click on USB Root Hub to choose Properties. Then you can see the Attached devices on the Power pane.
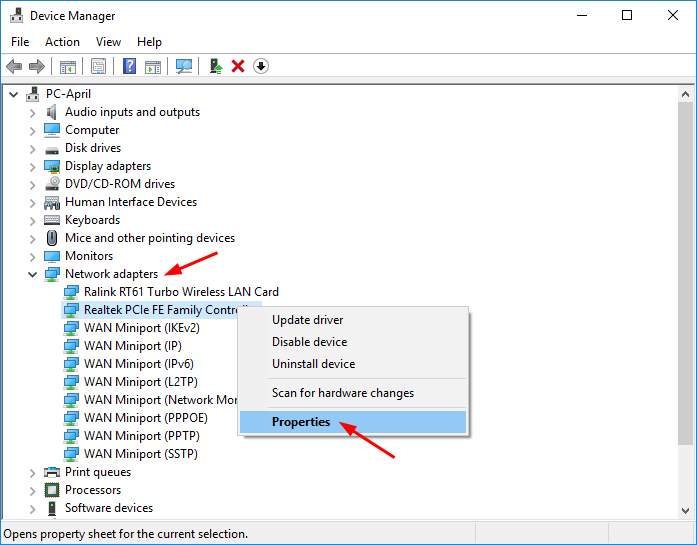
Solution 4. Modify your network adapter properties
- Press the Windows logo key + X key to open the quick access menu. Then click Device Manager to open it.
- Expand the Network adapters category. Right-click on your network adapter (it should be the one with a manufacturer brand name like Intel, Realtek, Ralink, Qualcomm, Broadcom, etc.) and choose Properties.
- Choose to view on the Advanced pane. Then scroll down to Wake on Magic Packet and Wake on pattern match. Set their Value to be Disabled from the drop-down menu one by one. Click OK to save your settings.
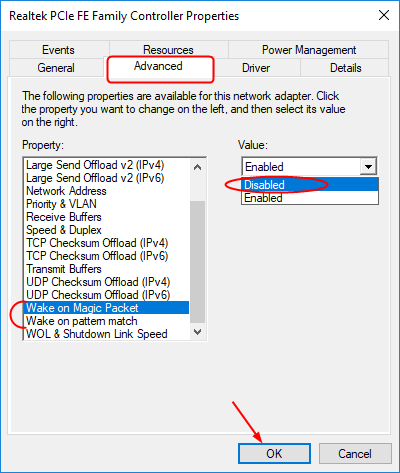
- See if the system interrupts still consume a high CPU usage on your computer.
Solution 5: Consider a system reset
If none of the above helps to fix the high CPU usage problem trigger by System interrupts, you may need to consider a Windows reset: it wipes out all software incompatibilities and problems, it’s also the rule of thumb in telling a software problem from a hardware one: if the problem remains even after a system reset, then it’s definitely a hardware problem.
To reinstall or reset your computer, here are some guides for reference:
That’s all there is to the fixes for System interrupts high CPU usage problem. Hopefully it can help you fix the error.
