


If you receive this error in Event Viewer: The driver detected a controller error on \Device\Ide\Ideport0, you’re not alone. Many users have reported it. But don’t worry, it’s fixable. And in most cases, the fix is pretty fast and simple…
Try these fixes
You don’t have to try them all; just work your way down the list until you find the one that works for you.
Fix 1: Unplug and replug your hard disk cable
Make sure your hard disk cable is properly connected to your motherboard. Try unplugging and then re-plugging your hard disk cable and see if it solves your “The driver detected a controller error on \Device\Ide\Ideport0” problem.
- Turn off your computer.
- Unplug your hard disk cable from your motherboard, wait a moment and then replug it into the motherboard.
- Start your computer and see if the error is fixed. If not, try Fix 2, below.
Fix 2: Update your drivers
If Fix 1 didn’t work for you, the most likely cause is a controller or chipset driver problem.
Fortunately, this is one of the easiest problems to fix.
There are two ways to update your controller and chipset drivers: manually and automatically.
Update your drivers manually — You can update your driver manually by going to the hardware manufacturer’s website, and searching for the latest driver. But if you take this approach, be sure to choose the driver that’s compatible with the exact model number of your hardware, and your version of Windows.
OR
Update your drivers automatically — If you don’t have the time, patience or computer skills to update your drivers manually, you can do it automatically with Driver Easy. You don’t need to know exactly what system your computer is running, you don’t need to risk downloading and installing the wrong driver, and you don’t need to worry about making a mistake when installing. Driver Easy handles it all.
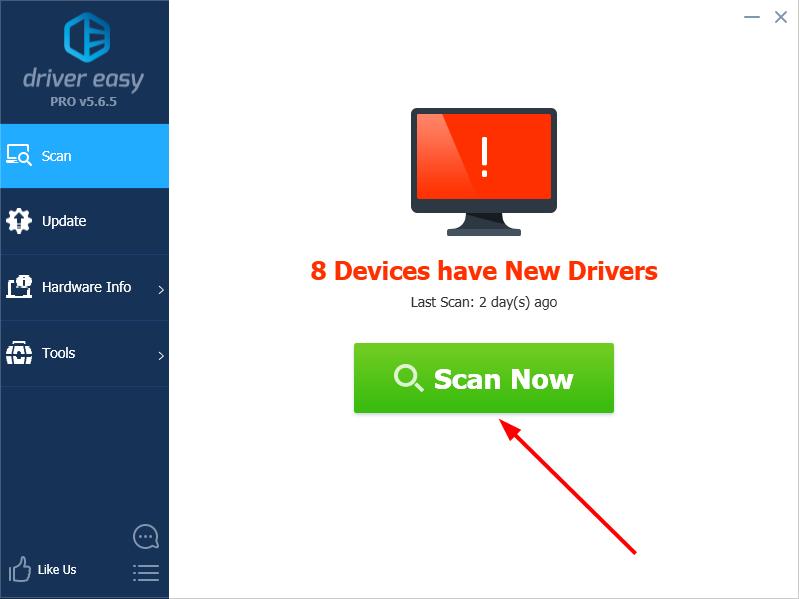
- Download and install Driver Easy.
- Run Driver Easy and click Scan Now. Driver Easy will then scan your computer and detect any problem drivers.
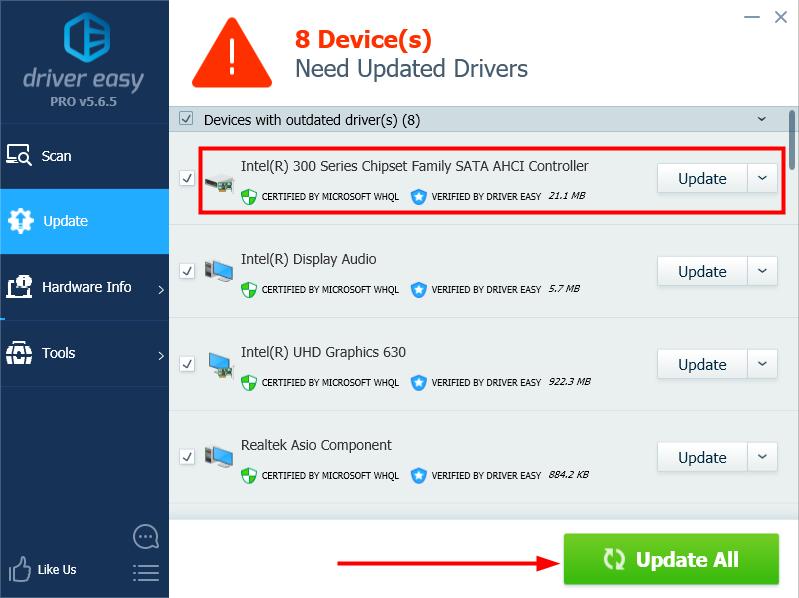
- Click Update next to any flagged devices to automatically download the correct version of their drivers, then you can install them manually. Or click Update All to automatically download and install them all automatically. (This requires the Pro version – you’ll be prompted to upgrade when you click Update All. You get full support and a 30-day money back guarantee.)
- Restart your computer and check if your “The driver detected a controller error on \Device\Ide\Ideport0” problem is resolved. If not, contact Driver Easy’s support team at support@drivereasy.com for further assistance. They’d be happy to help you. Or you can move on to Fix 3, below.
Fix 3: Update your BIOS
Some users fixed their The driver detected a controller error on \Device\Ide\Ideport0 issue with a BIOS upgrade. If the above steps didn’t work for you, you might as well give it a go. Here’s how to update your BIOS:
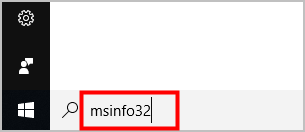
- Go to System Information to get detailed information about your computer:
- Type msinfo32 in the Windows search box and press Enter on your keyboard.
- At System Information, you can view the information of your System Manufacturer and System Model.
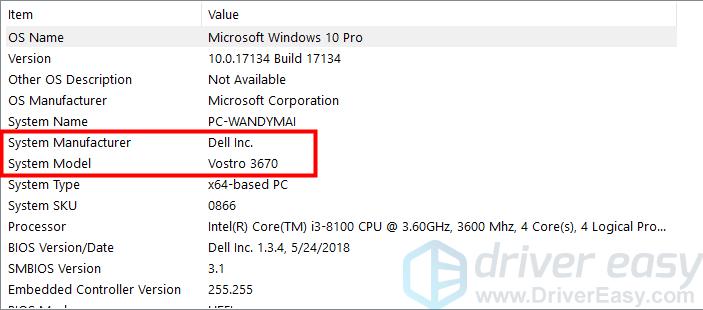
- Type msinfo32 in the Windows search box and press Enter on your keyboard.
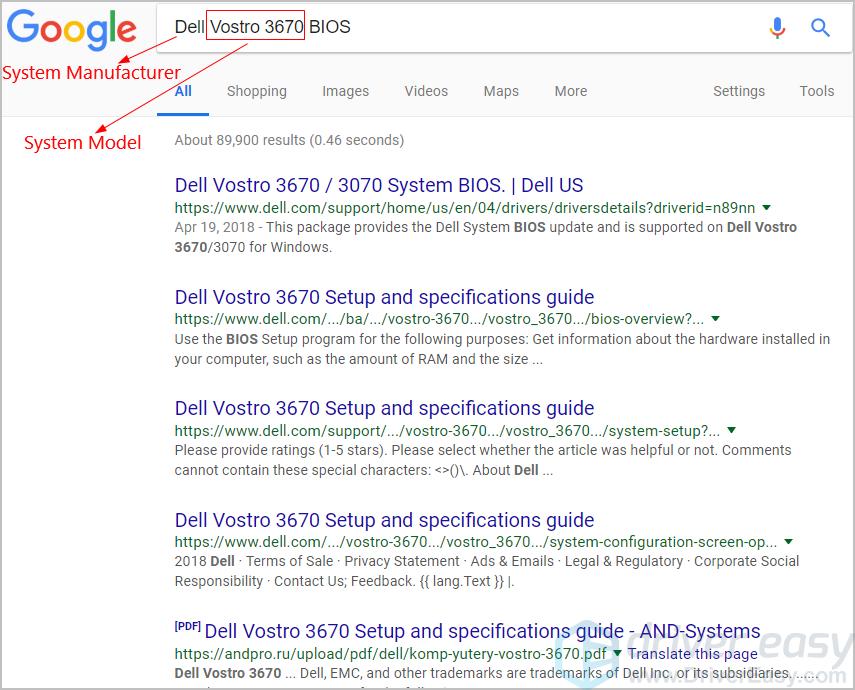
- Type your system’s manufacturer name, your system’s model name and “BIOS” in the Google search box, then select the matching result to go to the manufacturer’s official website and download BIOS update.
- Look for words or sections like Updates, Downloads, or Support.
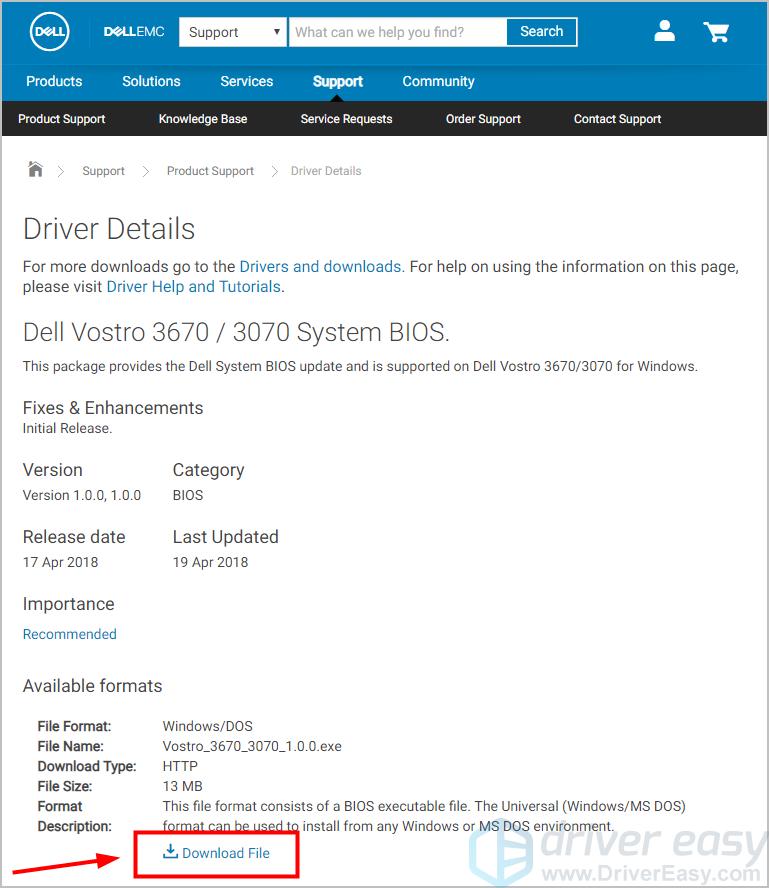
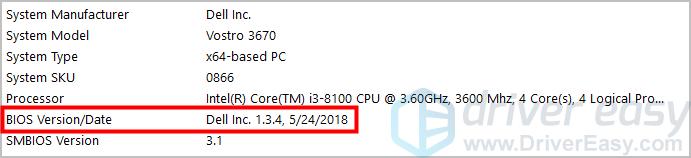
- Verify the update file is newer than the BIOS version that you see in System Information. Otherwise, there would be no need to download the update file.
- When the download is finished, make sure your computer is plugged in, then double-click on the downloaded file.Note: If you find there’re any instructions available in the downloaded file, make sure you follow the instructions strictly to update your BIOS. Or you can visit your BIOS manufacturer’s support site for a direct explanation of how to do so.
- Transfer the BIOS update file to a USB drive and keep the drive connected to your computer.
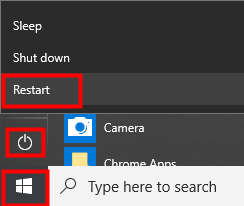
- Click the Start button > power icon > Restart.
- As soon as your computer shuts down, press repeatedly a specific key to enter BIOS. The key may vary, depending on your computer’s manufacturer.
If you’re using DELL, press F2 on your keyboard to access BIOS;
If you’re using HP, press F10 or F1;
If you’re using Lenovo, press F1;
If you’re using Toshiba, press F2 or F12;
Otherwise you can try pressing Del or F2, or you can confirm with your PC manufacturer the steps necessary to enter BIOS. - Just to be on the safe side, backup your BIOS: click the Backup or Save option or tab on the BIOS main screen, then follow the on-screen instructions.
- According to the information you obtain in Step 5), enable and use your BIOS update tool to begin updating your BIOS.IMPORTANT: the BIOS update process can’t be interrupted. Make sure your computer is connected to a power source, and don’t turn your PC off during the update.
Hopefully this can help you out.
You’re, as always, more than welcome to leave a comment below to share your results or any other suggestions.