Have you ever experienced the frustration of your touchpad suddenly ceasing to function? You’re not alone. It’s a common annoyance. But what’s even more exasperating is when you attempt to find and fix the issue in Device Manager, only to discover that your touchpad has just disappeared from the device list. If you’ve been there and are seeking solutions, this article is what you need.
We’ve prepared 4 fixes in the following that have the best chance of resolving your touchpad issue. Let’s find out how!
Try these fixes:
- Show hidden devices in Device Manager
- Add the touchpad driver back manually
- Update the touchpad driver
- Configure the BIOS settings
- Repair corrupt files
Fix 1: Show hidden devices in Device Manager
Some certain devices installed might not be displayed in the Device Manager by default or because the Windows system fails to detect the devices’ drivers. In this case, you should try the trick “Show hidden devices” in Device Manager to see if your touchpad can be enabled by following the steps below:
- Press Windows + X keys to open the quick access menu and select Device Manager.

- Click View and select Show hidden devices from the pop-up menu.

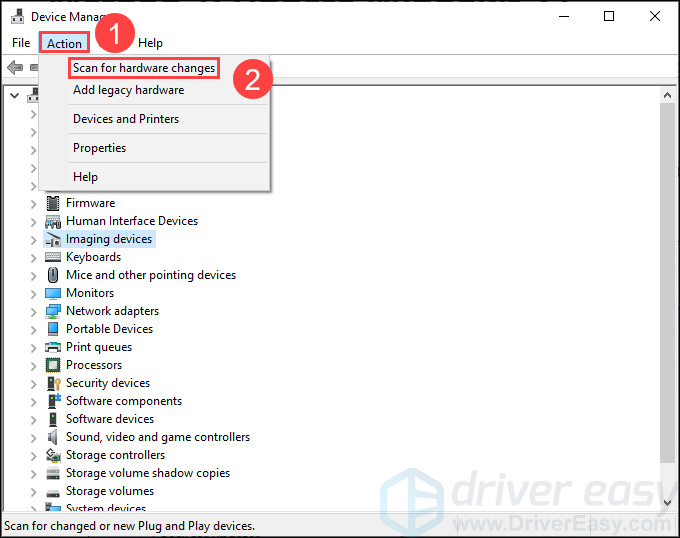
- Go on to click Action and select Scan for hardware changes from the pop-up menu
- Restart your PC for the trick to take effect.
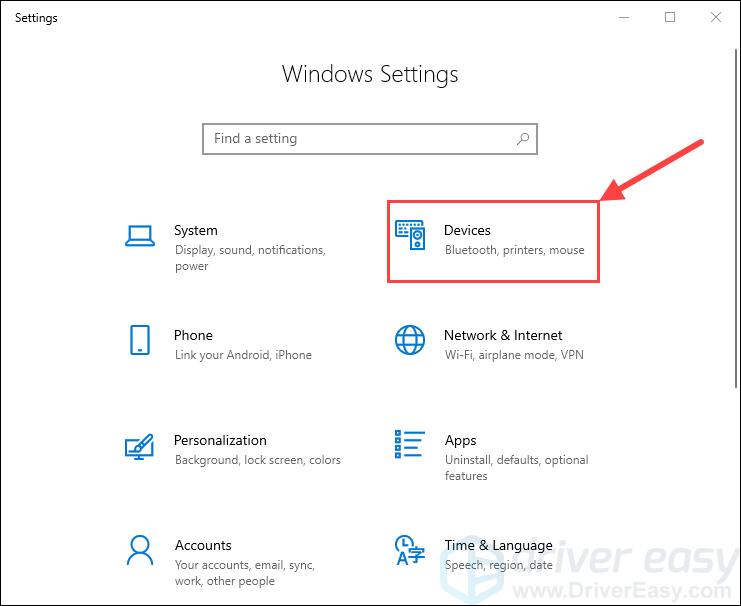
- After rebooting your computer, press Windows + I keys to open Windows Settings and select Devices.
- Check if Touchpad is in the Devices list now. If it does, click the toggle to On.
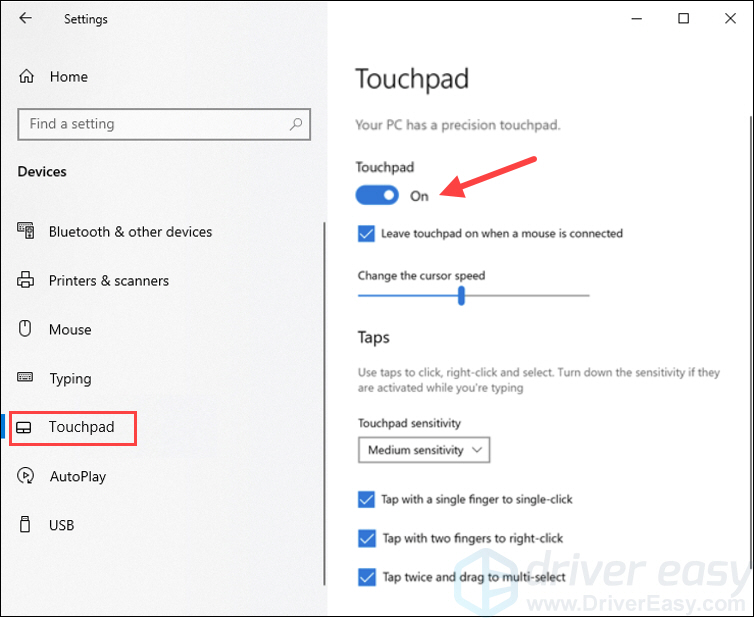
If it doesn’t, sorry that this fix doesn’t work for you, move on to try the next below.
Fix 2: Add the touchpad driver back manually
If you know the manufacturer of your touchpad (Synaptics and Elan are two of the most popular ones), you can also try to add the touchpad device back manually in Device Manager to see if it works for you. To do so:
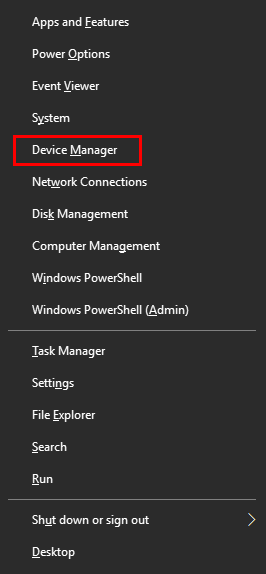
- On your keyboard, press the Windows logo key and X at the same time. Then select Device Manager.
- In Device Manager, select the first line (your computer name), then click Action on the menu bar and select Add legacy hardware.

- Click Next to move on.

- Select Install the hardware that I manually select from a list (Advanced) and click Next.

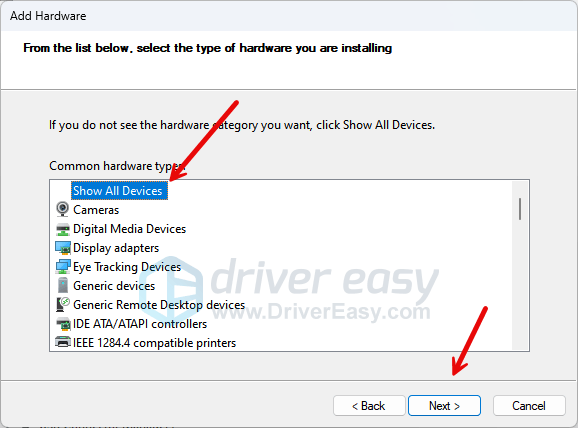
- Select Show All Devices, and click Next.
- As mentioned, two of the most popular touchpad manufacturers are Elan and Synaptics, so you can select one of them on the Manufacturer list on the left side, and then see if you can find the touchpad device on the right side. Sometimes, you may also need to check if your touchpad is listed under the Microsoft umbrella. You can also try your laptop manufacturer’s name, like Acer, Asus, HP Dell, etc., to see if your touchpad is listed under them.
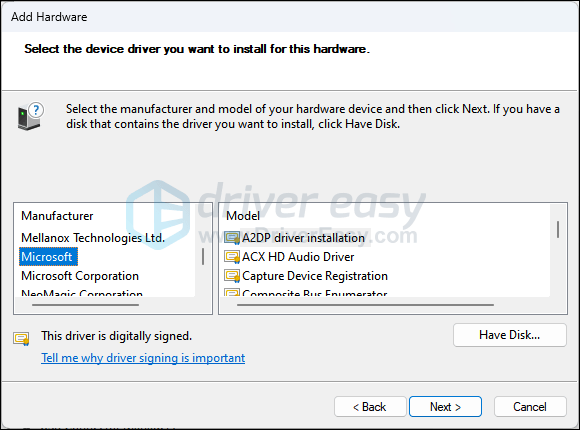
If you still can’t find your touchpad in this way, please move on to the next fix, below.
Fix 3: Update the touchpad driver
As you may have known, this problem may occur if you are using the wrong touchpad driver or it’s out of date. So you should update your touchpad driver to see if it fixes your problem. In the condition that the Device Manager can’t work for you, there are two other ways you can update your touchpad driver:
Option 1 – Manually – You’ll need some computer skills and patience to update your drivers this way because you need to find exactly the right driver online, download it and install it step by step.
OR
Option 2 – Automatically (recommended) – This is the quickest and easiest option. It’s all done with just a couple of mouse clicks – easy even if you’re a computer newbie.
Option 1 – Download and install the driver manually
To get the driver of your touchpad, you need to go to the official website of your device’s brand, find the driver corresponding with your specific flavor of Windows version (for example, Windows 32-bit) and download the driver manually.
Once you’ve downloaded the correct drivers for your system, double-click on the downloaded file and follow the on-screen instructions to install the driver.
Option 2 – Automatically update touchpad drivers
If you don’t have the time, patience or computer skills to update the driver manually, you can do it automatically with Driver Easy.
Driver Easy will automatically recognize your system and find the correct drivers for it. You don’t need to know exactly what system your computer is running, you don’t need to risk downloading and installing the wrong driver, and you don’t need to worry about making a mistake when installing.
You can update your drivers automatically with either the 7 days free trial or the Pro version of Driver Easy. It takes just 2 clicks, and you get full support and a 30-day money-back guarantee with the Pro version:
- Download and install Driver Easy.
- Run Driver Easy and click the Scan Now button. Driver Easy will then scan your computer and detect any problem drivers.

- Click the Activate & Update button next to the flagged device to automatically download and install the correct version of this driver.
Or click Update All to automatically download and install the correct version of all the drivers that are missing or out of date on your system (You’ll need the Pro version for this – when you select Update All, you’ll get a prompt to upgrade. If you’re not prepared to purchase the Pro version yet, Driver Easy provides a 7-day trial at no cost, granting access to all Pro features like fast downloads and easy installation. No charges will occur until after your 7-day trial period ends.)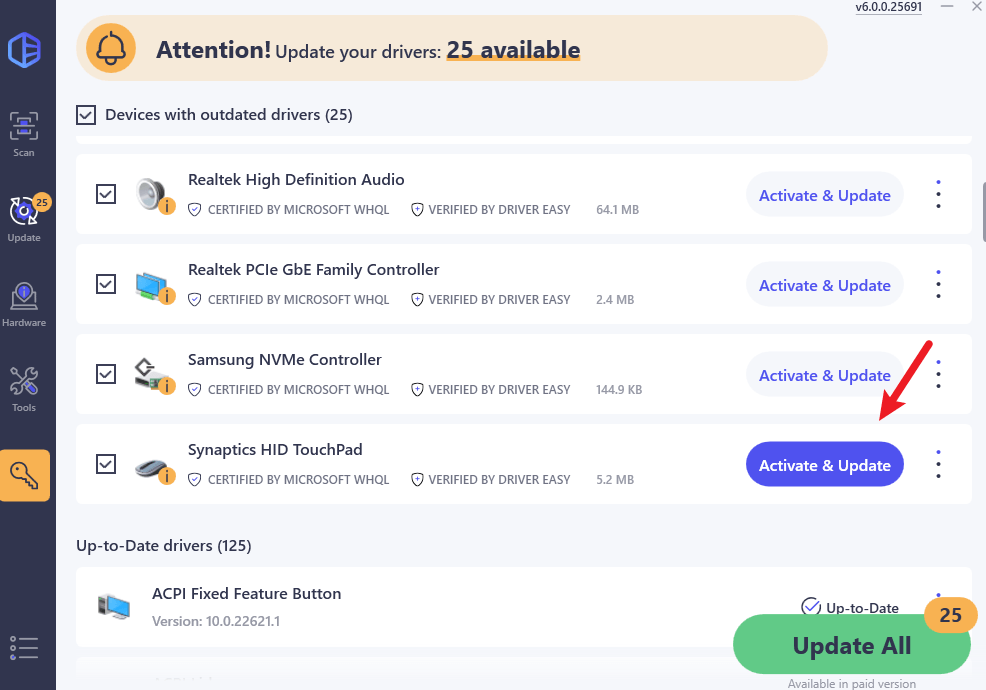
- After updating, restart your computer to take effect.
Fix 4: Configure the BIOS settings
Whenever your computer is booted, the BIOS is the first to be activated for operating system loading and device data reading. For some reason, your touchpad may be disabled in the BIOS and therefore can’t be displayed in Device Manager. So you might need to check your BIOS and set it to default. Here’s how:
- Restart your PC and keep pressing the assigned BIOS hotkey ( table below for your reference) as soon as you see the Windows logo on the screen to enter the BIOS settings.
| ASUS | F2 for all PCs, F2 or DEL for motherboards |
| Dell | F2 or F12 |
| HP | ESC or F10 |
| Lenovo | F2 or Fn + F2 |
| Lenovo (Desktops) | F1 |
| Lenovo (ThinkPads) | Enter + F1. |
| Microsoft Surface Tablets | Press and hold the volume up button |
| Samsung: | F2 |
| Sony | F1, F2, or F3 |
- After entering the BIOS, find the option that allows you to restore the BIOS under the Security tab or the Exit tab.
Note: Depending on what motherboard you have, the name of the option allowing you to restore the BIOS could be Reset to Default, Load Factory Defaults, Load Setup Defaults, Load Optimized Defaults, etc. - Select Yes in the window for confirmation.

- Once done, press the key next to Save and Exit.
- Restart your computer to see if the issue is fixed.
If this method doesn’t work, then try the last one below.
Fix 5: Repair corrupt files
If none of the above fixes work for you, you might want to consider a holistic scan for a file check on your PC. Because if your computer has corrupted system files or critical system files missing, your touchpad also won’t function properly.
To save you from labor, we recommend Fortect to help you repair corrupt files. Fortect is a powerful tool that is tailored to your specific system and operates privately and automatically. In addition to repairing faulty system files, it can also remove malware threats, detect dangerous websites, and free up disk space in a matter of seconds.
- Download and install Fortect.
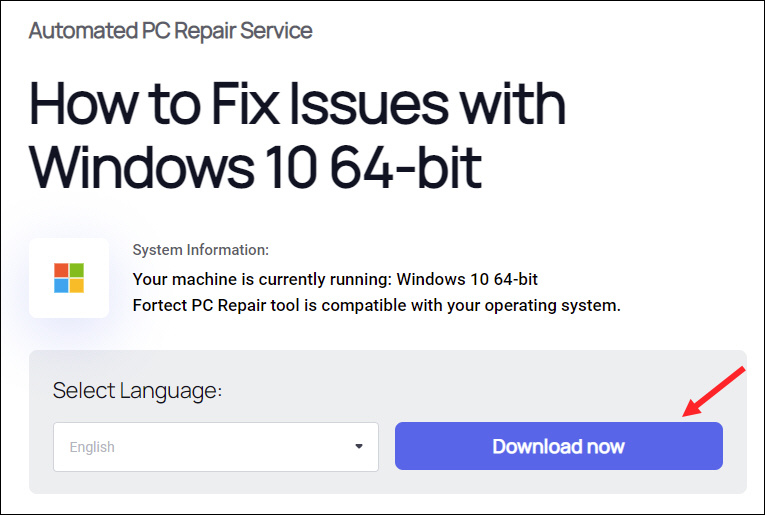
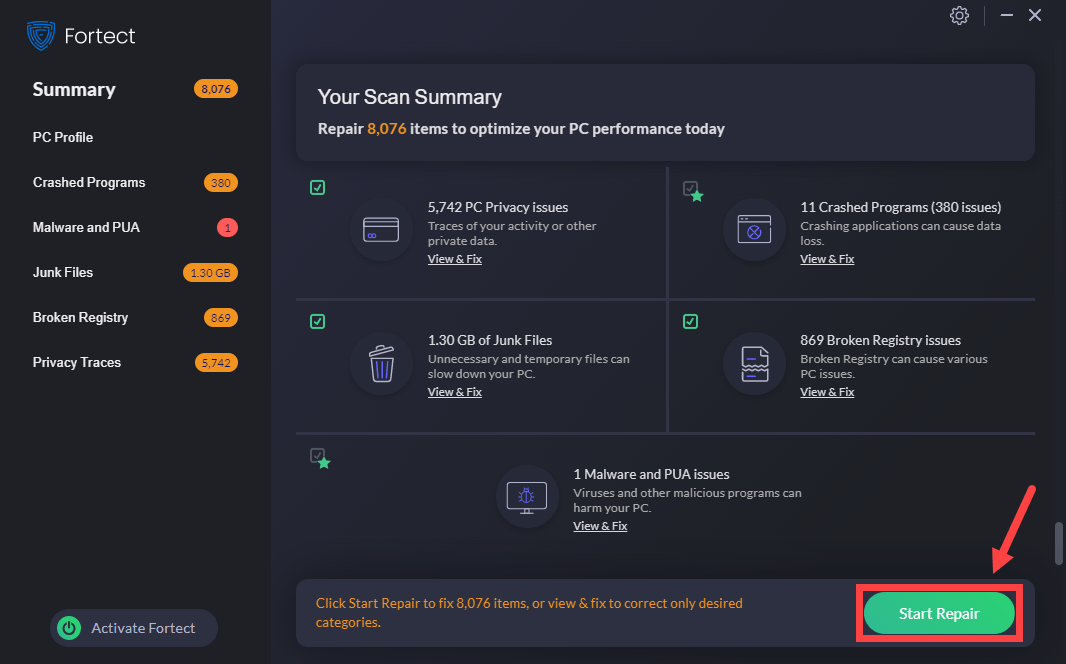
- Open Fortect and it will run a FREE scan of your PC. You’ll see a complete overview of your system and issues once the scan is finished.
- Click Start Repair if Fortect detects any missing or broken system files or other issues
There you have it – hopefully, you have successfully resolved your touchpad issue with these 4 fixes by now. Feel free to drop us a line if you have any questions or suggestions!
Trio Max Mobile Pixels Tri-Screen Laptop Monitor
- Plug and Play
- One Cable Setup
- 14” 1080p Widescreen for Better Laptop Vision
- Designed for Home Office and Work Anywhere
Editor’s Choice


