


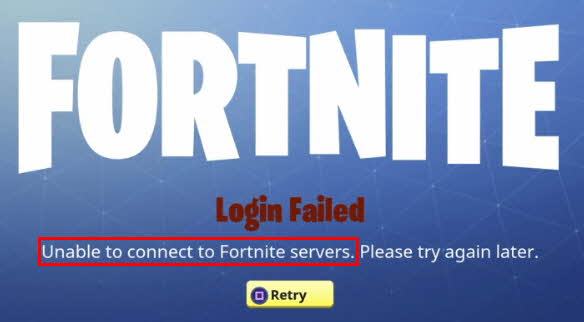
Unable to connect to Fortnite servers on your PC? Don’t worry… Although it’s incredibly frustrating, you’re definitely not the only person to experience this issue. Thousands of Fortnite players have recently reported the very same issue. More importantly, you should be able to fix this issue pretty easily…
Try these fixes
Here’s a list of fixes that have resolved this issue for other Fortnite players. You don’t have to try them all. Just work your way through the list until you find the one that does the trick for you.
- Modify the shortcut of the Epic Games Launcher
- Install the latest Fortnite patch
- Reboot your network
- Update your network driver
- Test your Internet connection speed
- Reset Winsock data
- Flush your DNS and Renew your IP
- Avoid wireless interference
- Disable the proxy server
- Change the DNS server
- Close bandwidth-hogging applications
Fix 1: Modify the shortcut of the Epic Games Launcher
If you run Fortnite from the Epic Games Launcher, try modifying the shortcut of the Epic Games Launcher to see if you can connect to Fortnite servers. Here is how to do it:
1) Close Fortnite and the Epic Games Launcher. Then end all the processes of Fortnite and the Epic Games Launcher.
2) Reconnect your Internet connection.
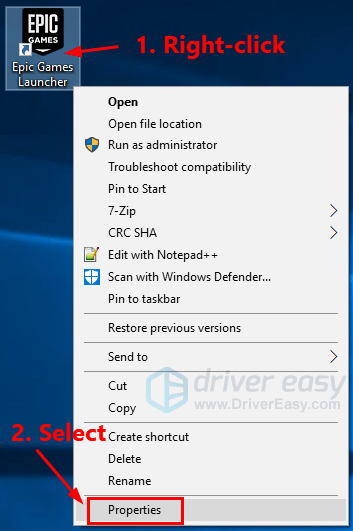
3) On your desktop, right-click the shortcut of Epic Games Launcher, then select Properties.
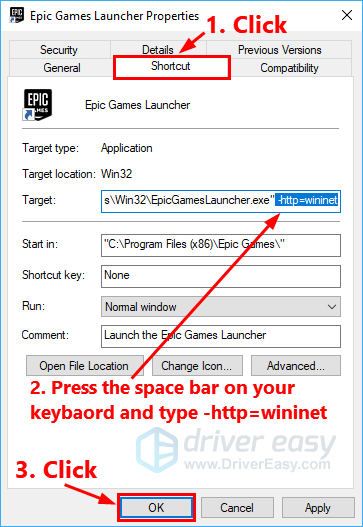
4) Click the Shortcut tab. In the text box next to Target, press the space bar and add -http=wininet to the end of its target. Click OK to save the change.
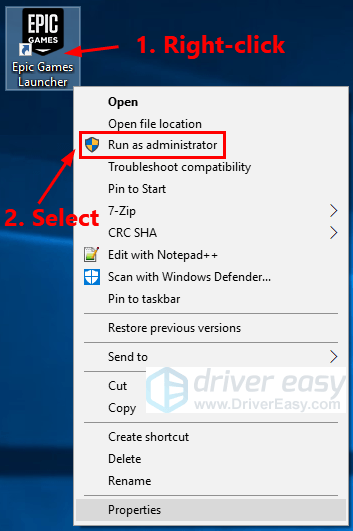
5) On your desktop, right-click the shortcut of Epic Games Launcher and click Run as administrator. You’ll be prompted for permission. Click Yes to run the Epic Games Launcher. See if you are able to connect to Fortnite.
6) If you are still unable to connect to Fortnite servers, you may need to verify Fortnite game files. Here is how to do it:
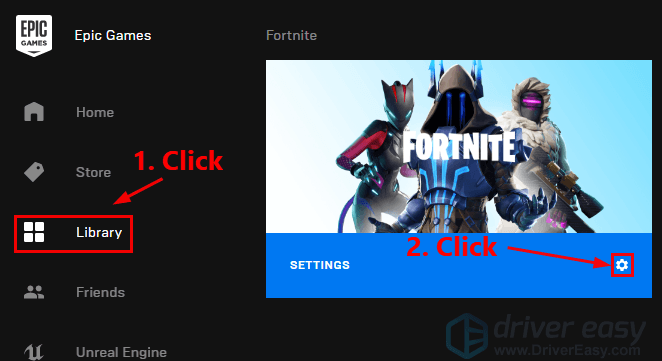
i. Launch the Epic Games Launcher. On the left, click Library. Then on the right, click the gear button in the lower-right corner of Fortnite.
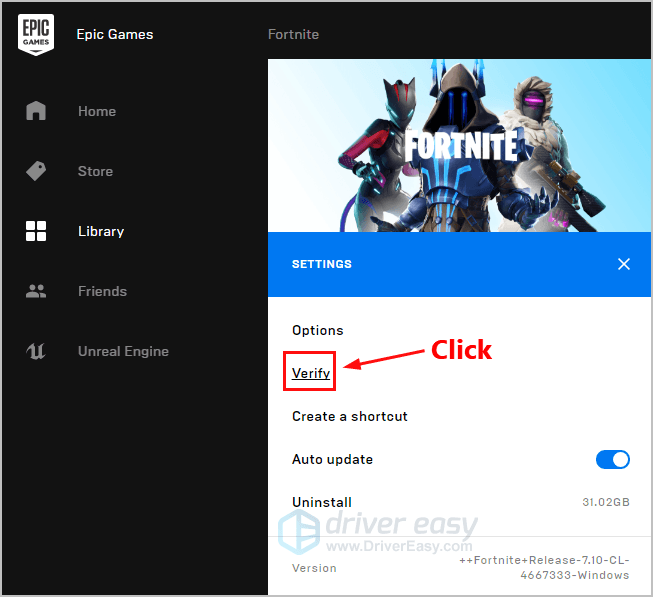
ii. Click Verify to verify Fortnite game files.
After verification, this issue should be fixed. If not, try the next fix, below.
Fix 2: Install the latest Fortnite patch
The developers of Fortnite release regular game patches to fix bugs. It’s possible that a recent patch has triggered this issue, and that a new patch is required to fix it. You can follow the instructions below to check for the latest Fortnite patch:
1) Run the Epic Games Launcher.
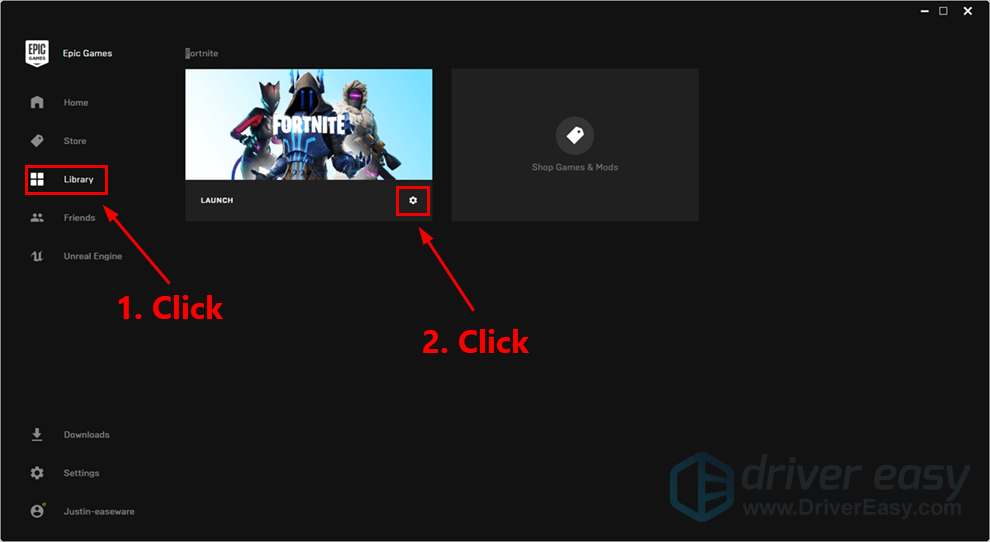
2) On the left panel, click Library. On the right, click the gear button on the lower-right corner of Fortnite.
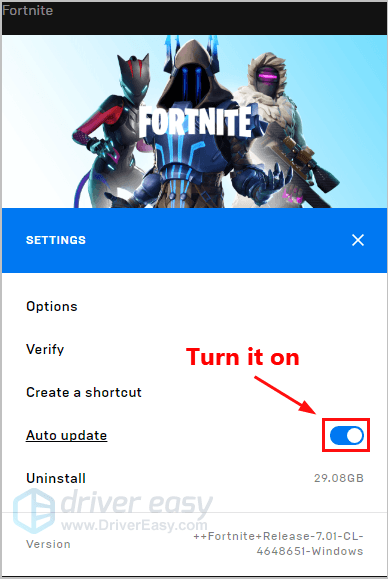
3) Turn on the toggle next to Auto update.
4) Restart the Epic Games Launcher.
5) If a patch is available, it will be detected by the Epic Games Launcher and the latest Fortnite patch will be automatically downloaded and installed when you launch Fortnite.
Run Fortnite again to check if you can connect to Fortnite servers or not. If it is not, or there was no new game patch available, move on to Fix 3, below.
Fix 3: Reboot your network
By rebooting your network, your Internet connection speed may be back to normal. So maybe it will also resolve this issue. Here is how to do it:
1) Unplug your modem (and your wireless router, if it’s a separate device) from power for 60 seconds.
2) Plug in your network devices again and wait until the indicator lights are back to their normal state.
3) Try launching Fortnite again.
See if you can connect to Fortnite servers. if not, try the next fix, below.
Fix 4: Update your network driver
If the network driver on your PC is missing or outdated, it may cause this issue. Try updating your network driver to see if this issue persists.
There are two ways to update your network driver: manually and automatically.
Manually update your network driver – You can update your network driver manually by going to the manufacturer’s website, and searching for the latest driver for your network adapter.
Or
Update your network driver automatically – If you don’t have the time, patience or computer skills to update your network driver manually, you can, instead, do it automatically with Driver Easy.
You don’t need to know exactly what system your computer is running, you don’t need to risk downloading and installing the wrong driver, and you don’t need to worry about making a mistake when installing. Driver Easy handles it all.
1) Download and install Driver Easy.
2) Run Driver Easy and click the Scan Now button. Driver Easy will then scan your computer and detect any problem drivers.
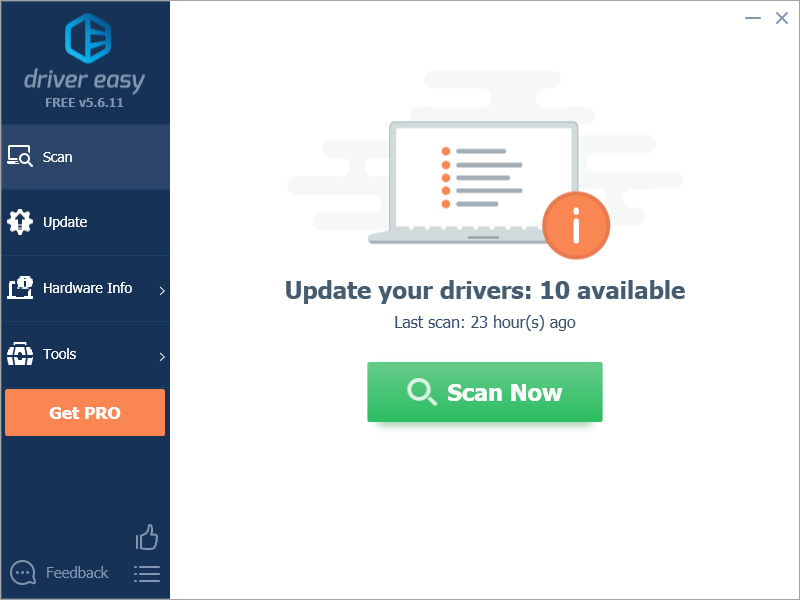
3) Click Update All to automatically download and install the correct version of all the drivers that are missing or out of date on your system.
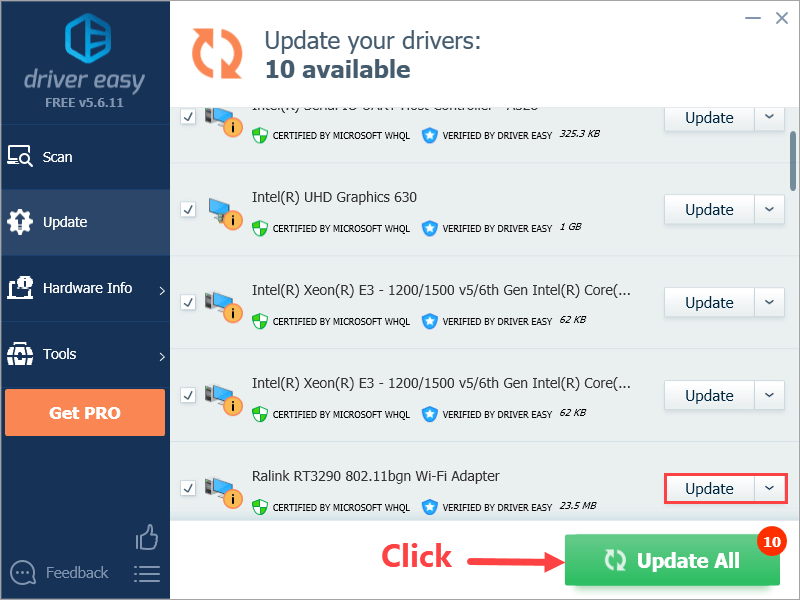
Alternatively, if you’re comfortable manually installing drivers, you can click ‘Update’ next to each flagged device in the free version to automatically download the correct driver. Once it’s downloaded, you can manually install it.
Fix 5: Test your Internet connection speed
If you still suffer from this issue after you reboot your network, you need to test your Internet connection speed first. Here is how to do it:
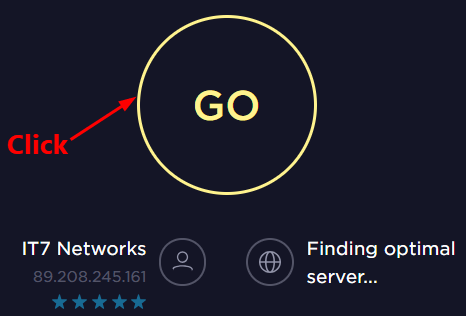
1) Click here to access the official website of SPEEDTEST.
2) Click GO to begin testing your connection speed.
If the speed test result is much slower than usual, you should turn to your Internet service provider (ISP) for further support. If the test result is normal, then try the next fix, below.
Fix 6: Reset Winsock data
Winsock is a programming interface and supporting program in the Windows operating system that defines how Windows network software should access network services. Resetting Winsock data may be helpful for dealing with some network connection issues. Here is how to do it:
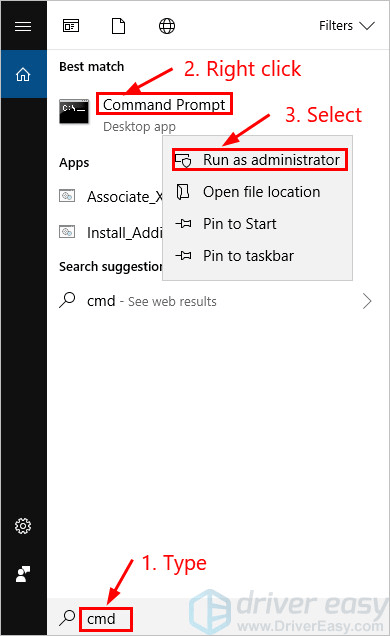
1) On your keyboard, press the Windows Logo Key and then type cmd in the search box. When you see Command Prompt in the list of results, right-click it and then select Run as administrator. You will be prompted for permission. Click Yes to run the Command Prompt.
2) In the Command Prompt, type netsh winsock reset and hit Enter.

3) Restart your PC to complete the reset.
Launch Fortnite after you restart your PC to see if you can connect to Fortnite servers. If not, try the next fix, below.
Fix 7: Flush your DNS and Renew your IP
This issue is also probably caused by DNS and IP issues. Try flushing your DNS and renewing your IP and maybe this issue will be resolved. Here is how to do it:
To flush your DNS:
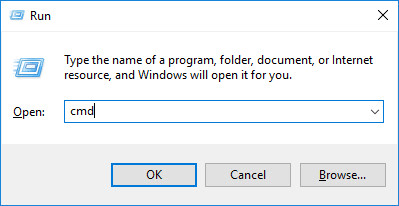
1) On your keyboard, press the Windows Logo Key and R at the same time to open the Run dialog. Type cmd and then press Ctrl, Shift and Enter on your keyboard at the same time to run the Command Prompt as administrator. You will be prompted for permission. Click Yes to run the Command Prompt.

2) Type the command line ipconfig /flushdns and press Enter on your keyboard.

To renew your IP:
1) On your keyboard, press the Windows Logo Key and R at the same time to open the Run dialog. Type cmd and then press Ctrl, Shift and Enter on your keyboard at the same time to run the Command Prompt as administrator. You will be prompted for permission. Click Yes to run the Command Prompt.
2) Type the command line ipconfig /release and press Enter on your keyboard.

3) Type the command line ipconfig /renew and press Enter on your keyboard.

4) Launch Fortnite.
See if you can connect to Fortnite servers. If this issue persists, try the next fix, below.
Fix 8: Avoid wireless interference
If you’re unable to connect to Fortnite servers when your PC connects to the Internet via your Wi-Fi network, this issue is also probably caused by wireless interference. Follow the instructions below to avoid wireless interference and improve your Wi-Fi signal:
1) Move your router to a new location. If your router is in the center of your home, you’ll get a better Wi-Fi signal.
2) Move wireless devices such as cordless phones or microwave ovens away from your router; or turn off those devices.
Launch Fortnite again to see if you can connect to its servers. If the issue reappears, try the next fix.
Fix 9: Disable the proxy server
If you’re using a proxy server, it may also cause a connection problem. Follow the instructions below to disable your proxy server to see if this issue reappears:
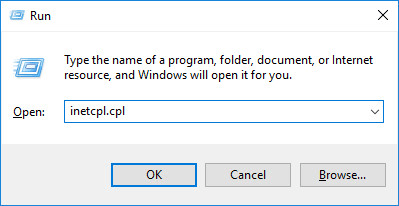
1) On your keyboard, press the Windows logo key and R at the same time to open the Run dialog. Type inetcpl.cpl and press Enter.
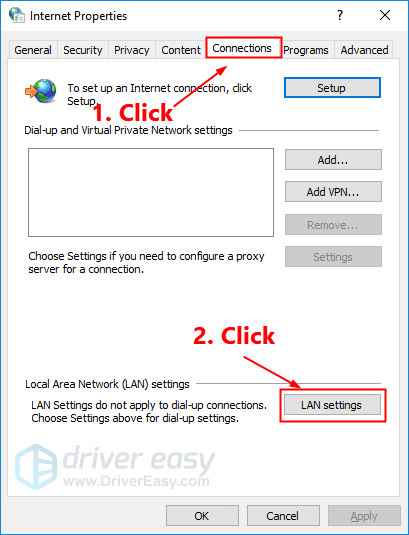
2) Navigate to the Connections tab. Select Never dial a connection if you see it (somewhere below Choose Settings if you need…). Then click on LAN settings.
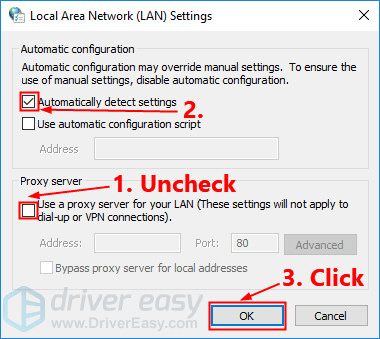
3) Uncheck the box next to Use a proxy server for your LAN. If it is already unchecked, check the box next to Automatically detect settings. Then click OK.
4) If you’re using a VPN or a third-party proxy server, disable it.
Launch Fortnite to see if you can connect to Fortnite servers. If not, try the next fix to change the DNS server.
Fix 10: Change the DNS server
Google Public DNS provides you with a speed boost and increased security. Try changing the DNS server in your PC to the Google Public DNS addresses to see if this issue can be resolved. Here is how to do it:
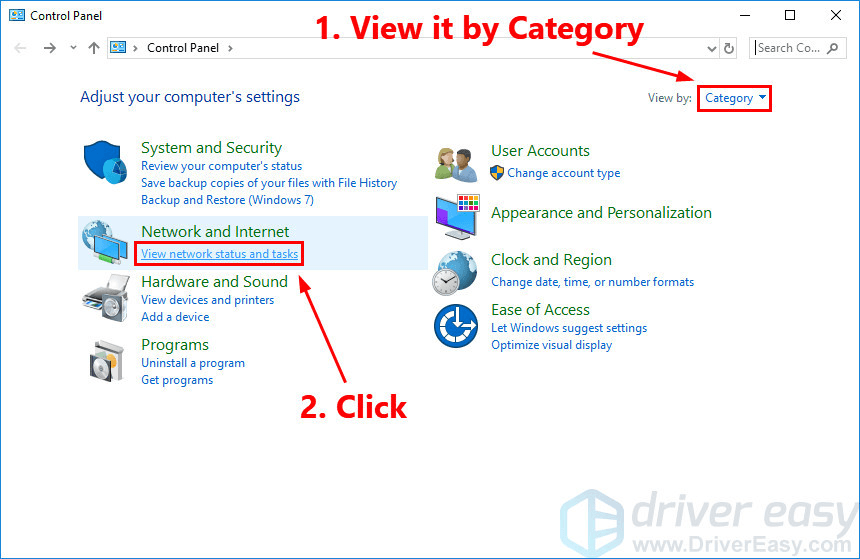
1) On your keyboard, press the Windows logo key and R at the same time to open the Run dialog. Then type control and press Enter to open the Control Panel.

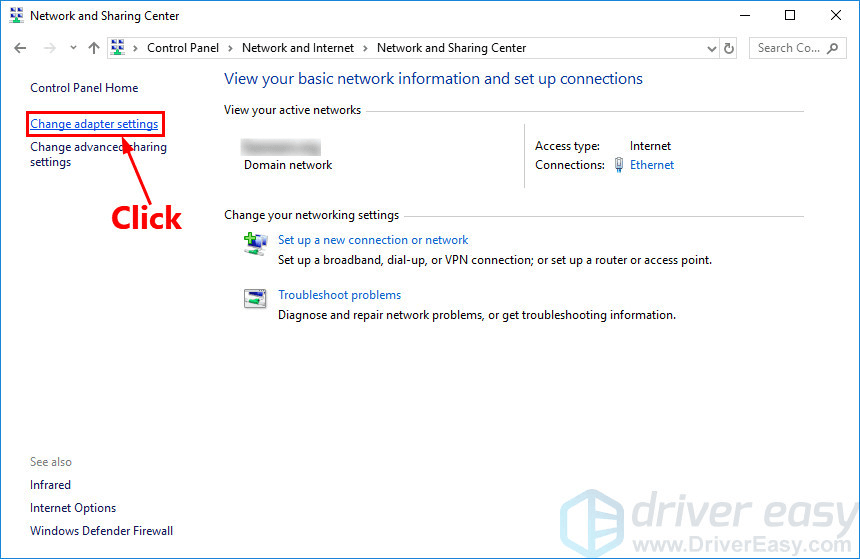
2) View the Control Panel by Category. Click View network status and tasks.
3) In the pop-up window, click Change adapter settings.
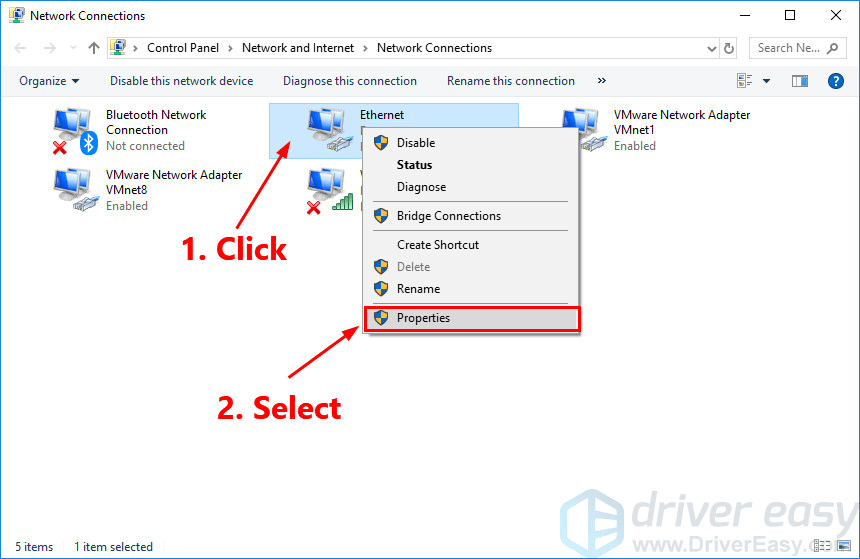
4) Right-click your current network and then select Properties.
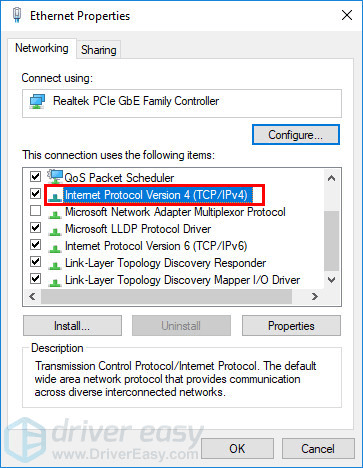
5) Double-click Internet Protocol Version 4 (TCP/IPv4) to view its properties.
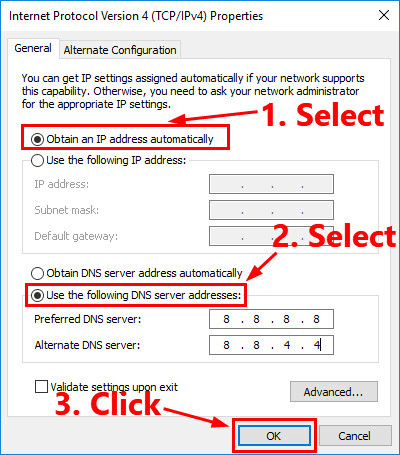
6) Select Obtain an IP address automatically and Use the following DNS server addresses. For the Preferred DNS server, enter the Google Public DNS address: 8.8.8.8; for the Alternative DNS server, enter the Google Public DNS address: 8.8.4.4. Then click OK to save the changes.
7) Restart your PC and launch Fortnite.
See if you can connect to Fortnite servers. If not, try the next fix.
Fix 11: Close bandwidth-hogging applications
If you’re running other applications like OneDrive, Dropbox and iCloud that require an Internet connection to download and upload files, or if your family members are watching TV shows at the same time, you be unable to connect to Fortnite servers because of those bandwidth-hogging applications.
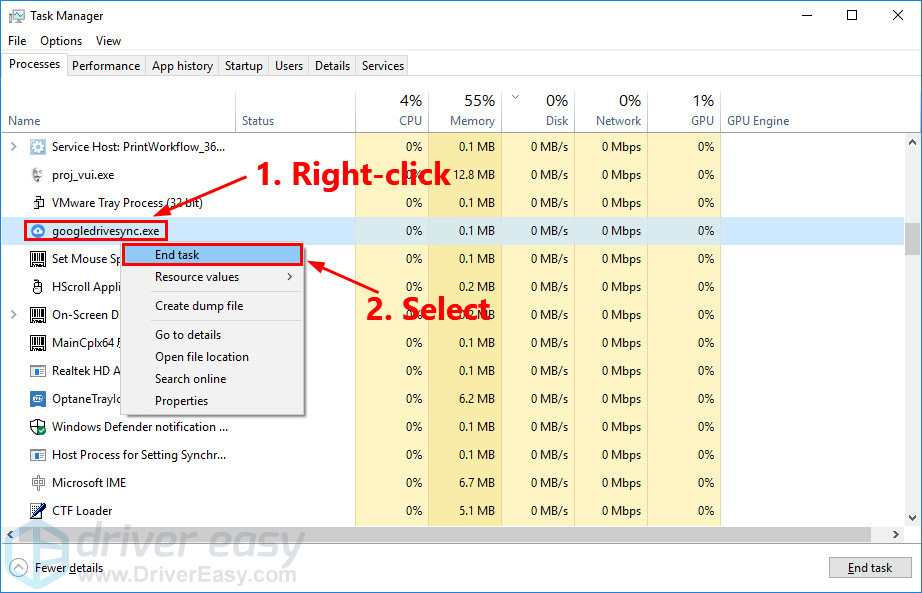
To resolve this issue, you need to close those bandwidth-hogging applications. Here is how to do it:
1) On your keyboard, press Ctrl, Shift and Esc at the same time to open the Task Manager.
2) Right-click the bandwidth-hogging applications and then select End task.
Launch Fortnite to see if you can connect to Fortnite servers or not.
Hopefully one of the fixes above resolved this issue for you. Please leave your comment below if you have any questions or suggestions.
DRIVEREASY to support us so that we can continue to create more high-quality content. In connection with Epic Games’ Support-A-Creator Program, we may receive a commission from certain in-game purchases.