


Have you ever found yourself in a frustrating situation where your camera is not working on your computer? You may instinctively try reinstalling the camera driver, only to find the camera is missing from Device Manager entirely. If so, don’t worry – you’re not alone. In this post, I’ll walk you through some effective fixes to get your camera back in Device Manager in no time. Let’s dig in and fix that missing camera problem for good.
Where is your webcam in Device Manager?
If you can’t find your webcam in Device Manager, you can check the following categories to see if it’s listed elsewhere:
- Cameras
- Imaging devices
- USB devices/ USB device hub
Have you found your camera in these device groups? If not, you can try the workarounds below to fix this issue.
Try these fixes
- Allow your device to access your camera
- Scan for hardware changes
- Update your device drivers
- Add a legacy camera driver
- Run the hardware troubleshooter
- Repair your system files
Fix 1. Allow your device to access your camera
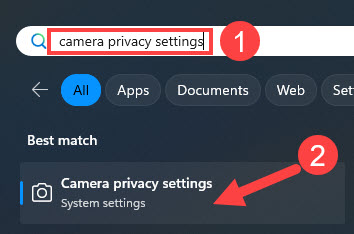
- On your keyboard, press the Windows logo key and type camera privacy settings.
- Select Camera privacy settings.
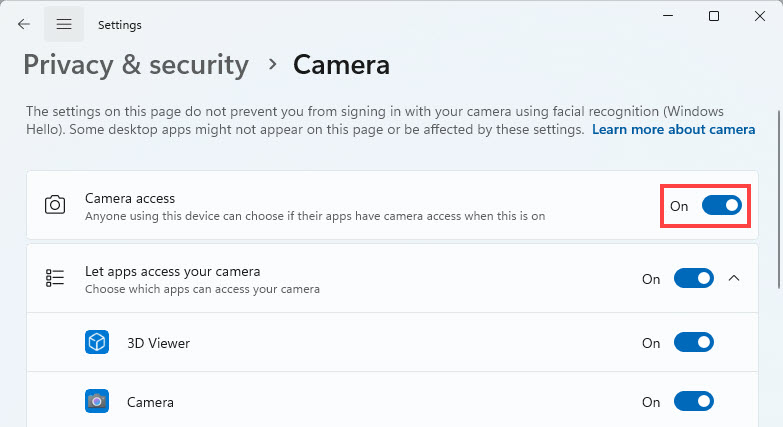
- Make sure the option Camera access is turned on. If you don’t see it’s on, you can click the Change button to turn it on. Then you may want to go back to Device Manager, and check if the camera is there.
- But if the camera is turned on but you still can’t find the camera in Device Manager, you can skip to the next fix below to solve your problem.
Fix 2. Scan for hardware changes
It’s possible that your computer already has the driver installed but the Windows system fails to detect the driver. Therefore, you can scan for hardware changes in Device Manager:
- Open Device Manager.
- Select Cameras (or Imaging devices/ USB devices) and click Action > Scan for hardware changes.
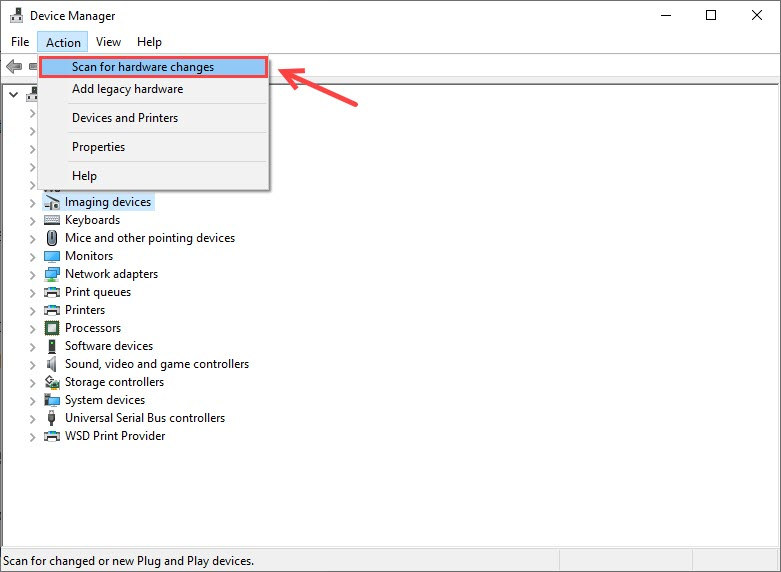
- If your webcam shows up, this means the driver has been successfully detected. Restart your computer for the changes to take full effect.
If scanning for hardware changes didn’t do the trick for you, you can try the next fix below.
Fix 3. Update your device drivers
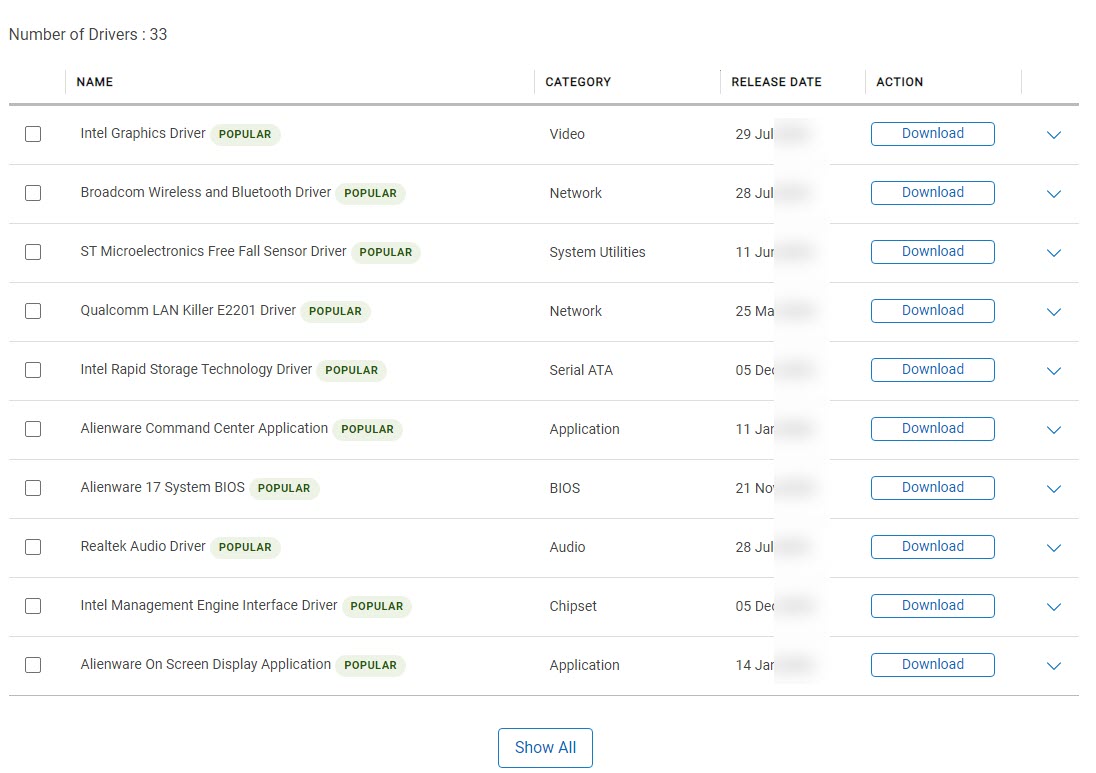
The first thing is to make sure all your device drivers are up to date. Since you can’t update the driver right from the Device Manager (learn why you can’t rely on Windows…), you’ll need to visit the manufacturer’s website and install the latest webcam drivers (along with other device drivers).
Option 1 – Manually
Let’s take Dell computers for an example:
- Go to the Dell Support page. Then enter your product model to get all the related drivers in Drivers & Downloads.

- Download the driver you need and follow the onscreen instructions to complete the installation.
Driver downloads center for other brands: Asus | HP | Lenovo | Acer
Option 2 – Automatically (Recommended)
If you don’t have the time, patience, or computer skills to update the drivers manually, you can do it automatically with Driver Easy.
Driver Easy will automatically recognize your system and find the correct drivers for it. You don’t need to know exactly what system your computer is running, you don’t need to be troubled by the wrong driver you would be downloading, and you don’t need to worry about making a mistake when installing. Driver Easy handles it all.
You can update your drivers automatically with either the 7 days free trial or the Pro version of Driver Easy. It takes just 2 clicks, and you get full support and a 30-day money-back guarantee with the Pro version:
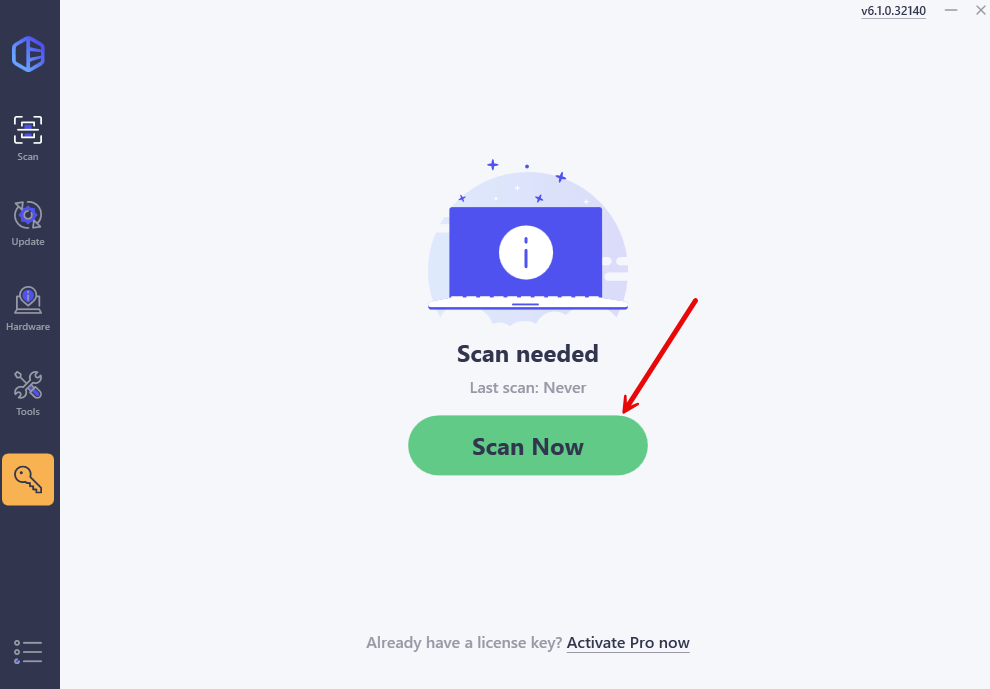
- Download and install Driver Easy.
- Run Driver Easy and click the Scan Now button. Driver Easy will then scan your computer and detect any problem drivers.
- Click the Activate & Update button next to the flagged device to automatically download and install the correct version of this driver.
Or click Update All to automatically download and install the correct version of all the drivers that are missing or out of date on your system (You’ll need the Pro version for this – when you select Update All, you’ll get a prompt to upgrade. If you’re not prepared to purchase the Pro version yet, Driver Easy provides a 7-day trial at no cost, granting access to all Pro features like fast downloads and easy installation. No charges will occur until after your 7-day trial period ends.)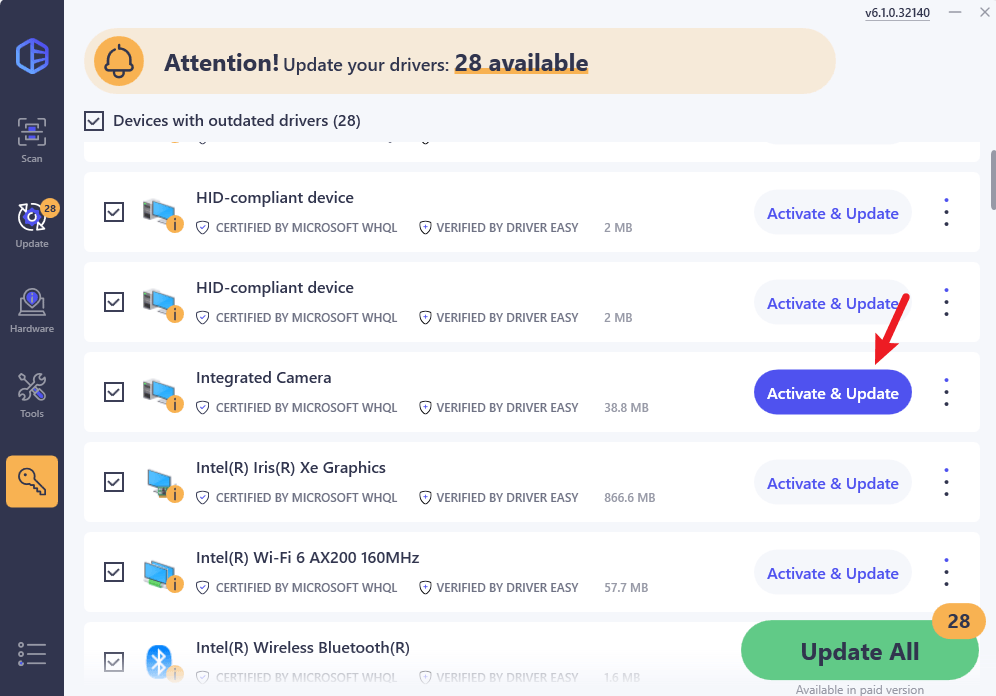
- Restart your computer for the change to take effect.
If you need assistance, please contact Driver Easy’s support team at support@drivereasy.com.
Fix 4. Add a legacy camera driver
If all drivers are up to date but the camera is still missing in Device Manager, you can try adding a camera manually:
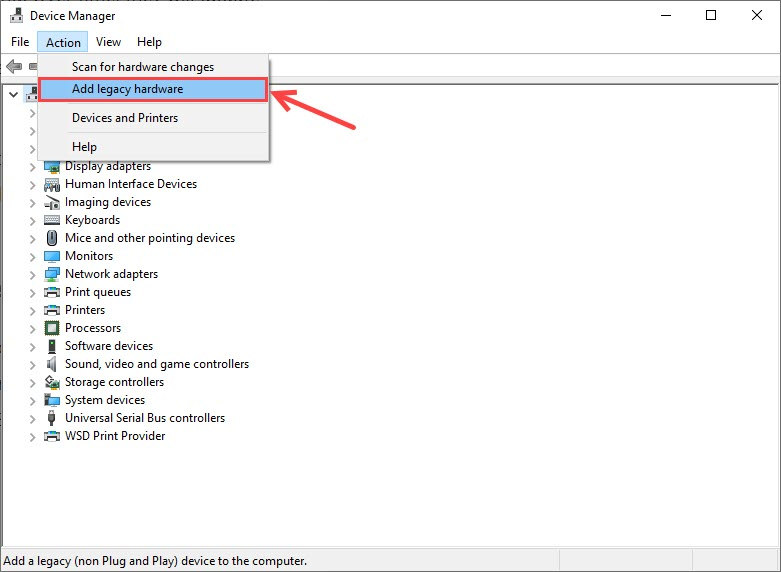
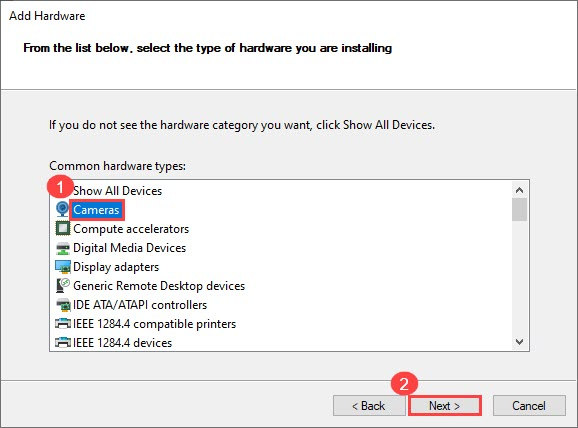
- Open Device Manager.
- Click Action > Add legacy hardware.
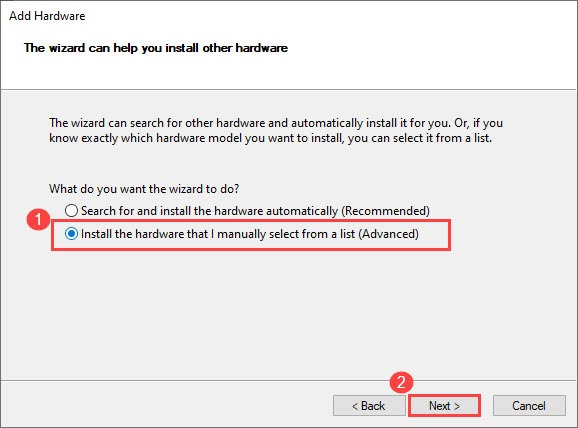
- Click Next when the Welcome to the Add Hardware Wizard window shows up.
- Select Install the hardware that I manually select from a list (Advanced). Then click Next.
- Choose Cameras and click Next.
- If a webcam driver is listed here, you can select the device and click Next. (You can select Have Disk if you have downloaded a driver for your webcam.)
- If there’s no device selected, you can go back to the last window, and select Imaging devices > Next.
- Select a device from the list and click Next.
Once you have successfully added a device, you can restart your computer for this to take effect.
Fix 5. Run the hardware troubleshooter
The Windows diagnostics tool can sometimes help with your hardware issues. To run this troubleshooter, please do the following:
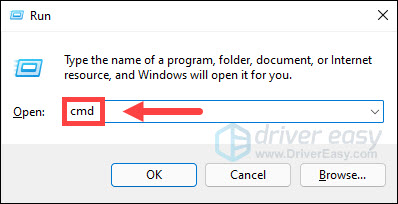
- On your keyboard, press the Windows logo key and R at the same time to open the Run box. Type cmd and press Enter to run the Command Prompt.
- Type and copy this command
msdt.exe -id DeviceDiagnosticand press Enter.
- Once the troubleshooter displays, you can click Next to run this tool.

- Click Apply this fix when the troubleshooter finds a fix for you.
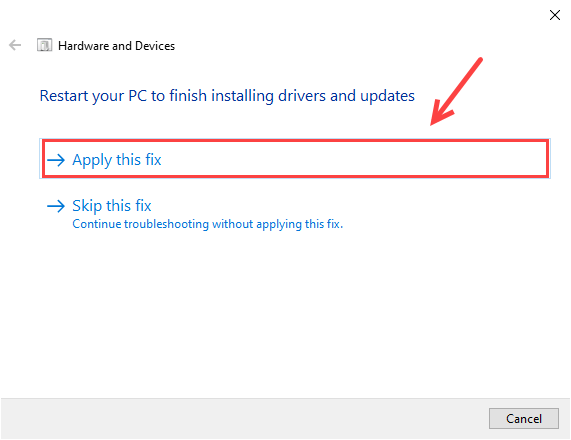
- You may need to restart your PC for the changes to take full effect.
Did the Hardware and Devices Troubleshooter solve the problem? If the camera is still missing in Device Manager, don’t worry. We have a few more fixes below.
Fix 6. Run the System File Checker
In case some system files related to your camera get corrupted, you can try scanning and restoring the corrupted system files using Windows built-in tools.
Step 1. Scan corrupt files with System File Checker
1) On your keyboard, press the Windows logo key and R at the same time to open the Run box. Type cmd and press Ctrl+Shift+Enter to run Command Prompt as administrator.
Click Yes when prompted for permission to make changes to your device.
2) In the Command Prompt, type the following command and hit Enter.
sfc /scannow
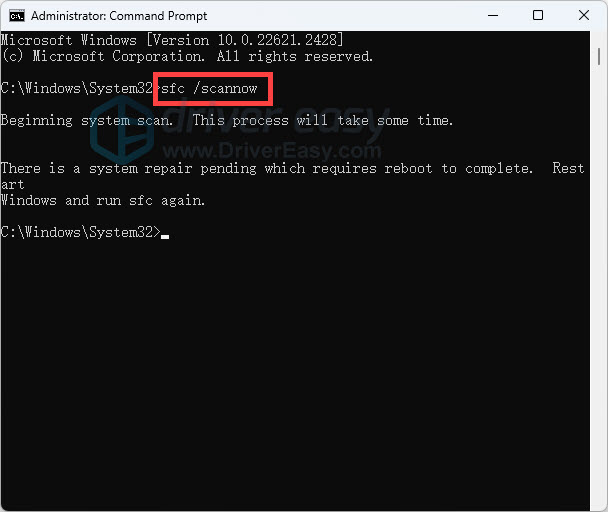
3) System File Check will begin to scan all system files and repair any corrupted or missing ones it detected. This may take 3-5 minutes.
4) You may receive something like the following messages after the verification.
- no errors
- it fixed some errors
- could not fix all errors
- could not fix errors at all
- ……
No matter what message you receive, you can try running dism.exe (Deployment Image Servicing and Management) to further scan the health of your PC.
Step 2. Run dism.exe
1) Run Command Prompt as admin and enter the following commands.
- This command line will scan the health of your PC:
dism.exe /online /cleanup-image /scanhealth
- This command line will restore the health of your PC:
dism.exe /online /cleanup-image /restorehealth
2) After the restore health process finishes, you may get some error messages.
- If restore heath gave you errors, you can always try this command line. This will take up to 2 hours.
dism /online /cleanup-image /startcomponentcleanup
- If you get Error: 0x800F081F with the restore health scan, reboot your PC and run this command line.
Dism.exe /Online /Cleanup-Image /AnalyzeComponentStore
If the System File Check finds any files corrupted, follow the on-screen instructions to repair them, and then restart your computer for the changes to take full effect.
Did the fixes above fix your camera missing in the Device Manager issue? If not, you can either contact Driver Easy (for Pro users) to have professional technicians solve the problem for you, or you can try resetting this PC to see if this works for you. But resetting your PC will erase all your installed programs and their settings. To keep all the data and applications, please create a backup before doing so.