


Communication is key in Counter-Strike 2, allowing you to provide valuable callouts and coordinate with your team. However, you may sometimes run into the frustrating issue of your microphone not working properly in-game. In this comprehensive guide, we will explore the various causes of the CS2 mic not working problem and the steps you can take to resolve it.
Understanding the problem
Before jumping into solutions, let’s first understand why your microphone may stop working in CS2. Here are some of the common reasons:
- Faulty hardware: Damaged cables, loose connections, and mic malfunctions can prevent proper audio input.
- Microphone permissions: Your system may block apps from accessing your mic. You may need to grant CS2 access.
- Incorrect mic settings: The mic you want to use may not be set as the default input device in your operating system or in the CS2 voice settings. Your mic’s input volume could also be muted or set too low.
- Outdated audio drivers: If your audio drivers are outdated or incompatible, they can cause mic issues. Keeping them updated is essential.
- Conflicts with other apps: Too many apps running in the background can interfere with your mic input in CS2.
How to fix CS2 mic not working
Here are detailed troubleshooting steps to resolve your CS2 microphone problem. You may not need to try them all; simply work your way down the list until you find the one that works for you.
- Check if it’s a hardware issue
- Make sure your mic is set as the default input device
- Make sure apps have access to the microphone
- Close unused background processes
- Download and install Windows updates
- Update audio drivers
- Restore the system from restore point
- Verify integrity of game files
- Repair system files
1. Check if it’s a hardware issue
To isolate the problem, you should check if your microphone or headset is broken.
- Test your mic on another PC.
If it works, it indicates an issue with your current PC.
If it doesn’t work on another PC, chances are it’s malfunctioning. Reach out to customer support for repair if it’s under warranty. Or you may need to purchase a new one. - Check mic cable connections to the PC to ensure no loose plugs.
If you’re sure that your microphone is functioning well but your teammates still cannot hear you, you’ll need to tweak some settings.
2. Make sure your mic is set as the default input device
Sometimes, your microphone may not be set as the default input device, both on your operating system’s sound settings and in-game settings.
Follow the steps below to check it.
Windows sound settings
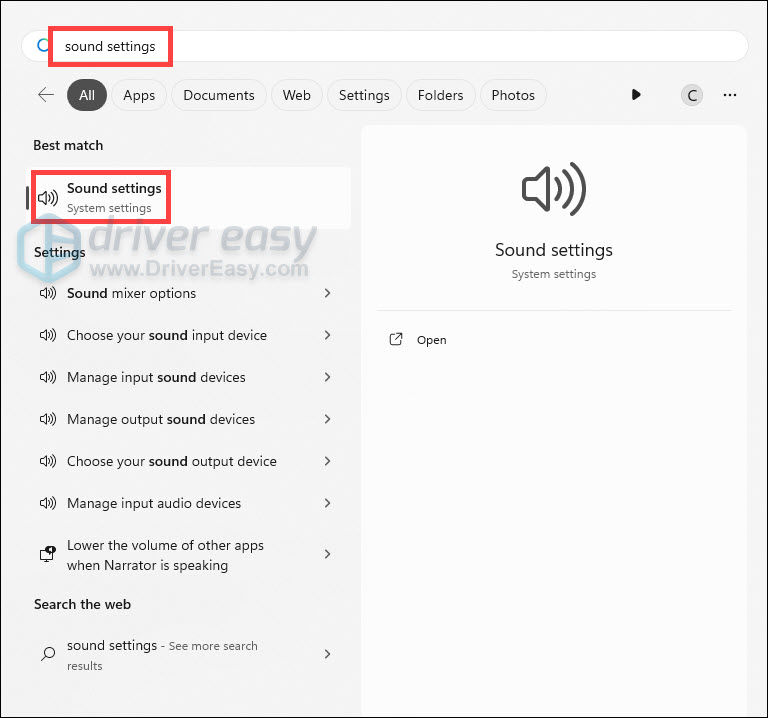
- Press the Windows logo key, then type Sound settings. Click it from the list of results.
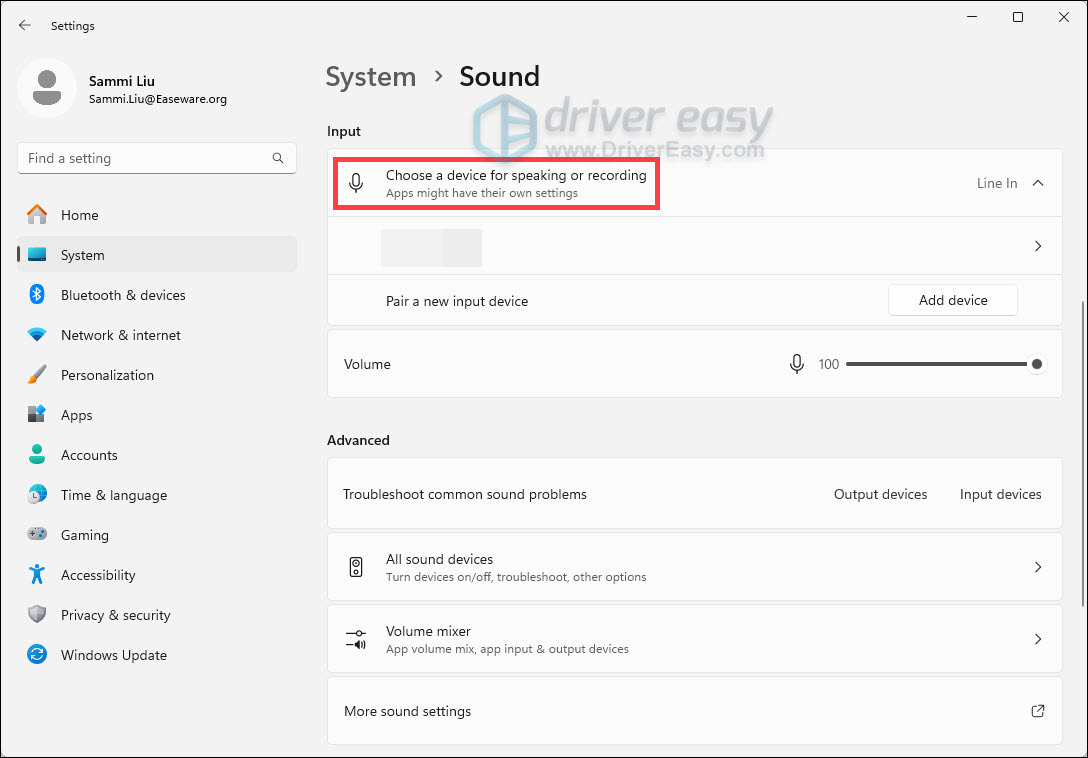
- In the section of Choose a device for speaking or recording, select the correct microphone device.
- Scroll to the bottom, and click More sound settings.

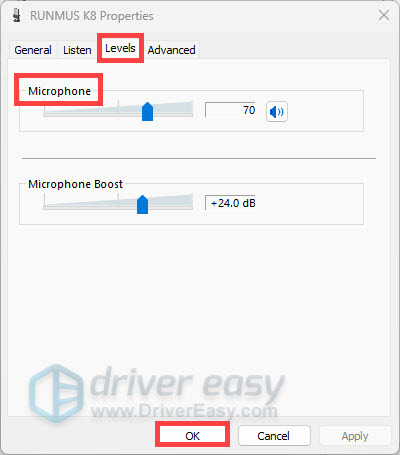
- Select the Recording tab, then select your microphone device and click Properties.
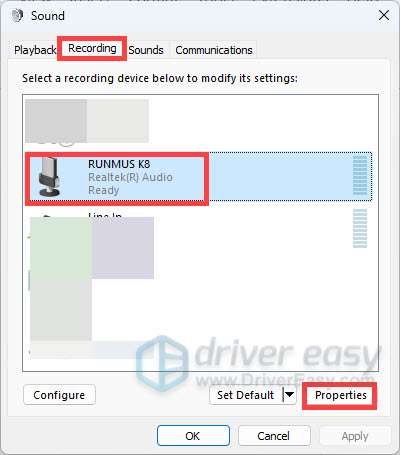
- Select the Levels tab, use the slider bar to adjust the volume level, and make sure that it’s not set to the mute mode. Then click OK to save the changes.
In-game voice settings
- On Steam, locate your game title and click PLAY.

- Now press the Shift + Tab keys simultaneously. Then click the gear icon in the bottom right corner of your screen. Select Voice from the left panel. Find Voice Input Device and make sure that your headset or microphone is selected, instead of making it set as default.

Scroll a bit and find Voice Transmission Threshold. Select Off.
After making these changes, test your microphone. If your problem persists, no worries! Below are some other fixes for you to try.
3. Make sure apps have access to the microphone
Sometimes, you may have prevented certain apps from accessing your microphone. To make sure that’s not happening to you, you should check this by following the steps below.
- On your keyboard, press the Windows logo + I keys simultaneously to open Settings.
- Select Privacy & security from the left panel. Then scroll down to the section App permissions, click on Microphone.

- Toggle on Microphone access and Let apps access your microphone.
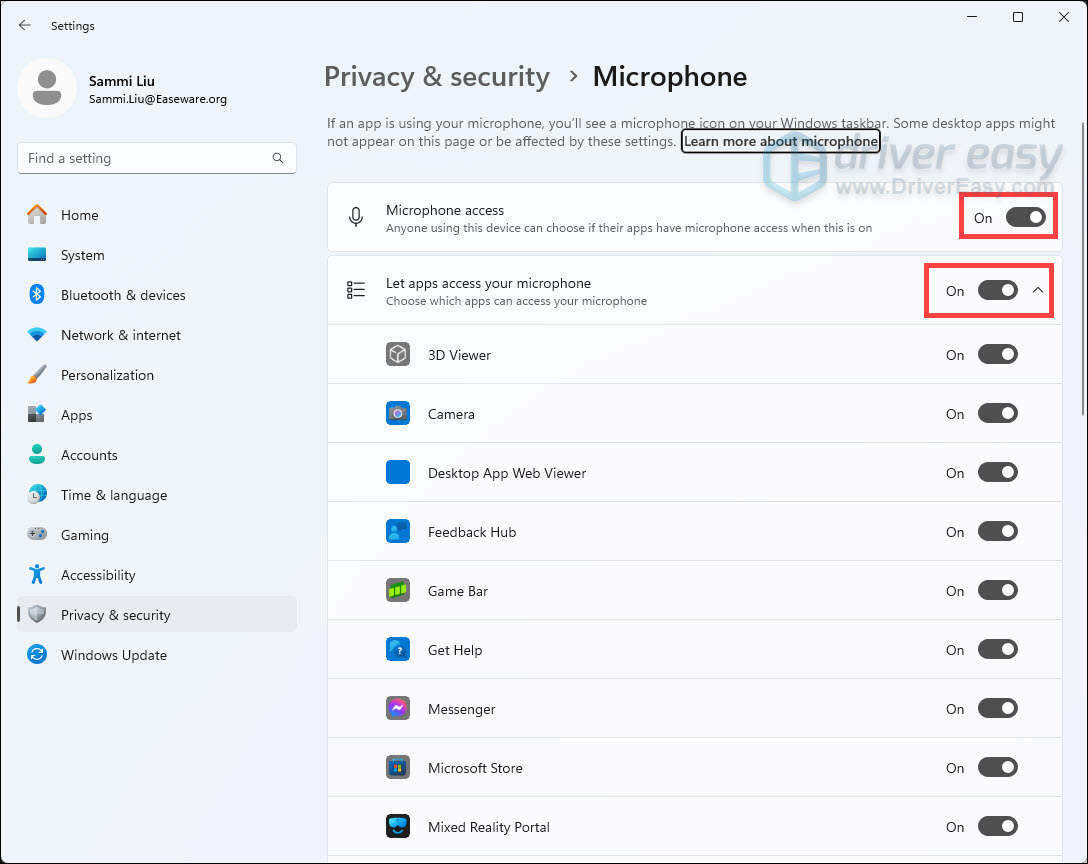
Also, make sure that you toggle on Let desktop apps access your microphone.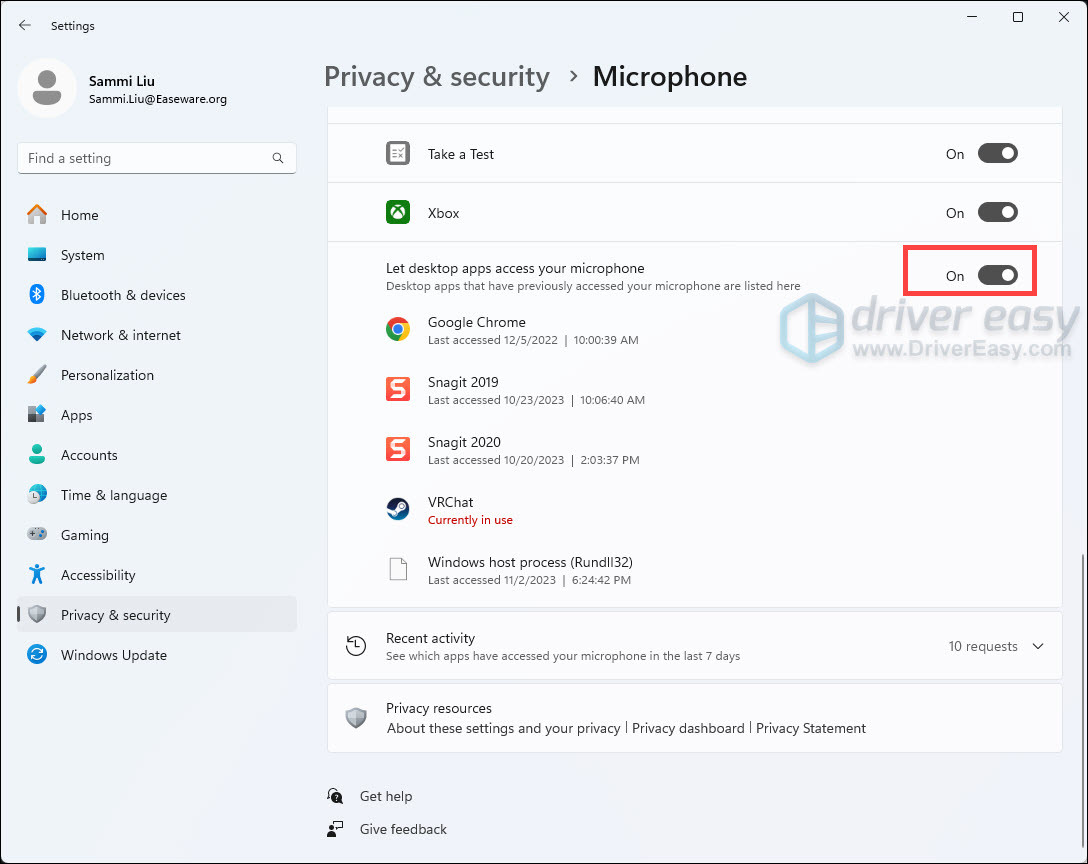
If you confirm that both Steam and your game have access to your microphone but your issue still occurs, try the next fix below.
4. Close unused background processes
Too many programs accessing the mic can step on each other’s toes. To reduce conflicts, try to shut down background apps that can access the mic like Discord, Skype, VR clients, etc. Fewer apps accessing the mic reduces interference.
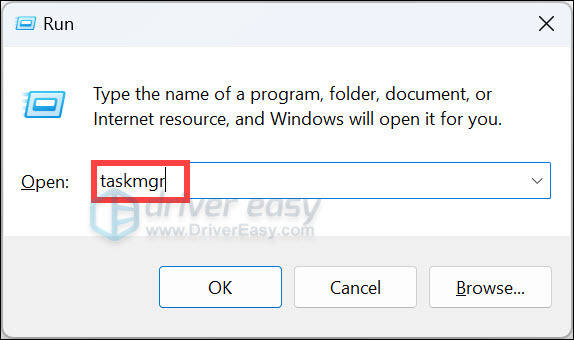
- On your keyboard, press the Windows logo + R keys simultaneously to open the Run box.
- Type taskmgr and hit Ener to open the Task Manager.
- Right-click the process that you don’t need to run while playing CS2 and select End task.
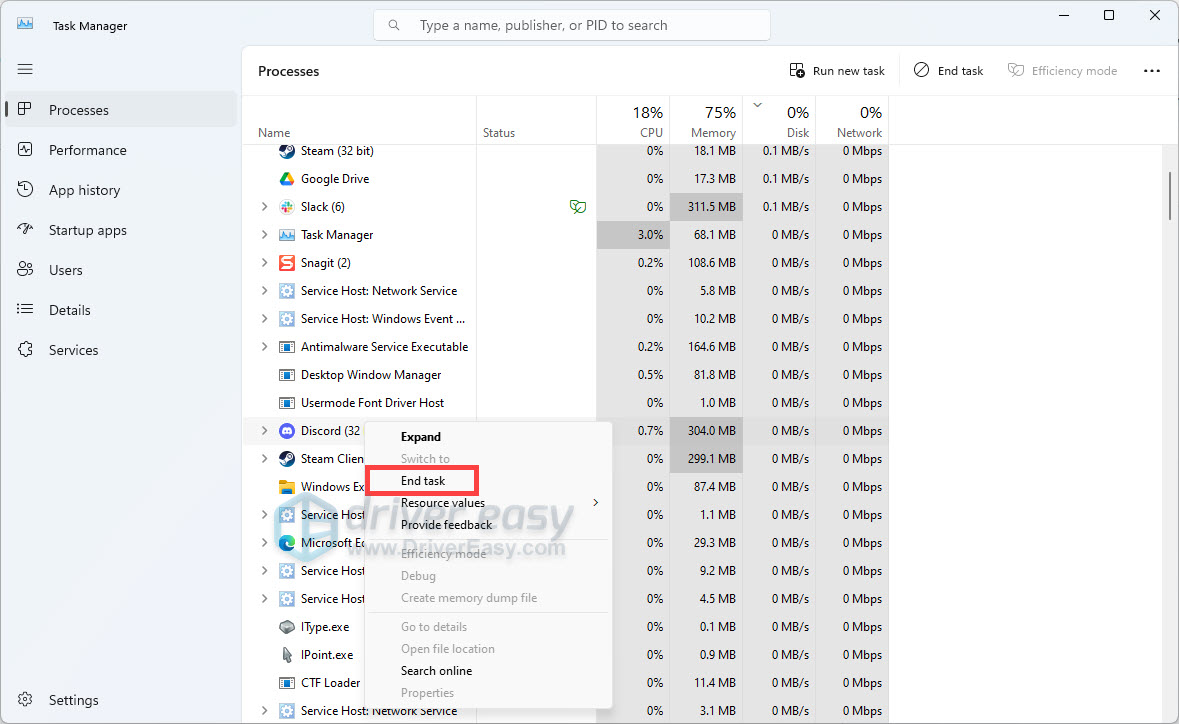
Close the window after you’re done and relaunch CS2 to check if your problem is solved.
5. Download and install Windows updates
Windows updates often come with bug fixes and optimizations specifically for audio components like microphones and sound cards. To resolve voice chat problems, keep your Windows fully updated.
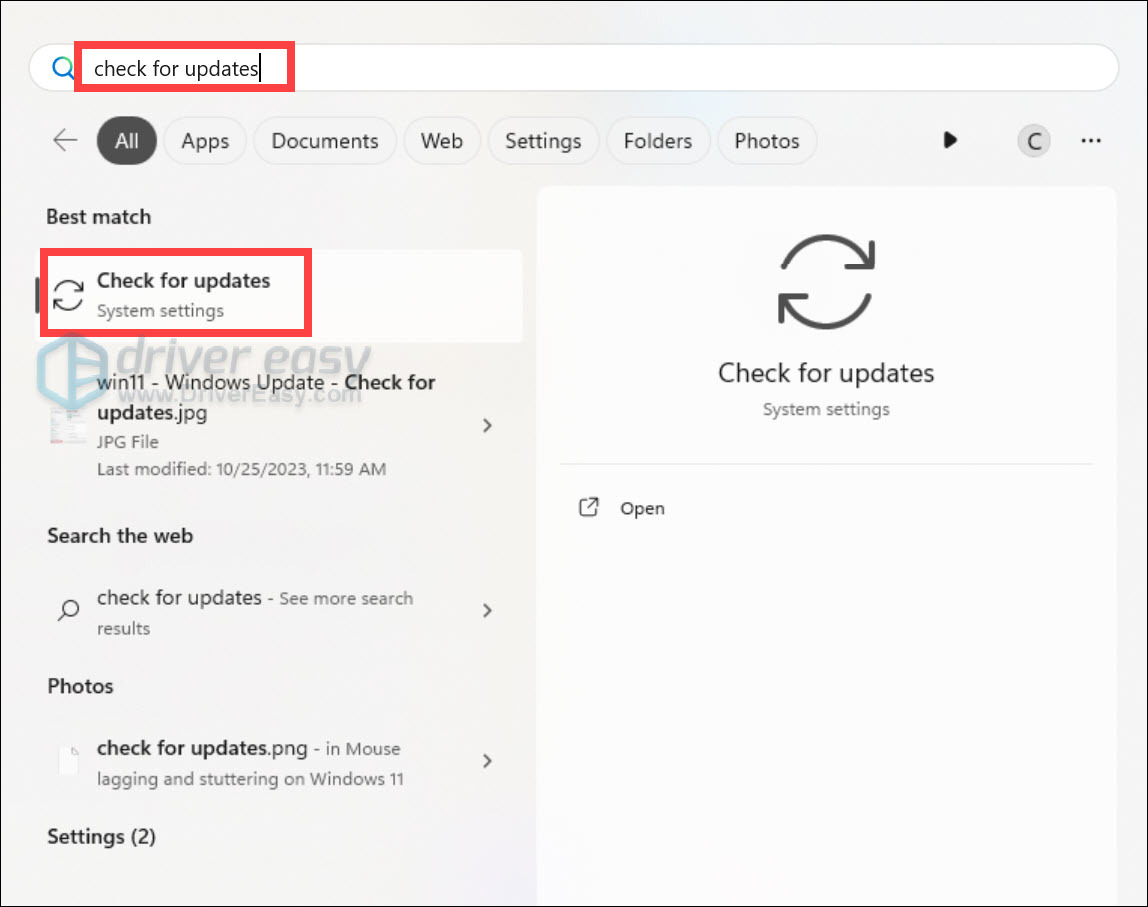
- On your keyboard, press the Windows logo key, then type check for updates. Open the settings Check for updates from the list of results.
- When the updates are available, simply click on the button Download & install.
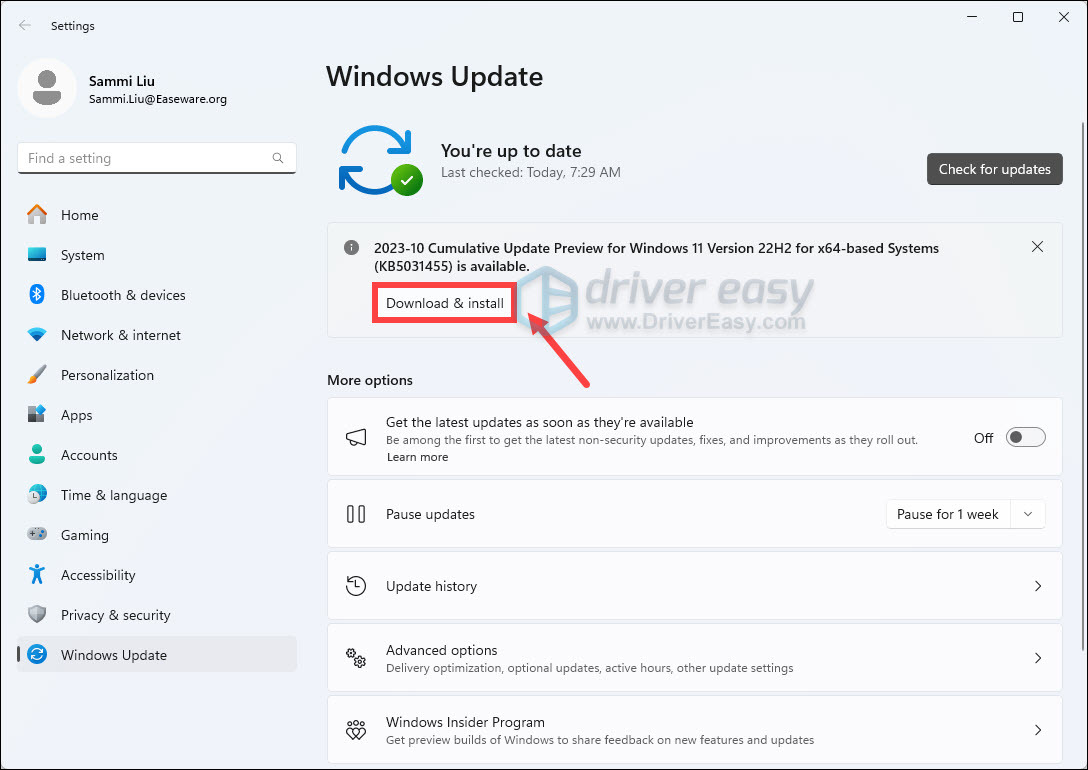
Or click on the Check for updates button and follow the on-screen instructions to download the latest updates for your system. You’ll be asked to restart your PC.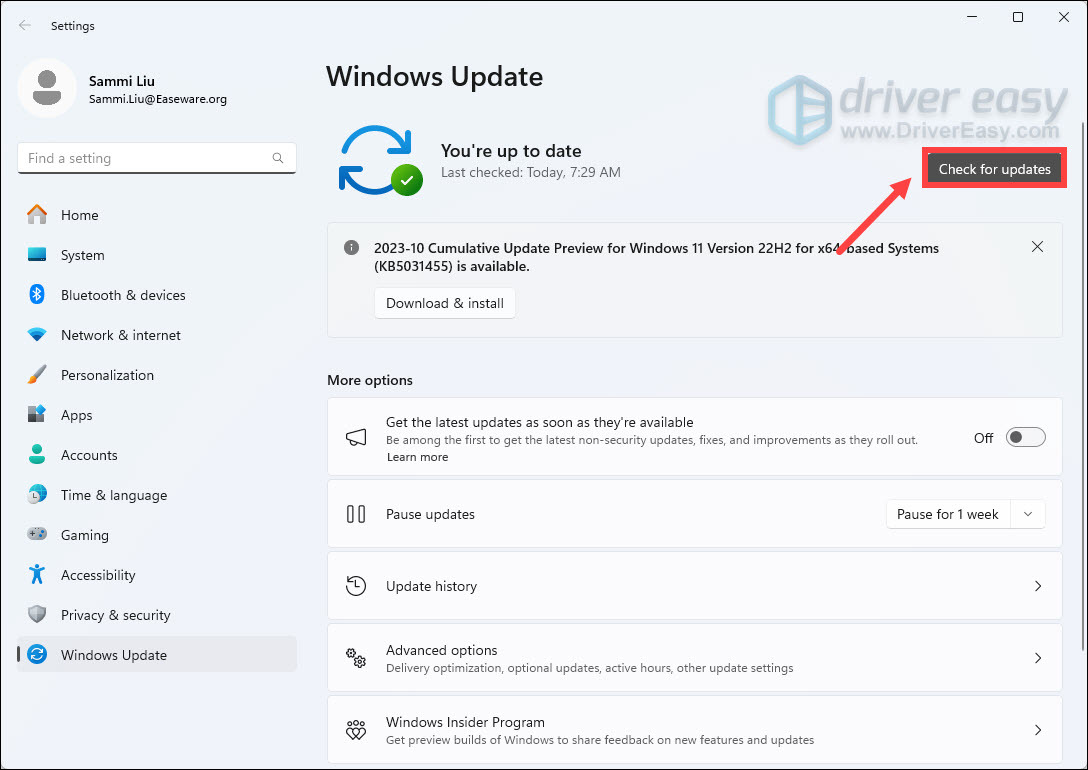
After the reboot, test your microphone and see if your teammates can hear you. If your problem persists, go to the next fix.
6. Update audio drivers
Keeping your audio drivers up-to-date is one effective way to fix microphone problems in CS2. Updating your drivers provides important bug fixes, optimizations, and improvements specifically tailored to your microphone or sound card model by the manufacturer. This can greatly improve the stability and performance of your hardware.
To update your audio driver, check the manufacturer of your sound device and visit their website for driver updates.
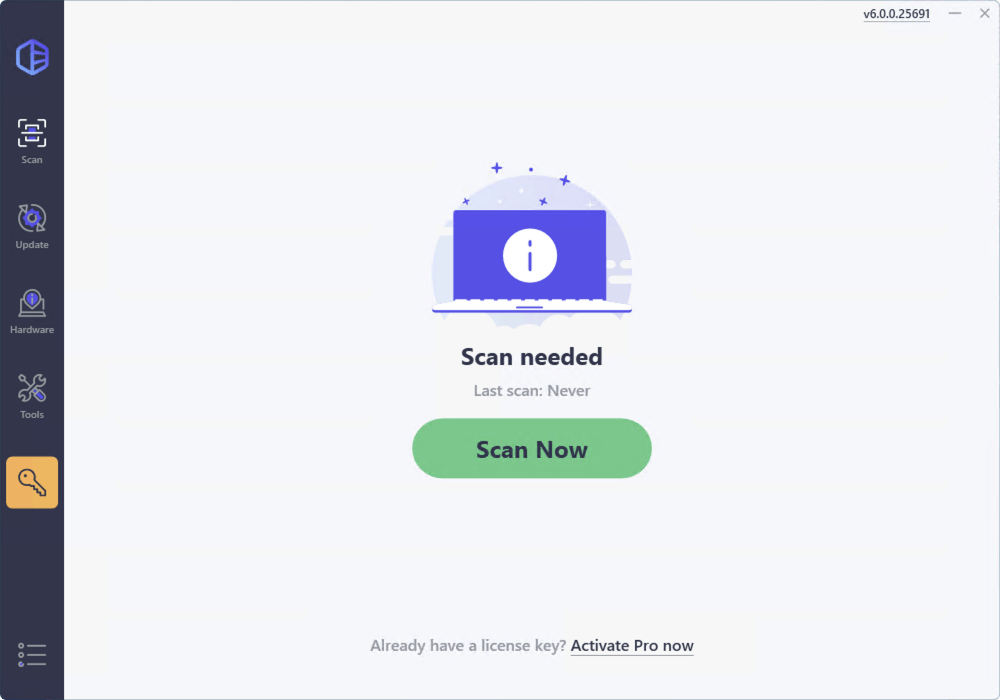
If you don’t have the time or patience to update drivers on your own, you can, instead, do it automatically with Driver Easy. Driver Easy will automatically recognize your system and find the correct drivers for your exact graphics card, and your Windows version, and it will download and install them correctly:
- Download and install Driver Easy.
- Just click Scan Now, and Driver Easy will scan your computer and detect any devices with missing or outdated drivers.
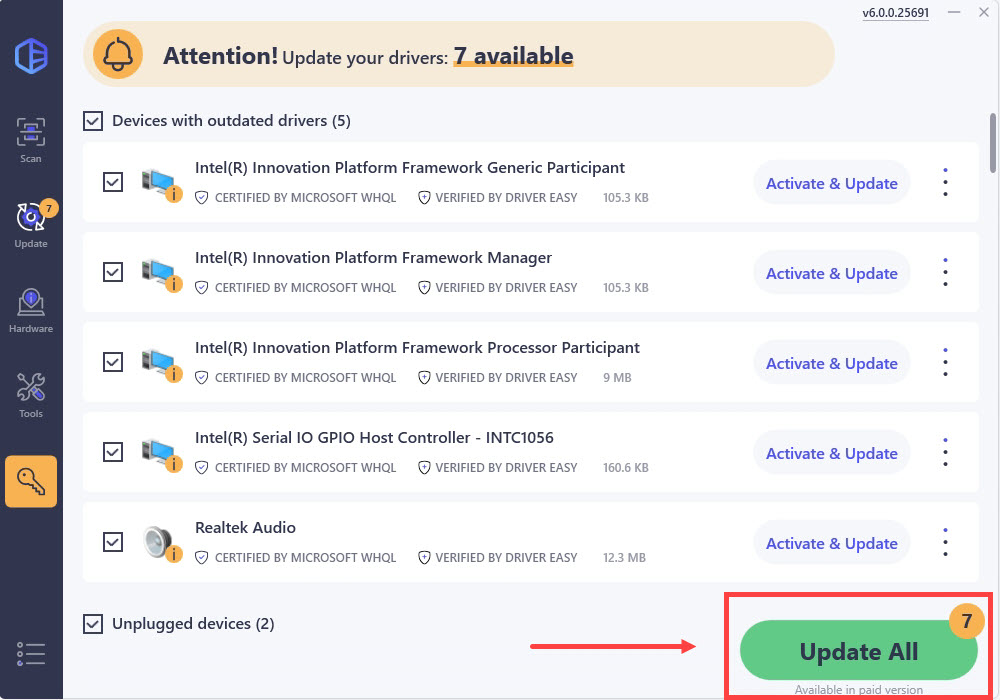
- Click the Activate & Update button next to any flagged device or click Update All to update all the outdated drivers. You can sign up for the free trial to update drivers with no upfront cost.
After downloading and installing driver updates, reboot your device.
If you’re still having the mic not working problem, try the next fix below.
7. Restore the system from restore point
If you have ever created a restore point, try to restore your computer to a point before this problem arose.
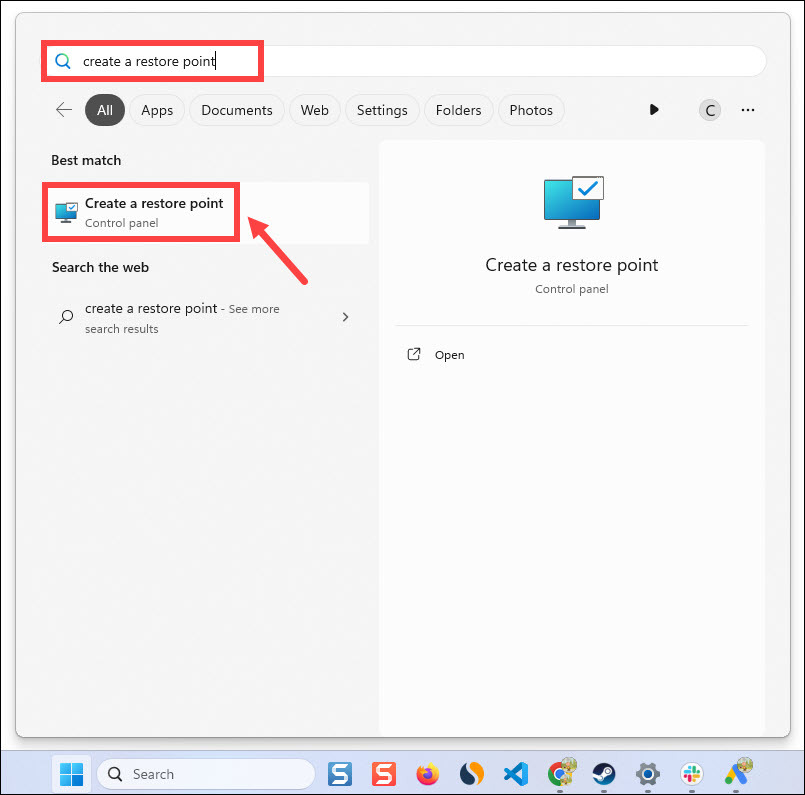
- On your keyboard, press the Windows logo key, then type create a restore point. Click Create a restore point from the list of results.
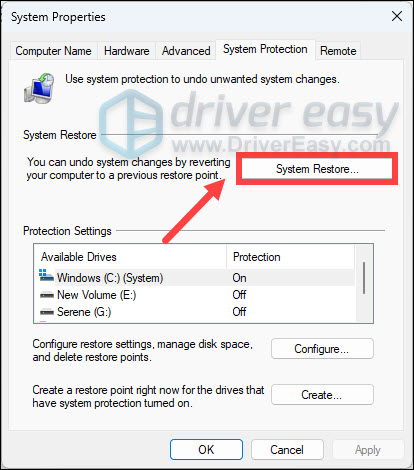
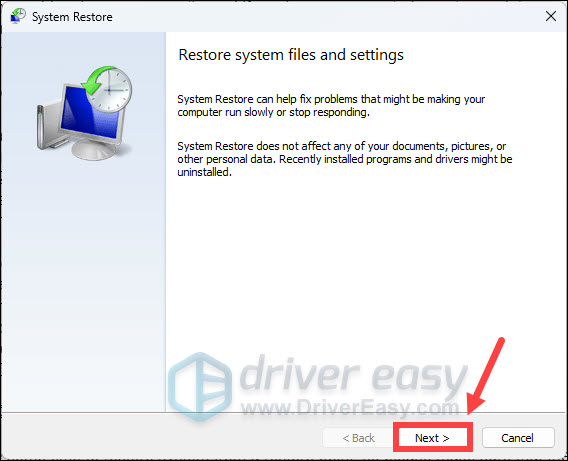
- Click System Restore.
- Click Next.
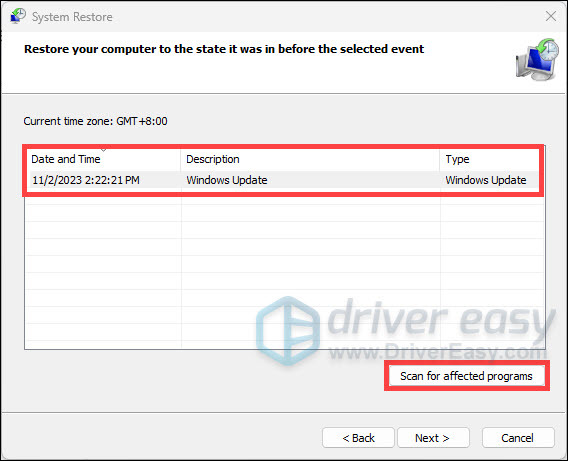
- Select the restore point that you want to use from the list of results, then click Scan for affected programs.
- You will see a list of items that will be deleted if you restore to this restore point. If you’re OK with the deletions, select Close to proceed.
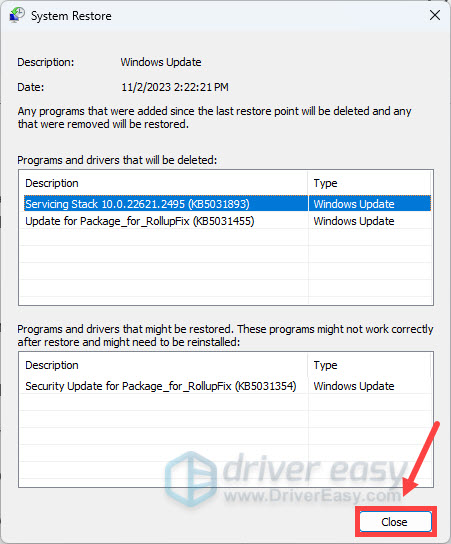
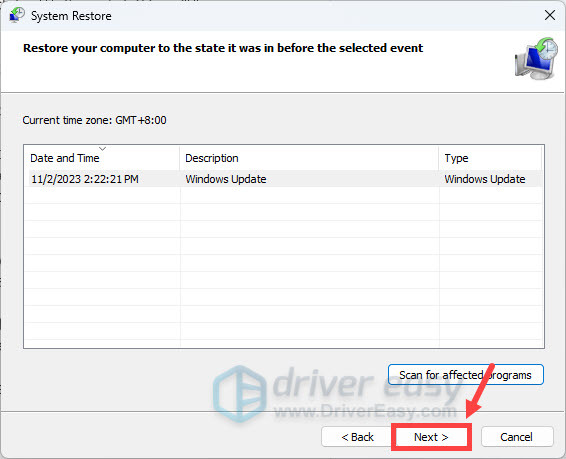
If this is not what you’re going to restore, go back to the previous step to select another restore point. - Click Next.
- Confirm your restore point and click Finish. Then click Yes to start restoring the system from the restore point.
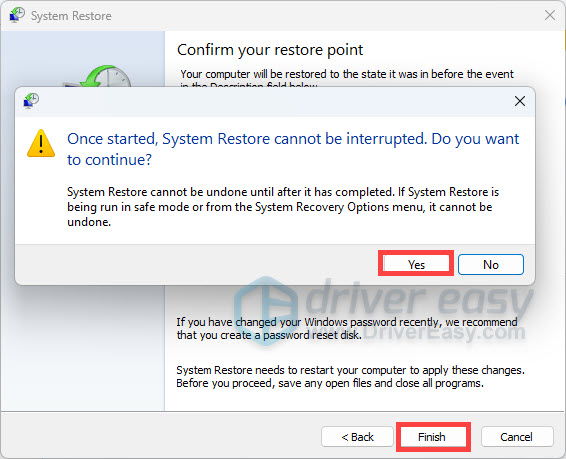
Wait for the process to complete and your computer will be restarted.
8. Verify integrity of game files
Verifying the integrity of CS2’s game files can help fix microphone issues by detecting and repairing any corrupted, incomplete, or missing files that may be causing voice chat bugs. The verification checks that all necessary audio-related files are intact since problems with those could disrupt microphone input.
To do this, all you have to do is:
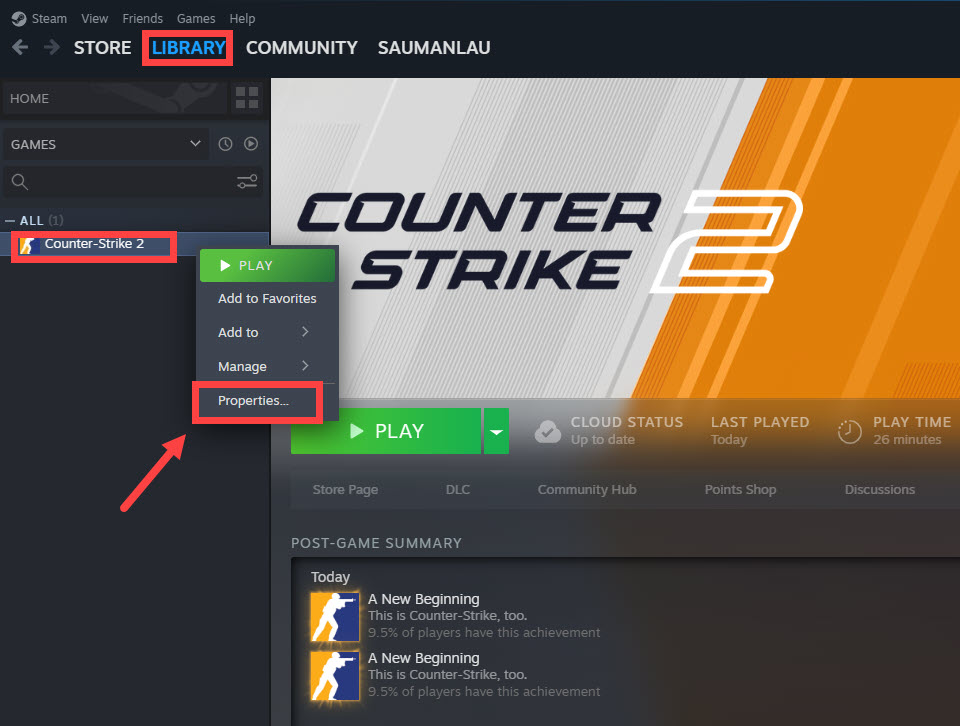
- Open Steam. Under LIBRARY, right-click your game and select Properties from the drop-down menu.
- Select the Installed Files tab and click on the Verify integrity of game files button.
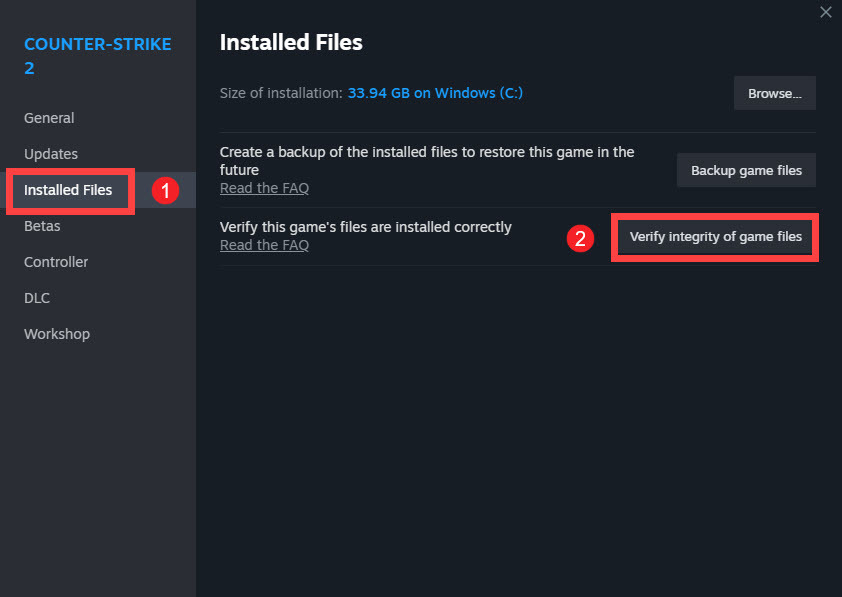
- Steam will verify the game’s files – this process may take several minutes.
When the verification process is finished, get into your gameplay and check if your in-game mic is working properly.
9. Repair system files
If all else fails, it’s time to dig something deeper. You should check if you have any corrupted system files that may be disrupting proper audio input. System file errors could prevent microphone data from being processed correctly.
To fix it, run the System File Checker scan:
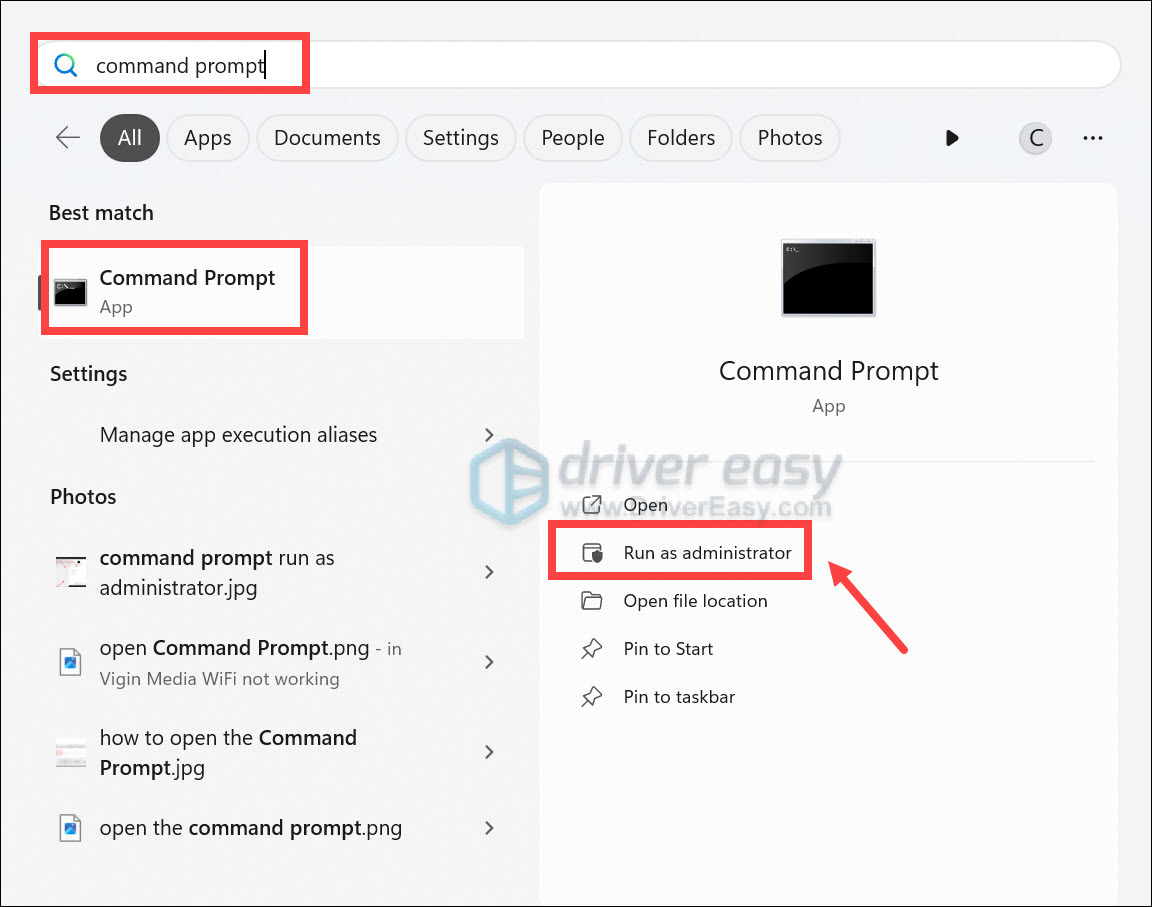
- On your keyboard, press the Windows logo key, and type command prompt. Find Command Prompt from the list, then click Run as administrator.
- Click Yes when you receive the UAC prompt.
- Type sfc /scannow and hit Enter.
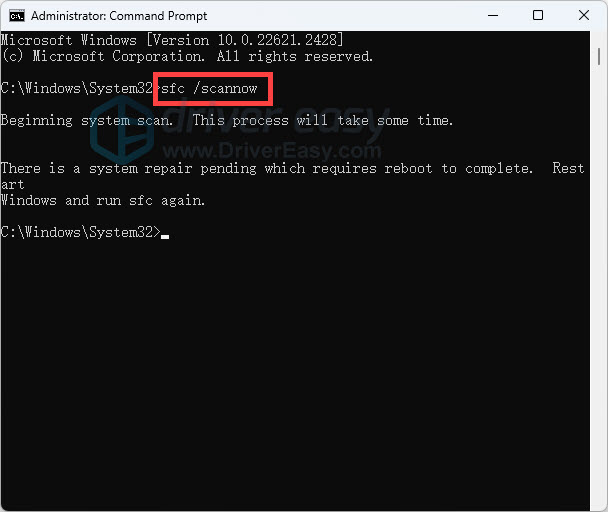
- If damaged files are found, run DISM /Online /Cleanup-Image /RestoreHealth to repair them.

So this is the full guide to troubleshooting your issue of the mic not working on CS2. Hopefully, you can immerse into the gameplay with your teammates now!