


Many Realtek audio device users are having problems with producing sound through the Realtek Digital Output. When it is set as the default device, the sound from the speakers connecting to their computer cannot work properly.
If you are having this issue, don’t worry. The following methods can help you bring the sound of your speakers back.
- Set the Speakers as Default Device
- Disable audio enhancements
- Reinstall the Realtek audio driver
- Update the Realtek audio driver
1. Set the Speakers as Default Device
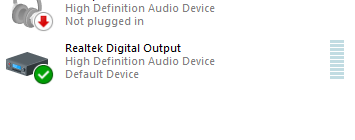
It may not be necessary for you to use Realtek Digital Output. Digital Outputs refer to high-definition digital audio devices, which do not use regular (analog) cables to connect to computers. For example, a TV with an HDMI connection, or a high-definition audio system, like a home theater system, uses the digital output.
So if you are using regular speakers and you (or your computer) have set Realtek Digital Output as Default Device, the sound of your computer may not be able to play normally. You should set the Speakers as Default Device to get the normal sound. To do so:
on Windows 10
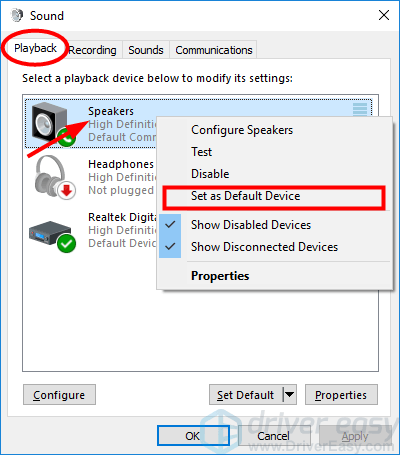
- Right-click on the speaker icon on your taskbar, and then select Playback devices.

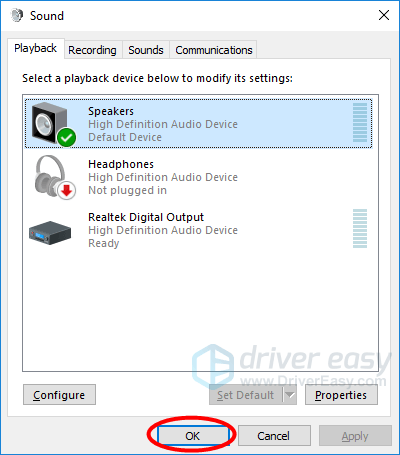
- In the Sound window, select the Playback tab, right-click on Speakers, and then select Set as Default Device.
- Hit OK.
on Windows 11
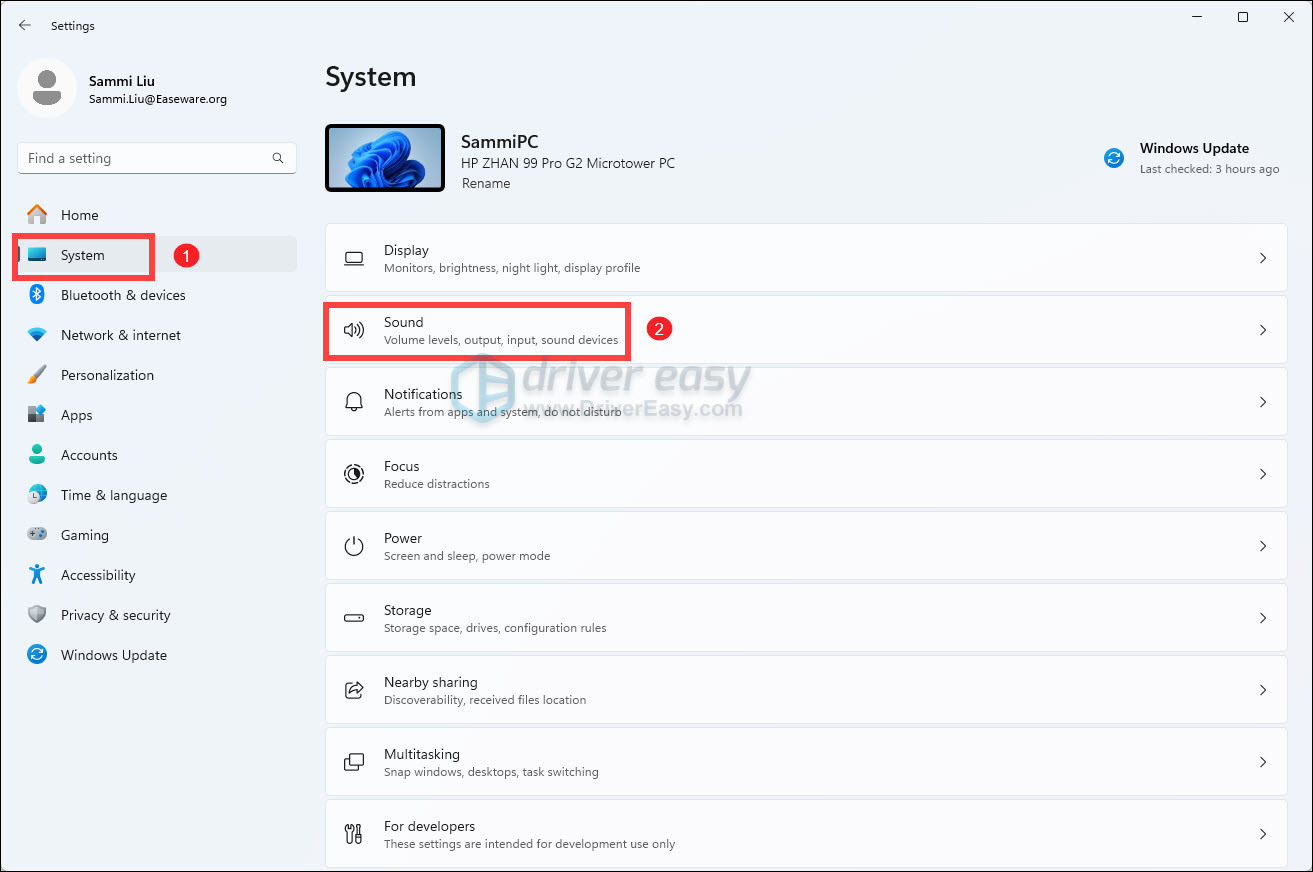
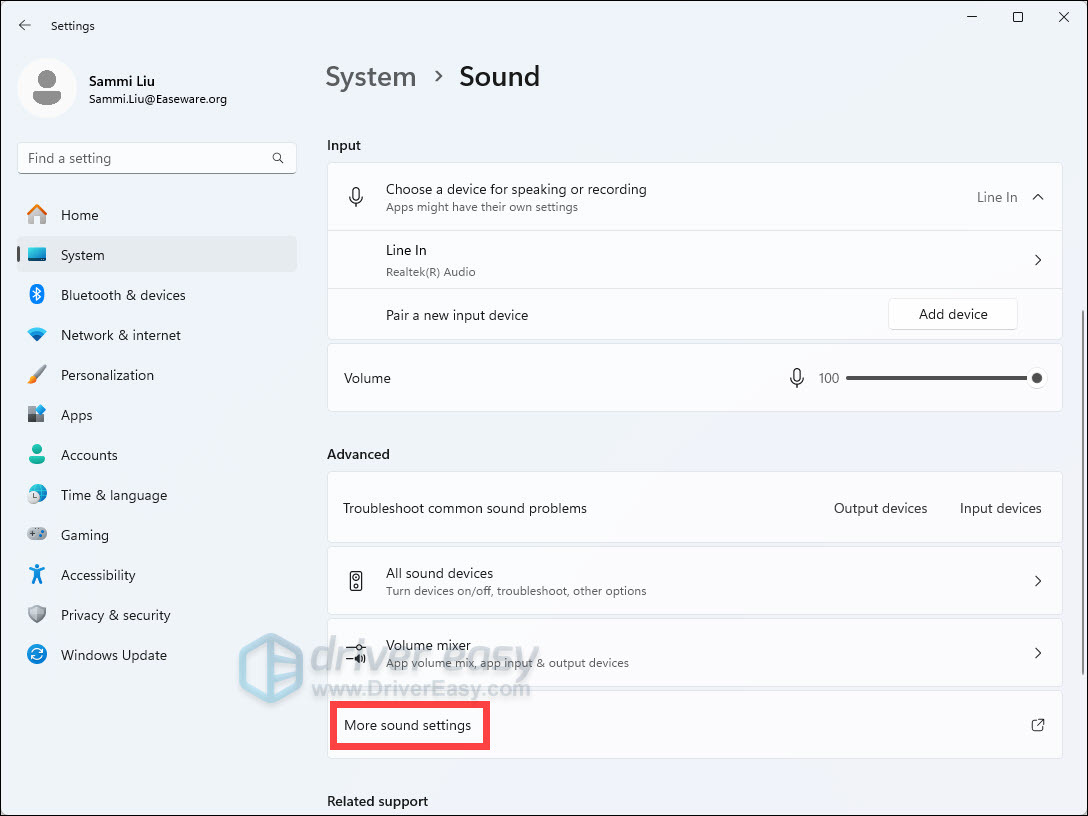
- On your keyboard, press the Windows logo + I keys simultaneously to open Settings.
- From the left navigation panel, select System, then click Sound from the right.
- Scroll down and click More sound settings.
- Under the Playback tab, right-click your speaker and select Set as Default Device.
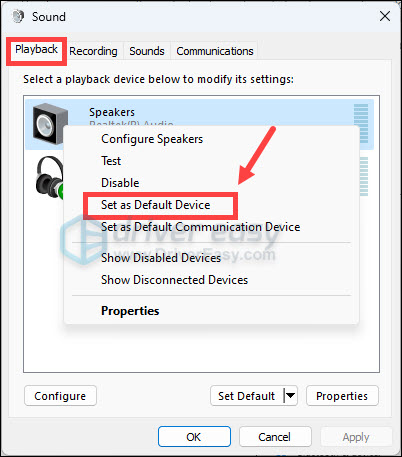
Your speakers are now set as the default audio output device. If this method works for you, you will hear the sound of your computer from your speakers again.
2. Disable audio enhancements
Audio enhancement packages are aimed at enhancing your audio performance. But this feature can sometimes cause some problems. When your Realtek digital output has no sound, try disabling audio enhancements to see if it helps. Here’s how to do this:
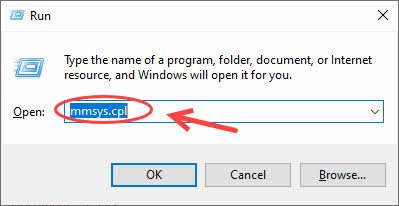
- On your keyboard, press the Windows logo key and R at the same time. Type in mmsys.cpl and press Enter.
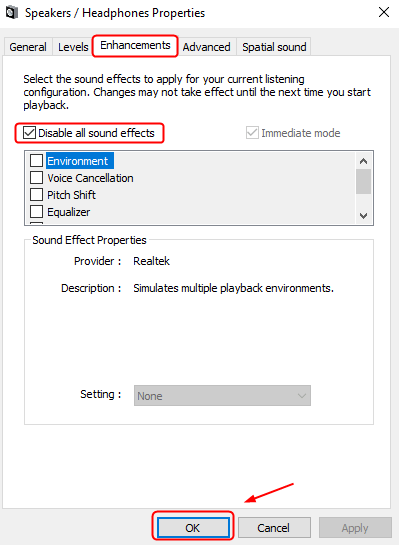
- Navigate to the Playback tab. Right-click your default sound device here and choose Properties.

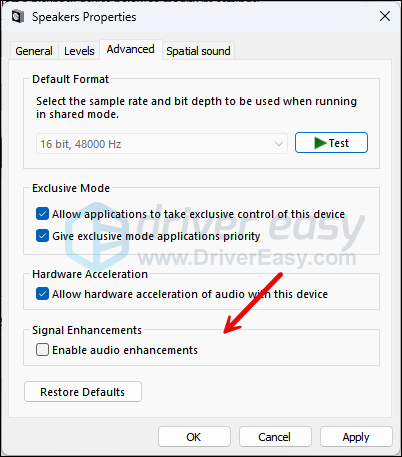
- Navigate to the Enhancements tab, then tick the box for Disable all sound effects. Then click OK to save the change.
- For some sound cards, the options may differ. So you can try to see if there’s an Advanced tab, where you can untick the box for Enable audio enhancements.
Now do a test to check if disabling audio enhancements helped you solve the issues. If not, please move on.
3. Reinstall the Realtek audio driver
A wrong or incorrect Realtek audio driver could also be the culprit to the Realtek digital output not working problem. If this is your case, you can reinstall the Realtek audio driver to see if it helps. To do so:
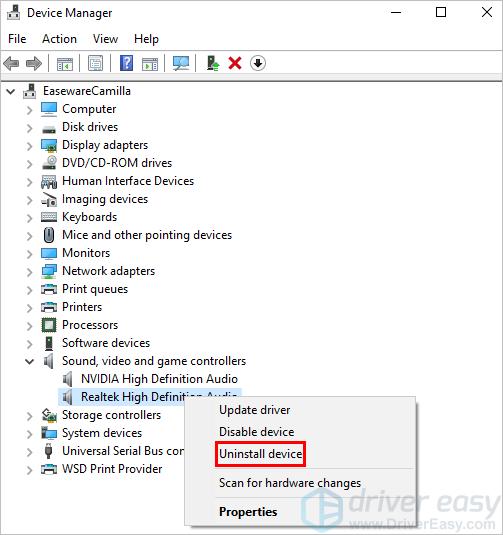
- On your keyboard, press the Windows key and the R key at the same time, then type devmgmt.msc and hit Enter.

- Double-click to expand the Sound, video and game controllers category, then right-click your sound card and select Uninstall device.
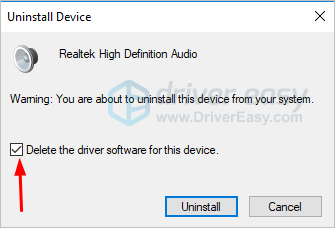
- Tick the box for Delete the driver software for this device if you’re on Windows 10, 8.1 and 7.
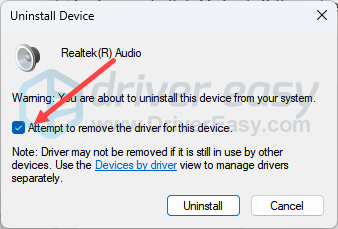
- Tick the box for Attempt to remove the driver for this device and click Uninstall if you’re on Windows 11.
- Restart your computer for the last working audio driver to be installed by Windows automatically.
If this doesn’t work for you, please move on to the next fix below.
4. Update the Realtek audio driver
You may be using a wrong or outdated audio driver if there is no sound from your Realtek Digital Output. You should update the Realtek audio driver to see if this fixes the problem.
One easy and credible way to do so is to use Driver Easy.
Driver Easy will automatically recognize your system and find the correct drivers for it. You don’t need to know exactly what system your computer is running, you don’t need to risk downloading and installing the wrong driver, and you don’t need to worry about making mistakes when installing.
You can update your drivers automatically with either the 7 days free trial or the Pro version of Driver Easy. It takes just 2 clicks, and you get full support and a 30-day money-back guarantee with the Pro version:
- Download and install Driver Easy.
- Run Driver Easy and click the Scan Now button. Driver Easy will then scan your computer and detect any problem drivers.

- Click the Activate & Update button next to the flagged device to automatically download and install the correct version of this driver.
Or click Update All to automatically download and install the correct version of all the drivers that are missing or out of date on your system (You’ll need the Pro version for this – when you select Update All, you’ll get a prompt to upgrade. If you’re not prepared to purchase the Pro version yet, Driver Easy provides a 7-day trial at no cost, granting access to all Pro features like fast downloads and easy installation. No charges will occur until after your 7-day trial period ends.)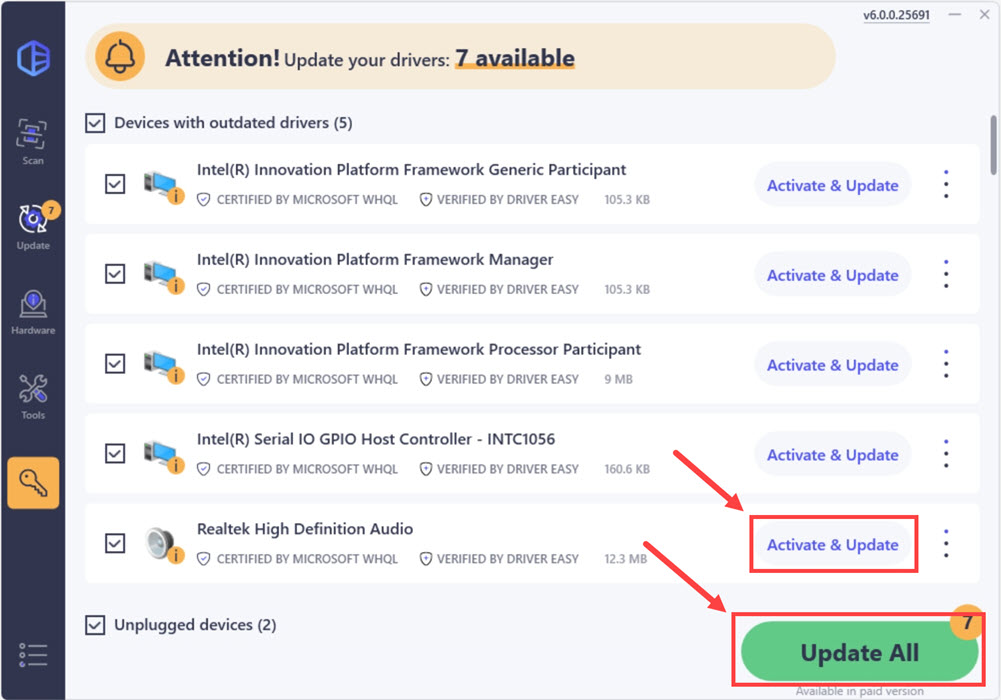
- After updating, restart your computer to take effect.