


Have mic issues with your Razer BlackShark V2? First, make sure your mic button (on the left headphone) is not activated and the mic is firmly plugged in. But if the mic of your Razer BlackShark V2 is still not working, you can try the following fixes:
- Ensure the microphone is attached properly
- Rule out the hardware failure
- Set your headset as the default device
- Make sure your apps can access the mic
- Update the audio driver
- Run the sound troubleshooter
- Uninstall your Razer Synapse
Fix 1. Ensure the microphone is attached properly
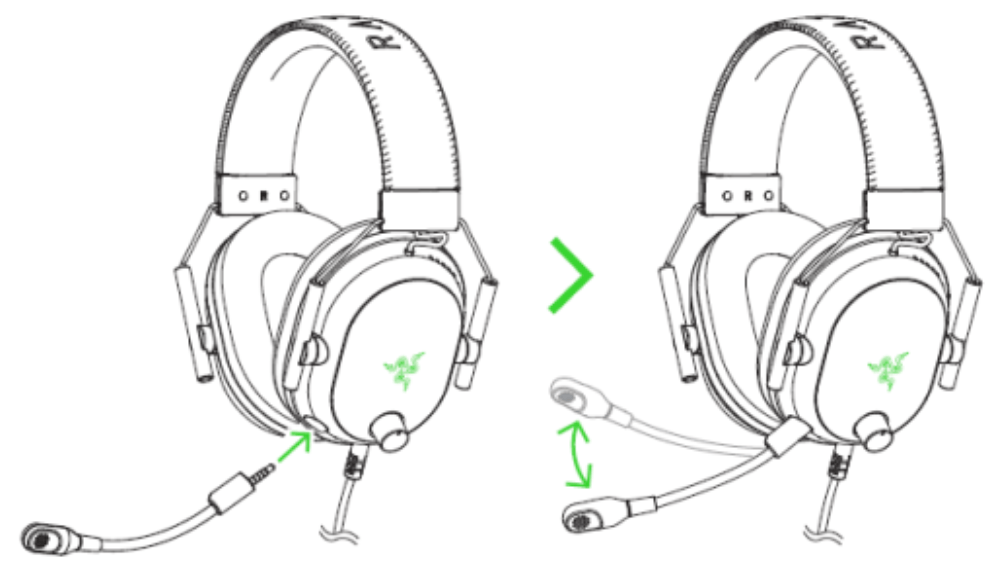
Since the Blackshark V2 headset comes with a detachable mic, it’s important to connect your microphone properly and bend it until it’s parallel to your mouth.
Fix 2. Rule out the hardware failure
If your mic is still not working, you can rule out any headset hardware issues by connecting your Razer BlackShark V2 to a different audio source. If the mic works just fine with other devices, you can move on to the next fix.
But if it’s still not working whatsoever when connected to another audio source, you may want to contact Razer Support to have your headset replaced or repaired.
Fix 3. Set your headset as the default device
It’s possible that your Razer BlackShark V2 is not set as the default device, thus causing the mic not working issue. To move on to other fixes, you should take a look at this setting:
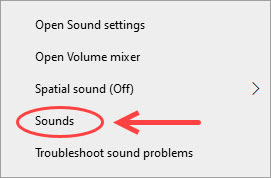
- Right-click the volume button in the notification area, and click Sounds.
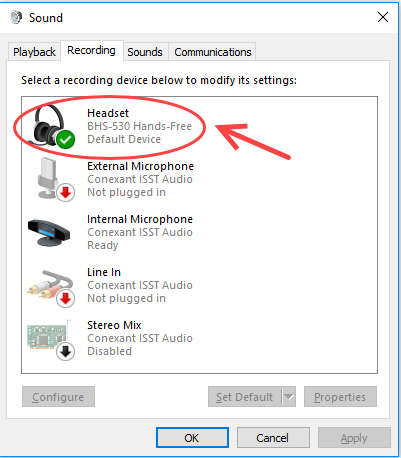
- Go to the Recording tab, and make sure your Razer Blackshark V2 is set as the default input device. If not, you can right-click your headset, and select Set Default.
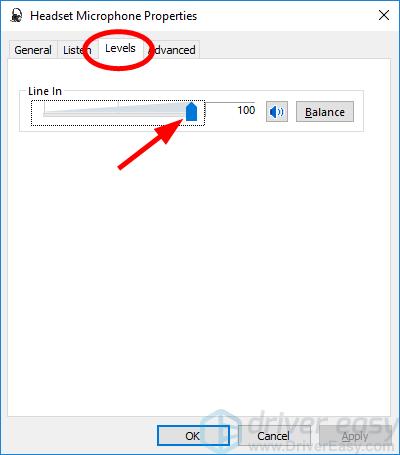
- Then you can right-click your headset and select the Properties > Levels tab. Make sure the volume is set at an appropriate level.
- Click OK to save the changes.
Once you have set your Razer BlackShark V2 as the default input device, you can test your microphone. If it’s still not working, you can try the next fix.
Fix 4: Make sure your apps can access the mic
Not the microphone is not picking up the phone, you should ensure that your apps can access it:
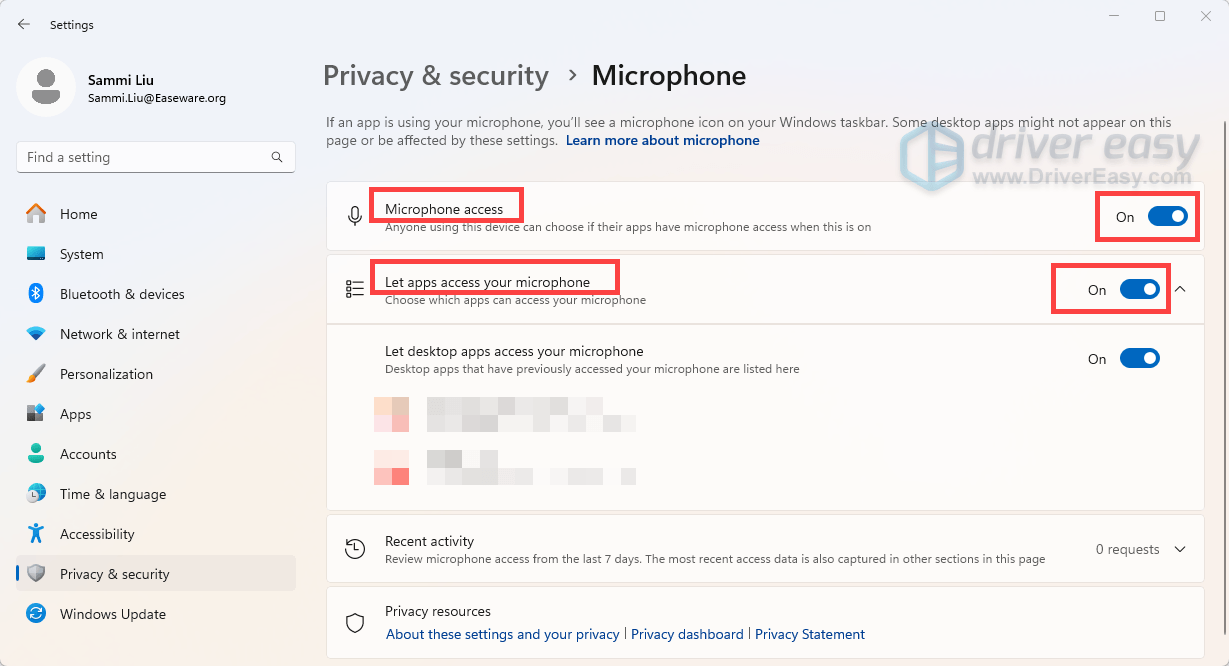
- On your keyboard, press the Windows logo key + I simultaneously to open Settings.
- Select Privacy & security from the left pane, then click Microphone under the App permissions section.

- Toggle On Microphone access and Let apps access your microphone.
After applying the changes, test your microphone. If it’s still not picking up your voice, try the next fix below.
Fix 5. Update the audio driver
If the audio driver on your PC is outdated or gets corrupted, you may encounter the Razer BlackShark V2 mic not working issue. To keep your gaming headset always in its tip-top condition, you can try updating the audio driver.
There are two ways for you to update an audio driver:
Option 1 – Manually – The manual process requires you to visit the manufacturer’s website to download the latest driver and install them manually, which is time-consuming.
Option 2 – Automatically – Updating your driver automatically, on the other hand, is very easy. Simply install and run Driver Easy, and it will automatically find all the devices on your PC that need new drivers, and install them for you. You don’t need to know exactly what system your computer is running, you don’t need to risk downloading and installing the wrong driver, and you don’t need to worry about making mistakes when installing.
You can update your drivers automatically with either the 7 days free trial or the Pro version of Driver Easy. It takes just 2 clicks, and you get full support and a 30-day money-back guarantee with the Pro version:
- Download and install Driver Easy.
- Run Driver Easy and click the Scan Now button. Driver Easy will then scan your computer and detect any problem drivers.

- Click the Activate & Update button next to the flagged device to automatically download and install the correct version of this driver.
Or click Update All to automatically download and install the correct version of all the drivers that are missing or out of date on your system (You’ll need the Pro version for this – when you select Update All, you’ll get a prompt to upgrade. If you’re not prepared to purchase the Pro version yet, Driver Easy provides a 7-day trial at no cost, granting access to all Pro features like fast downloads and easy installation. No charges will occur until after your 7-day trial period ends.)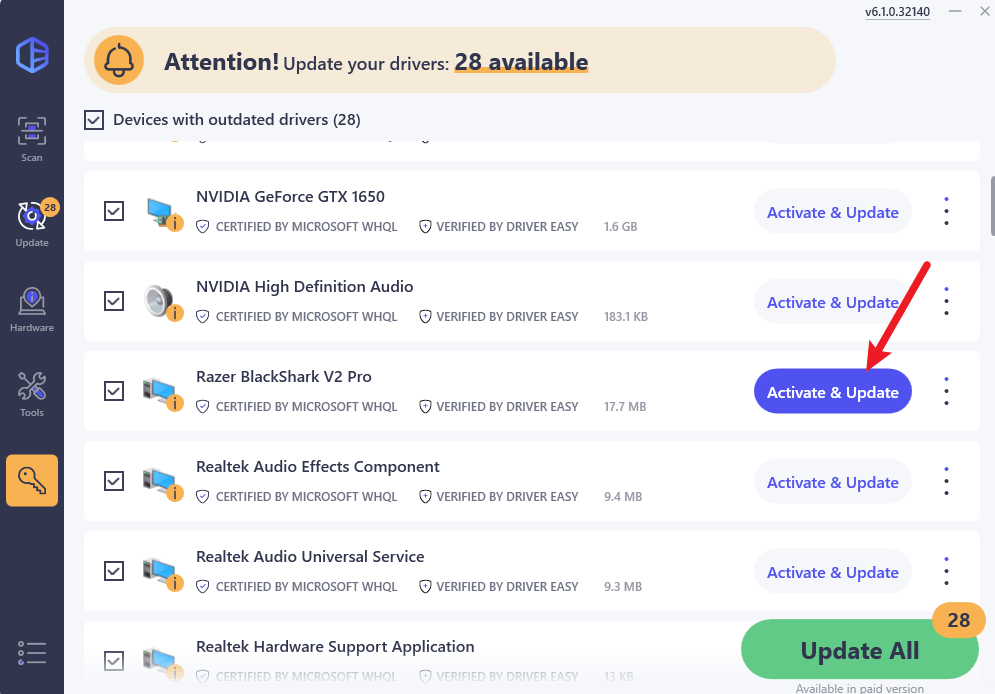
- After updating, restart your computer to take effect.
Once the audio driver is updated successfully, you can test your microphone and see if the Razer BlackShark V2 mic issue has been resolved.
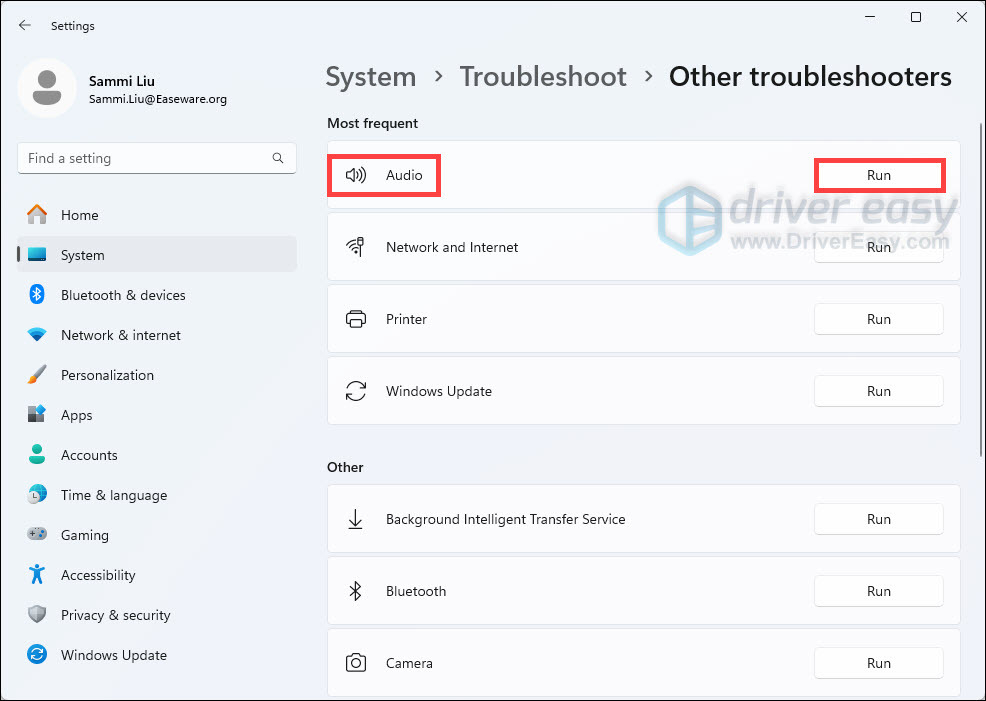
Fix 6. Run the audio troubleshooter
If the workarounds above failed to solve your Razer BlackShark V2 mic not working, you can try running the built-in audio troubleshooter and let it diagnose and resolve the issue for you.
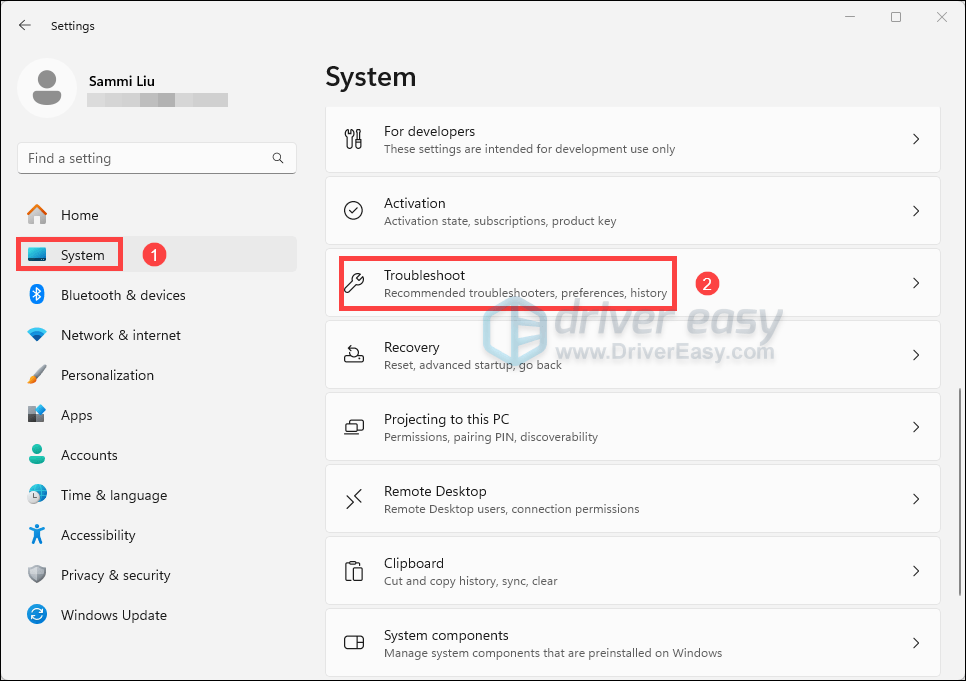
- On your keyboard, press the Windows logo key + I to open Settings.
- From the left navigation pane, select System. Scroll down and click Troubleshoot.
- Click Other troubleshooters.
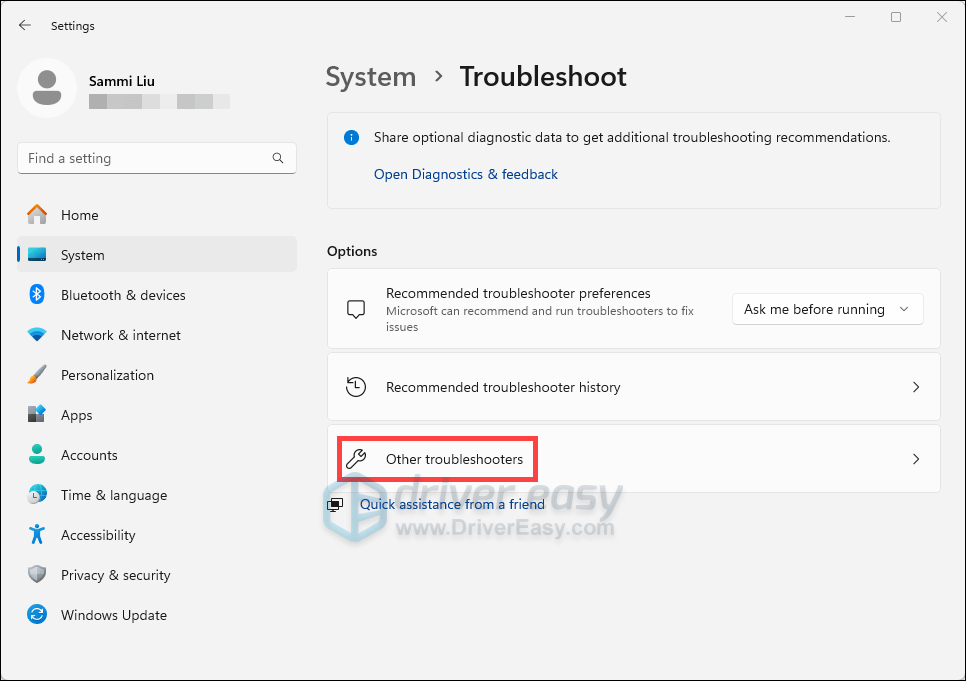
- Go to Audio section and click the Run button to start the audio troubleshooter.
Does this method do the trick? If not, don’t worry. You can try the method below.
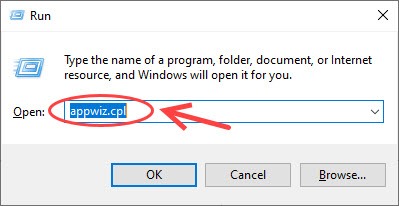
Fix 7. Uninstall your Razer Synapse
Sometimes the Razer software can become incompatible with your headset, especially when you already have all the up-to-date drivers and correct sound settings. So you may need to try this method to check if this fixes your Razer BlackShark mic not working issue.
- On your keyboard, press the Windows logo key and R at the same time. Type appwiz.cpl in the box and press Enter.
- Right-click Razer Synapse and select Uninstall.
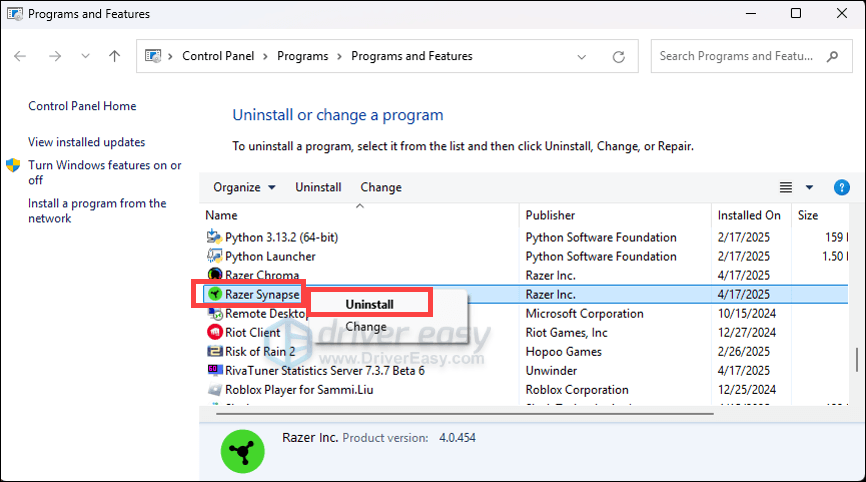
- Download the latest software from the Razer official website, and complete the installation.
There you have it – all possible fixes for your Razer BlackShark V2 mic issues. Does your Razer BlackShark mic work like a charm now? Hopefully, your mic issue has been resolved by now. Feel free to drop us a line if you want to share with us your own troubleshooting experience.