


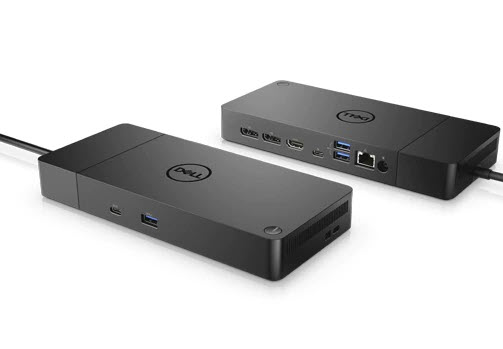
Dell docking station WD19 allows you to access various peripherals such as a mouse, keyboard, speaker, external hard drive or display with one USB-C cable. But if the Dell WD19 is not recognized properly or working optimally, there might be problems with your device drivers. To update the drivers for Dell WD19, here are 2 methods you can try.
Option 1 – Manually – You’ll need some computer skills and patience, as you have to find the exactly right driver online, download and install it on your own.
Option 2 – Automatically (recommended) – This is the quickest and easiest solution that requires just a couple of clicks.
Method 1 – Manually update Dell WD19 drivers
Dell provides support and driver updates regularly on its official website. You can get the latest Dell WD19 drivers via the following steps below:
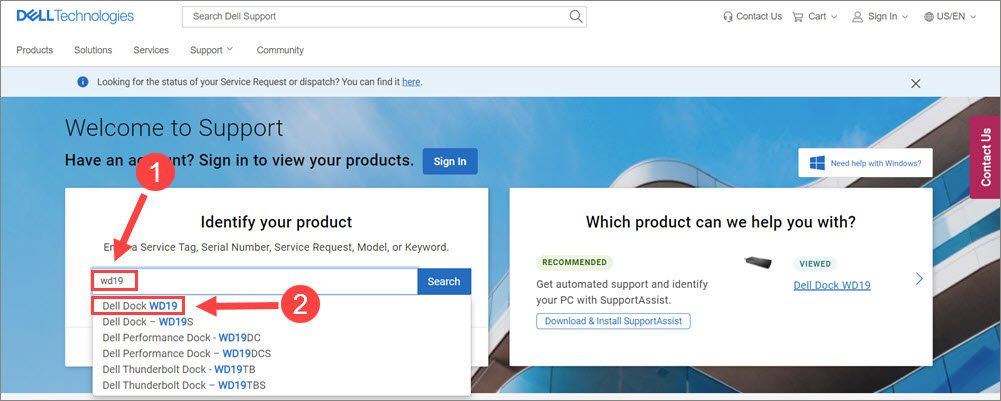
- Go to Dell’s Drivers & Downloads page.
- Type wd19 in the product search box and select Dell Dock WD19 from the drop-down menu.
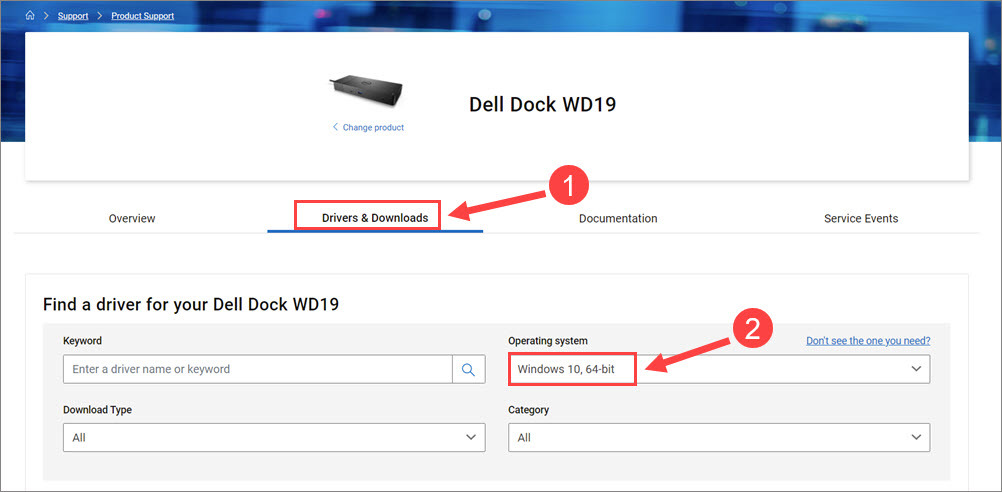
- Navigate to the Drivers & Downloads tab and choose your operating system, Windows 10 64-bit for example.
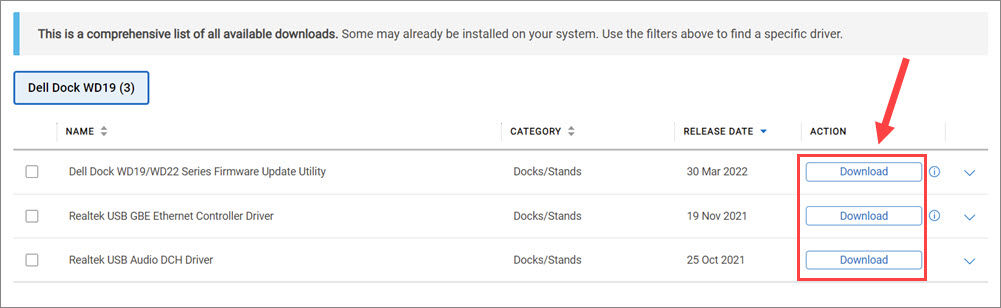
- Scroll down to the driver list, and click the Download button next to each necessary driver for Dell WD19 docking station.
Once you downloaded all the drivers, open the downloaded files and follow the on-screen instruction to install those drivers manually. If you prefer a more convenient way to update the driver, check out the next method.
Method 2 – Automatically update your drivers
If you don’t have the time or patience to update the Dell WD19 drivers manually, you can do it automatically with Driver Easy.
Driver Easy will automatically recognize your system and find the up-to-date and compatible drivers for it. You don’t need to know exactly what system your computer is running, you don’t need to risk downloading and installing the wrong driver, and you don’t need to worry about making a mistake when installing.
- Download and install Driver Easy.
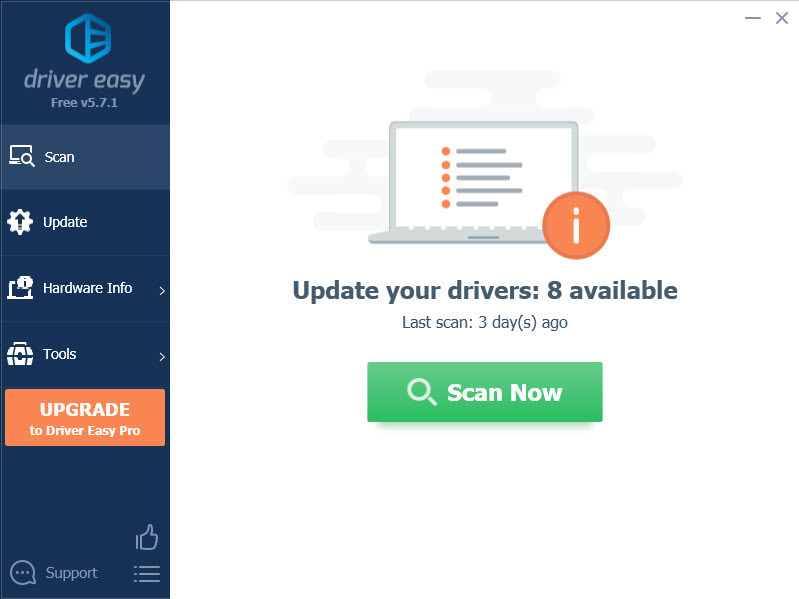
- Run Driver Easy and click Scan Now. Driver Easy will then scan your computer and detect any problem drivers.
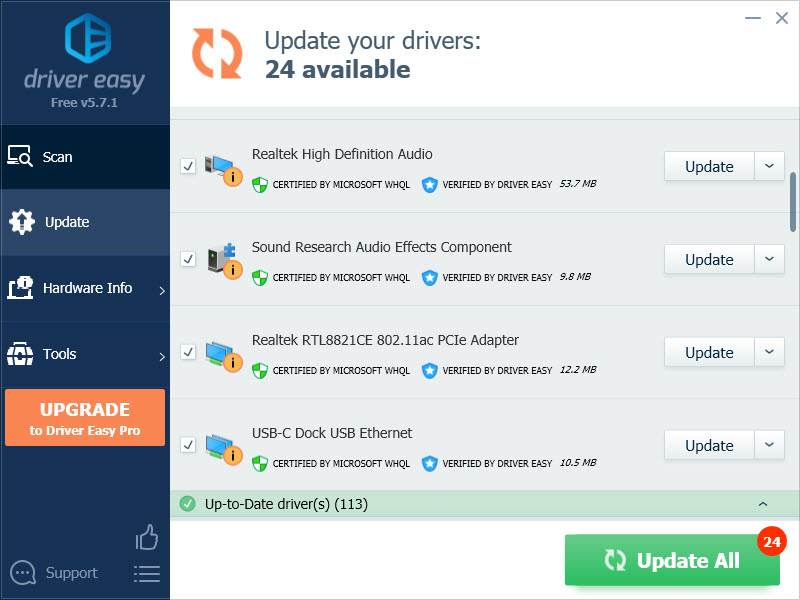
- Click Update All to automatically download and install the correct version of all the drivers that are missing or out of date on your system (this requires the Pro version – you’ll be prompted to upgrade when you click Update All). Or you can click the Update button next to a flagged driver to download the correct version of this driver. You can only download one driver at a time and install it manually with Free Version.
After the update, you may reboot the PC for the changes to take full effect. Check if your Dell WD19 works perfectly now.
Hopefully this article helps when you need to install and download Dell WD19 drivers. If you have any questions or suggestions, feel free to leave a comment below.
