


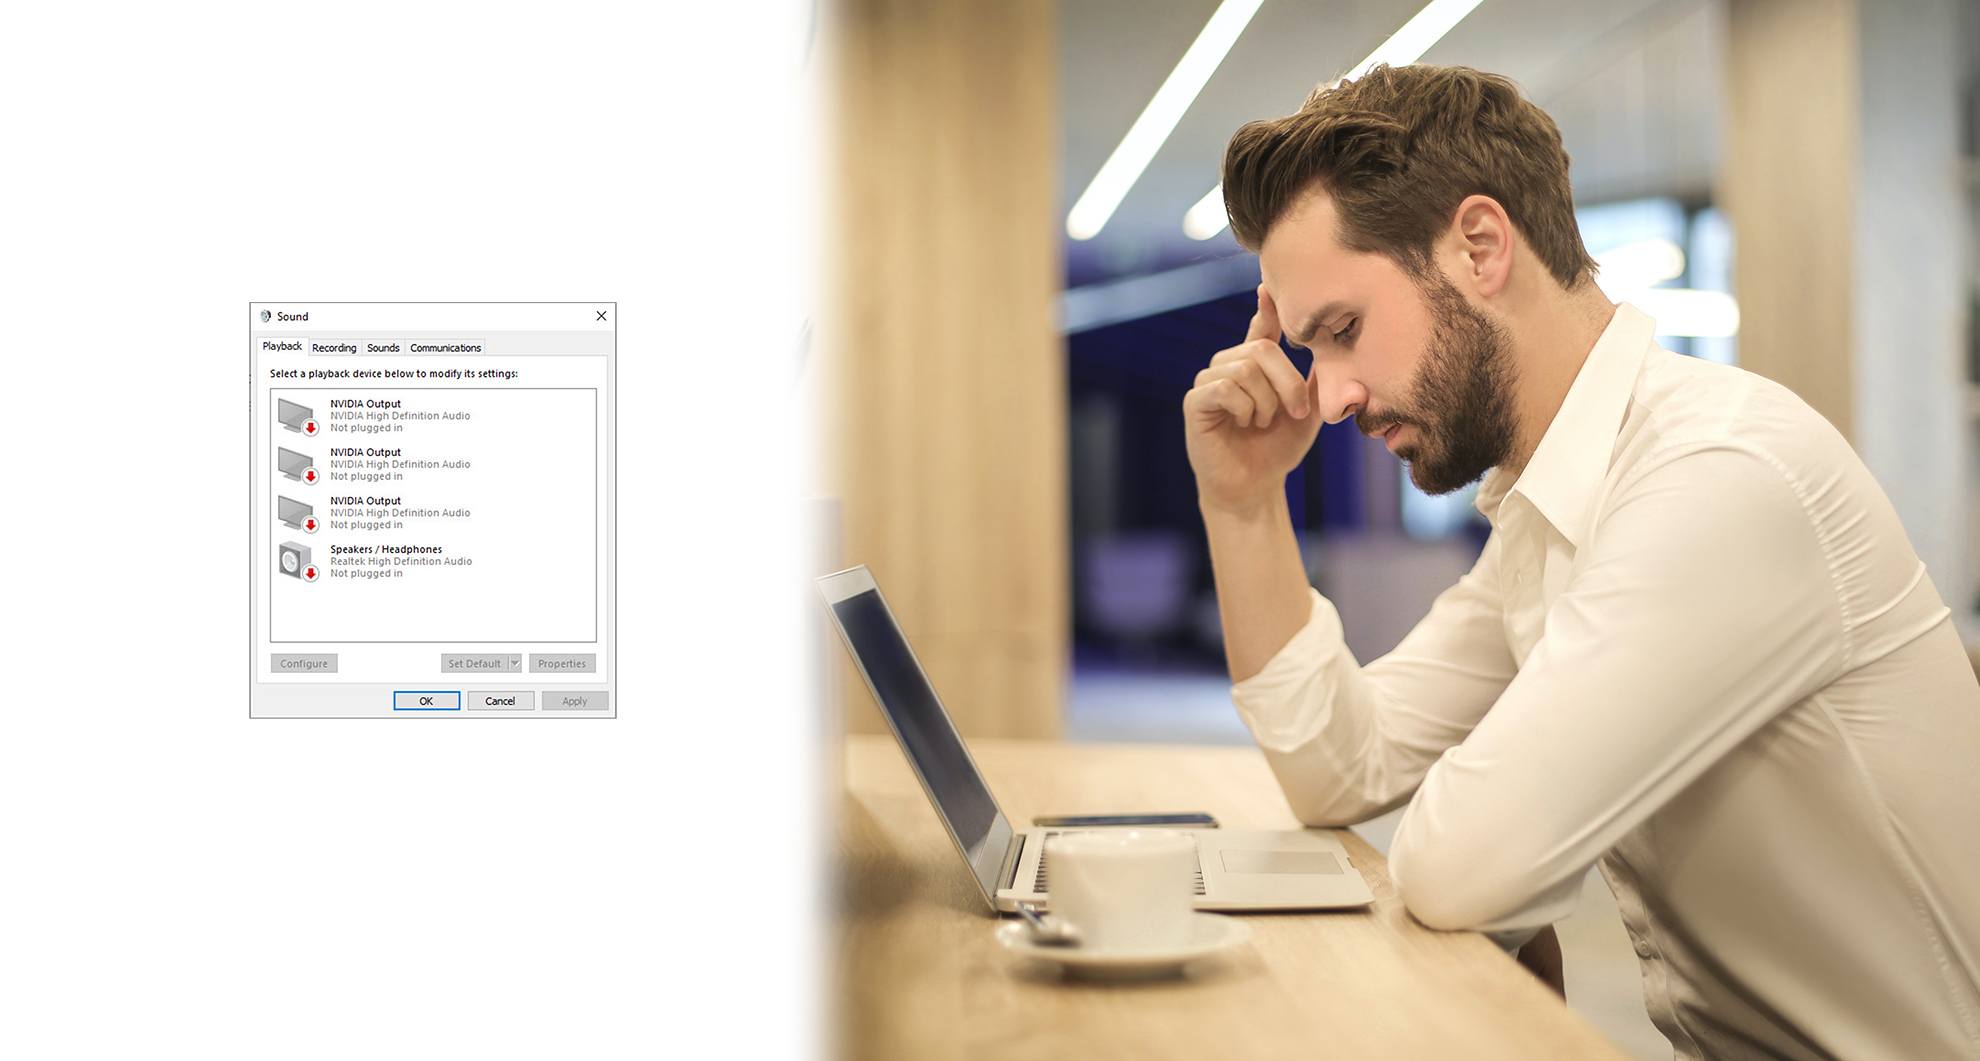
Your NVIDIA outputs are grayed out and listed as Not plugged in? Fail to enable your HDMI sound? Don’t panic. You’re definitely not alone. Many Windows users are reporting exactly the same issue. But most important of all, you can fix it quickly and easily.
Try these fixes
- Check NVIDIA Output Port Settings
- Update NVIDIA Graphics Driver
- Rollback your driver
- Use the generic high definition audio device driver
Fix 1: Check NVIDIA Output settings
If you can’t enable sound for HDMI output. First, you need to check if you’ve set the NVIDIA output correctly.
- Right-click your desktop and select NVIDIA Control Panel.
- Go to Display > Set up digital audio. Make sure you’ve selected your connected device for HDMI.
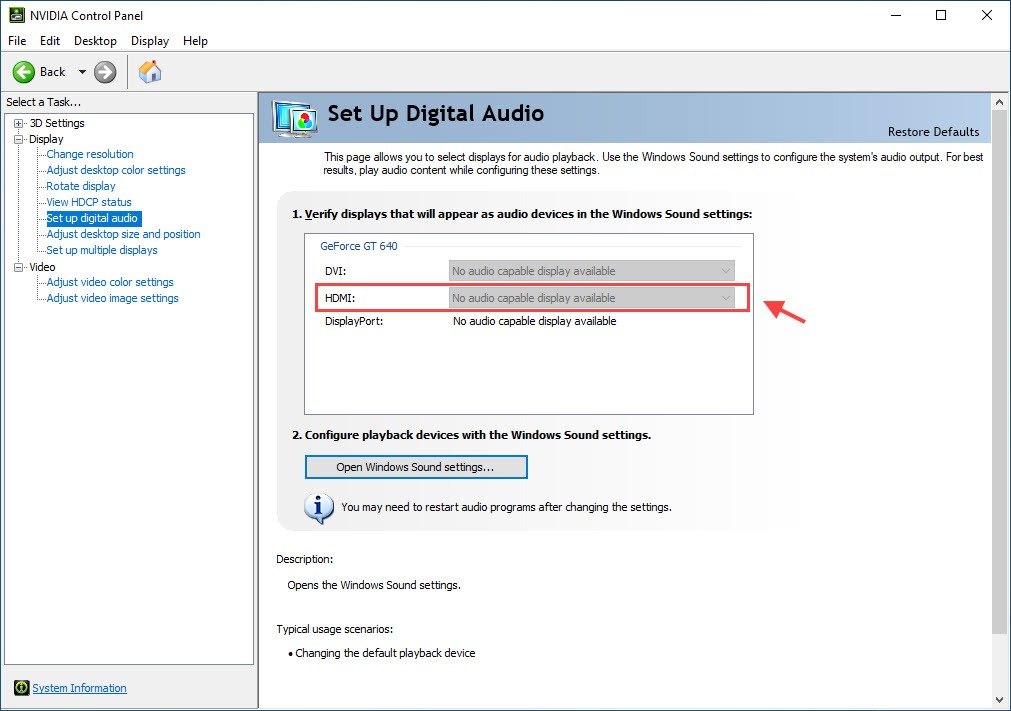
- Click Open Windows Sound Settings.
- Under the Playback tab, right-click the blank area and check Show Disabled Devices and Show Disconnected Devices. Your device should not be grayed out anymore.
- Select your device and Set Default.
If this simple method solved your connection problems, then congratulations! But if not, don’t worry, you can go ahead to the next fix.
How to Fix HDMI No Sound after Connecting Computer to Monitor and TV.
Fix 2: Update NVIDIA graphics driver
In most cases, if this error persists, you may have faulty or outdated NVIDIA drivers installed. To fix it, you should update your NVIDIA graphics driver to the latest version. Although it seems like a sound card driver issue, many users solved the issue by updating their NVIDIA graphics driver.
There are two ways you can update your NVIDIA drivers: manually or automatically.
Option 1: Manually
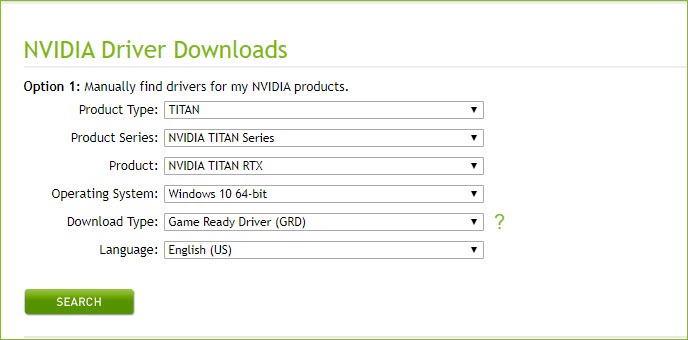
To update your NVIDIA graphics driver manually, you’ll need to go to NVIDIA Driver Downloads of NVIDIA official website to download the latest & correct driver and install it manually.
- After NVIDIA automatically detects your system and graphics card, click Search. (If not, you need to enter all required information.)
- Click the DOWNLOAD button.
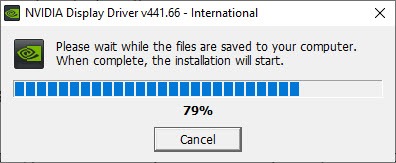
- Double click the downloaded file and follow the onscreen instructions to extract it to your computer.
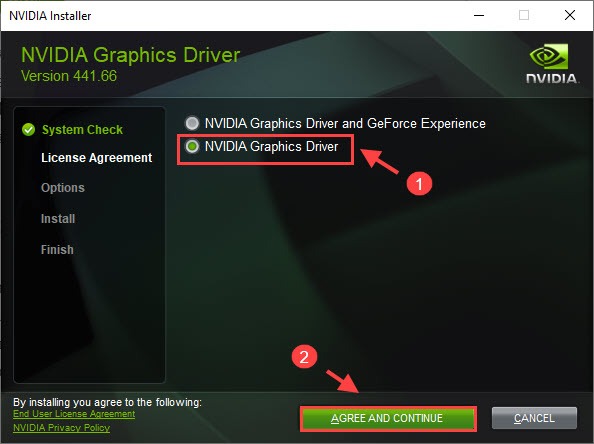
- After performing the system check, select only NVIDIA Graphics Driver. Then click AGREE AND CONTINUE.
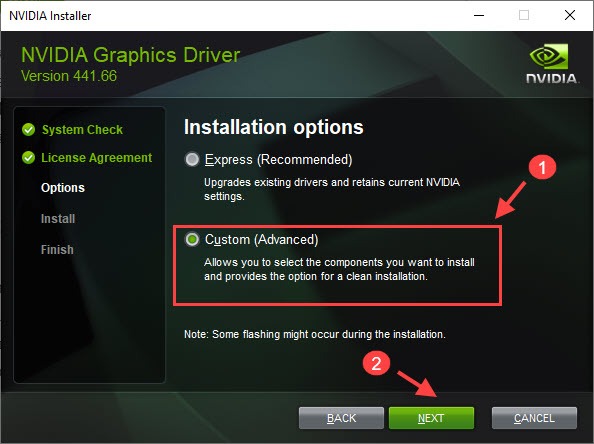
- Select Custom(Advanced) > NEXT.
- Be sure to tick the box next to Perform a clean installation, then click NEXT.
(You can uncheck the software you don’t need.)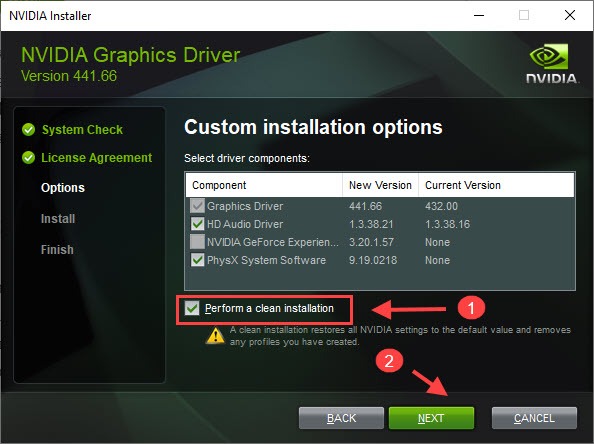
- Follow the on-screen instructions to complete the installation.
- Restart your computer for the changes to take effect.
NVIDIA outputs should be showing normally now. If not, you can try the next fix.
Option 2: Automatically
If you don’t have the time or patience to play with drivers manually, you can do it automatically with Driver Easy. Driver Easy will automatically recognize your system and find all the correct drivers for your device.
You don’t need to know exactly what system your computer is running, you don’t need to risk downloading and installing the wrong driver, and you don’t need to worry about making a mistake when installing. Driver Easy handles it all.
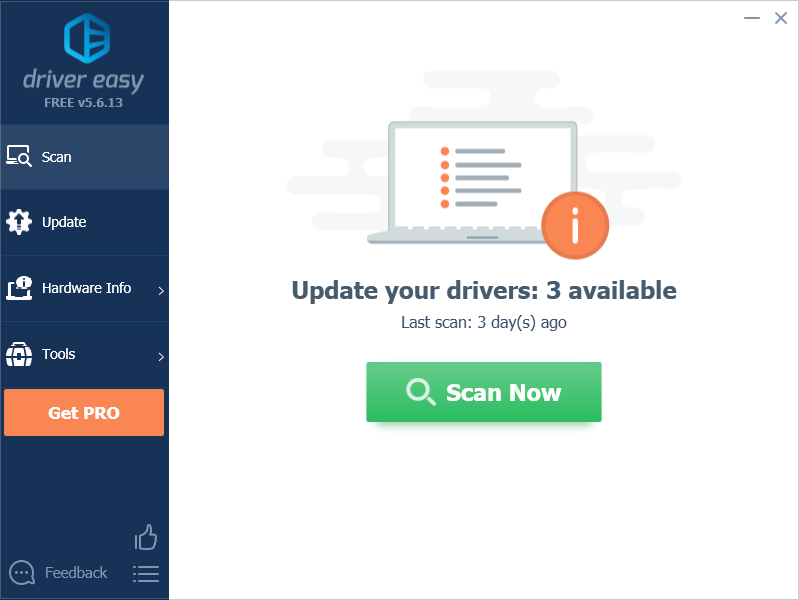
- Download and install Driver Easy.
- Run Driver Easy and click the Scan Now button. Driver Easy will then scan your computer and detect any problem drivers.
- Click the Update button next to your sound card driver to automatically download the correct version of that driver, then you can manually install it (you can do this with the FREE version).
Or click Update All to automatically download and install the correct version of all the drivers that are missing or out of date on your system. (This requires the Pro version. You will get full support and a 30-day money back guarantee. You’ll be prompted to upgrade when you click Update All.)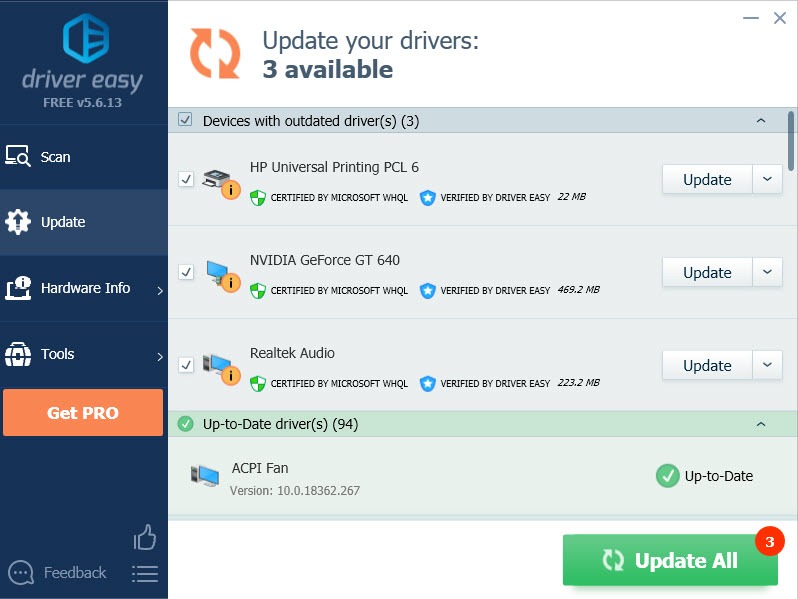
- Restart your computer for the changes to take effect.
- Go to Playback devices and see if the issue has been solved. Your audio output devices should be “ready” instead of “not plugged in” now.
Fix 3: Rollback your driver
If you have recently updated your driver or updating the graphics driver failed to solve your issue, you can roll back the graphics driver.
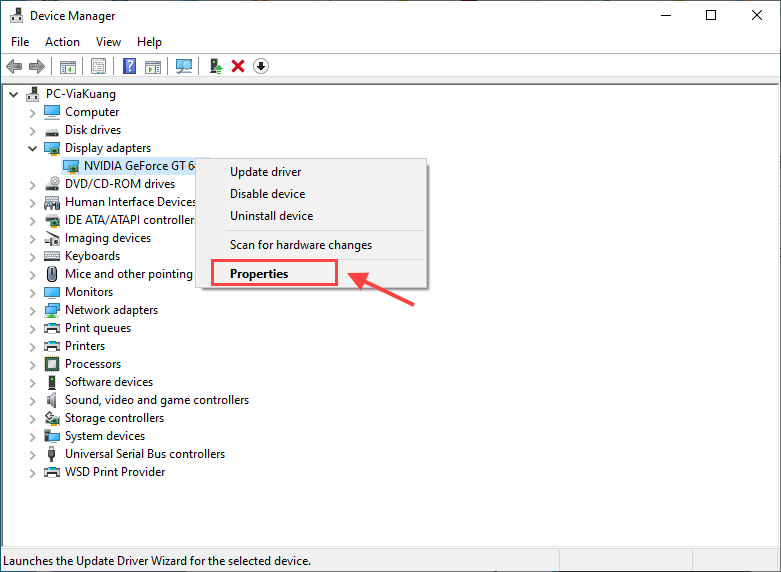
- Right click the Start menu and select Device Manager.

- Double click Display Adapters, then right click your graphics card driver and select Properties.
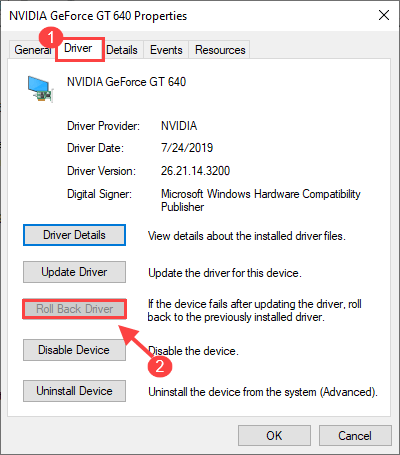
- Go to the Driver tab, and select Roll Back Driver if the option is not gray.
- Follow the on-screen instructions to proceed.
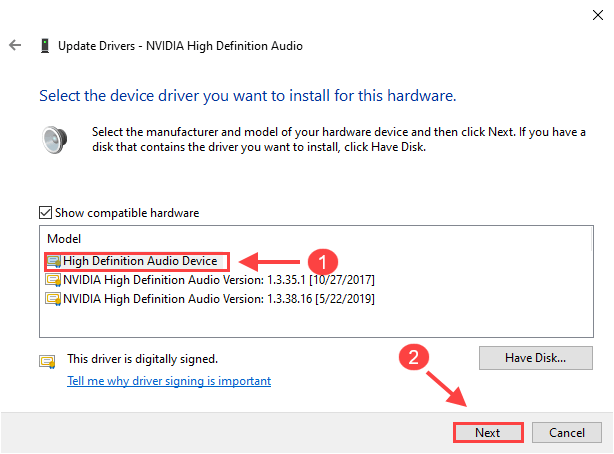
Fix 4: Use the generic high definition audio device driver
If working on your graphics card driver has no effect, you should try switching to the generic audio driver that Windows offers, especially for Intel-based computer users.
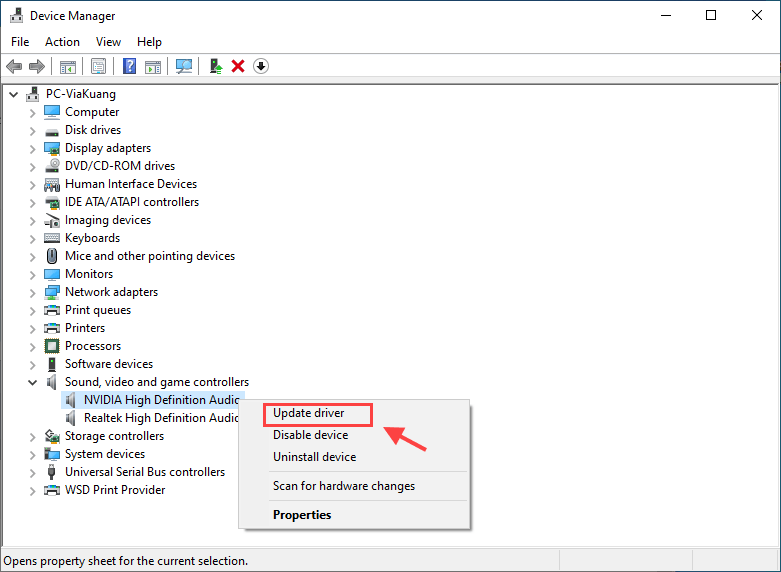
- Go to Device Manager.
- Double click Sound, video and game controllers.
- Right-click your NVIDIA High Definition Audio and select Update driver.
- Click Browse my computer for driver software.
- Click Let me pick from a list of available driver on my computer.
- Select High Definition Audio Device. Then click Next.
- Click No if you’re prompted for a restart.
- Go back to Device Manager and click Action, then select Scan for hardware changes.
- Check if the issue still persists.