


Keeping your graphics drivers up to date is essential for optimal performance, especially for gaming, video editing, and overall system stability. Below are three effective methods to update your graphics drivers.
- Automatically update your graphics drivers (Recommended)
- Update graphics driver via Device Manager or Windows Update
- Manually update your graphics driver
Method 1: Automatically Update Graphics Drivers (Recommended)
The simplest way to update your graphics drivers is by using a driver updater tool like Driver Easy. This tool offers several benefits:
- Automatic Detection:
Whether it’s your graphics drivers (NVIDIA, Intel, AMD), audio drivers, bluetooth drivers, or other device drivers, Driver Easy will scan your computer and list any hardware with missing, outdated, or mismatched drivers. - Certified Drivers:
Access to over 29 million certified drivers directly from manufacturers. - Update or roll back drivers quickly and safely:
You don’t need to know what system your computer is running, you don’t need to scour the web for the right driver download, and you don’t need to risk downloading or installing the wrong driver. Driver Easy does it all for you, automatically. No computer knowledge needed.
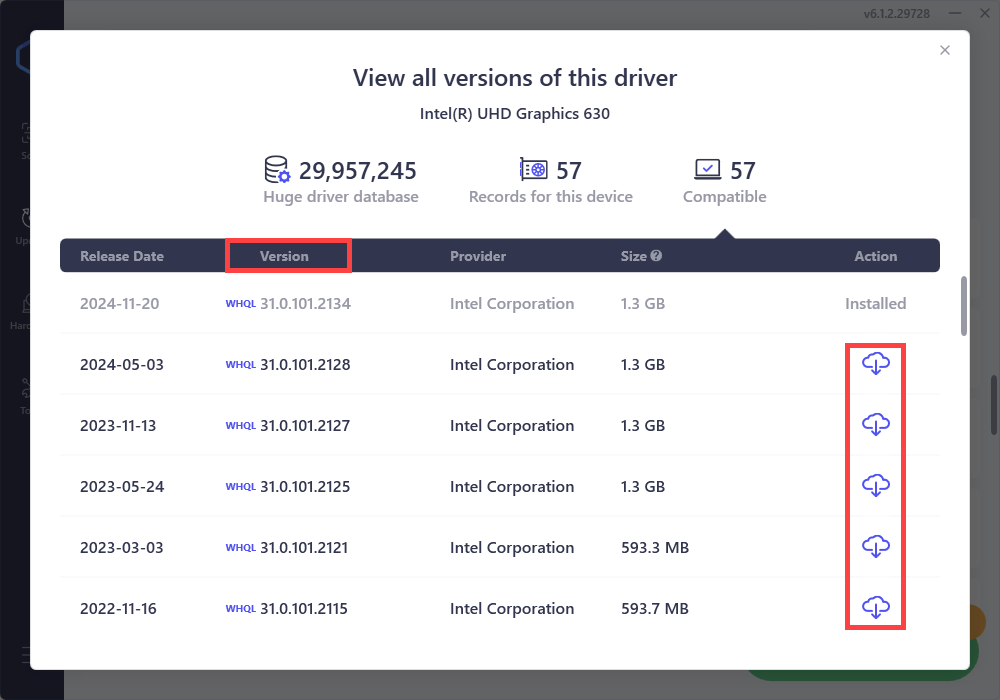
Besides, Driver Easy lists all the available versions of a driver and allows you to roll back with just a few clicks. Right, sometimes the newest version just won’t work right for you and with Driver Easy, you just got this option to roll back to the previous version! This could be pretty useful for gamers who wish to get a performance boost by updating graphics drivers but the results just aren’t within expectation. You can select View all driver versions and install a specific version of driver.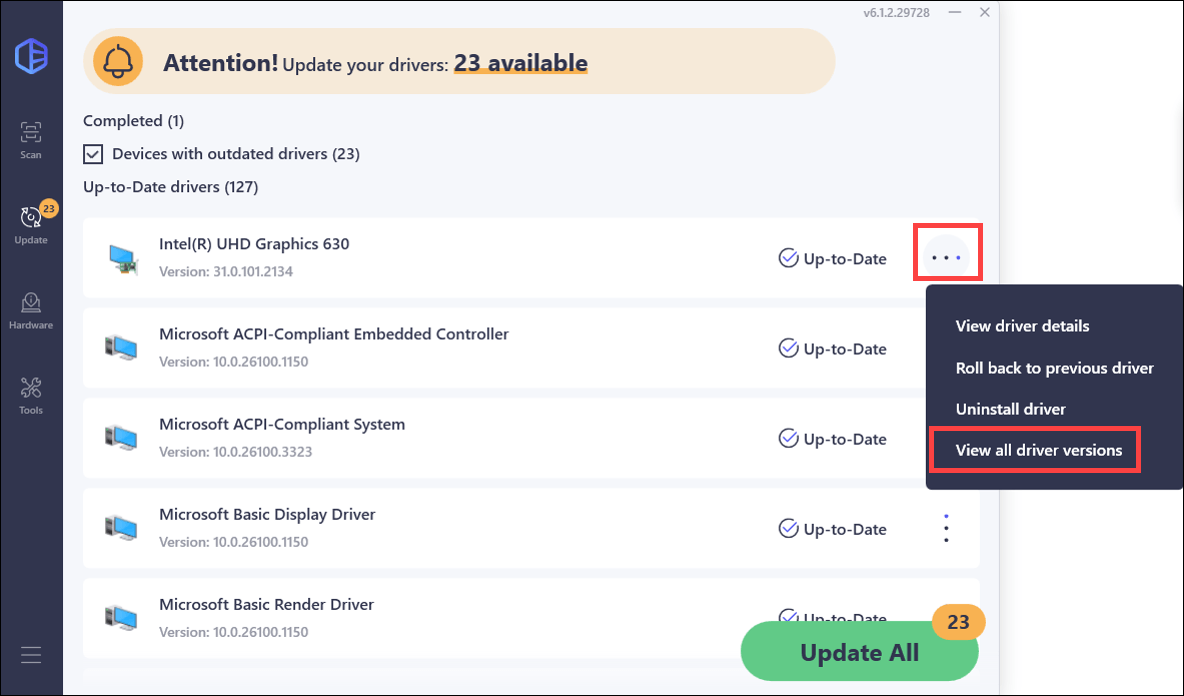
- And much more…
Here’s how to use Driver Easy to update your graphics driver automatically:
- Download and install Driver Easy.
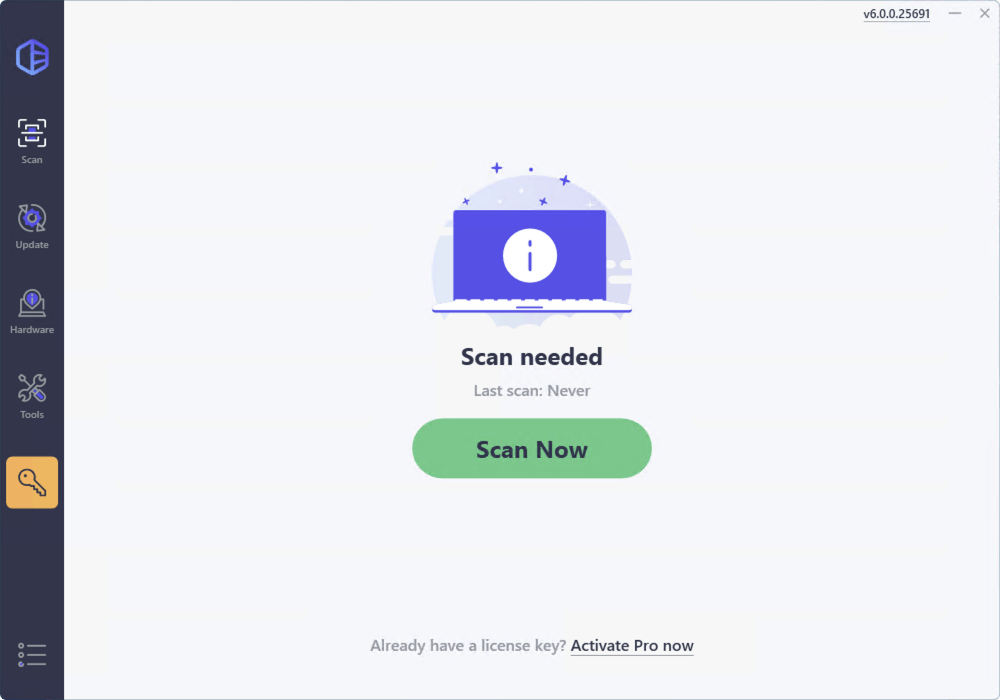
- Run it and click Scan Now, and Driver Easy will scan your computer and detect any devices with missing or outdated drivers.
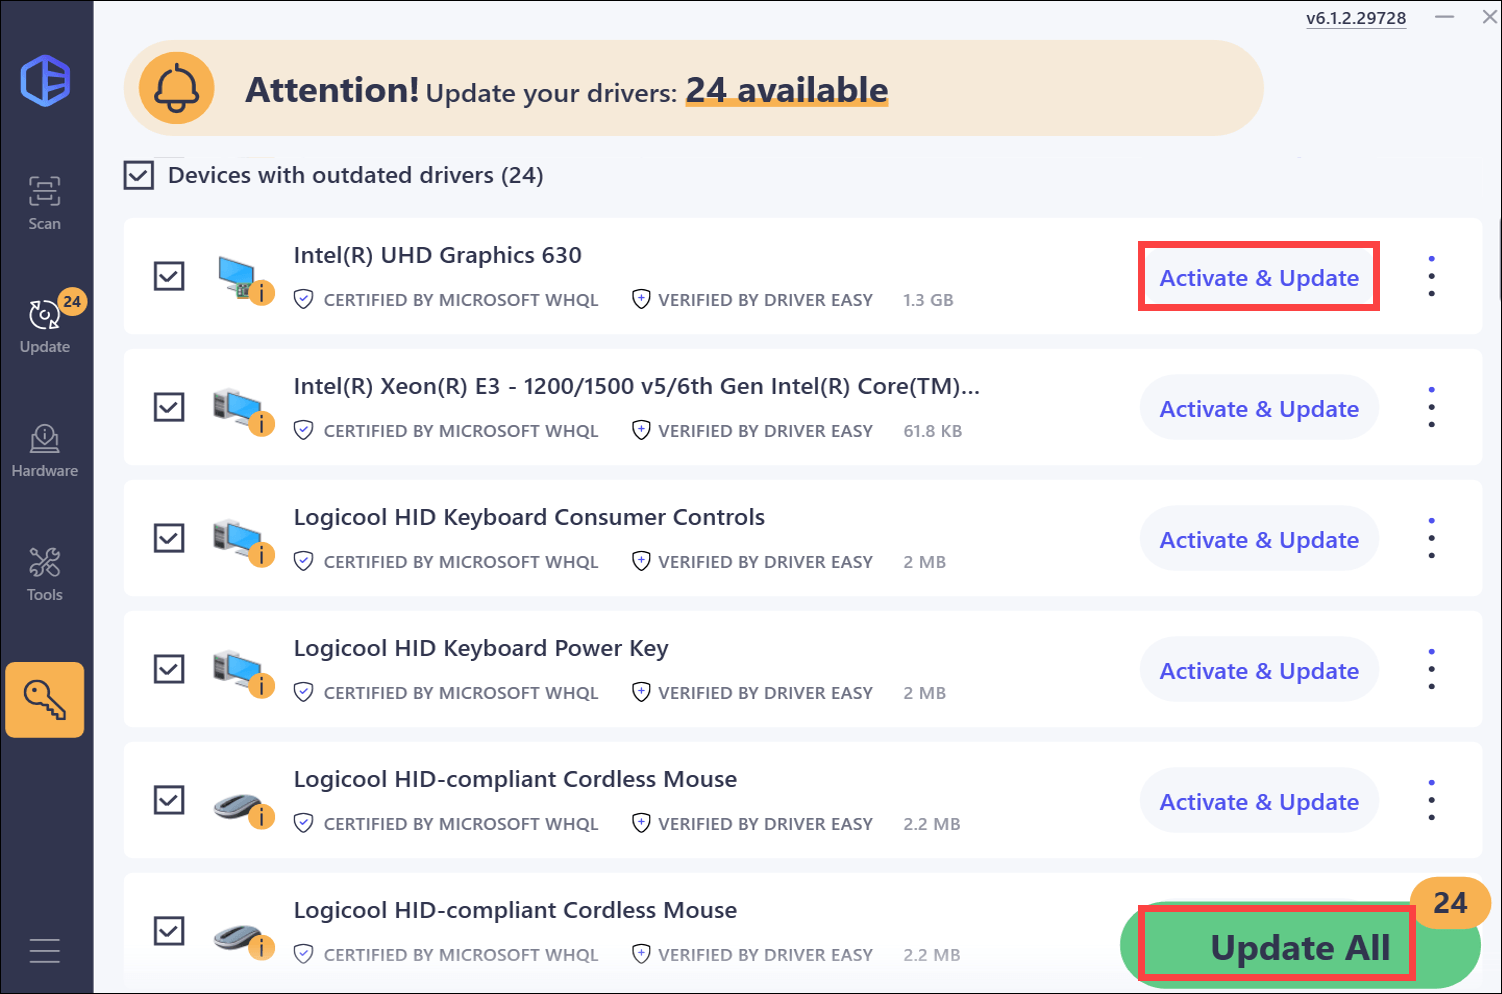
- Click Activate & Update next to your device name. Or click Update All to update all drivers at once. You’ll be prompted to upgrade by clicking on these buttons. If you’re not ready for your purchase, sign up for the free trial to update drivers with no upfront cost.
After updating your graphics driver, restart your PC for the changes to take effect.
Method 2: Update Graphics Drivers via the Device Manager or Windows Update
Device Manager is a Windows utility that allows you to update and reinstall drivers for individual devices (e.g. your video card, sound card or network card) for free. Updating drivers via the Device Manager can be easy and straightforward. Here are the steps you can take:
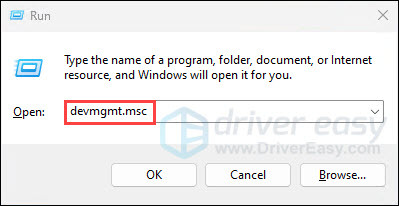
- On your keyboard, press the Windows logo key + R at the same time to invoke the Run box.
- Type devmgmt.msc and hit Enter.
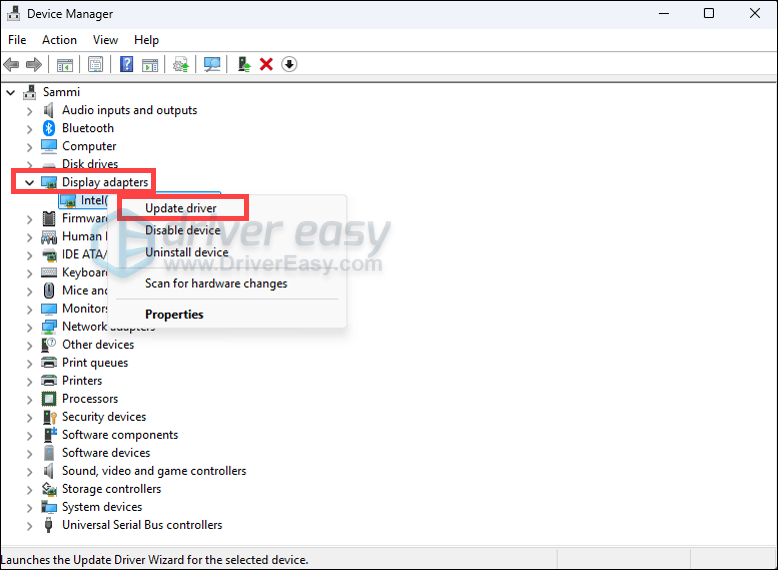
- Expand the category Display adapters. Right-click your device and select Update driver.
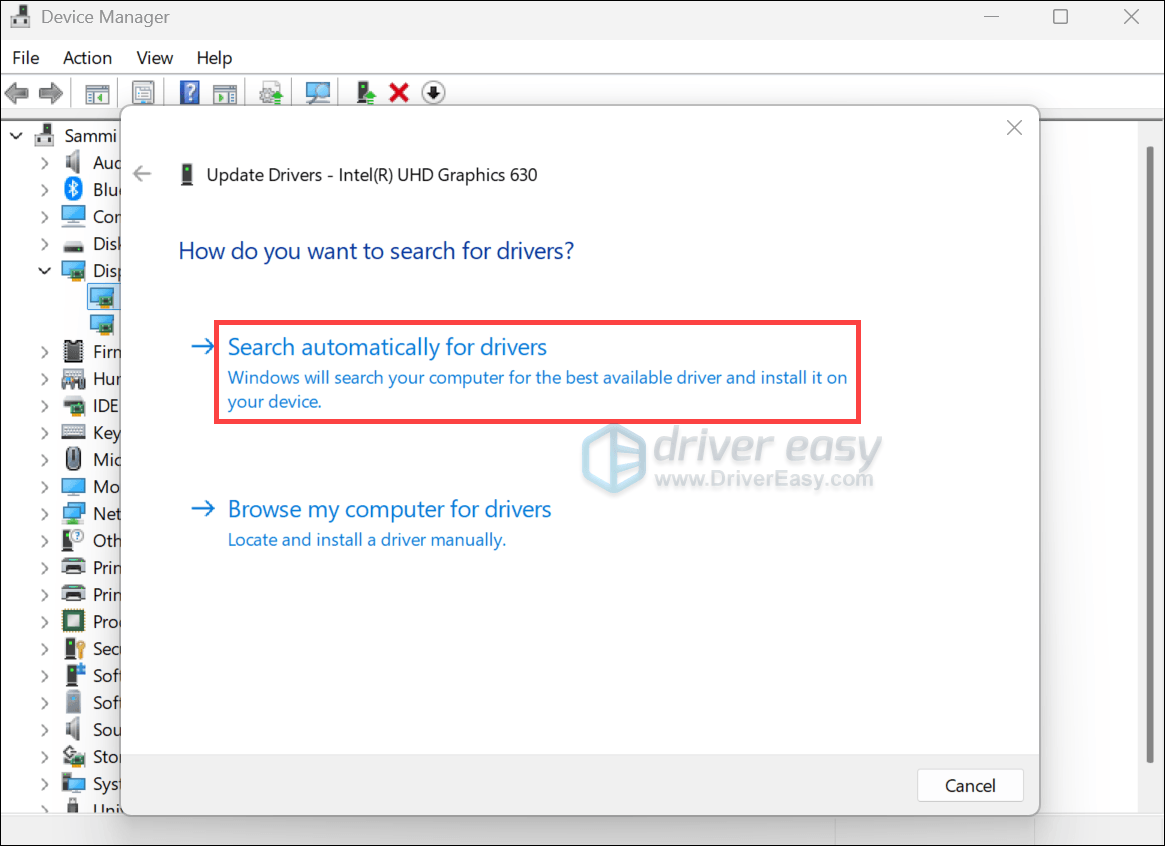
- Select Search automatically for updated driver software. Then follow the on-screen instructions to proceed.
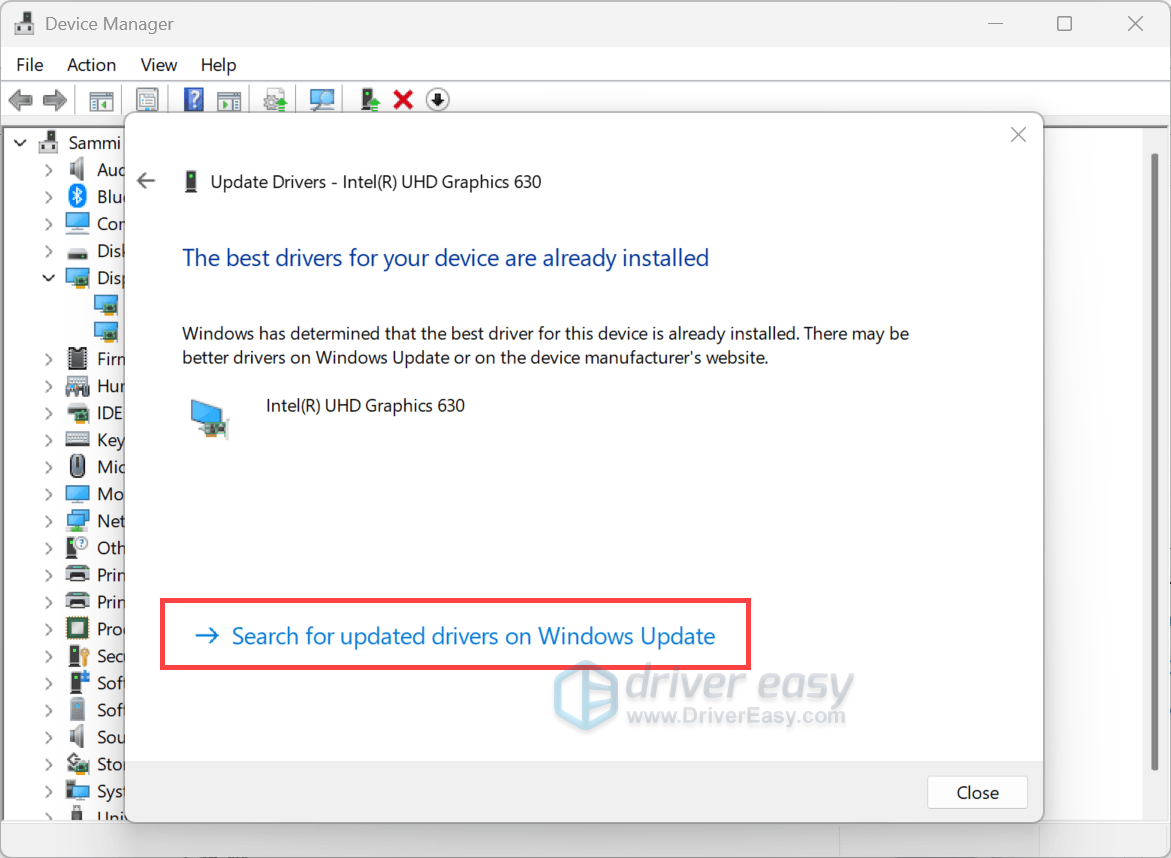
- If you receive the message saying that “Windows has determined that the best driver for this device is already installed. There may be better drivers on Windows Update or on the device manufacturer’s website. ” You can further your search by clicking Search for updated drivers on Windows Update.
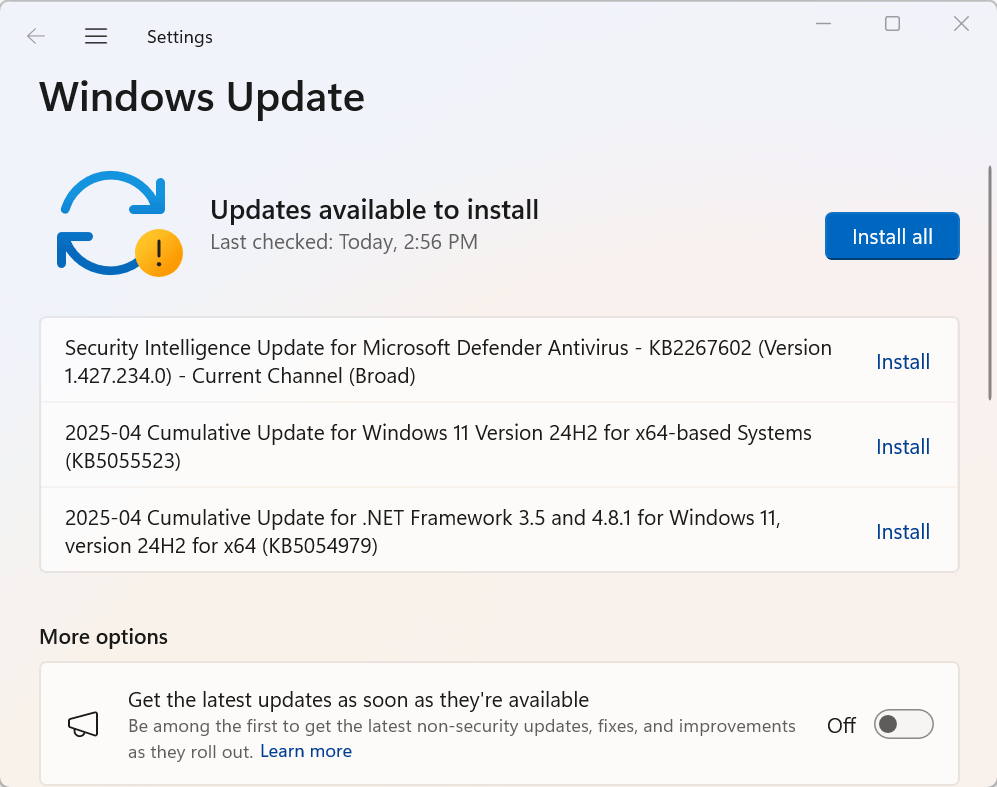
- The Windows Update menu should be opened. When available, download and install the updates by following the on-screen instructions.
Method 3: Update Your Graphics Drivers from the Manufacturer’s Website
Another way to update graphics drivers is to visit the device manufacturer’s website, download the appropriate driver for free, and manually install it on your computer. Below we’ll detail how you can update graphics drivers for your NVIDIA, AMD, or Intel device.
Step 1: Identify Your Graphics Card and System Information
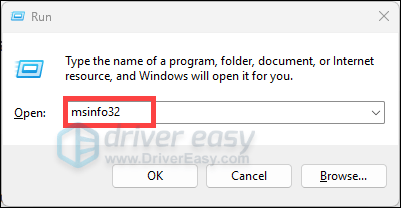
- On your keyboard, press the Windows logo key + R at the same time to invoke the Run box.
- Input msinfo32 and hit Enter. This will open the System Information window.
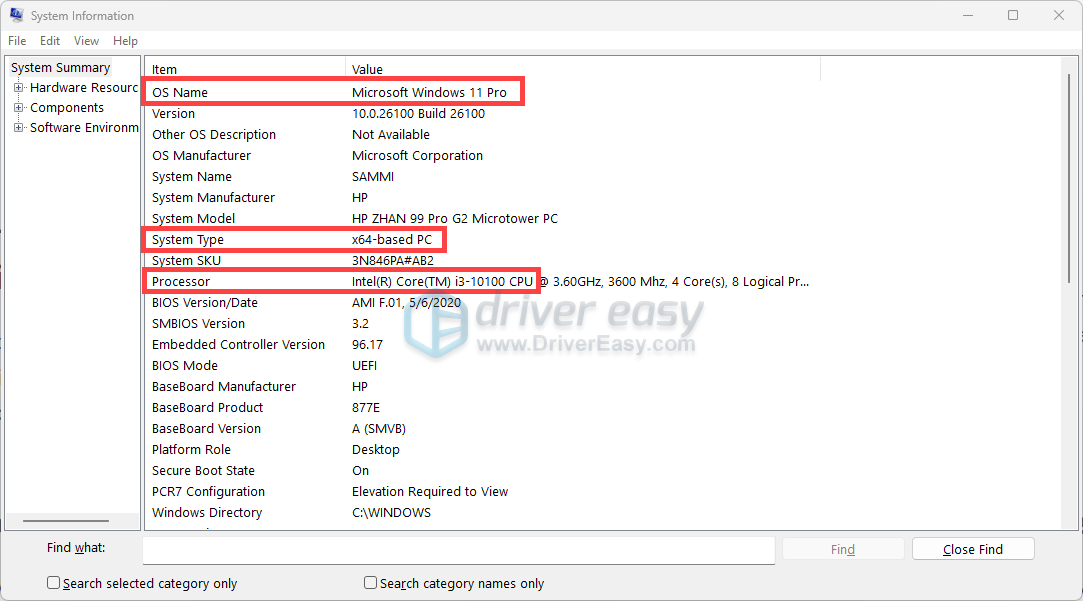
- In the System Summary section, you’ll need to note down the following information:
- OS Name
- System Type
- Processor (For users with integrated graphics, you’ll need this information to locate the correct graphics driver. If your processor is Intel® Core™, you may also need to identify the generation of the processor, which is the first number after i9, i7, i5, or i3. Here’s an example: Intel® Core™ i3-10100 Processor is 10th generation because the number 10 is listed after i3. )
- Then expand the Components category, then click Display. Here you’ll see the graphics card model you’re having, along with the driver version and other information.
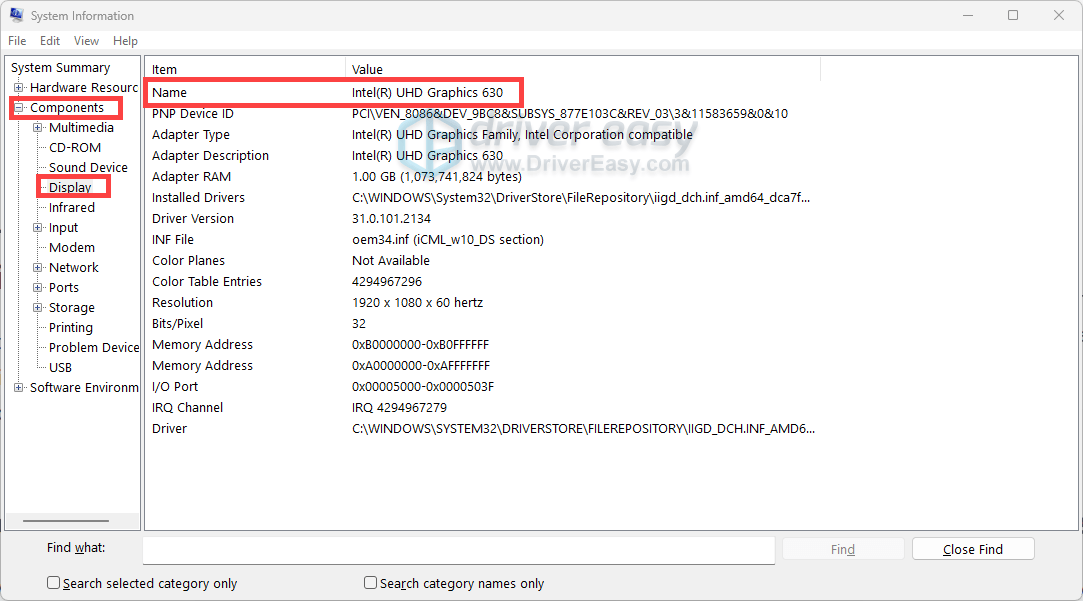
Some systems have both integrated and dedicated graphics cards.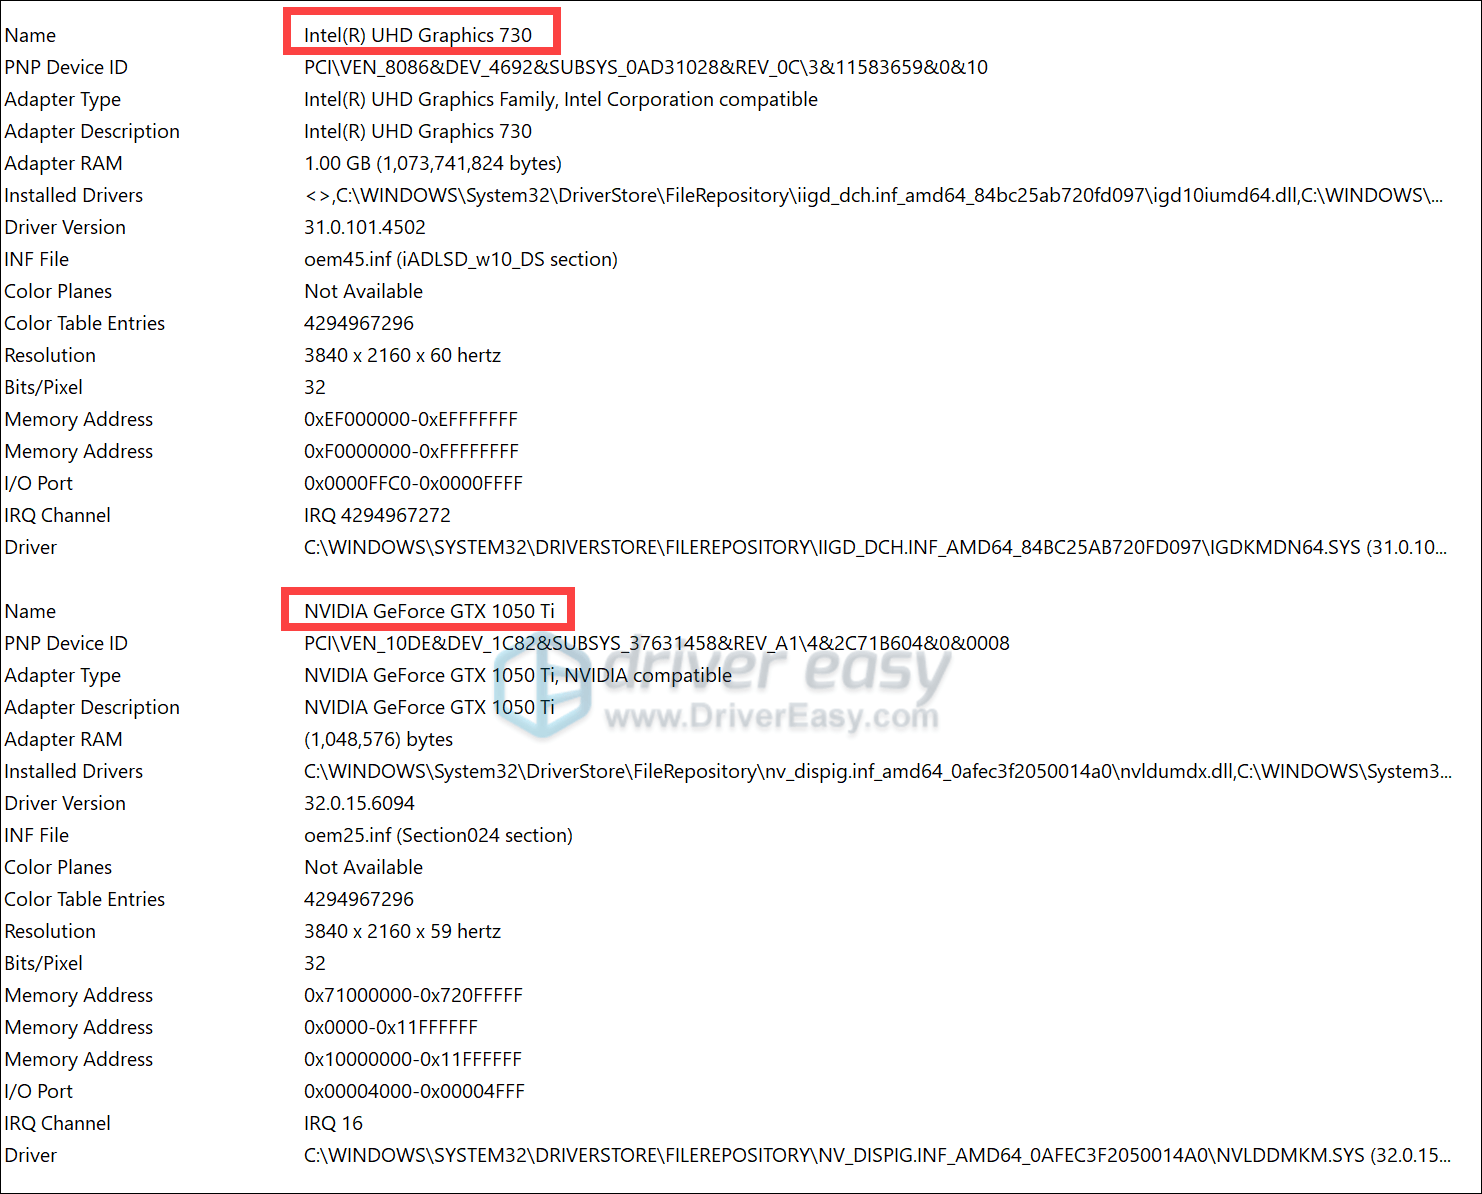
Once you gather the necessary information, follow the step-by-step guide below to update your graphics drivers.
NVIDIA
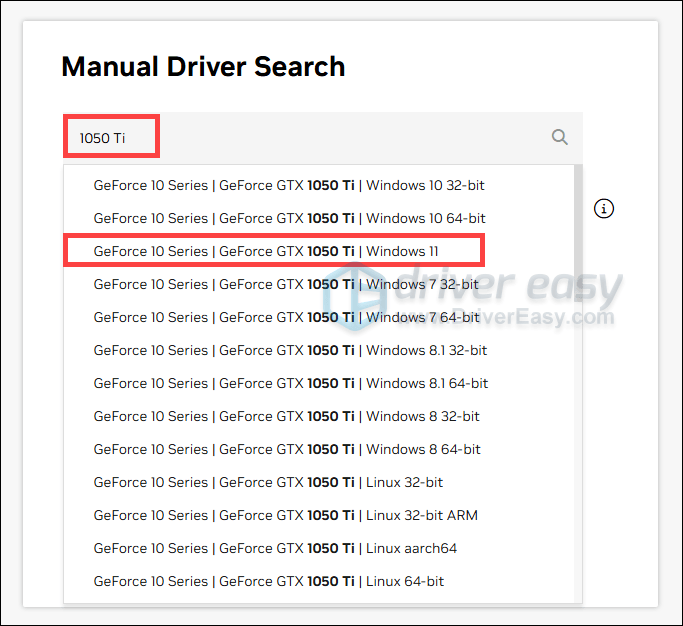
- Go to NVIDIA Manual Driver Search page.
- Enter your graphics card model into the search field. You do not have to enter the complete name, but the most significant part, for example, 1050 Ti. Then select it from the list of results.
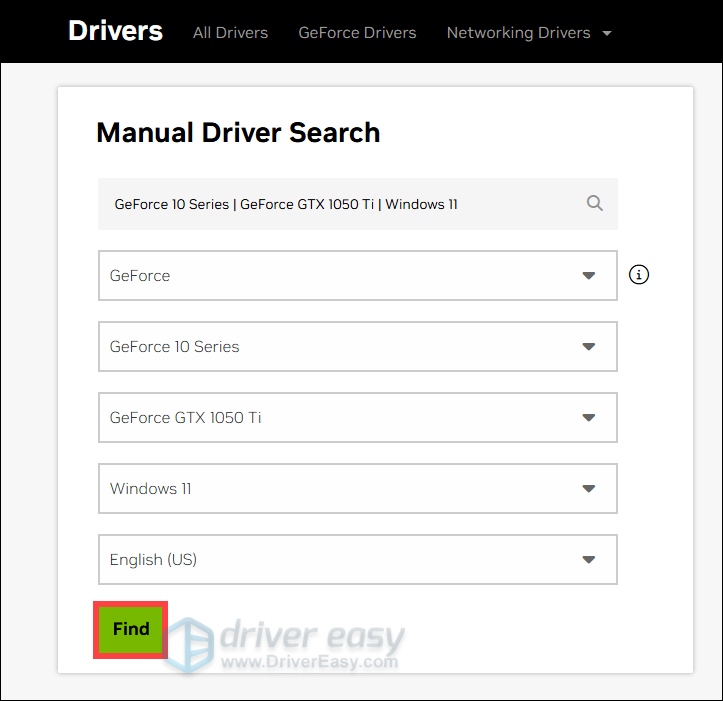
- Then click Find.
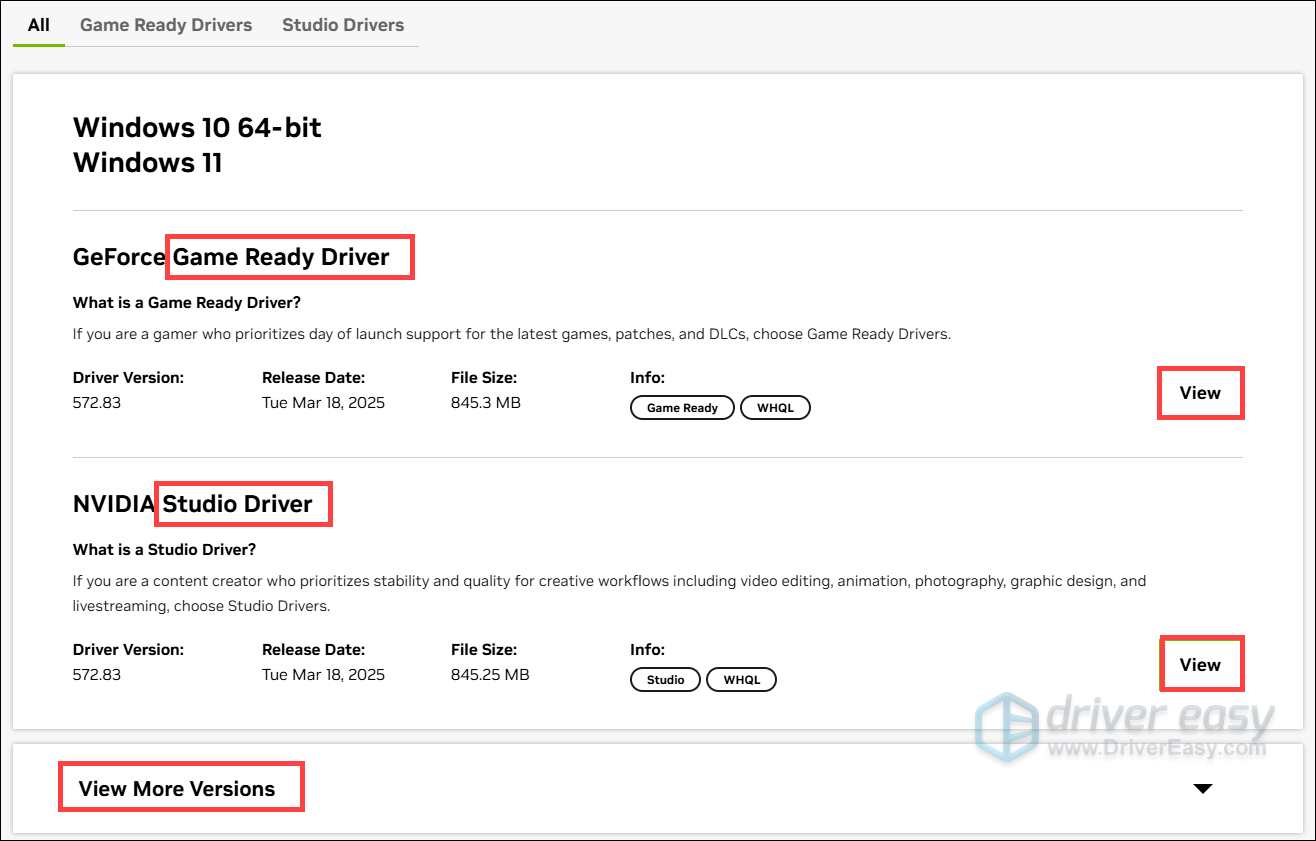
- When results show up, click the View button next to the driver you want to download. Usually, you’re given with the game ready drivers as well as the studio drivers. And you can also download the other versions of your preference.
- Click on the Download button. Then follow the on-screen instructions to download and install the driver for your system.

If you simply want to check for the latest version of the graphics driver, you can do that easily with the NVIDIA App. What you have to do is download and install it. Then launch the software and select Drivers from the left pane, and click the Download button next to the latest driver when available.
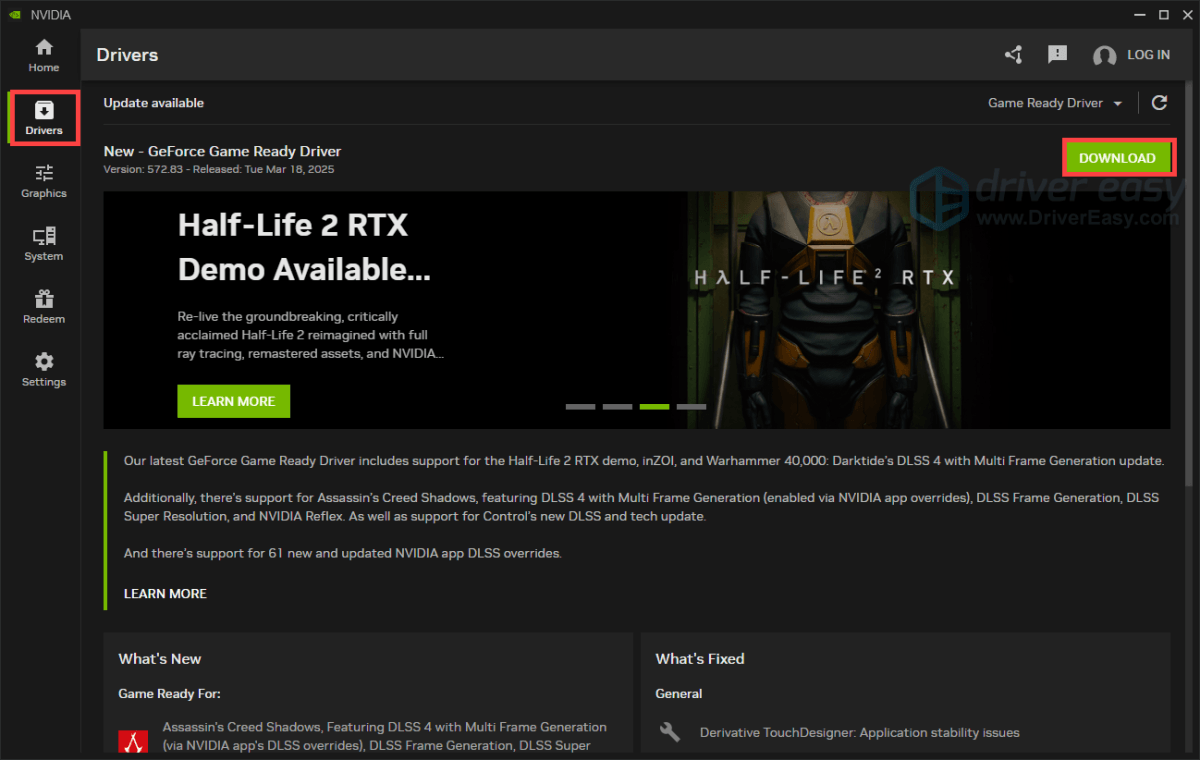
You can also select Game Ready Driver or Studio Driver from the drop-down menu.

AMD
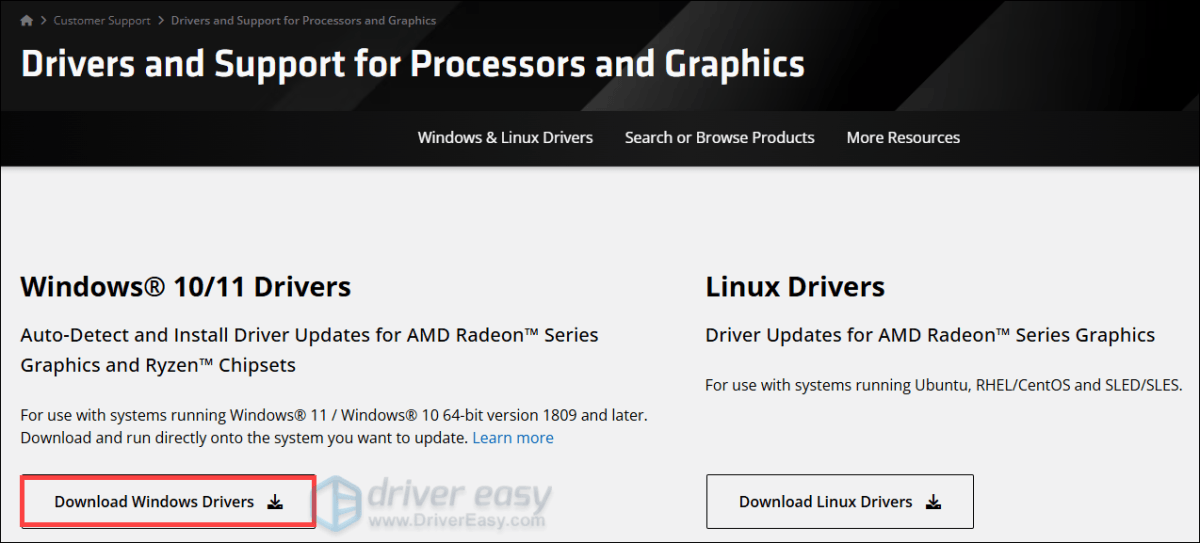
Systems running Windows® 11 / Windows® 10 64-bit version 1809 and later can utilize the AMD Auto-Detect and Install Tool. You can get the latest version from AMD Drivers and Support and complete the setup. Once done, launch the software and it will detect your AMD graphics product and Windows version, then provide the latest compatible driver.
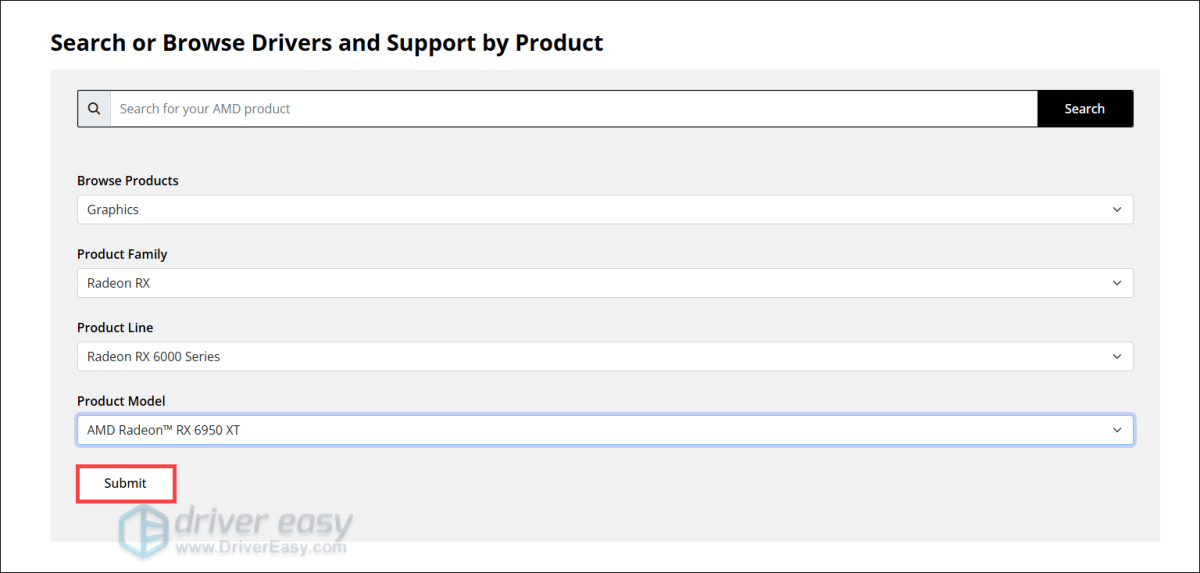
For users with other rigs, search or browse Drivers and Support by product. Select your specific GPU model and click Submit.
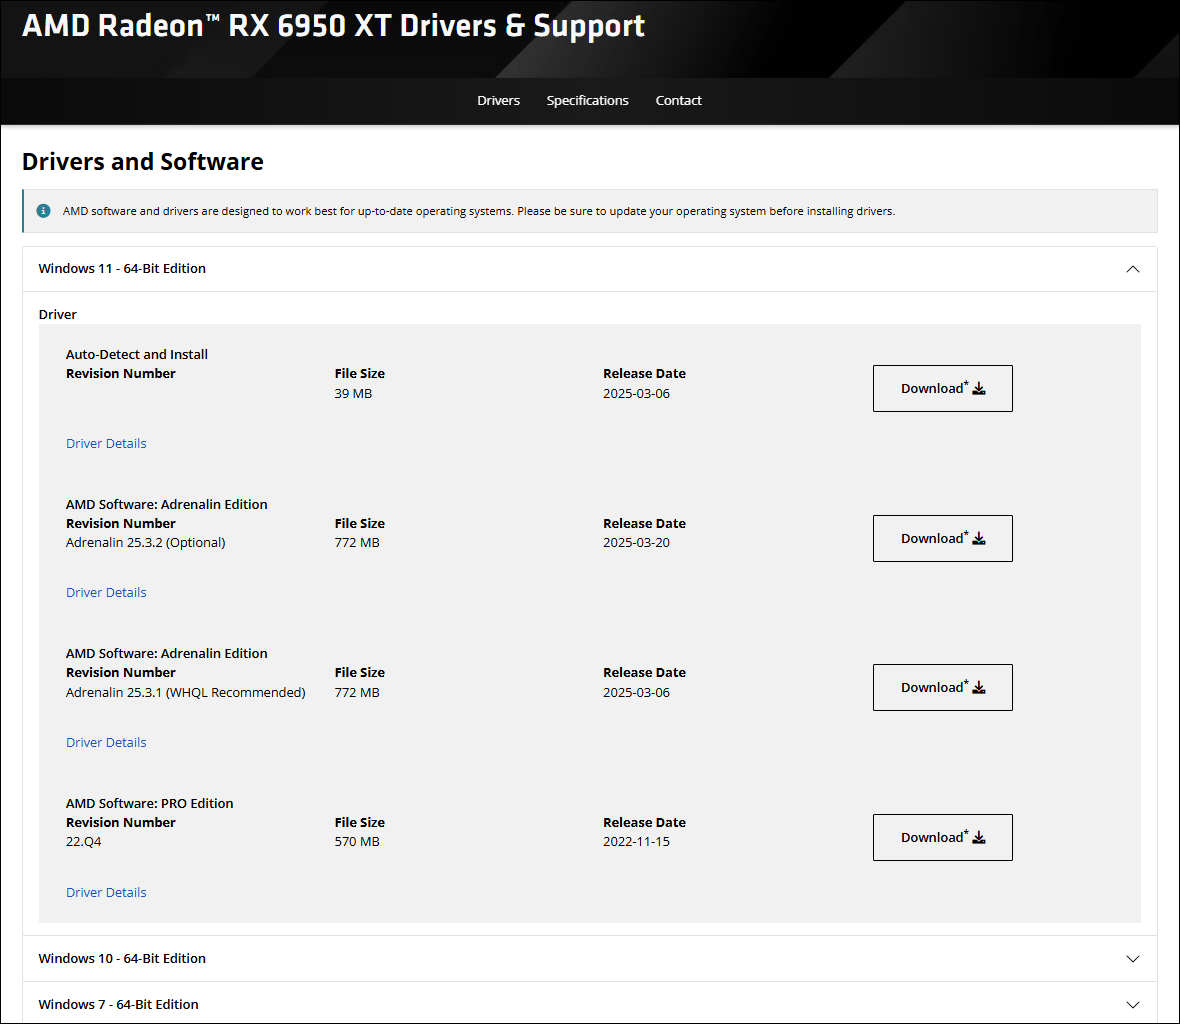
Download the one that is corresponding to your operating system.
Intel
The Intel Driver & Support Assistant (Intel DSA) is a program that helps scan your system for Intel hardware and check for available driver updates, offering to download and install them.
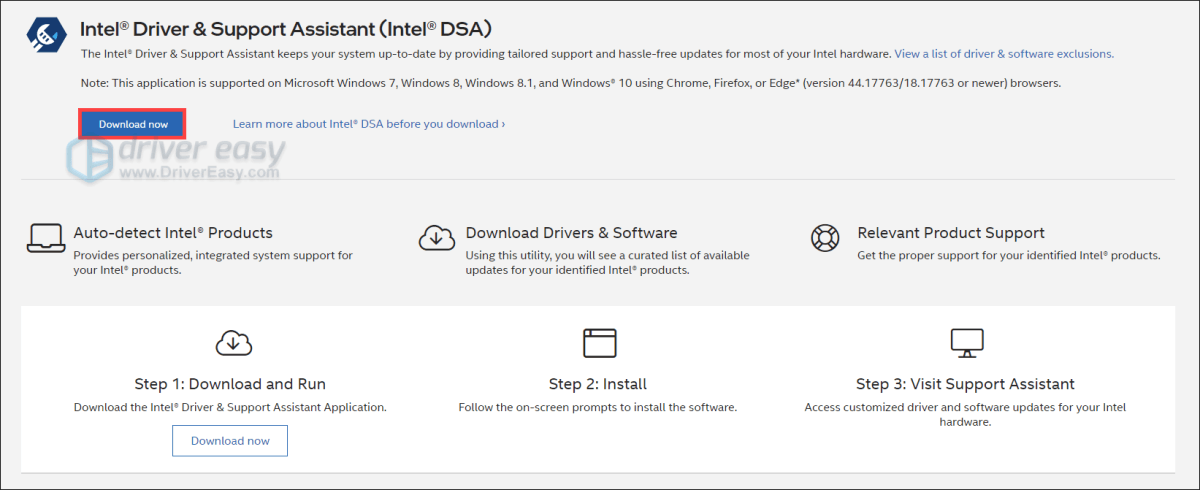
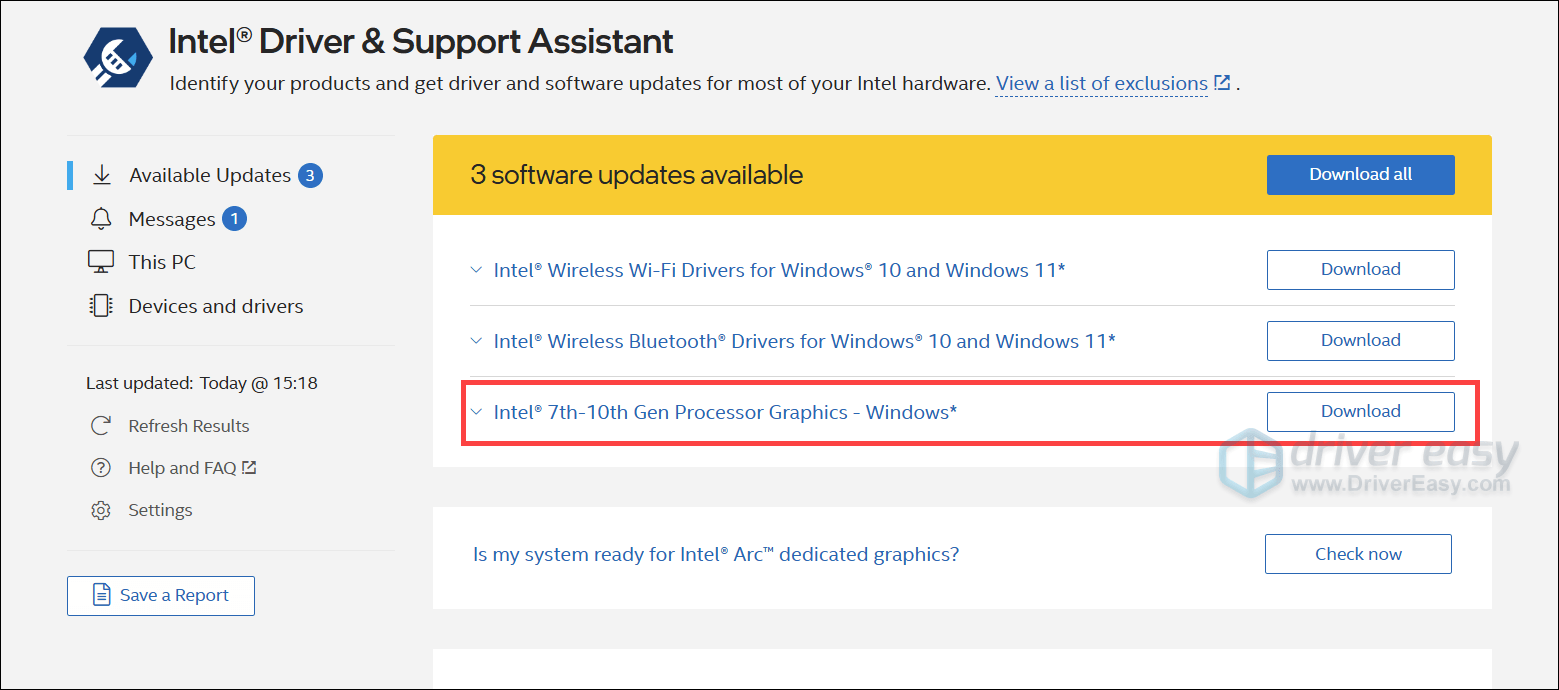
When launching the program, you should be redirected to a page where it will show you if there are updates available.
However, this program is not foolproof. Sometimes it may fail to detect your system. In this circumstance, you can manually search for the driver updates. Below are the steps you can follow.
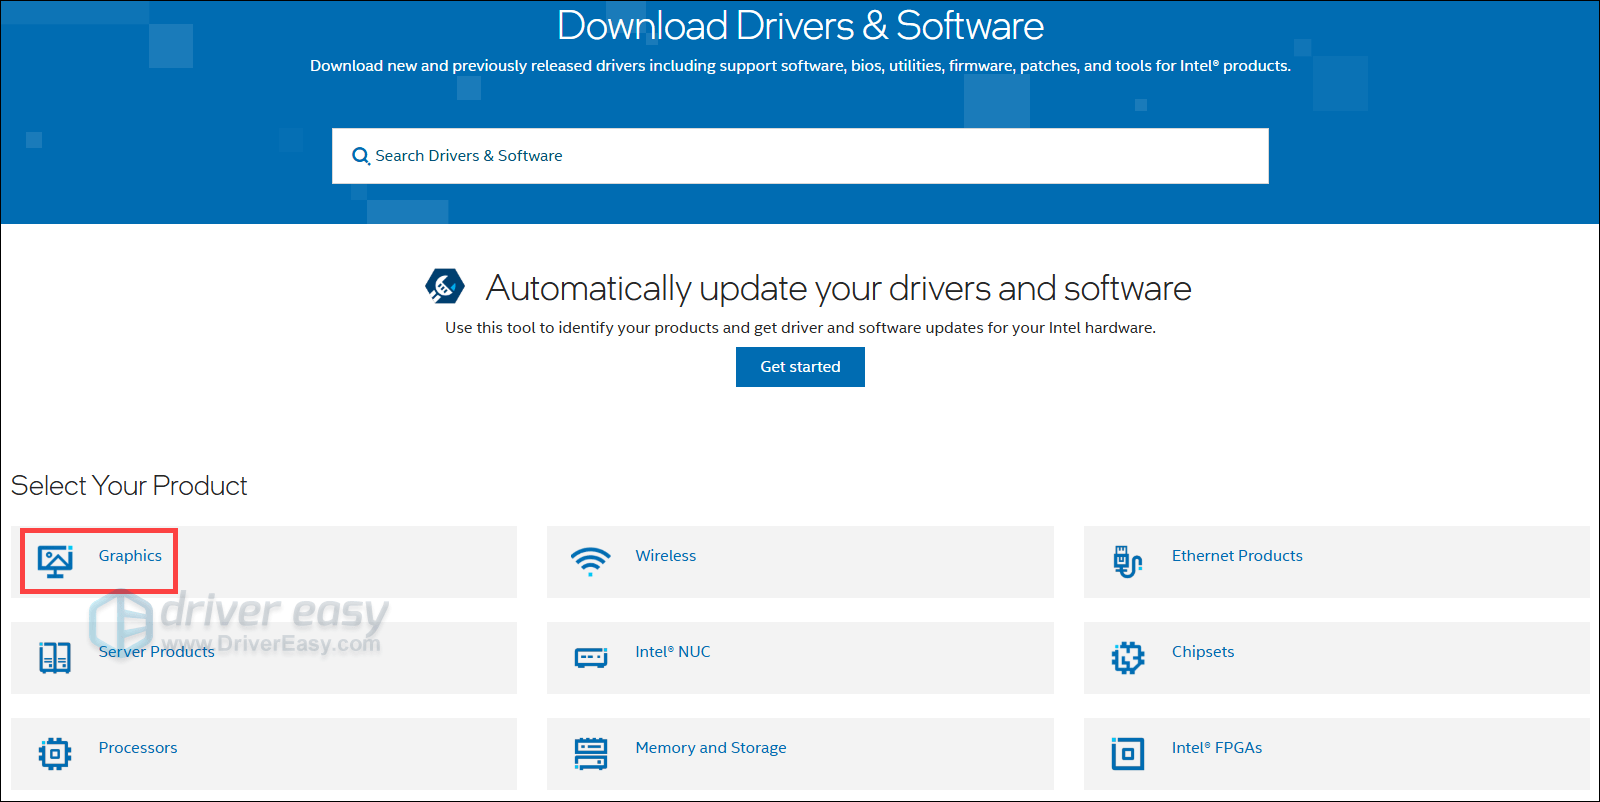
- Navigate to the Download Center.
- Select Graphics.
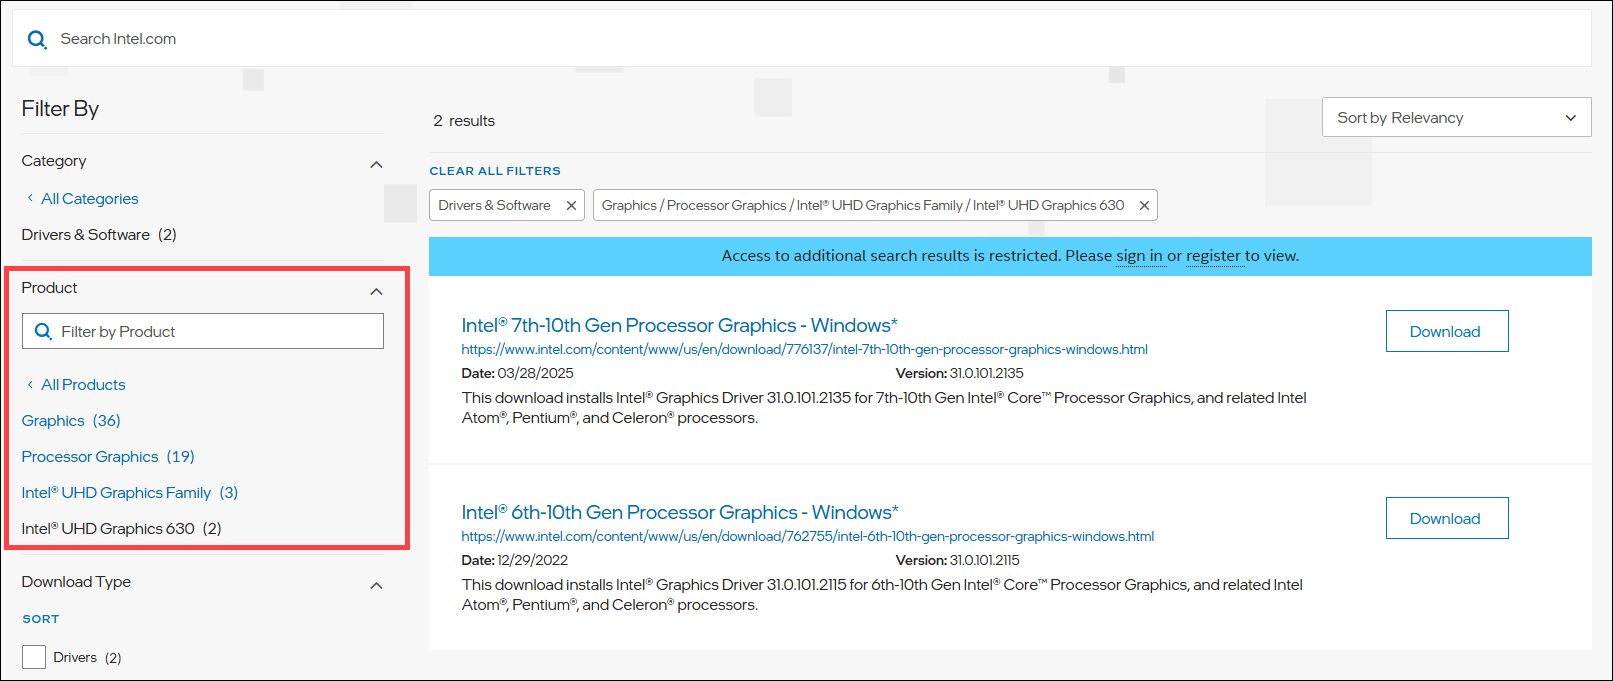
- Select your graphics card model from the left pane. Once done, find the one that is compatible with your system and click on the Download button.
Why you should update your graphics drivers
Keeping your graphics drivers up to date is essential for optimal performance, especially for gaming, video editing, and overall system stability. Below are key reasons to regularly update your graphics drivers:
1. Enhance System Performance
Updated graphics drivers can significantly improve your system’s performance, particularly when running graphics-intensive applications like games or video editing software. Manufacturers often release driver updates that optimize performance and fix bugs, contributing to a smoother user experience.
2. Ensure Compatibility with New Software
New applications and games may require the latest graphics drivers to function correctly. Without updated drivers, you might encounter issues such as crashes, graphical glitches, or sluggish performance. Regularly updating your drivers ensures that your system remains compatible with the latest software offerings.
3. Enhance System Stability
Outdated drivers can lead to system instability, causing issues like screen flickering, or unexpected crashes. Updating your graphics drivers can resolve these problems, leading to a more stable computing experience.
4. Access New Features and Improvements
Graphics driver updates often introduce new features, enhancements, and support for emerging technologies. By keeping your drivers up to date, you can take advantage of these advancements as they become available.
Manually updating graphics drivers can be a complex process that often requires a certain level of technical knowledge. Use Driver Easy to streamline this process, which offers a user-friendly solution that automates driver updates and ensures optimal system performance.
✓ Automatically detect all missing, outdated or mismatched drivers
✓ One click to update all drivers
✓ All drivers certified
✓ Safe restore: roll back to the previously installed driver
And much more…