


You’ve got your new printer, HP DeskJet 2755e. But as you may know, you can’t expect it to start printing within seconds if you just plug it into your computer without doing anything else. Right, you’ve got to install a driver that’ll enable your computer to work with that printer. It’s a piece of software that translates your computer data into a format your printer can understand. To download and install the driver, follow the simple step-by-step guide below.
How to download the HP DeskJet 2755e driver
In order to set up a new printer, you’ll need to download the driver onto your computer. Below are the steps you can take.
- Visit the page, HP Customer Support – Software and Driver Downloads.
- Enter your printer name into the search box. Then click on it from the list.
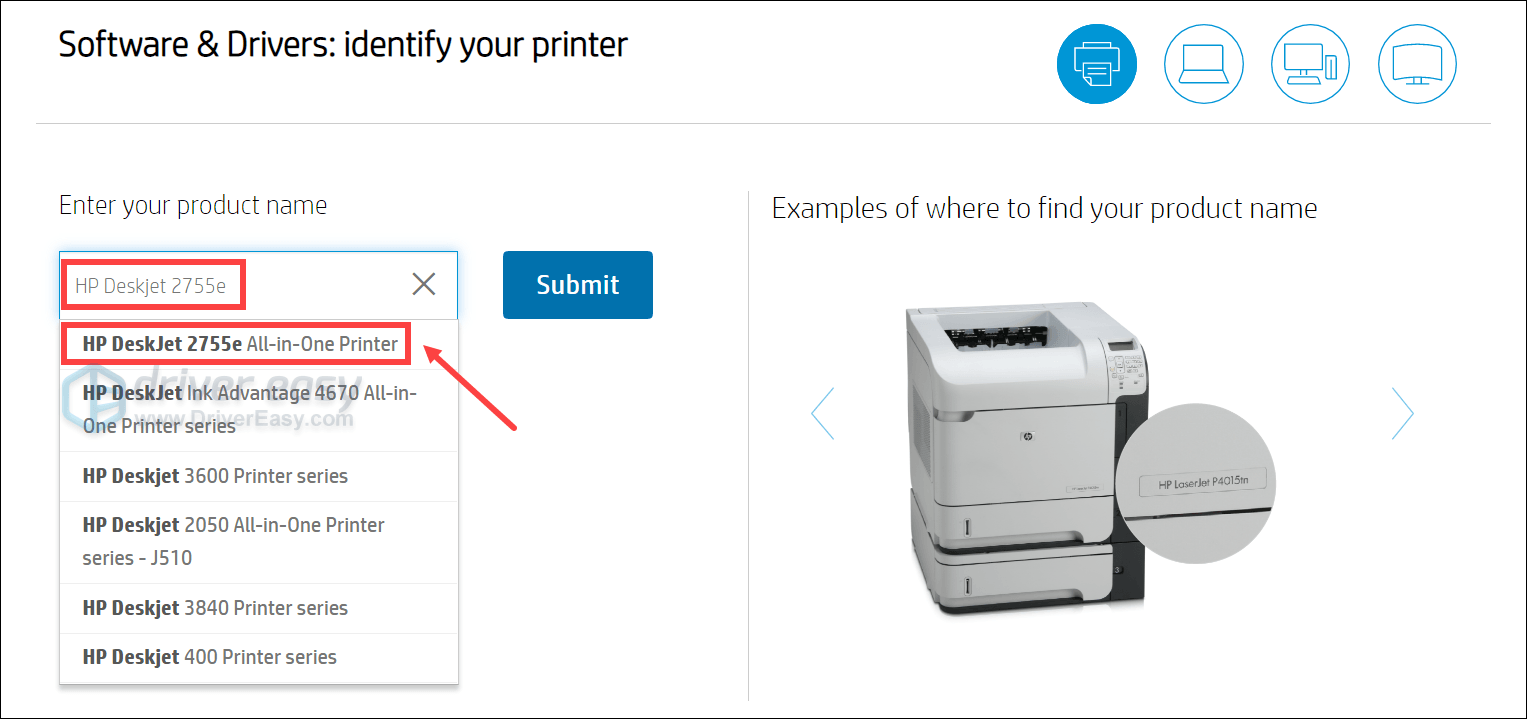
- Automatically, it’ll detect your operating system. If you wish to download software related to another OS, you can click on Choose a different OS.
Review the driver options here and download the ones you’ll need. Then follow the on-screen instructions to install them correctly.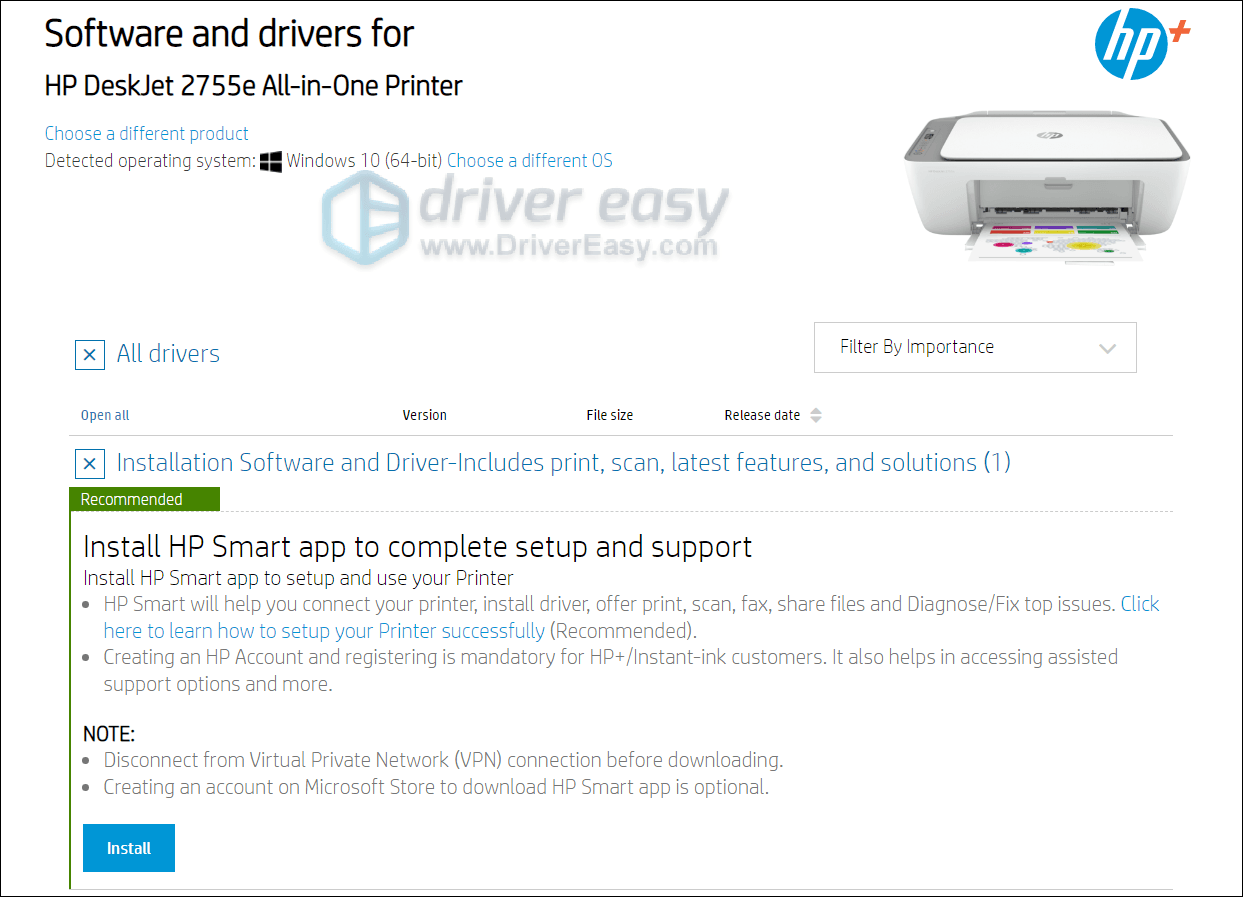
Tips: How to update your HP DeskJet 2755e driver
Now you’ve already installed the driver on your computer, it may receive periodic updates to fix bugs and bring new features, which you definitely don’t wanna miss. Additionally, driver updates come with other perks and updating the HP DeskJet 2755e driver could be the first troubleshooting step you’ll take when you encounter any issues including the printer not printing.
Below we’ll show you 2 ways to update your HP DeskJet 2755e driver: manually and automatically.
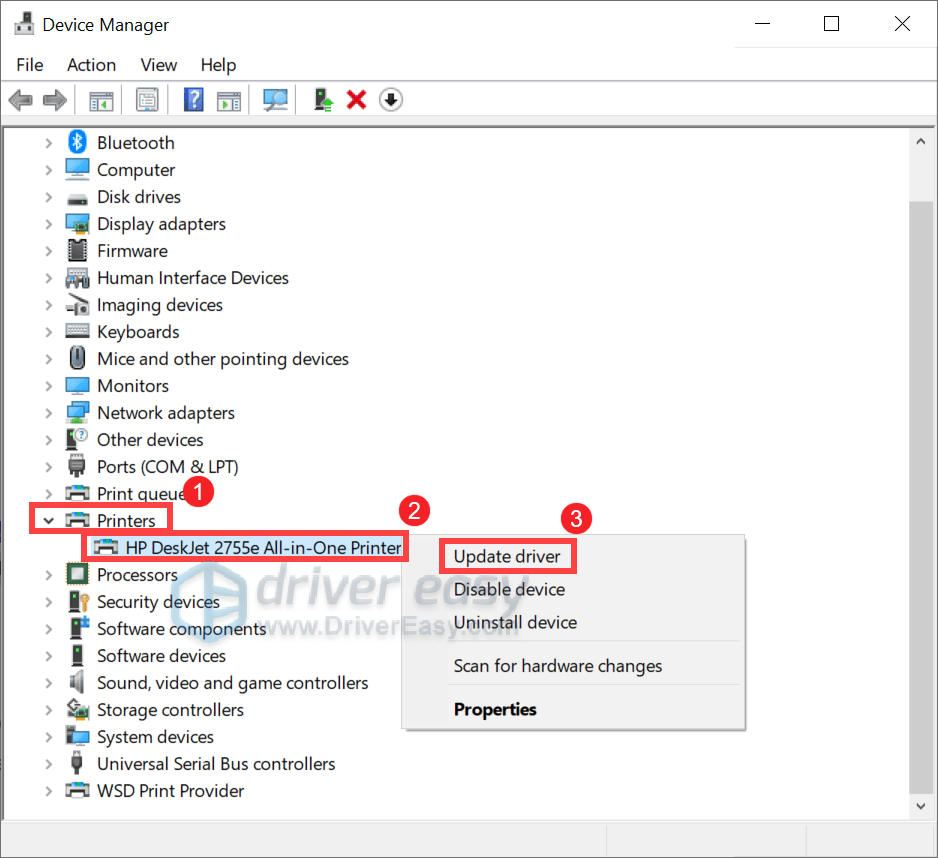
Option 1: Update your driver manually through the Device Manager
- On your keyboard, press the Windows logo + R keys simultaneously to open the Run box.
- Type devmgmt.msc and hit Enter to open the Device Manager.
.png)
- Double-click on Printers to expand the list. Then right-click your device and select Update driver.
- Click Search automatically for drivers. Then follow the on-screen instructions to install the updated driver.
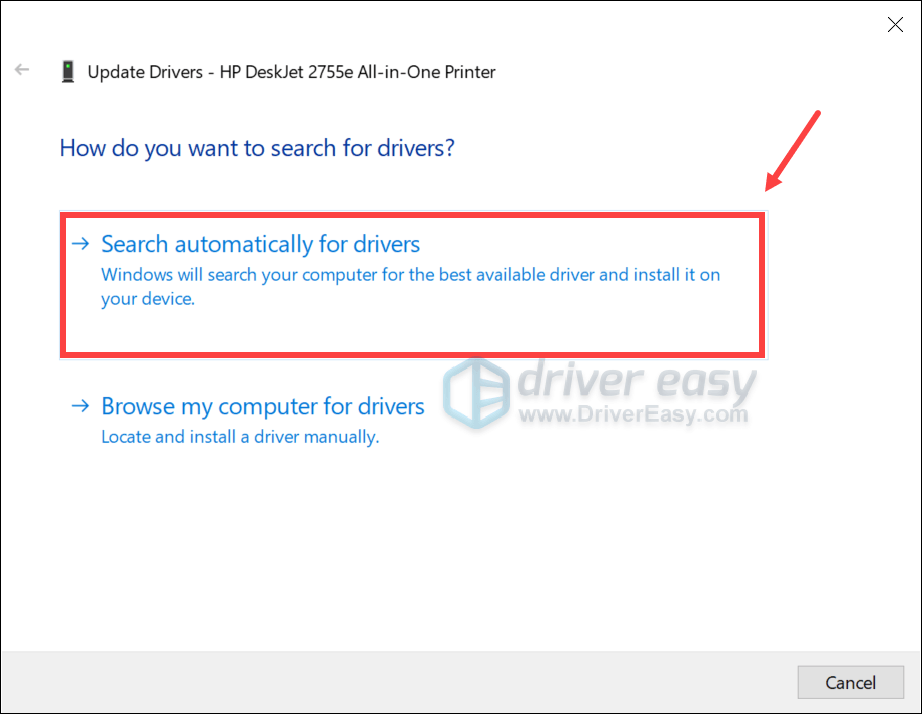
When an update is successfully installed, restart your computer.
Option 2: Update your driver automatically with Driver Easy (recommended)
Sometimes Windows will tell you that you’ve already had the latest driver version, but it’s not. Or it could be the case that updating drivers manually seems too tedious and time-consuming for you, you can use dedicated driver updating software such as Driver Easy. It’s a handy tool that automatically helps you detect any problematic drivers, then download and install the latest version of drivers for your system, direct from the device manufacturers. With Driver Easy, updating drivers is just a matter of a few mouse clicks.
You can update your drivers automatically with either the 7 days free trial or the Pro version of Driver Easy. It takes just 2 clicks, and you get full support and a 30-day money-back guarantee with the Pro version:
- Download and install Driver Easy.
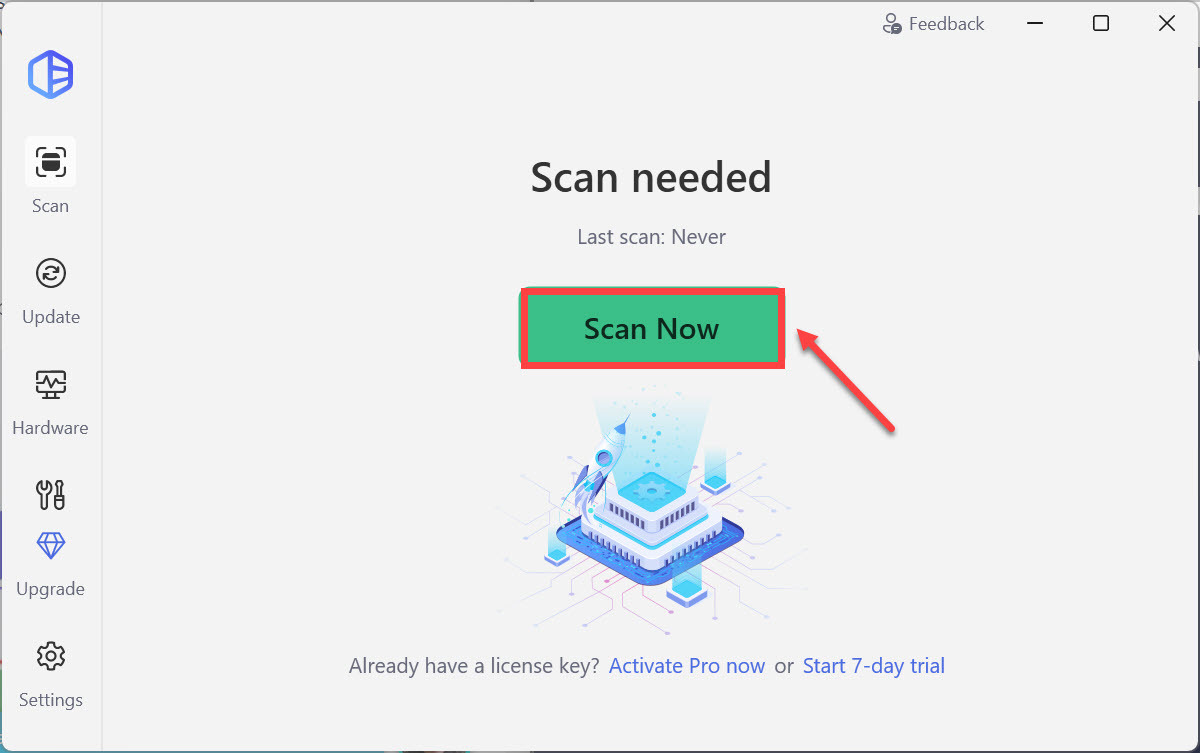
- Run Driver Easy and click the Scan Now button. Driver Easy will then scan your computer and detect any problem drivers.
- Click the Activate & Update button next to the flagged device to automatically download and install the correct version of this driver.
Or click Update All to automatically download and install the correct version of all the drivers that are missing or out of date on your system (You’ll need the Pro version for this – when you select Update All, you’ll get a prompt to upgrade. If you’re not prepared to purchase the Pro version yet, Driver Easy provides a 7-day trial at no cost, granting access to all Pro features like fast downloads and easy installation. No charges will occur until after your 7-day trial period ends.)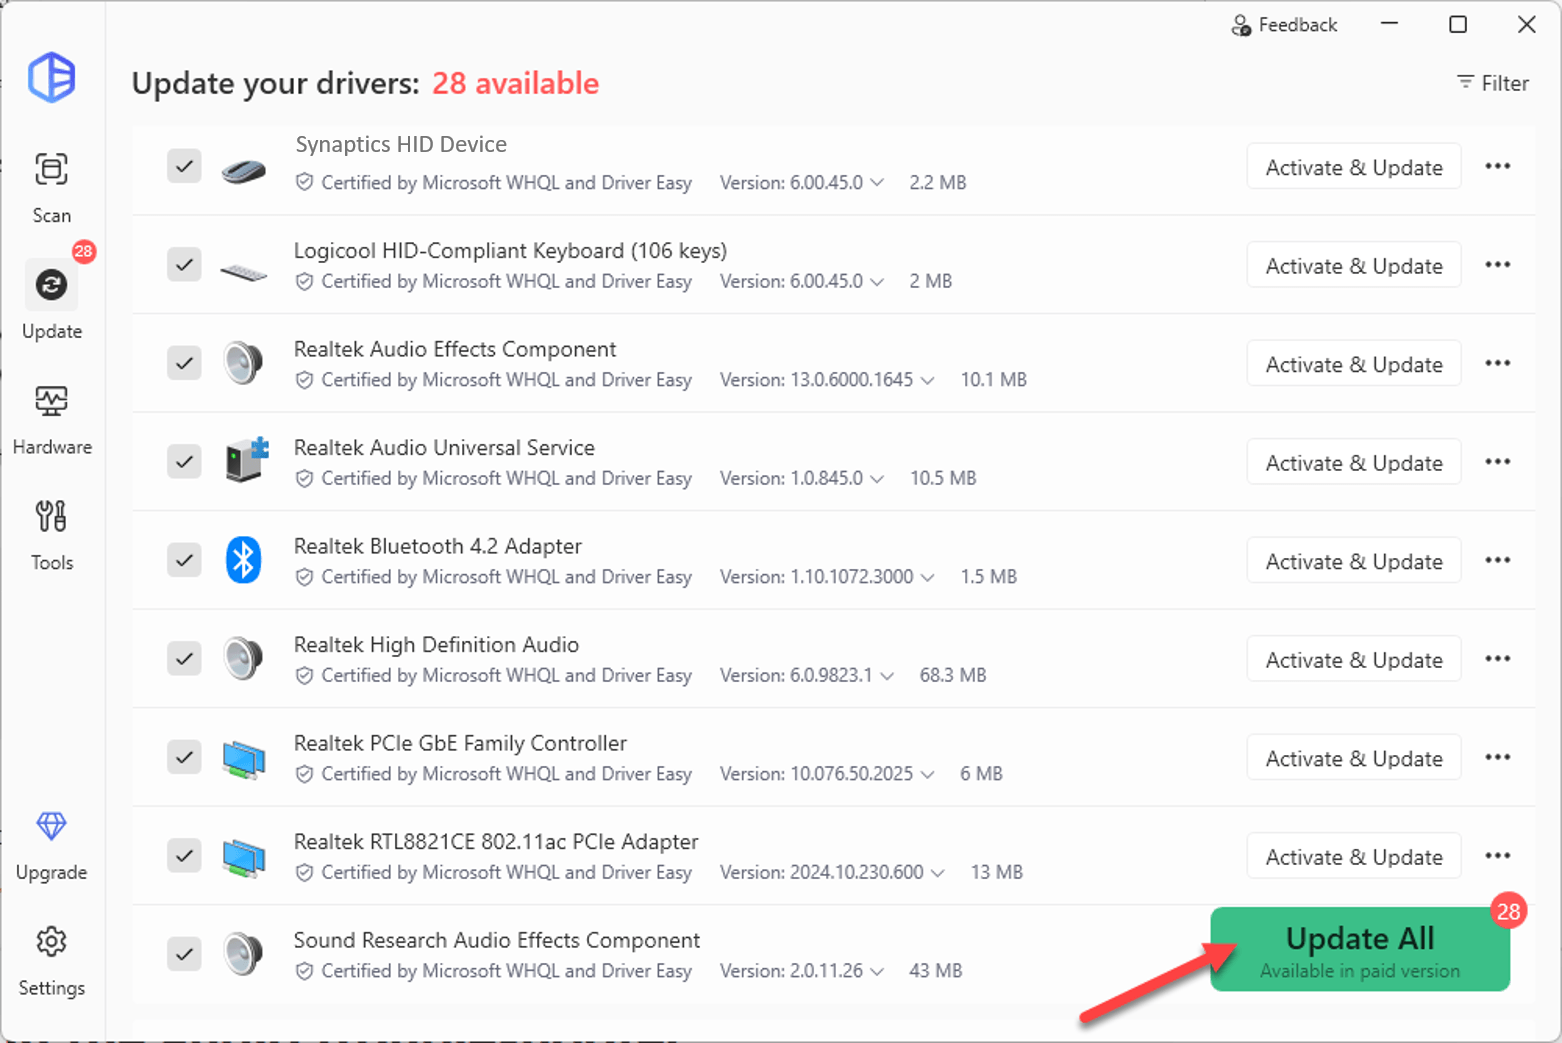
- Restart your computer for the change to take effect.
After installing all driver updates, reboot your computer for the changes to take full effect.