


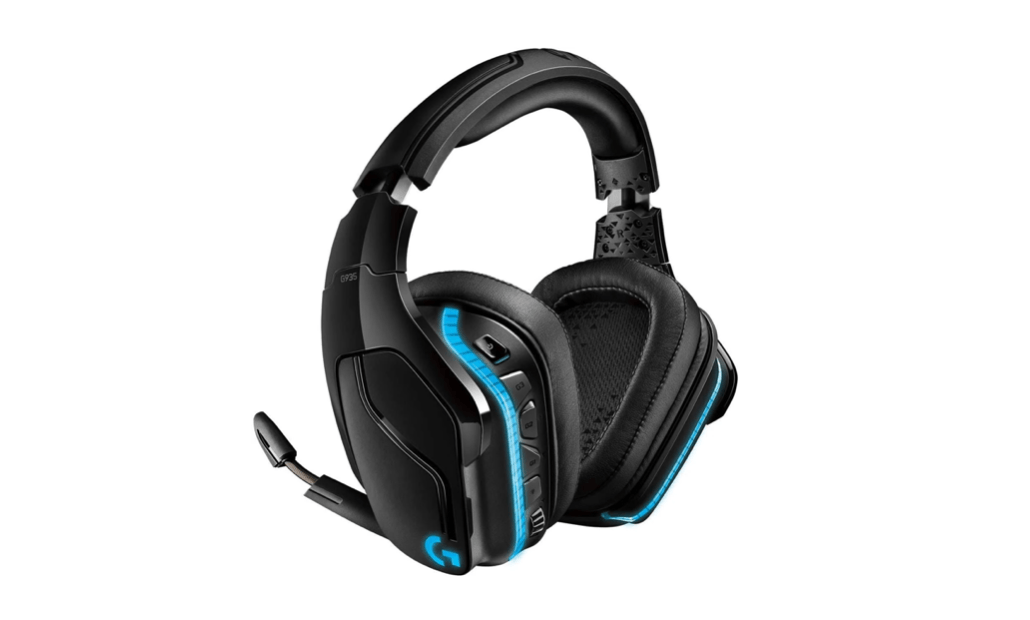
The Logitech G935 is a great value gaming headset with features like customizable LED lights, wireless audio, and surround sound. But occasionally, users may find the microphone of it suddenly stops working. If you’re having the same issue, don’t worry, this post may help you fix it!
Try these fixes:
You may not need to try them all; just work your way down the list until you find the fix that works.
- Allow access to your mic on your PC
- Update your audio drivers
- Check the sound settings
- Reinstall Logitech Gaming Software
- Try an external sound card
- Run the audio troubleshooter
Before you begin
Before you start trying the fixes below, you should simply have a basic check on your headset as follows:
- Check the physical mute button on the left earcup to make sure that your headset is not muted.
- Charge the headset to check if it has run out of battery.
- Connect the headset to another PC. If the G935 mic still doesn’t work, it’s most likely because the headset has expired.
Method 1: Allow access to your mic on your PC
The first method to fix the problem is to check if your computer lacks permission to access the mic on your Logitech G935 headset. Here’s how to check:
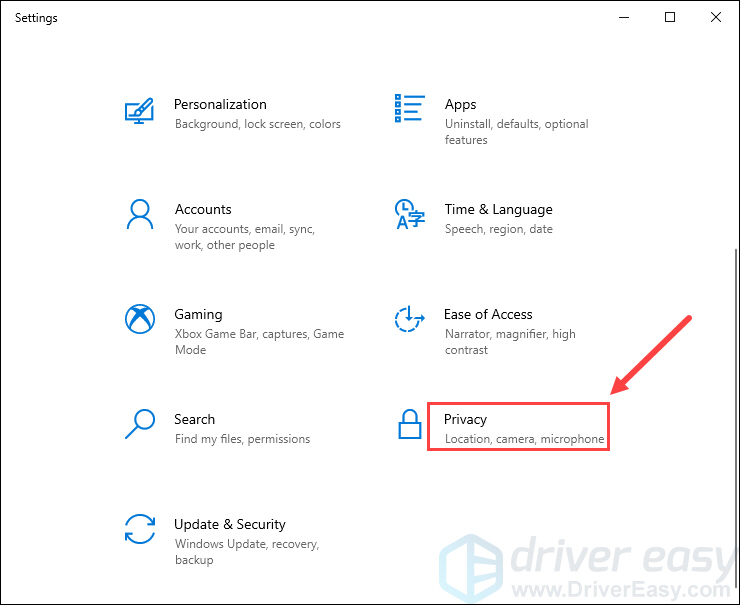
- Press the Windows + I keys to open Windows settings and then select Privacy.
- On the left panel, select Microphone, then click the Change button. Check if the toggle is On in the pop-up window. If it isn’t, toggle the switch to On.
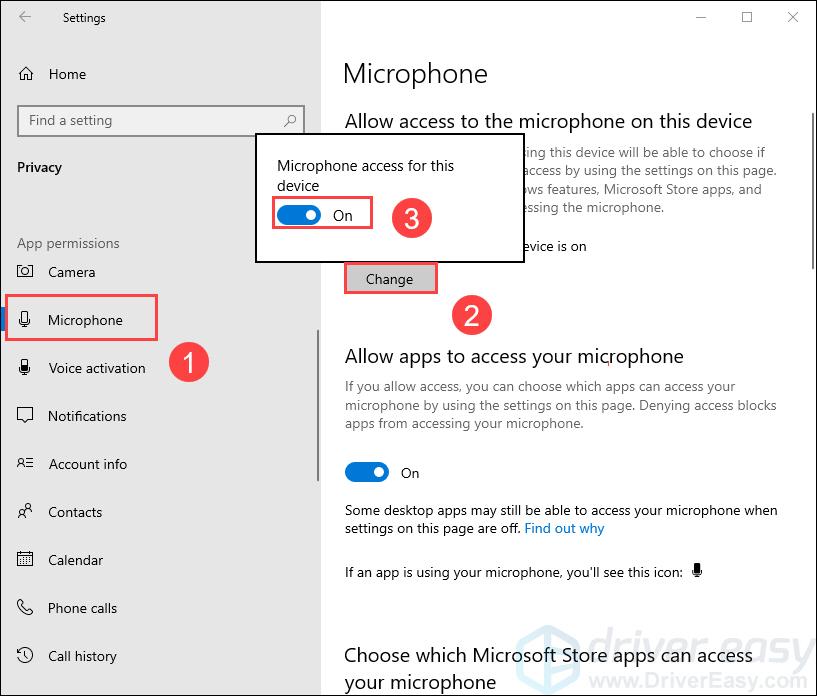
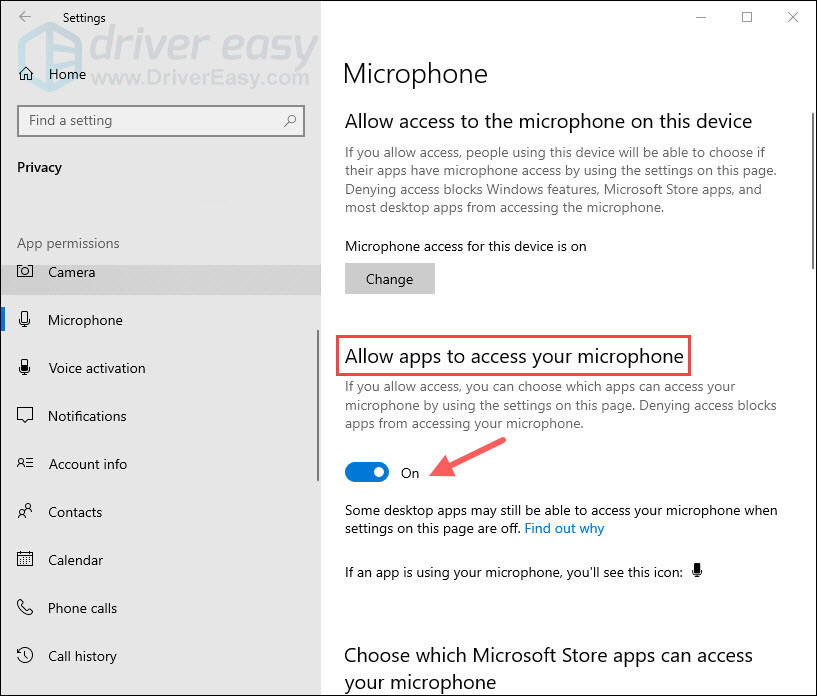
- Now check to see if the toggle under Allow apps to access your microphone is turned On. If it isn’t, toggle the switch to On.
Check your microphone to see if it’s back to normal. If it isn’t, proceed to the next fix down below.
Method 2: Update your audio drivers
This problem may also occur if you are using a faulty audio driver or it’s out of date. So you should update your audio drivers to see if it fixes the mic not working problem.
Whether you choose to update the device drivers manually, using Windows Update, or you use a trusted third-party product, it’s essential that you have the latest correct device drivers for your operating system at all times.
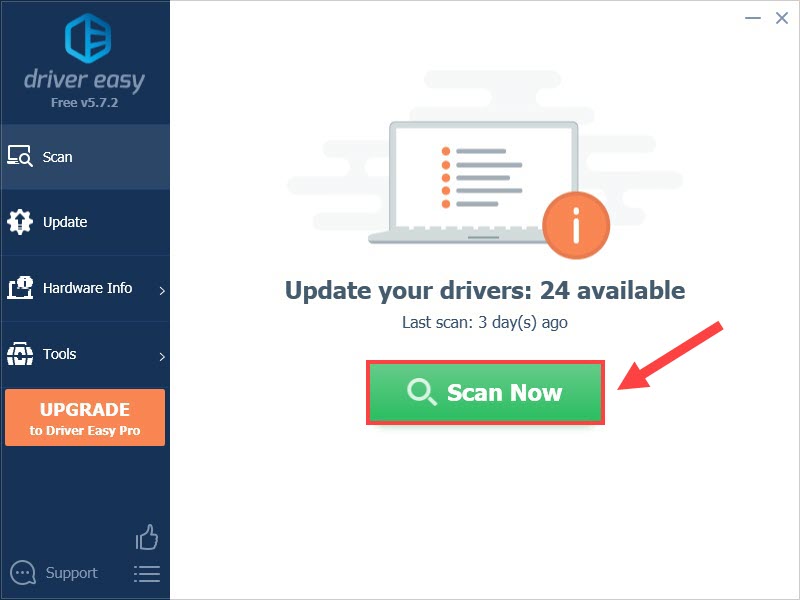
If you’re not comfortable playing with device drivers, we recommend using Driver Easy. Driver Easy will automatically recognize your system and find the correct drivers for your exact audio, and your Windows version, and it will download and install them correctly:
- Download and install Driver Easy.
- Run Driver Easy and click the Scan Now button. Driver Easy will then scan your computer and detect any problem drivers.
- Click the Update button next to the flagged audio drivers to automatically download the correct version of that driver, then you can manually install it (you can do this with the FREE version).
Or click Update All to automatically download and install the correct version of all the drivers that are missing or out of date on your system. (This requires the Pro version which comes with full support and a 30-day money-back guarantee. You’ll be prompted to upgrade when you click Update All.)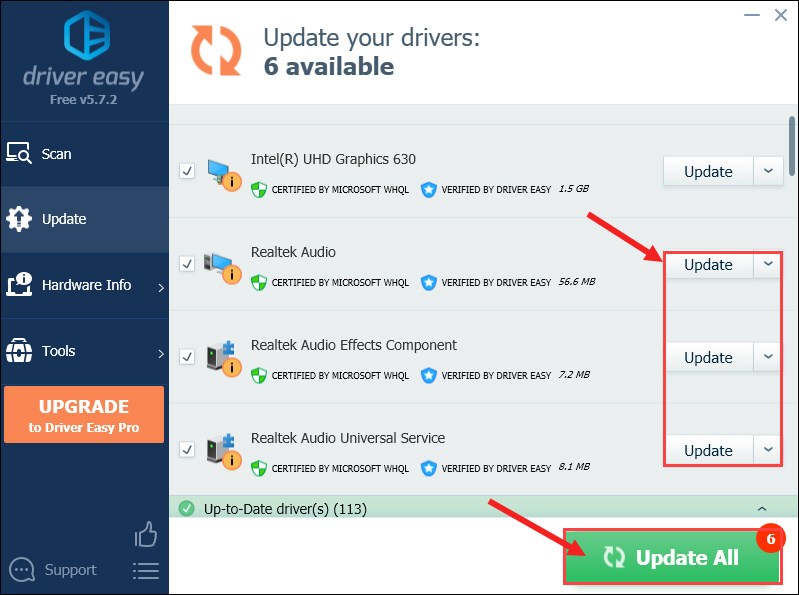
- After updating your audio drivers, reboot your computer for the trick to take effect.
Method 3: Check the sound settings
If your Logitech G935 microphone is somehow disabled or not set as the default in the sound settings, it won’t work on your computer. You can check if this is your case by following the steps below:
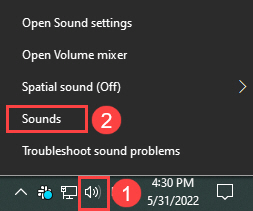
- Right-click the volume icon on the right side of the taskbar, and then select Sounds.
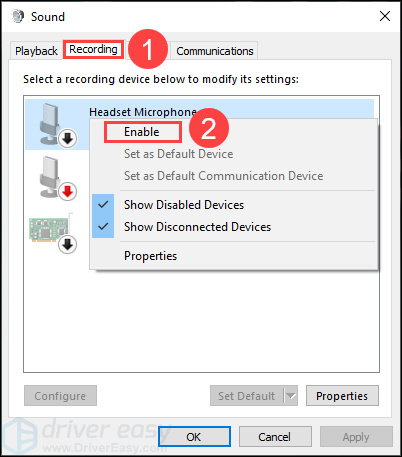
- Under the Recording tab, right-click on any empty space inside the device list and then tick Show Disabled Devices.
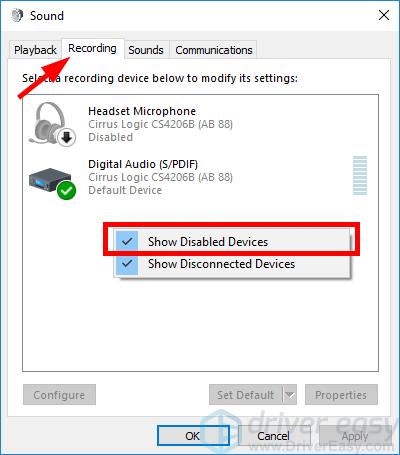
- If your Logitech G935 microphone is disabled in the sound settings, right-click on it and then select Enable.
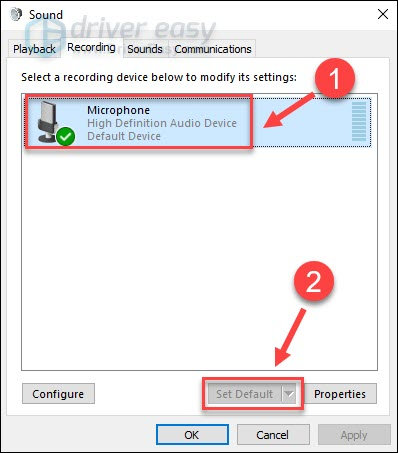
- Check if the mic is the default device. If not, click Set Default.
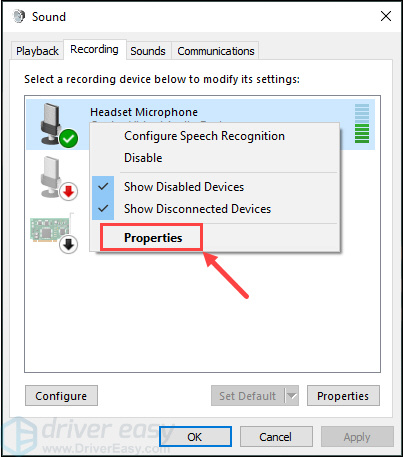
- Now right-click the Headset Microphone again and select Properties.
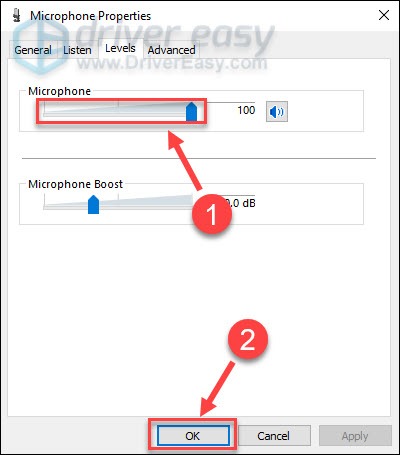
- Under the Levels tab, drag the microphone slider to the highest value and then click OK to save your changes.
Restart your PC and test your microphone to see if it works properly now. If not, move on to the next fix below.
Method 4: Reinstall Logitech Gaming Software
A conflict between your PC and the Logitech Gaming Software could also be the source of the issue.To solve the conflict, you need to reinstall the software that allows your computer to reload data from your Logitech headset. Here’s how it’s done:
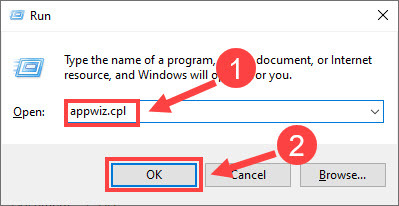
- Press the Windows + R keys to open the Run command. Type appwiz.cpl in the text box and then click OK.
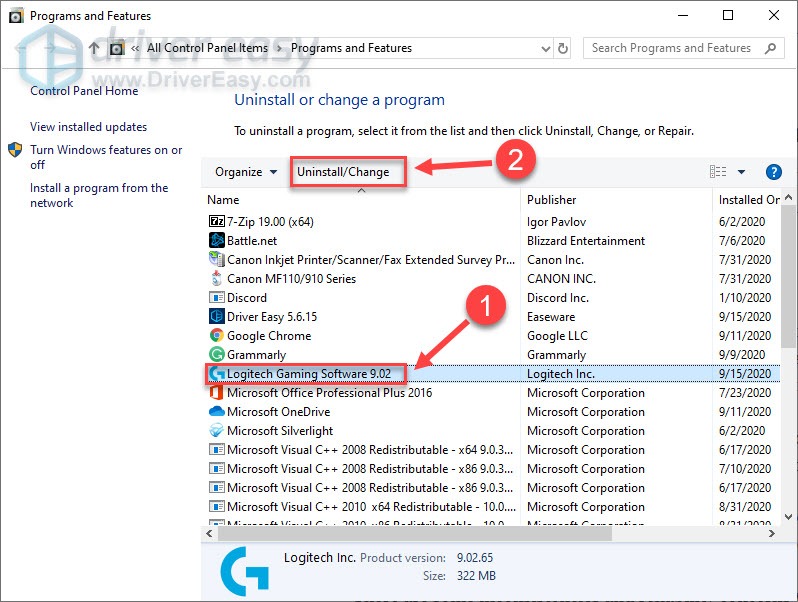
- Find the Logitech Gaming Software. Click on it and then click Uninstall/Change.
- After uninstalling the program, head to Logitech’s support website and download the latest version of Logitech Gaming Software that matches your operating system.
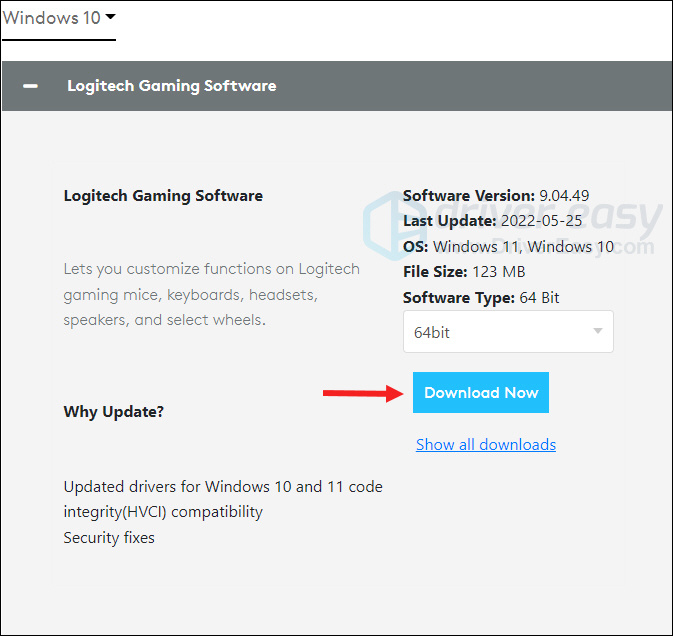
- Open the downloaded file and follow the on-screen instructions to install the software.
Connect your Logitech G935 to your computer and check the mic to see if you can use it now.
Method 5: Try an external sound card
When the sound card or the audio port of your laptop/desktop computer is somehow defective, your headset mic could fail to work. To check if that’s the case and solve the problem, you can try a USB audio card. It’s an external device that can bypass issues in your built-in sound card or audio port, and recover the audio function when you need to use your Logitech headset mic.
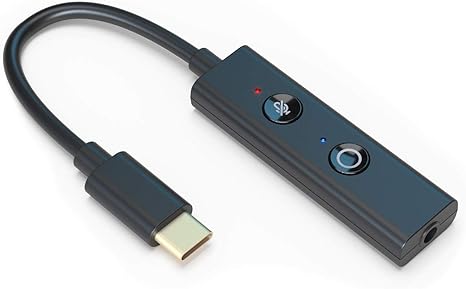
See price at Amazon >>
Method 6: Run the audio troubleshooter
If none of the above fixes work, you can try your luck with the audio troubleshooter. It’s a built-in tool that may be able to diagnose and fix a variety of common sound issues in your computer. To use it:
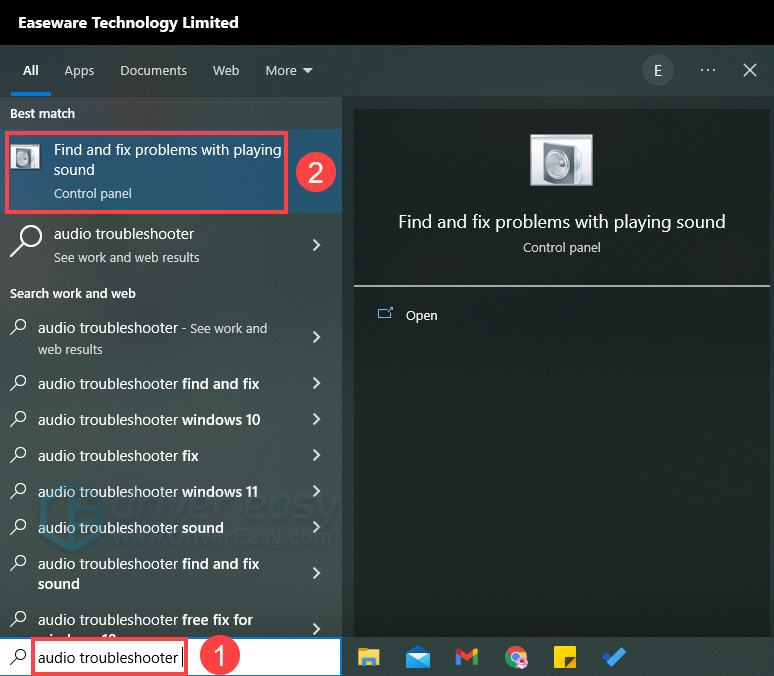
- Type audio troubleshooter in the search box on the taskbar, select Find and fix problems with playing sound from the results
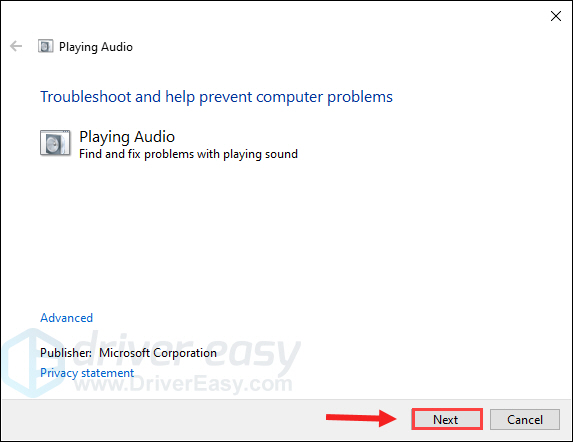
- Click Next and then follow the wizard to complete the troubleshooting process.
That’s it! Hopefully, this post can help you resolve the Logitech G935 mic not working problems. Feel free to add a comment below to let us know your ideas or which fix helps.