


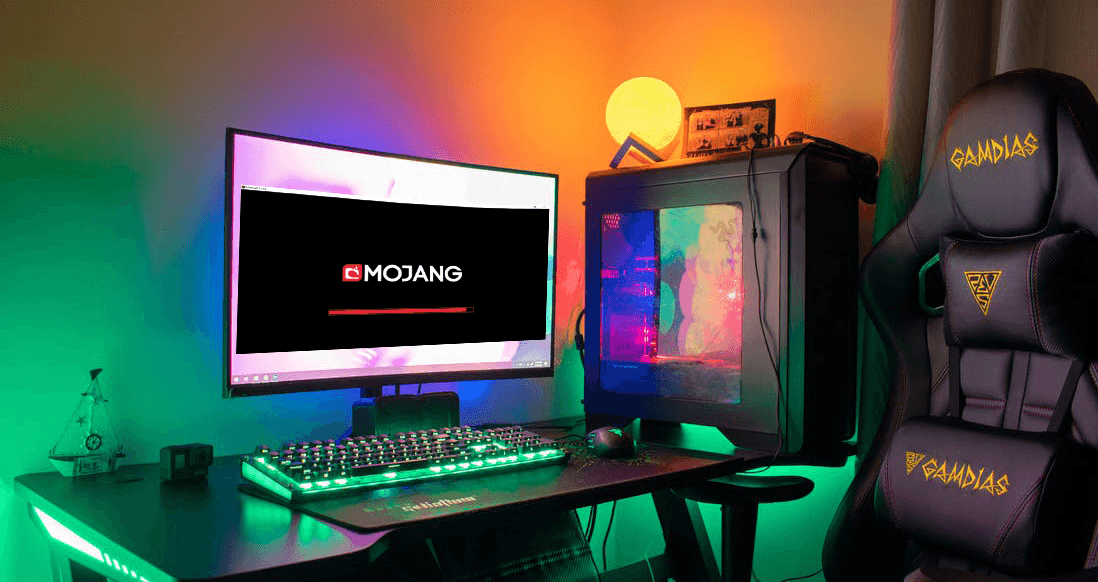
Some players are reporting that they can’t get past the Mojang screen. It looks like it’s hard to fix, and this problem can persist for months. If you’re one of them, don’t worry. In this post, you’ll find all the possible fixes with detailed troubleshooting steps.
Try these fixes
You don’t have to try them all; just walk your way down until you find the one that works.
- Uninstall your antivirus software
- Don’t use free VPNs
- Update your device drivers
- Remove the adware
- End the runtime broker
- Run Minecraft Launcher in compatibility mode
- Perform a clean reinstall
Fix 1: Uninstall your antivirus software
Many things can cause Minecraft stuck on the loading screen issue, but one of the most known issues is your antivirus software. Many antivirus software is incompatible with Minecraft and should be uninstalled from your system.
Disabling these antivirus apps won’t always work, so you can uninstall them temporarily to check if this is the culprit of your game.
The known problematic software are:
- AVG Antivirus
- BitDefender
- ByteFence
- Comcast Constant Guard
- McAfee Anti-virus/Intel Security
- Norton Antivirus
- etc.
You can view the full list of known incompatible software here.
Fix 2: Don’t use free VPNs
Mojang has blocked most VPN users from logging into Minecraft as these free VPNs are often used by malicious users to hack into accounts. This can cause login/loading issues. Some VPNs such as Express VPN and NordVPN (get an 80% off coupon) get Minecraft unblocked, giving you access to all of the latest features no matter where you live.
Fix 3: Update your device drivers
Just in case, make sure all your drivers are up to date. Outdated or corrupted device drivers are outdated or corrupted (especially your graphics driver) can lead to a lot of issues such as Minecraft being stuck on the loading screen.
There are mainly two ways to update your device drivers:
Option 1 – Manually – you’ll need to visit the manufacturer’s website to download the latest driver and install them manually (Learn How). For example, you’ll need to go to the NVIDIA, AMD, or Intel driver download page, and find the exact driver for your device, then download and install them on your computer.
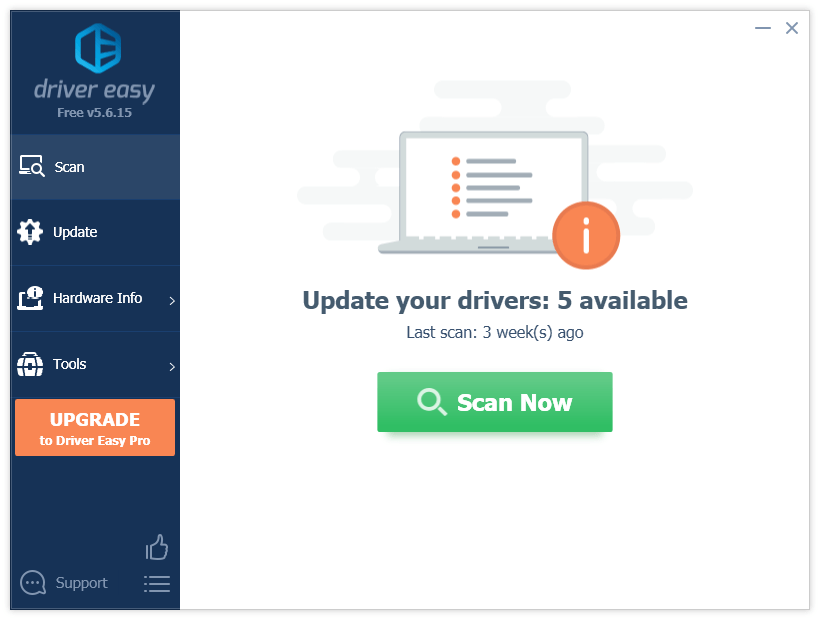
Option 2 – Automatically – Updating your drivers can be easily done within a few clicks with Driver Easy. You don’t have to know anything about computers. Just perform a quick scan and Driver Easy will detect all the outdated drivers and update them all automatically.
- Download and install Driver Easy.
- Run Driver Easy and click the Scan Now button. Driver Easy will then scan your computer and detect any problem drivers.
- Click Update next to your graphics card to download the latest driver, and then install it manually (you can do this in the Free version).
Or click Update All to automatically download and install the correct version of all the drivers that are missing or out of date on your system. (This requires the Pro version – you get 30-day money back guarantee and full technical support.)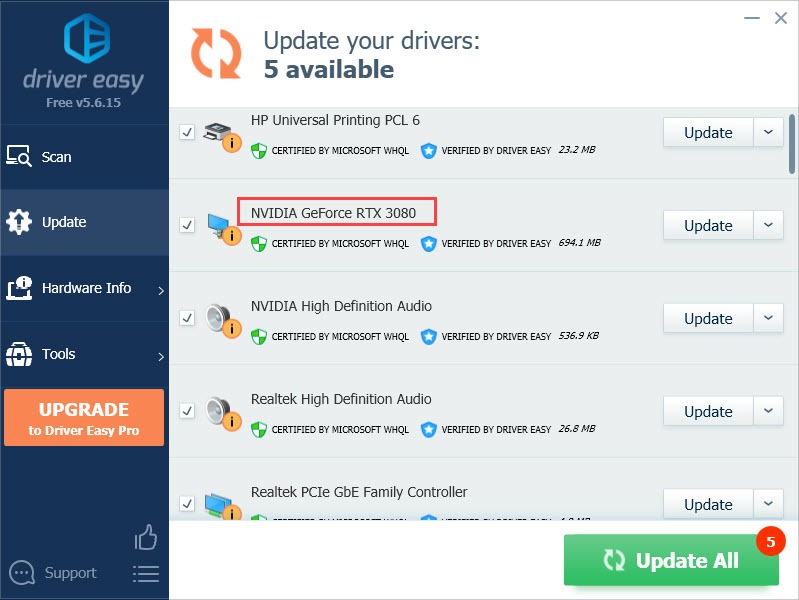
Once the driver is updated, you’d better restart your computer and try launching your Minecraft again to check if it can load normally. If unfortunately not, you can try the next fix.
Fix 4: Remove the adware
Many players find removing the adware helped them get past the forever-loading Majong screen. You can use the free utility AdwCleaner to remove useless adware:
- Go to the Malwarebytes official website and download the AdwCleaner to your computer.
- Follow the on-screen instructions to complete the installation.
- Run a scan and remove any malware found.
- Restart the computer and see if Minecraft launches then.
Fix 5: End the runtime broker
This is a temporary fix for many players, and you can try this to see if it works for you, too. Here’s how:
- Launch your Minecraft.
- On your keyboard, press the Ctrl + Shift + Esc at the same time to open the Task Manager.
- Look for Minecraft and click the arrow beside it.
- Click on the Runtime Broker, and click End Task.
If you want a permanent fix, you can try uninstalling some apps that use runtime broker.
- Right-click the Start menu (the Windows logo) and select Windows PowerShell (Admin).
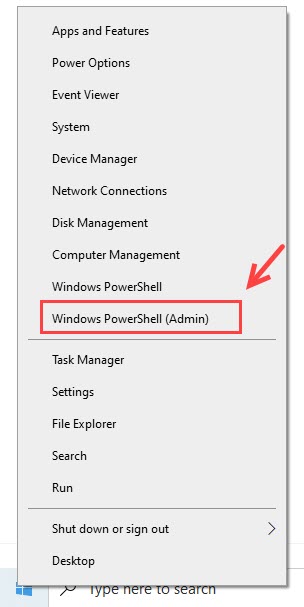
If you are on Windows 11, it will be Terminal (Amin).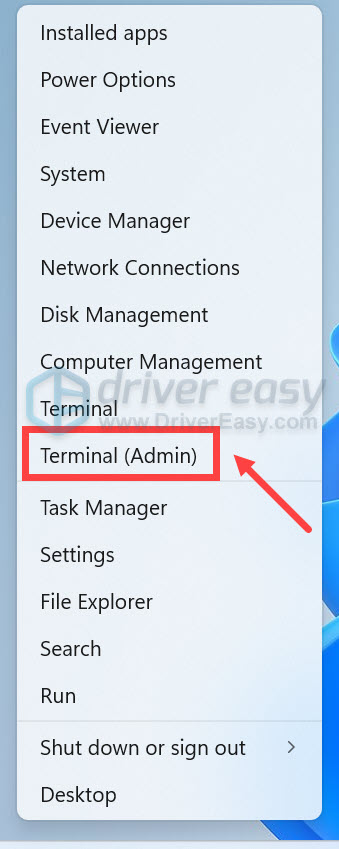
- Type or paste Get-AppxPackage *photos* | Remove-AppxPackage and press Enter. This will uninstall the Windows Photo app from your machine.
- Restart your PC to see if Minecraft can load normally.
If this method doesn’t work for you, then try the next fix, below.
Fix 6: Run Minecraft Launcher in compatibility mode
Many find running Minecraft launcher in compatibility mode helped solve the Minecraft stuck on the loading screen issue. This method has varying success, but it’s worth trying. Here’s how to do it:
- Go to the folder where you installed the Minecraft Launcher.
- Right-click Minecraft Launcher and select Properties.
- Go to the Compatibility tab, and select Windows 7 for the Compatibility mode. Also, remember to check the Disable fullscreen optimizations box.
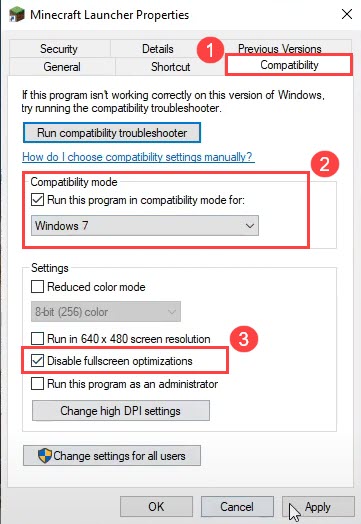
- Click Apply > OK.
Now you can launch your Minecraft again to see if this issue has been resolved by now.
Fix 7: Perform a clean reinstall
Minecraft stuck on the loading screen might be triggered by some important files in your Minecraft folder. Performing a clean uninstall might fix that. To do that, you’ll need to delete all the Minecraft data.
- On your keyboard, press the Windows key and R at the same time to open the Run box. Type appwiz.cpl and press Enter.
- Right-click Minecraft, and select Uninstall.
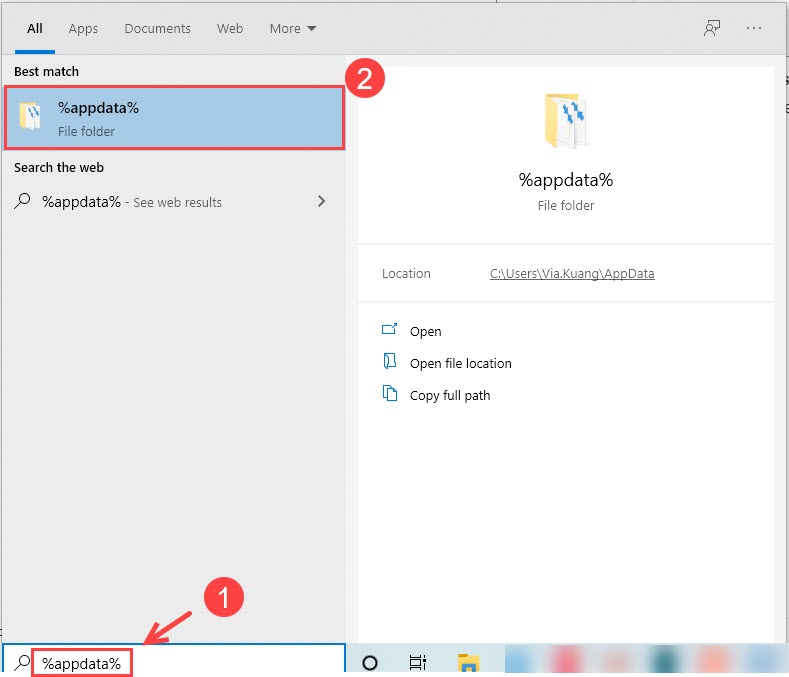
- Once complete, type %appdata% in the Windows Search bar, and select the %appdata% folder.
- In case your system’s uninstallation removes all your worlds, you can create a backup of your worlds.
- Once done, delete the .Minecraft folder.
- Download the most recent version of Minecraft Java here.
Did one of the fixes above solve your problem? Feel free to share your own troubleshooting experience with us in the comment below.