


If you’re experiencing Onikuma headset mic not working, you’re not alone. This is a common issue reported by many users, but don’t worry. After reading this post, you’ll learn 4 quick & easy fixes to get your headset mic back to working.
Here are the fixes:
You don’t need to try them all. Simply work your way down the list until you find the one that does the trick.
- Run the audio troubleshooter
- Check the privacy settings
- Set your Onikuma mic as the default device
- Update your audio driver
Before performing the fixes below, you should do some basic checks to rule out the hardware problems and connection failures.
- The loose connection will prevent your microphone from working. Try replugging your Onikuma headset to PC securely and firmly and also testing a different audio jack.
- Use the microphone on another computer to confirm it’s not physically damaged.
- Check the mute switches on your microphone and make sure it’s disabled.
Fix 1 – Run the audio troubleshooter
Windows offers a set of troubleshooters to help you with the device glitches. So if something goes wrong with your Onikuma headset mic, you can start with this easy tool to detect the potential causes.
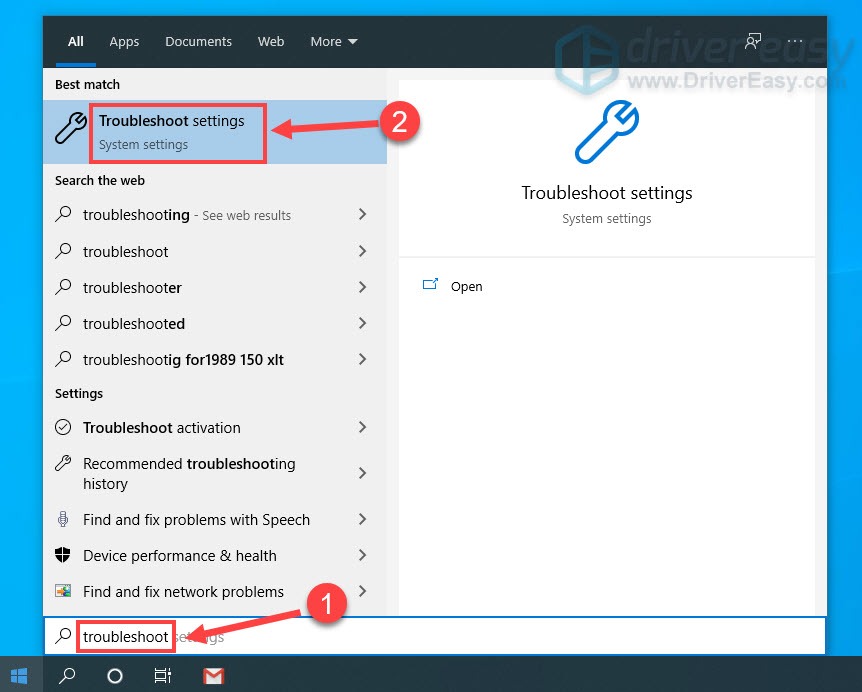
- Type troubleshoot in the Windows search box and select Troubleshooting settings.
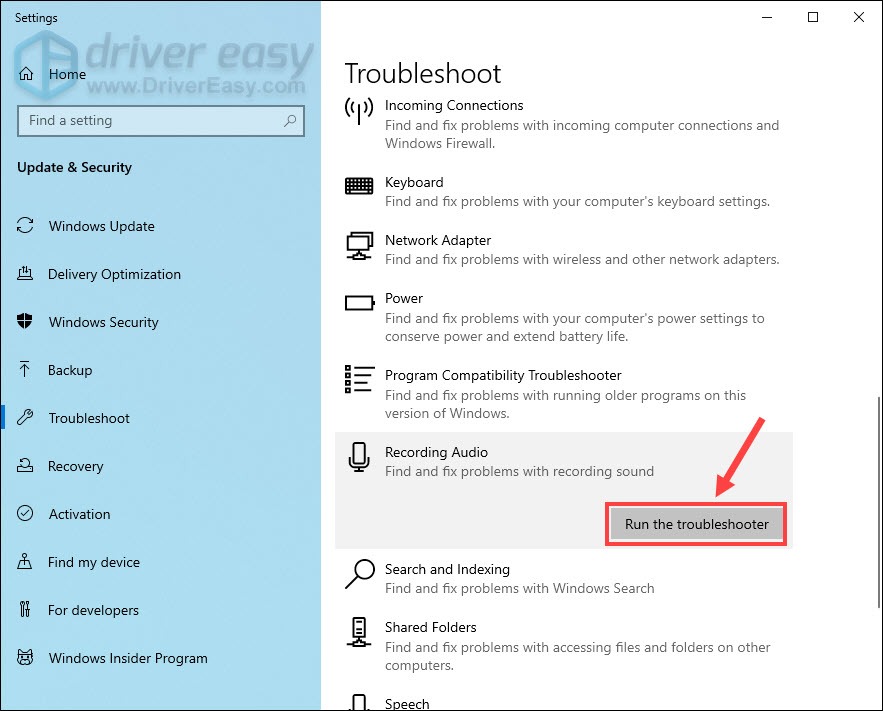
- Scroll down to Recording Audio. Then select it and click Run the troubleshooter.
Wait for the process to complete and follow the on-screen instructions to repair the detected issues. If your microphone still doesn’t work, proceed to the next method.
Fix 2 – Check the privacy settings
To ensure your Onikuma headset mic functions as intended, you should allow the system and applications to access it. You can adjust the setup in your privacy settings.
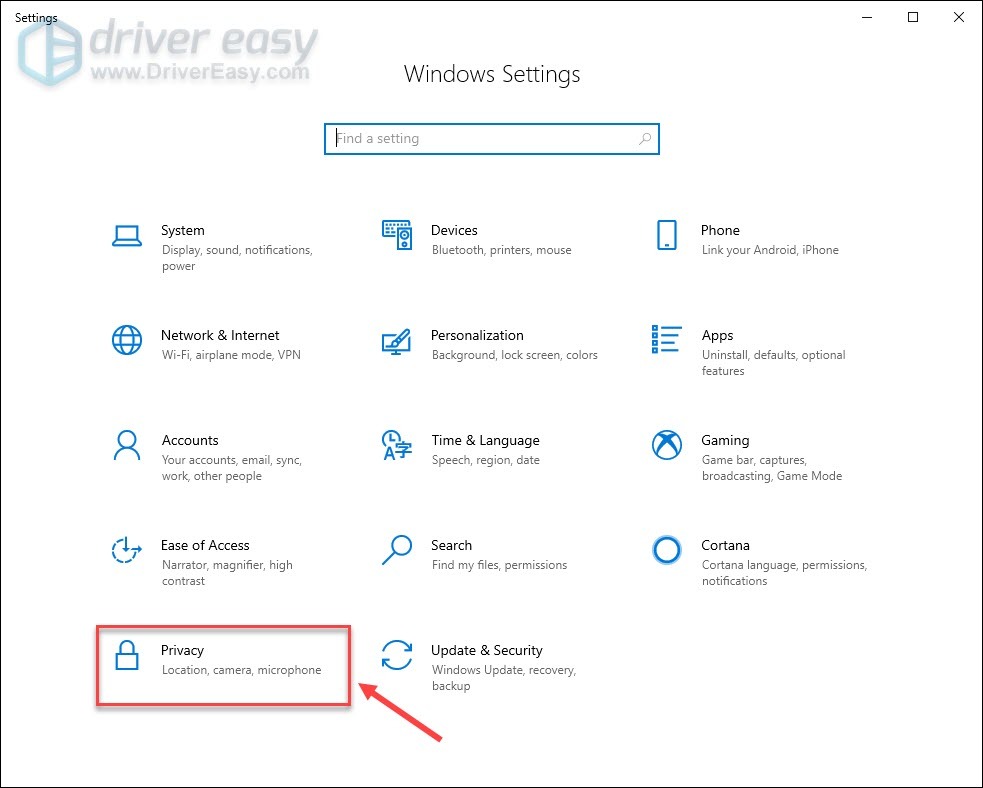
- On your keyboard, press the Windows logo key and I at the same time to open the Windows Settings menu.
- Select Privacy.
- Navigate to the Microphone tab on the left pane. Then, click the Change button and turn on Microphone access for this device.
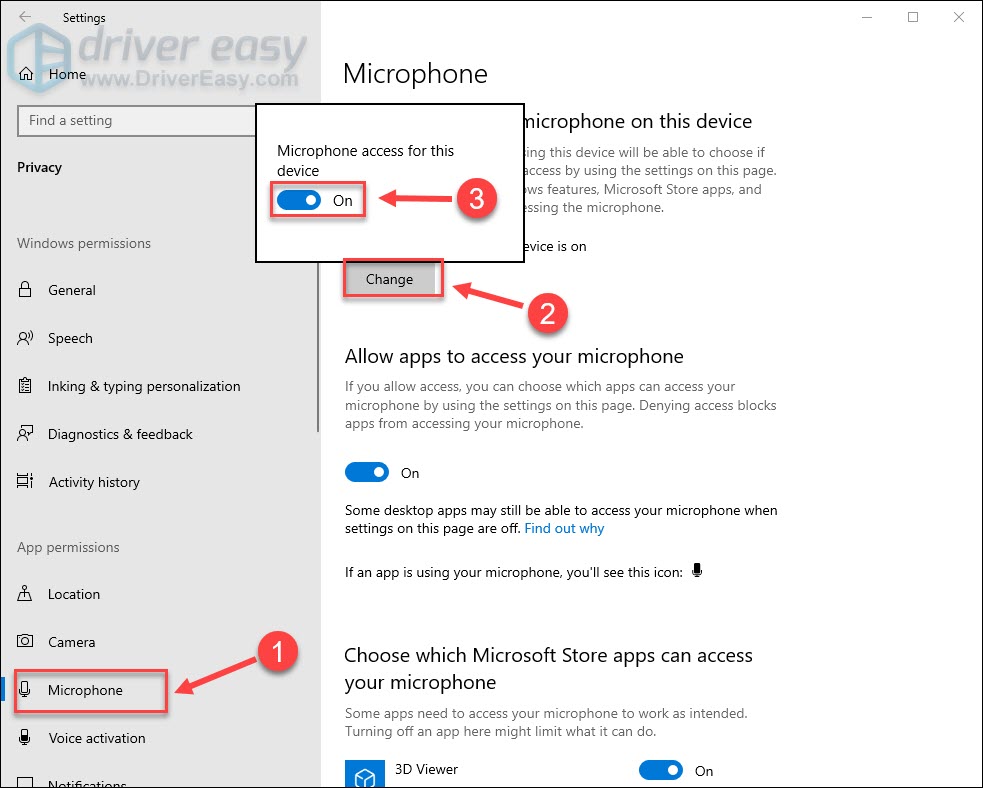
- Toggle on the button below Allow apps to access your microphone.
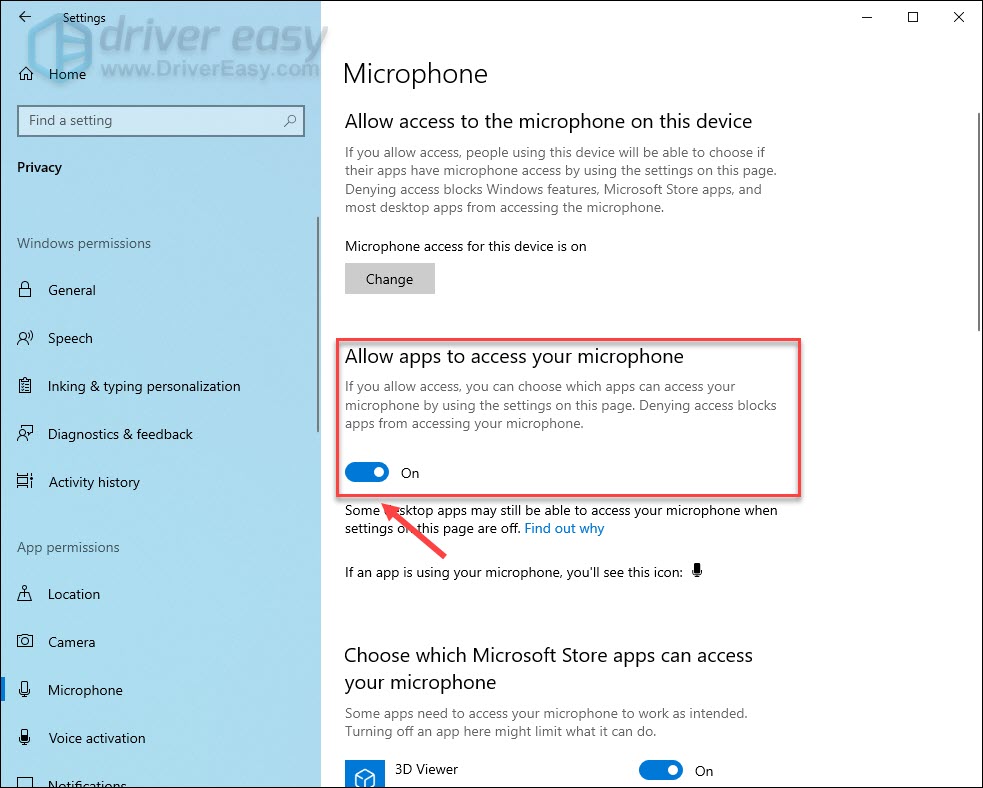
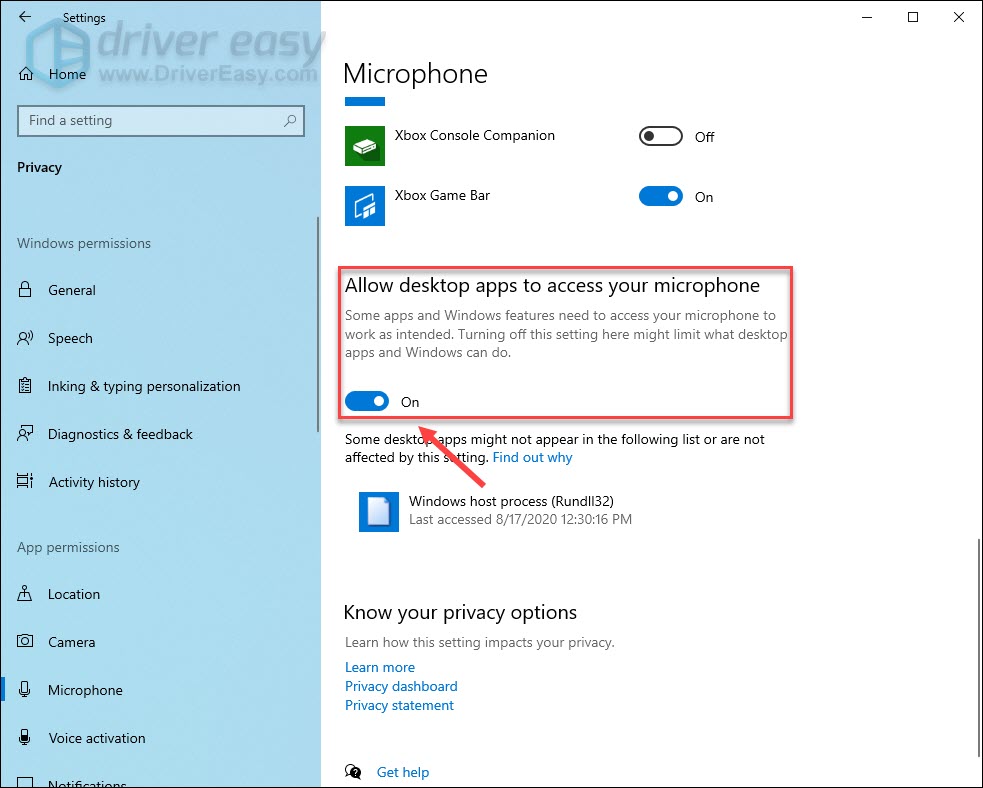
- Scroll to locate Allow desktop apps to access your microphone, and set the option to On.
Now you should be able to use the Onikuma headset mic with whatever applications. But if the problem persists, try the next fix below.
Fix 3 – Set your Onikuma mic as the default device
If there are multiple microphone inputs on your computer, the Onikuma headset mic might not be used properly until you set it as the default device. Here’s how:
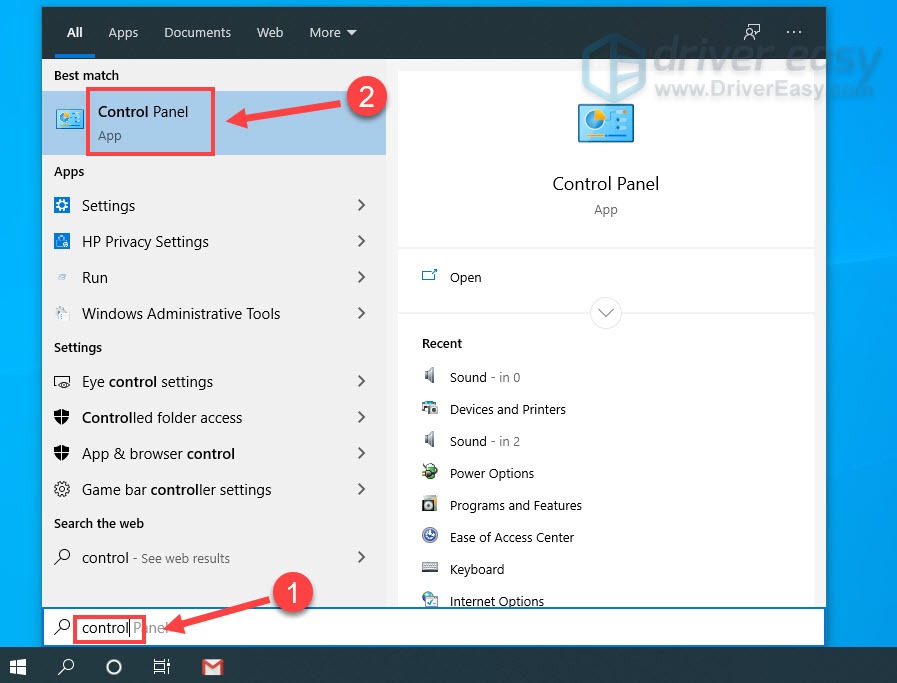
- In the Windows search box, type control and select Control Panel.
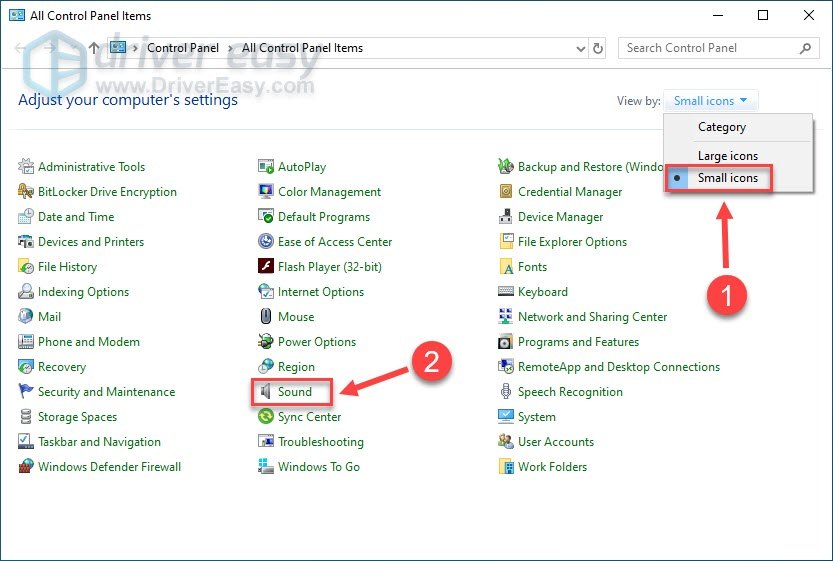
- Select Small icons next to View by and click Sound.
- Select the Recording tab. Then right-click your Onikuma headset mic and click Enable (if it’s not) and click Set as Default Device.
If you don’t see it listed, right-click any blank space and tick Show Disabled Devices.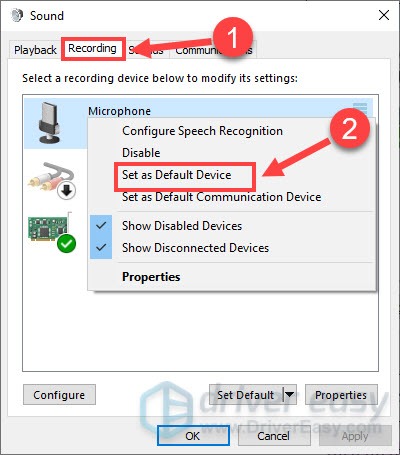
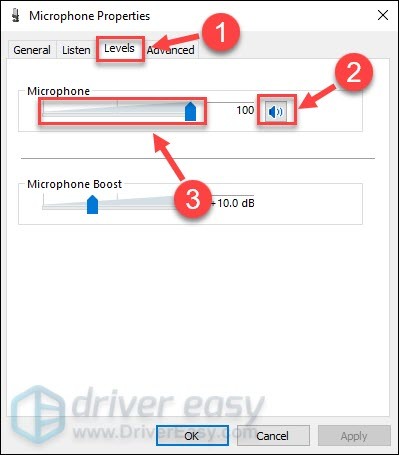
- Right-click the microphone again and select Properties.

- On the Levels tab, check whether the microphone is muted. If yes, click the speaker icon to unmute it and drag the volume slider to the max.
In some cases, Onikuma headset mic not working only occurs in specific applications. If so, you should check the application settings and manually set the Onikuma headset as your preferred audio device.
If this method doesn’t help either, move on to the next fix to check your audio driver.
Fix 4 – Update your audio driver
If the audio driver is faulty or outdated, your Onikuma headset may constantly act up and the mic isn’t working. To keep your gaming headset up and running at all times, you should update the audio driver on a regular basis.
There are mainly two ways you can update your audio driver: manually or automatically.
Option 1 – Download and install the driver manually
You can find the most recent correct driver on the website of your headset or computer manufacturer. Then download the one that is compatible with your Windows version.
Once you’ve downloaded the correct driver for your system, double-click the downloaded file and follow the on-screen instructions to install it.
Option 2 – Automatically update your audio driver (recommended)
If you don’t have the time, patience or computer skills to update the audio driver manually, you can do it automatically with Driver Easy.
Driver Easy will automatically recognize your system and find the correct drivers for it. You don’t need to know exactly what system your computer is running, you don’t need to risk downloading and installing the wrong driver, and you don’t need to worry about making a mistake when installing.
You can update your drivers automatically with either the FREE or the Pro version of Driver Easy. But with the Pro version it takes just 2 clicks:
- Download and install Driver Easy.
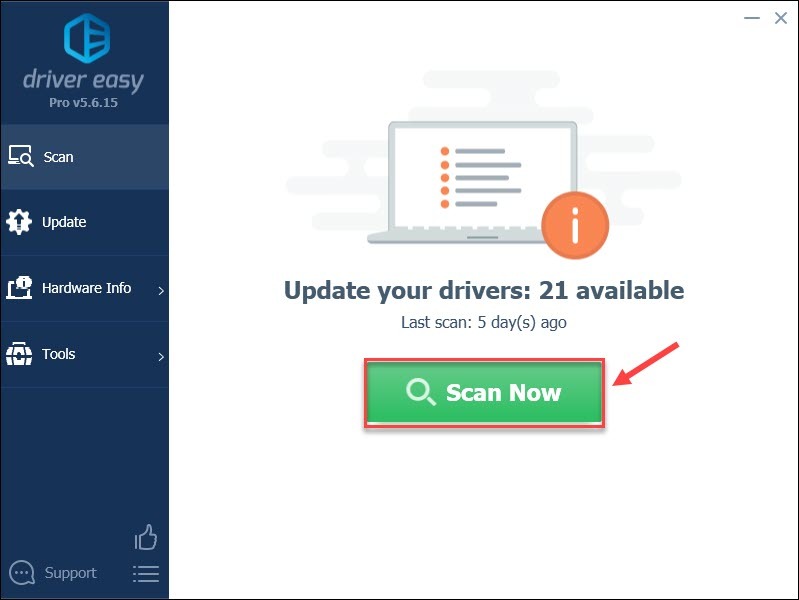
- Run Driver Easy and click the Scan Now button. Driver Easy will then scan your computer and detect any problem drivers.
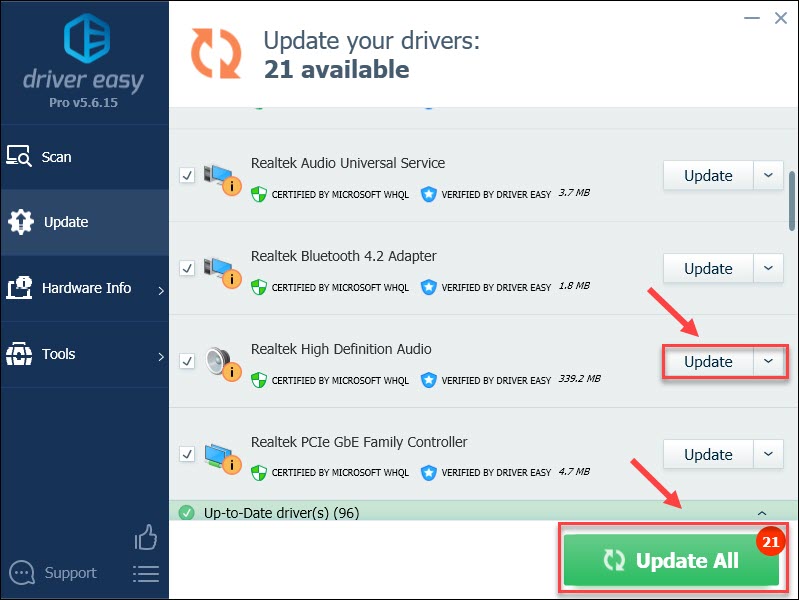
- Click Update All to automatically download and install the correct version of all the drivers that are missing or out of date on your system (this requires the Pro version – you’ll be prompted to upgrade when you click Update All). Or you can click Update to do it for free, but it’s partly manual.
If you need assistance, please contact Driver Easy’s support team at support@drivereasy.com.
After updating all the available drivers, you’ll find the performance of your devices largely improves.
Hopefully one of the fixes above resolves your Onikuma headset mic not working issue. If you have further questions or suggestions, feel free to leave a comment below and we’ll be glad to help.