


If you cannot open Realtek HD Audio Manager, you’re not alone. Many Windows users are reporting it. But the good news is you can fix it. This article gives you practical solutions to solve the problem.
Possible cause
Since Realtek HD Audio Manager is a tool installed along with the Realtek audio driver, when the Audio Manager is missing or not opening, it’s probably due to faulty or outdated audio drivers. And updating or reinstalling the audio drivers can always fix the issue.
Try these fixes
Fix 1: Update the Realtek HD Audio driver
There are two ways you can update your Realtek HD Audio driver.
Option 1 – Manually – You’ll need some computer skills and patience to update your Realtek HD Audio driver this way, because you’ll need to find the driver that’s compatible with your exact audio device model and your version of Windows, then download and install the driver step-by-step.
OR
Option 2 – Automatically (Recommended) – This is the quickest and easiest option. You’re all done with just a couple of mouse clicks – easy even if you’re a computer newbie.
Option 1 – Download and install the driver manually
Realtek keeps updating drivers. To get them, you need to go to the Realtek website, find the drivers corresponding with your specific flavor of Windows version (for example, Windows 64 bit) and download the driver manually.
Once you’ve downloaded the correct drivers for your system, double-click on the downloaded file and follow the on-screen instructions to install the driver.
Option 2 – Automatically update Realtek HD Audio drivers
If you don’t have the time, patience or computer skills to update your Realtek HD Audio driver manually, you can, instead, do it automatically with Driver Easy.
Driver Easy will automatically recognize your system and find the correct drivers for it. You don’t need to know exactly what system your computer is running, you don’t need to risk downloading and installing the wrong driver, and you don’t need to worry about making a mistake when installing. Driver Easy handles it all.
- Download and install Driver Easy.
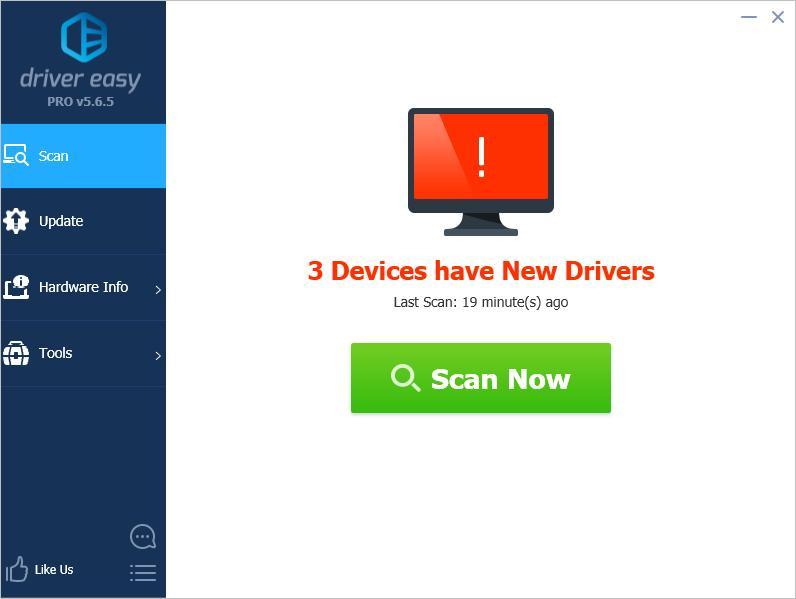
- Run Driver Easy and click Scan Now. Driver Easy will then scan your computer and detect any problem drivers.
- Click the Update button next to your Realtek audio device to automatically download the correct version of its driver, then you can manually install it (you can do this with the FREE version).
Or click Update All to automatically download and install the correct version of all the drivers that are missing or out of date on your system. (This requires the Pro version which comes with full support and a 30-day money back guarantee. You’ll be prompted to upgrade when you click Update All.)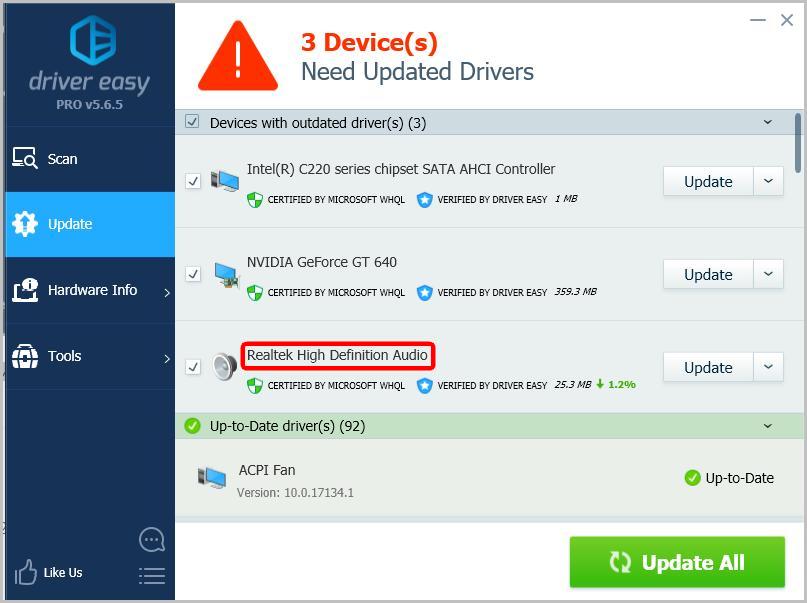
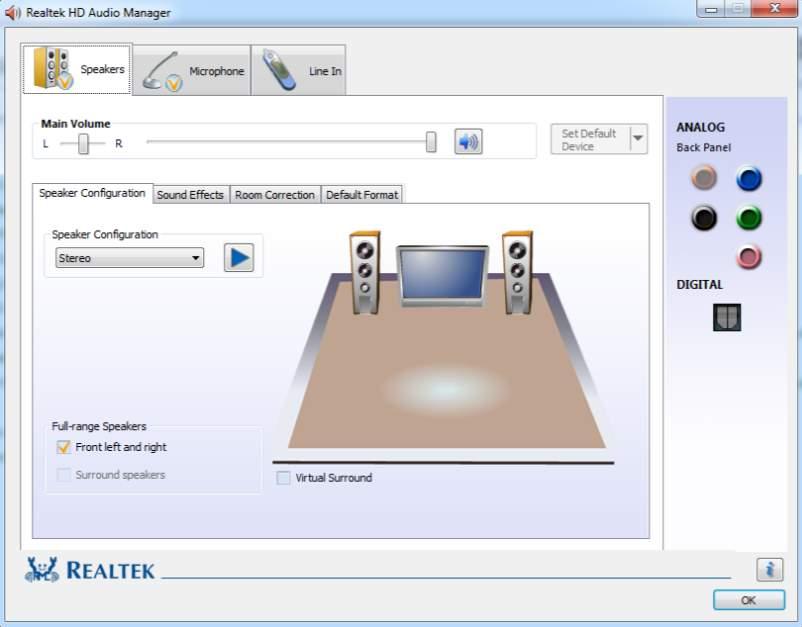
If the Realtek HD Audio driver is installed successfully, the Realtek HD Audio Manager should be installed. You can go to Control Panel and view items by “Small icons”. Realtek HD Audio Manager can be found there.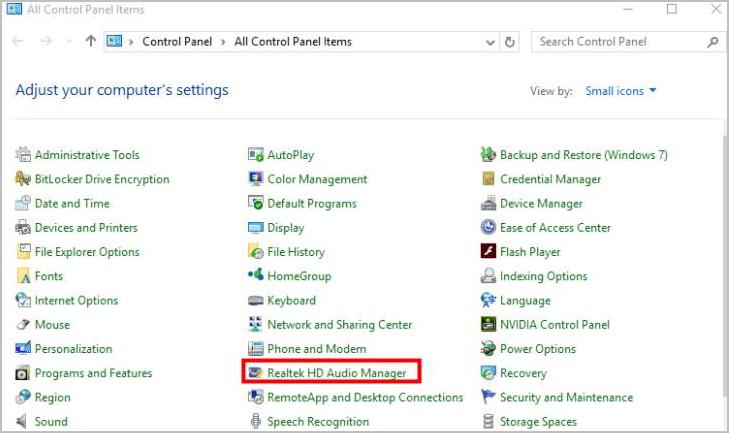
If Realtek HD Audio Manager doesn’t appear in Control Panel, you can navigate to the following path: C:\Program Files\Realtek\Audio\HDA\RtkNGUI64.exe, then double-click on the file to open Realktek HD Audio Manager.
Fix 2: Reinstall the Realtek HD Audio driver
You can also try reinstalling the Realtek HD Audio driver via Device Manager. Here’s what you need to do.
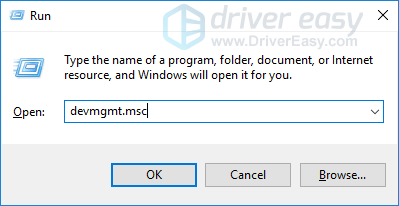
- On your keyboard, press the Windows logo key and R at the same time to invoke the Run box.
- Type devmgmt.msc and press Enter to access Device Manager.
- Expand the Sound, video and game controllers entry.
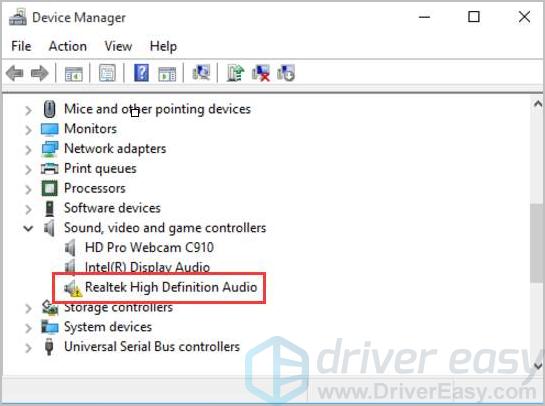
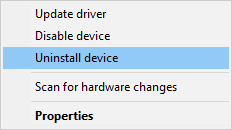
- Right-click on your Realtek device, then select Uninstall device.
- Restart your PC, and Windows will automatically reinstall the driver.
Fix 3: Check for Windows updates
If many users are reporting the same issue, Microsoft may launch a system update to help solve the problem. So, you can also try checking for Windows updates to sort out your issue.
- Type update in the Windows search box, then select Check for updates or Windows update.
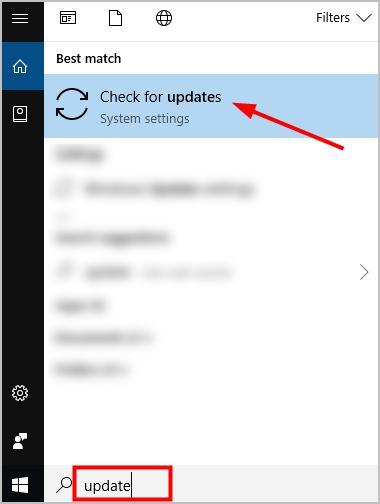
- Click Check for updates in the pop-up window.
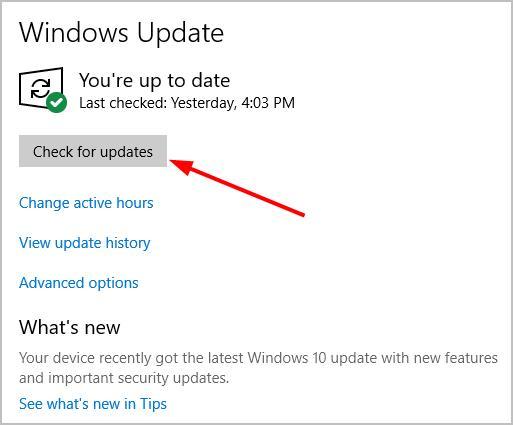
- Install all identified updates to troubleshoot the issue.
Just have a try now!
You’re welcome to leave a comment below to share your results or any other suggestions.