


If you’re using a Corsair headset but it’s not working as expected, i.e. no sound or the microphone not functioning, you’re not alone. This type of issue is usually caused by the improper settings, an outdated audio driver or firmware. But don’t worry. This post will show you all the easy & quick solutions.
Try these fixes:
You don’t need to try them all. Just work your way down the list until you find the one that does the trick.
- Troubleshoot hardware issues
- Update your audio driver
- Check the sound settings
- Update the firmware
- Reinstall iCUE
Fix 1 – Troubleshoot hardware issues
Before trying anything more complicated, you can do some troubleshooting via the steps below.
- Test your Corsair on the other computer to make sure it’s not physicially broken.
- Repair the connection. Simply replug the Corsair headset into your PC and try another USB port.
If you’re using the wireless dongle, use a paper clip to press into the tiny hole near the dongle’s LED. When it starts to blink, hold the Power button on your headset until the dongle’s LED turns solid.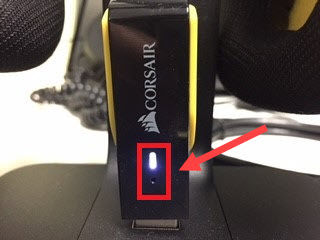
If you confirm there is no problem related to hardware, continue to the second fix below.
Fix 2 – Update your audio driver
The audio driver is essential for a headset or microphone to work properly. If it’s missing, faulty or outdated, you may encounter the Corsair headset not working problem. To keep your headset up and running all the time, make sure to install the latest device drivers.
You can search for the most recent driver from the official website of your PC manufacturer or the Corsair download page and install it manually. But if you don’t have the time, patience or computer skills to update your audio driver manually, you can do it automatically with Driver Easy.
Driver Easy will automatically recognize your system and find the correct drivers for it. You don’t need to know exactly what system your computer is running, you don’t need to risk downloading and installing the wrong driver, and you don’t need to worry about making a mistake when installing.
You can update your drivers automatically with either the 7 days free trial or the Pro version of Driver Easy. It takes just 2 clicks, and you get full support and a 30-day money-back guarantee with the Pro version:
- Download and install Driver Easy.
- Run Driver Easy and click the Scan Now button. Driver Easy will then scan your computer and detect any problem drivers.

- Click the Activate & Update button next to the flagged device to automatically download and install the correct version of this driver.
Or click Update All to automatically download and install the correct version of all the drivers that are missing or out of date on your system (You’ll need the Pro version for this – when you select Update All, you’ll get a prompt to upgrade. If you’re not prepared to purchase the Pro version yet, Driver Easy provides a 7-day trial at no cost, granting access to all Pro features like fast downloads and easy installation. No charges will occur until after your 7-day trial period ends.)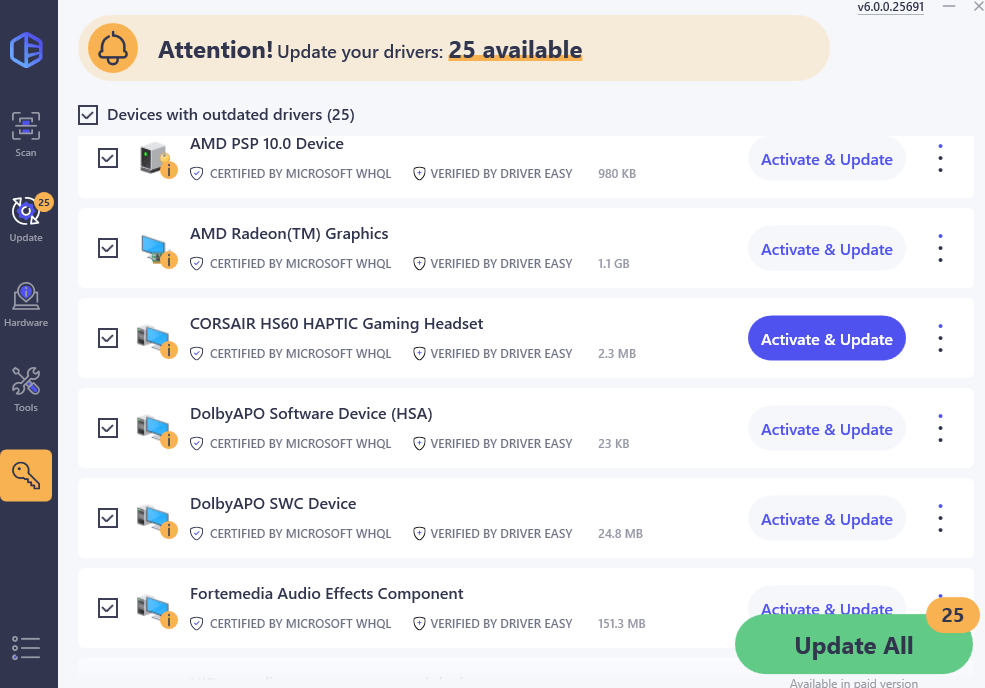
- After updating, restart your computer to take effect.
If you need assistance, please contact Driver Easy’s support team at support@drivereasy.com.
Does the driver update get your Corsair headset back to work now? If not, take a look at more fixes below.
Fix 3 – Check the sound settings
In most cases, your Corsair headset will be set as default automatically once it’s connected properly. But if you’ve constantly changed between the headsets and speakers, the settings might be messed up. And you’ll need to configure the correct setup manually.
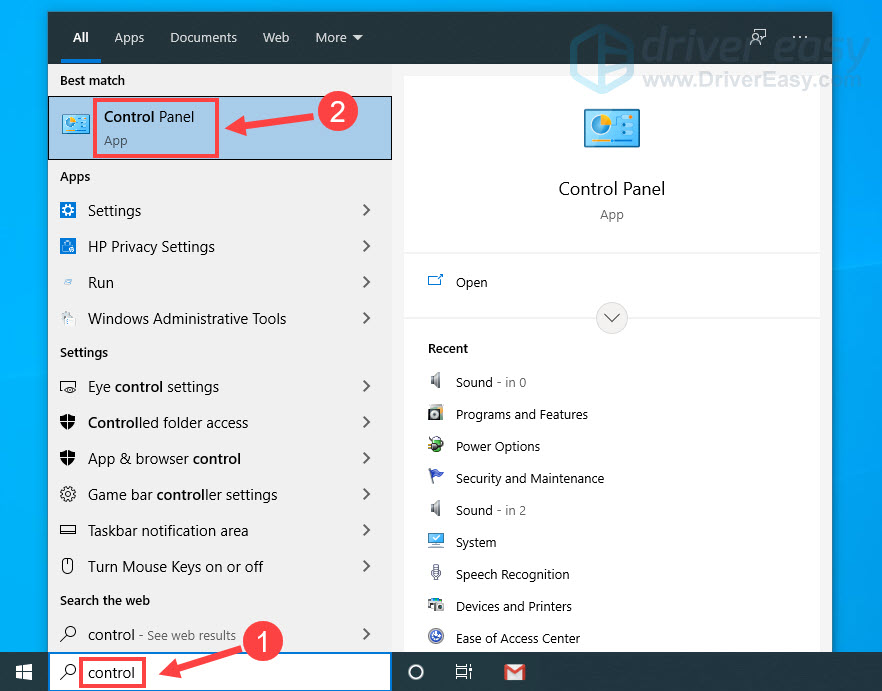
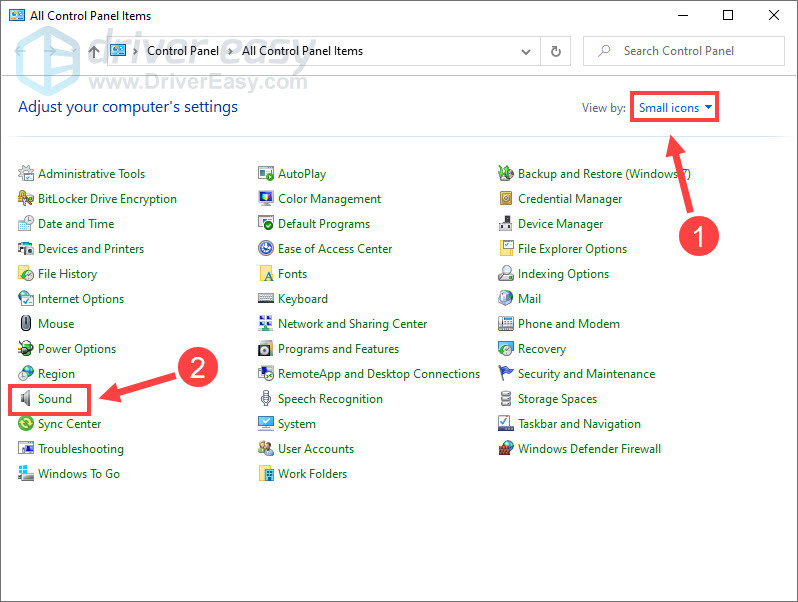
- In the Windows search box, type control and select Control Panel.
- Select Small icons next to View by and click Sound.
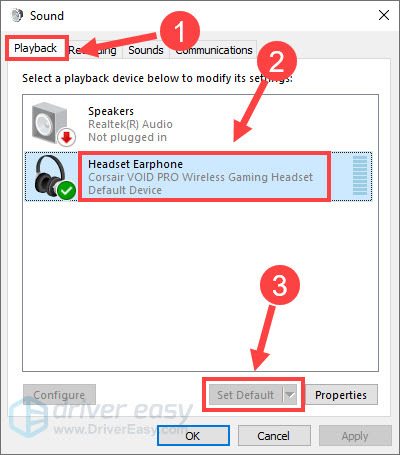
- On the Playback tab, make sure your Corsair headset is enabled (covered with a green check mark). Then, click it and click Set Default.
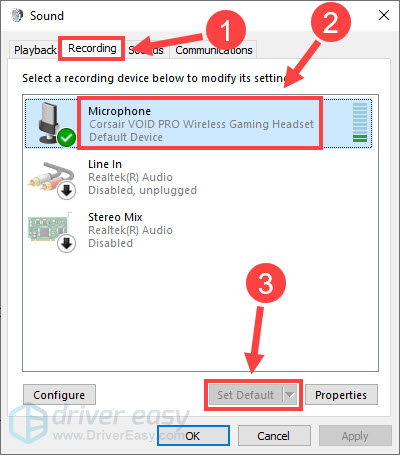
- Navigate to the Recording tab. Select the Corsair headset microphone and click Set Default.
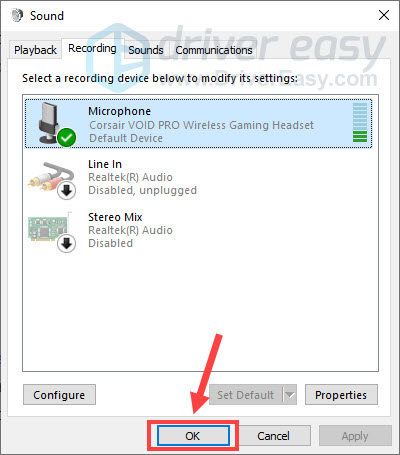
- Click OK to save the changes.
Once completed, check if your Corsair headset functions well. If not, try to troubleshoot the firmware.
Fix 4 – Update the firmware
A firmware update, which includes performance improvement and bug fixes, is necessary for the proper functioning of devices. If your Corsair headset somehow stops working, try updating the firmware to see if that helps your case.
- Connect your Corsair headset to the computer.
- Launch iCUE. If you don’t have one, download it.
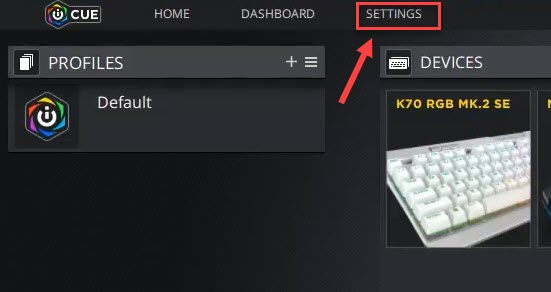
- Navigate to the Settings tab.
- Select your headset first, then check Force update and click the Update button.
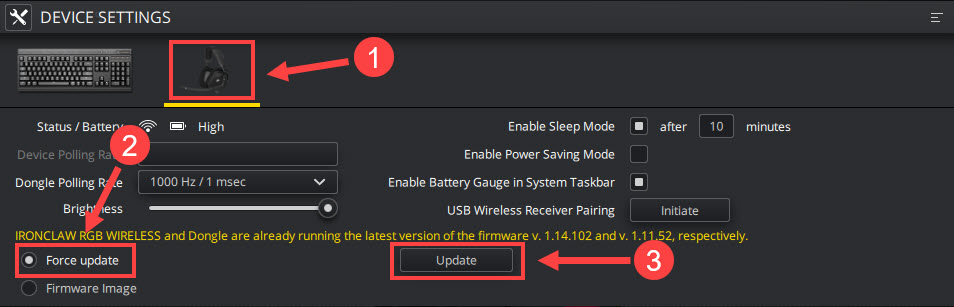
Wait for the process to complete and see how your headset works. Still no luck with the firmware update? Don’t worry. Check out the last solution.
Fix 5 – Reinstall iCUE
iCUE is a powerful tool that helps you control and customize your Corsair devices (learn more). However, users reported that the latest iCUE update may conflict with the operating system and cause Corsair headset not to work. To fix this, you should reinstall the Corsair audio driver and iCUE as well.
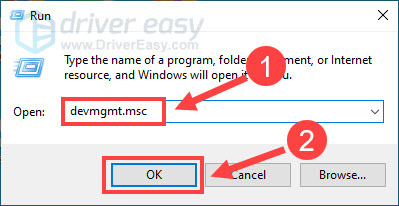
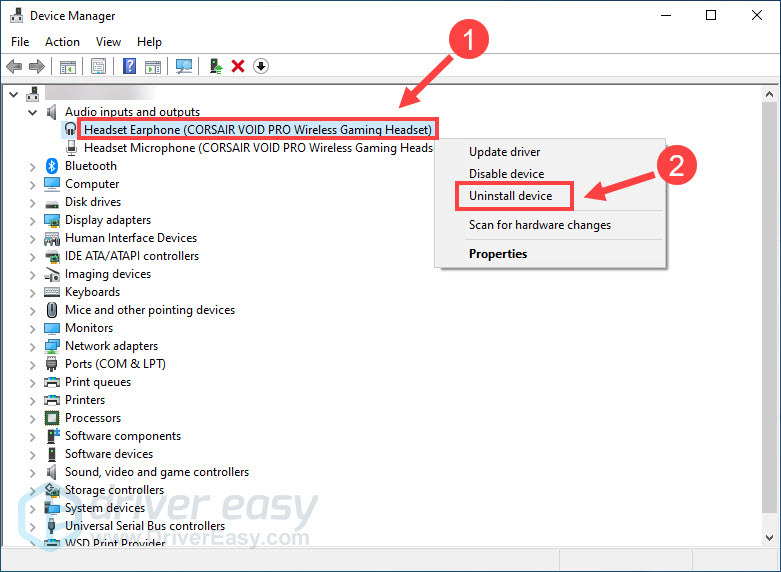
- On your keyboard, press the Windows logo key and R at the same time to invoke the Run command. Then type devmgmt.msc and click OK.
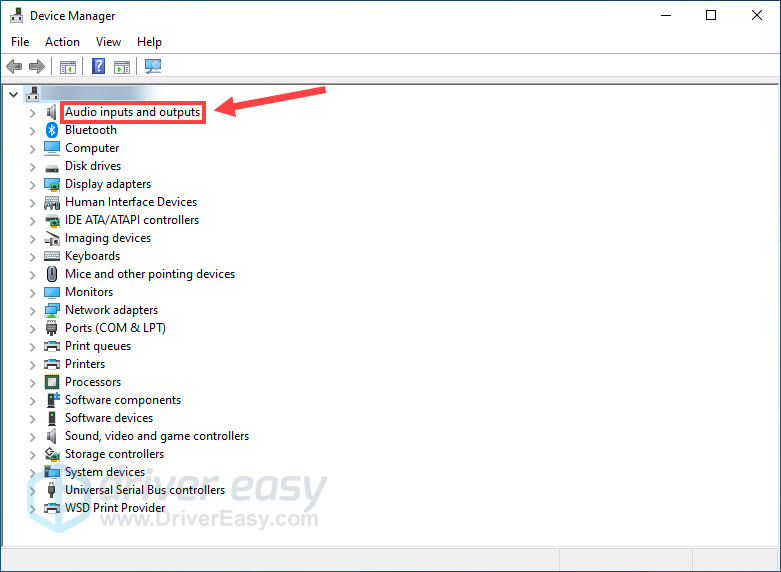
- Double-click Audio inputs and outputs to expand the list.
- Right-click your Corsair device and select Uninstall device. Make sure you’ve uninstalled the driver for both headset earphone and microphone.
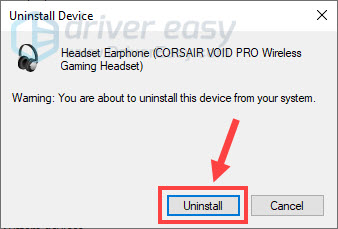
- Click Uninstall to confirm.
- Unplug the headset and restart your computer.
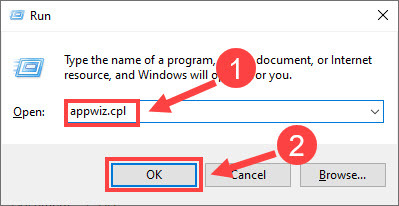
- On your keyboard, press the Windows logo key and R to open the Run command. Type appwiz.cpl in the text field and click OK.
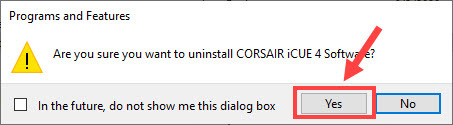
- Select iCUE and click Uninstall.
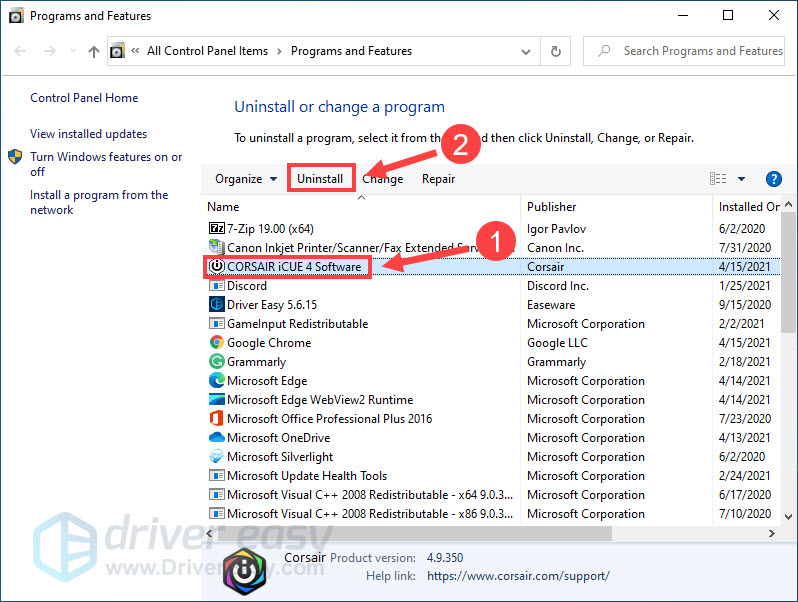
- Click Yes.
- Restart the computer and download the latest version of iCUE and install it.
- Launch iCUE. Then replug your Corsair headset into the computer.
After performing the whole reinstallation process as above, you should find the headset returns to normal.
Hopefully this post helped you with the Corsair headset not working problem. If you have further questions or suggestions, please feel free to leave a comment below.