


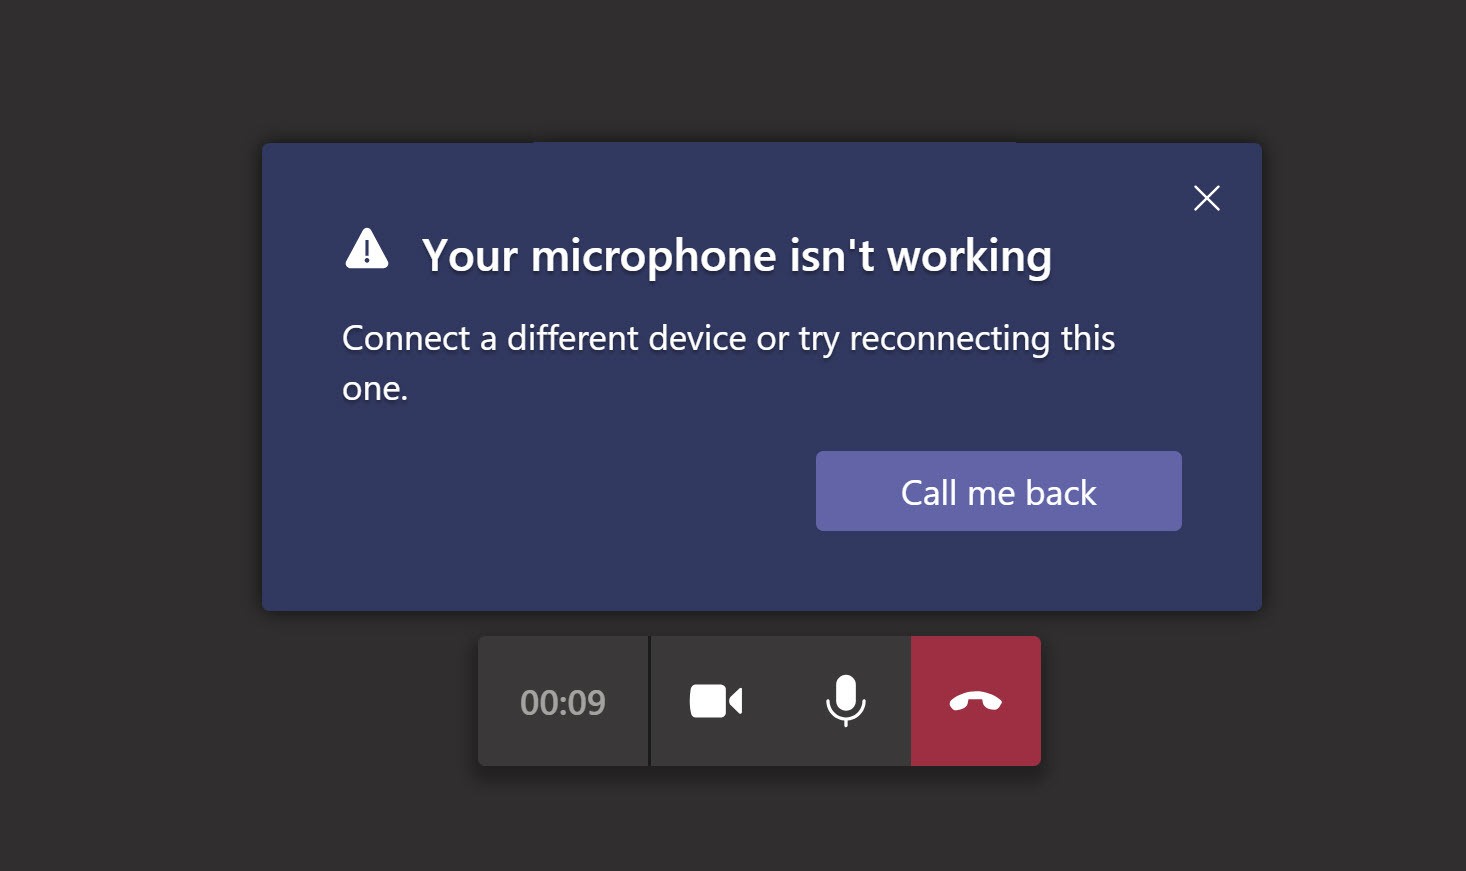
Microsoft Teams offers a variety of convenient features for online conferencing. However, many users complain that their microphone randomly stops working in Teams and they can’t communicate during a call normally. If you encounter the same problem, don’t worry. Here are some tried-and-true fixes.
Fixes to try:
You may not try them all; just work your way down the list until you find the one that does the trick.
- Allow access to your microphone
- Configure the microphone settings
- Check Microsoft Teams settings
- Update your audio driver
- Reinstall Microsoft Teams
Fix 1 – Allow access to your microphone
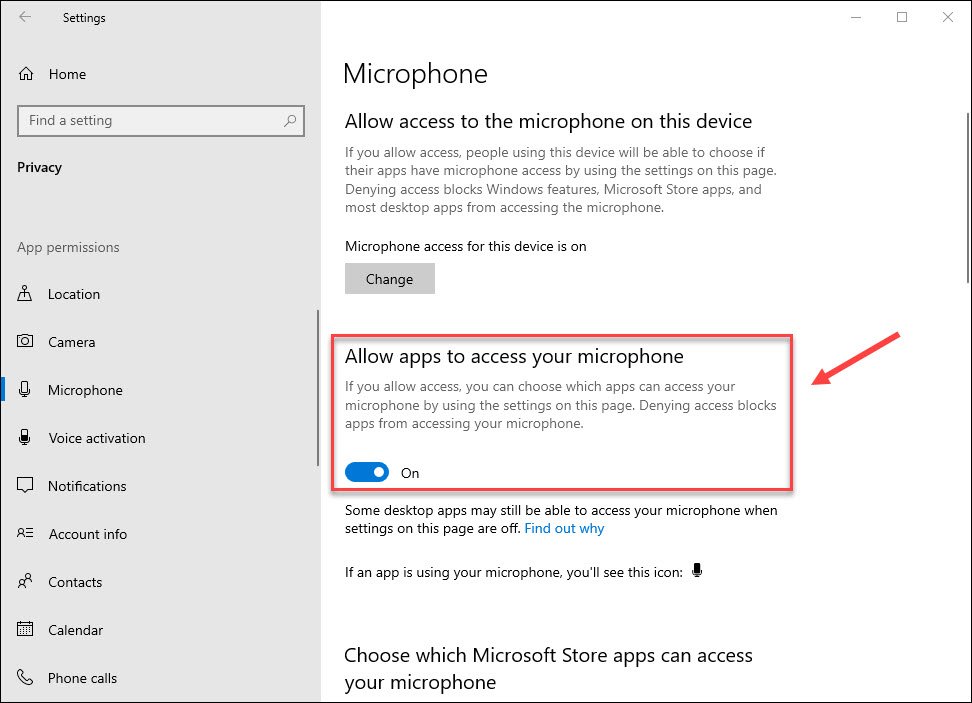
If Windows has restricted Microsoft Teams from accessing your microphone, you’ll run into the mic-not-working issue. To grant the permission correctly, you can follow the instruction below:
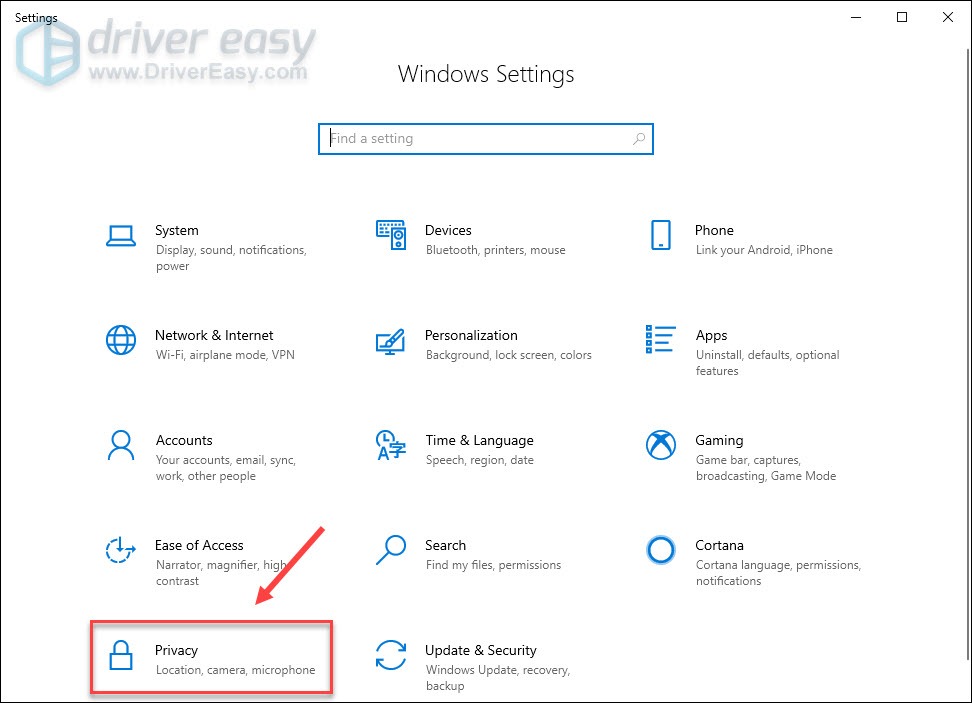
- On your keyboard, press the Windows logo key and I at the same time to enter the Settings menu.
- Select Privacy.
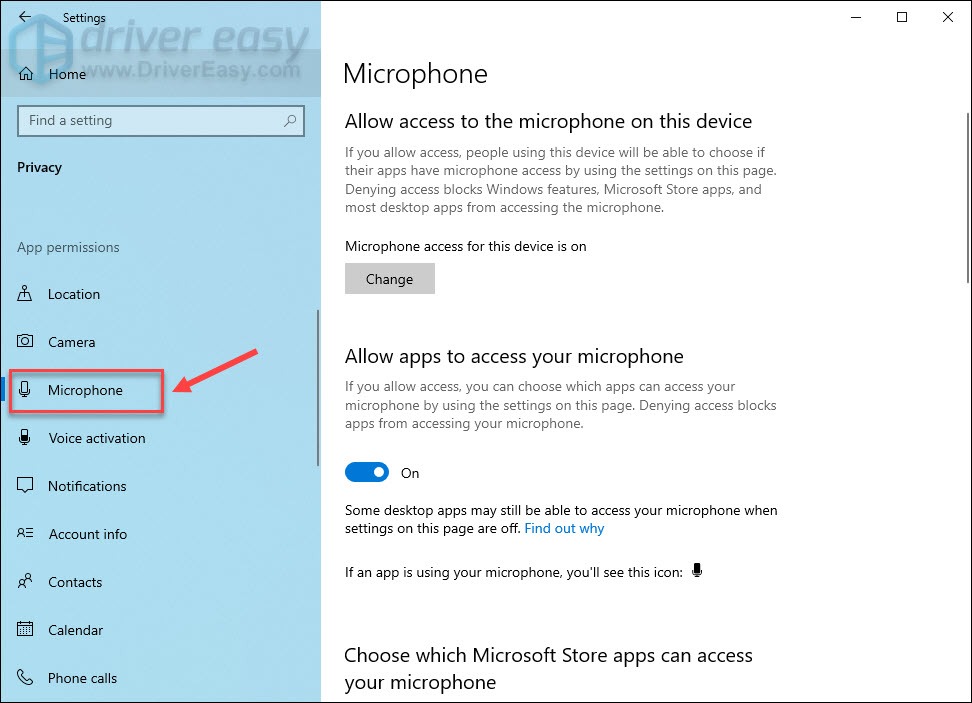
- Select Microphone in the left pane.
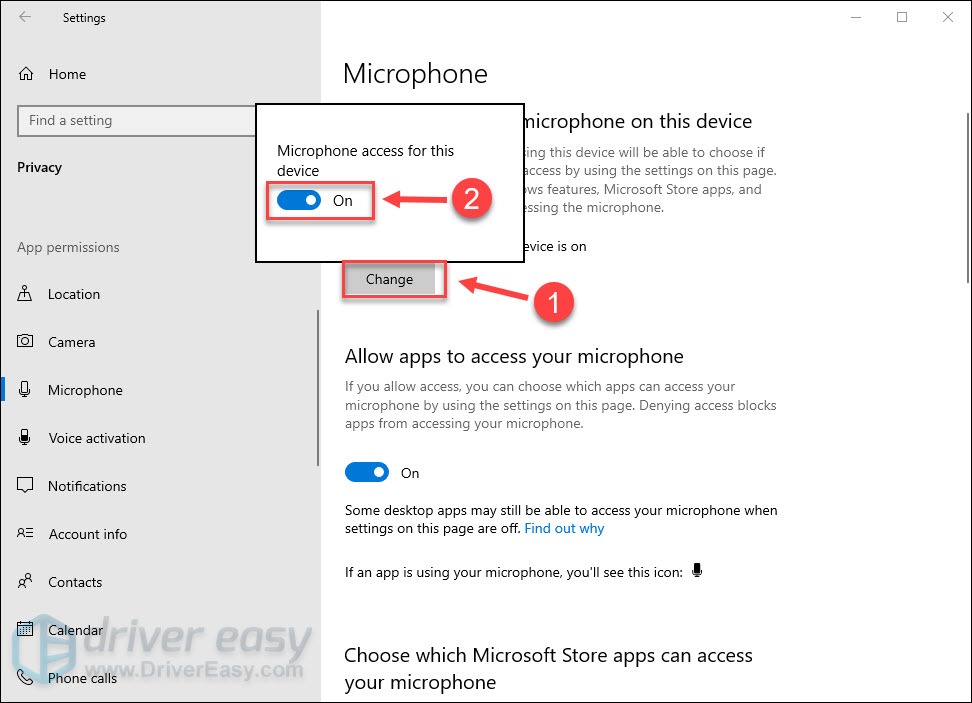
- Click the Change button and turn on Microphone access for this device.
- Under Allow apps to access your microphone, toggle on the button.
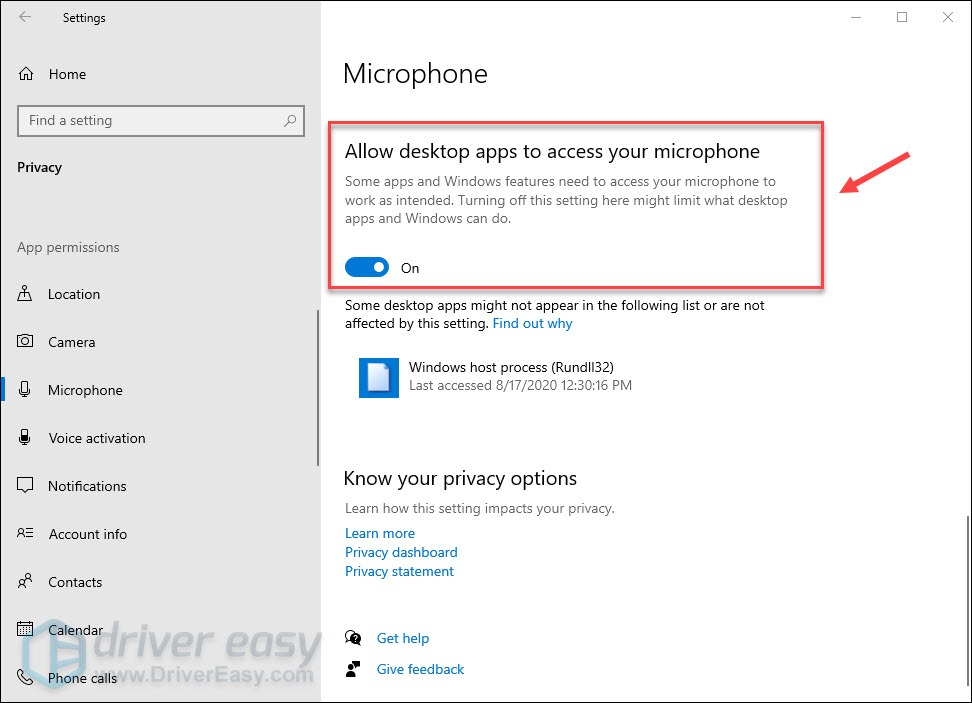
- Scroll down and set Allow desktop apps to access your microphone to On.
Does your microphone return to normal? If not, proceed to more fixes below.
Fix 2 – Configure the microphone settings
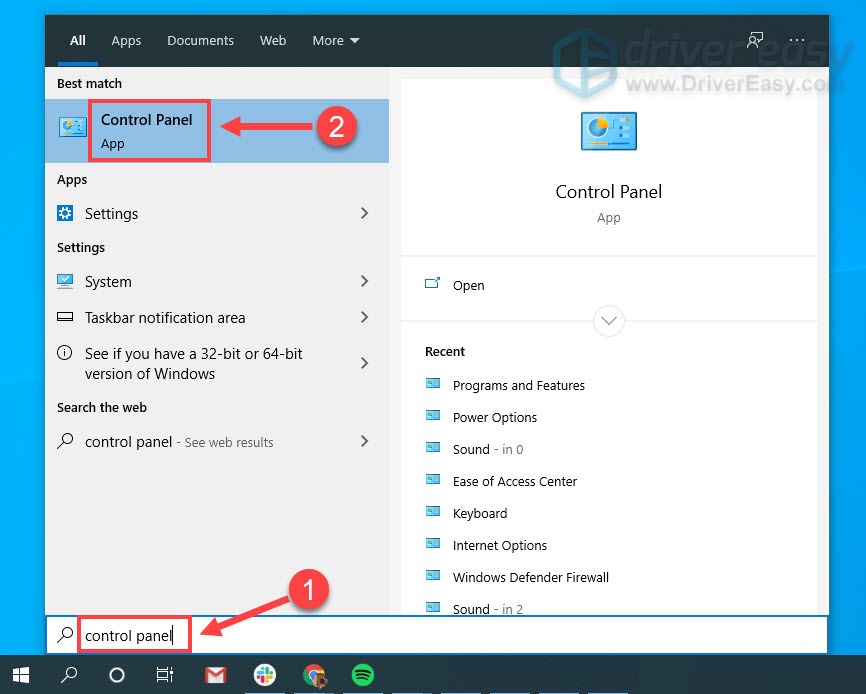
To make your microphone work, it’s also important to configure the microphone settings correctly on your PC. You need to ensure the microphone is not muted and set as the default device.
- Type control panel in the search box and click Control Panel.
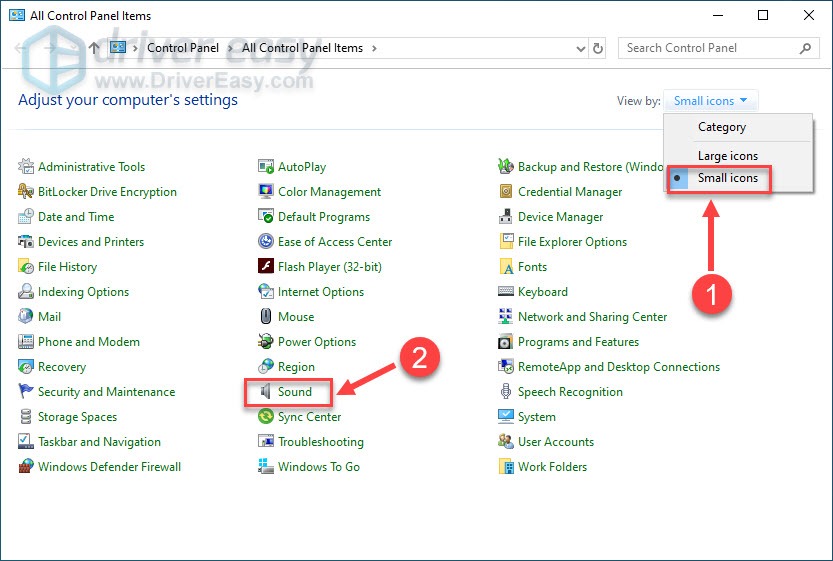
- Select Small icons from the drop-down menu next to View by. Then, click Sound.
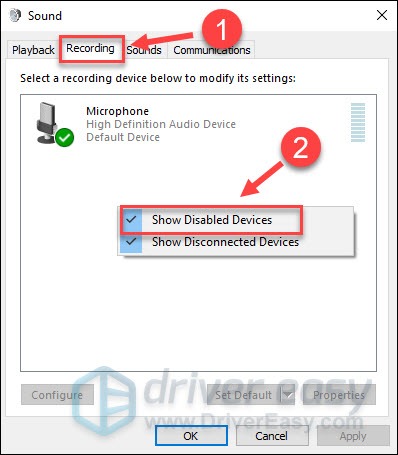
- Navigate to the Recording tab, and right-click any empty space below. Then, tick Show Disabled Devices.
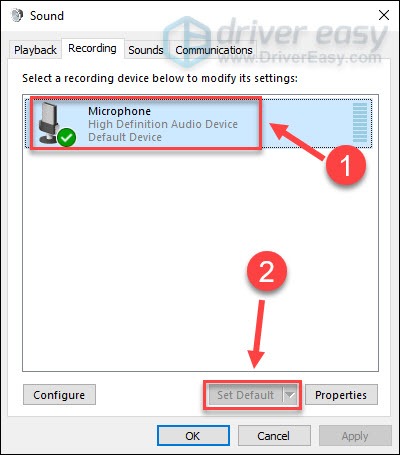
- Right-click the idle microphone and click Disable one by one.
- Select the correct input device and click Set Default.
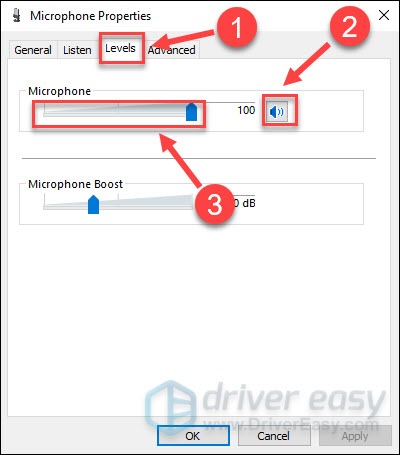
- Click the microphone you’re using and click Properties.

- Go to the Levels tab. Then make sure it’s not muted and drag the volume slider to the max.
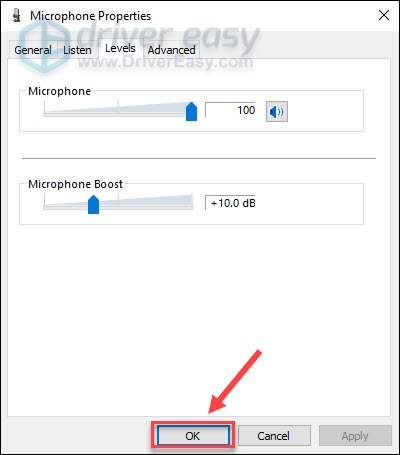
- Click OK to apply the changes.
Now that everything is set up in the right way, test your microphone in Microsoft Team. If it still fails to work, check out the next fix.
Fix 3 – Check Microsoft Teams settings
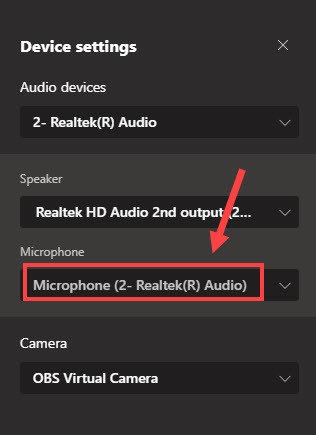
In most cases, Microsoft Team will automatically recognize the exact microphone you’re using, but if it doesn’t, you can select the correct device manually.
- Run Microsoft Teams and join a meeting.
- Click the settings icon at the upper right corner and click Device Settings.
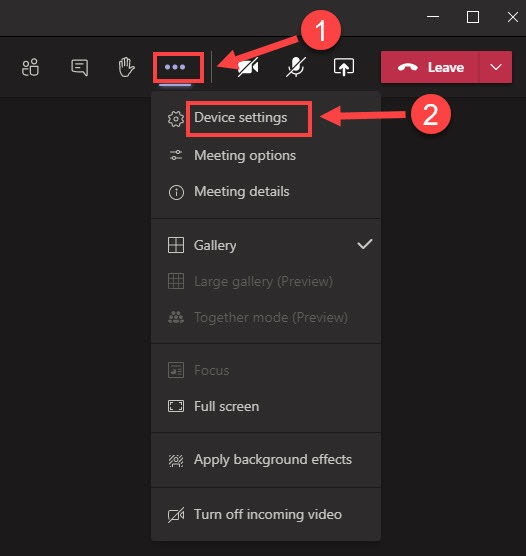
- Under the microphone section, choose the device you’re using.
Re-open the app and join a call to test your microphone. If the issue persists, check out the next fix.
Fix 4 – Update your audio driver
The Microsoft Teams mic not working issue may indicate problems with your audio driver. To ensure the microphone work smoothly when you’re on an online class or meeting, you should always keep the audio driver up–to-date. Here are two ways for you to update the audio driver: manually or automatically.
Option 1 – Download and install the driver manually
To update the driver manually, you can visit the PC or the headset manufacturer’s website and search for the most recent driver corresponding with your specific flavor of Windows version (for example, Windows 32 bit).
Once you’ve downloaded the right driver for your system, double-click the downloaded file and follow the on-screen instructions to install it.
Option 2 – Automatically update your audio driver (recommended)
If you don’t have the time, patience or computer skills to update your audio driver manually, you can, instead, do it automatically with Driver Easy.
Driver Easy will automatically recognize your system and find the drivers for your device, and your Windows version, and it will download and install them correctly:
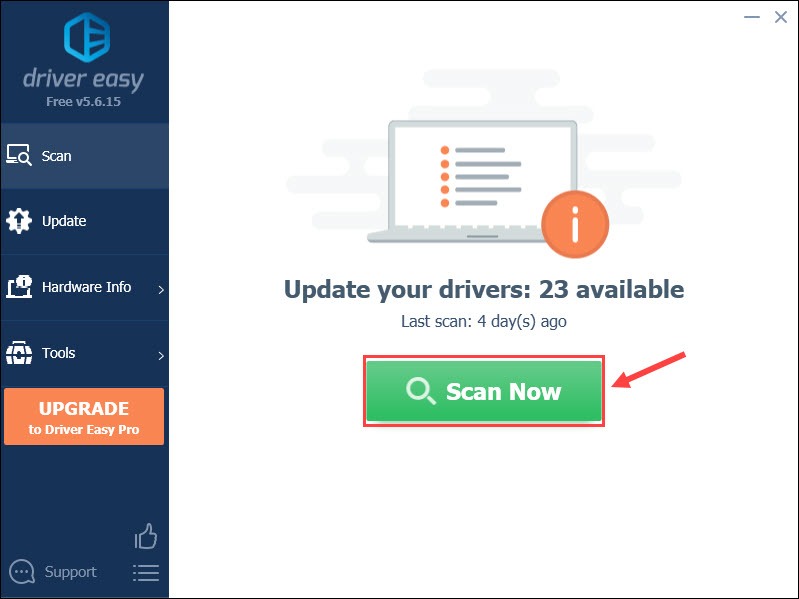
- Download and install Driver Easy.
- Run Driver Easy and click the Scan Now button. Driver Easy will then scan your computer and detect any problem drivers.
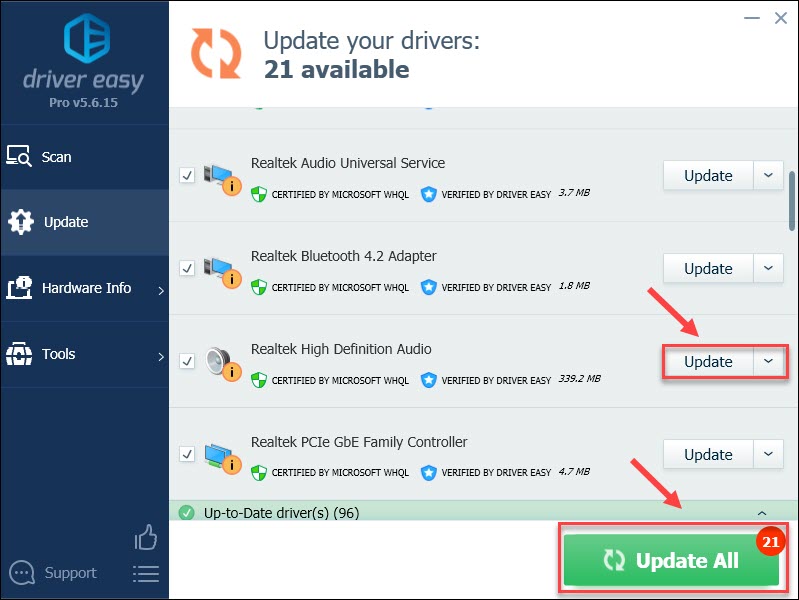
- Click Update All to automatically download and install the correct version of all the drivers that are missing or out of date on your system (this requires the Pro version – you’ll be prompted to upgrade when you click Update All). Or you can click Update to do it for free, but it’s partly manual.
If you need assistance, please contact Driver Easy’s support team at support@drivereasy.com.
Regular driver updates can make your audio device run in the tip-top condition, but if this doesn’t fix Microsoft Teams microphone not working, there is the last method to try.
Fix 5 – Reinstall Microsoft Teams
If none of the solutions above get your microphone back to working, the cause might be on the software’s end. Download and reinstall the latest Microsoft Teams to resolve the errors during the previous installation.
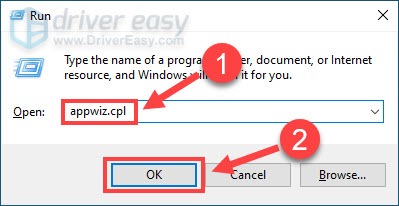
- On your keyboard, press the Windows logo key and R at the same time to open the Run command. Then, type appwiz.cpl and click OK.
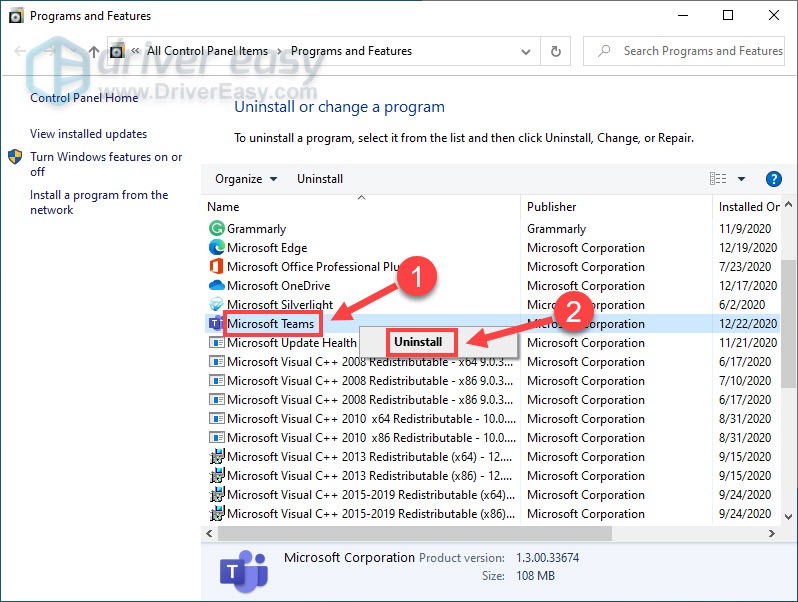
- Right-click Microsoft Teams and click Uninstall.
- Download the newest version of Microsoft Team from its official website.
Now your microphone should be working perfectly with Microsoft Teams.
Hopefully this post is helpful to you. Have further questions or suggestions? You’re more than welcome to leave a comment below.