


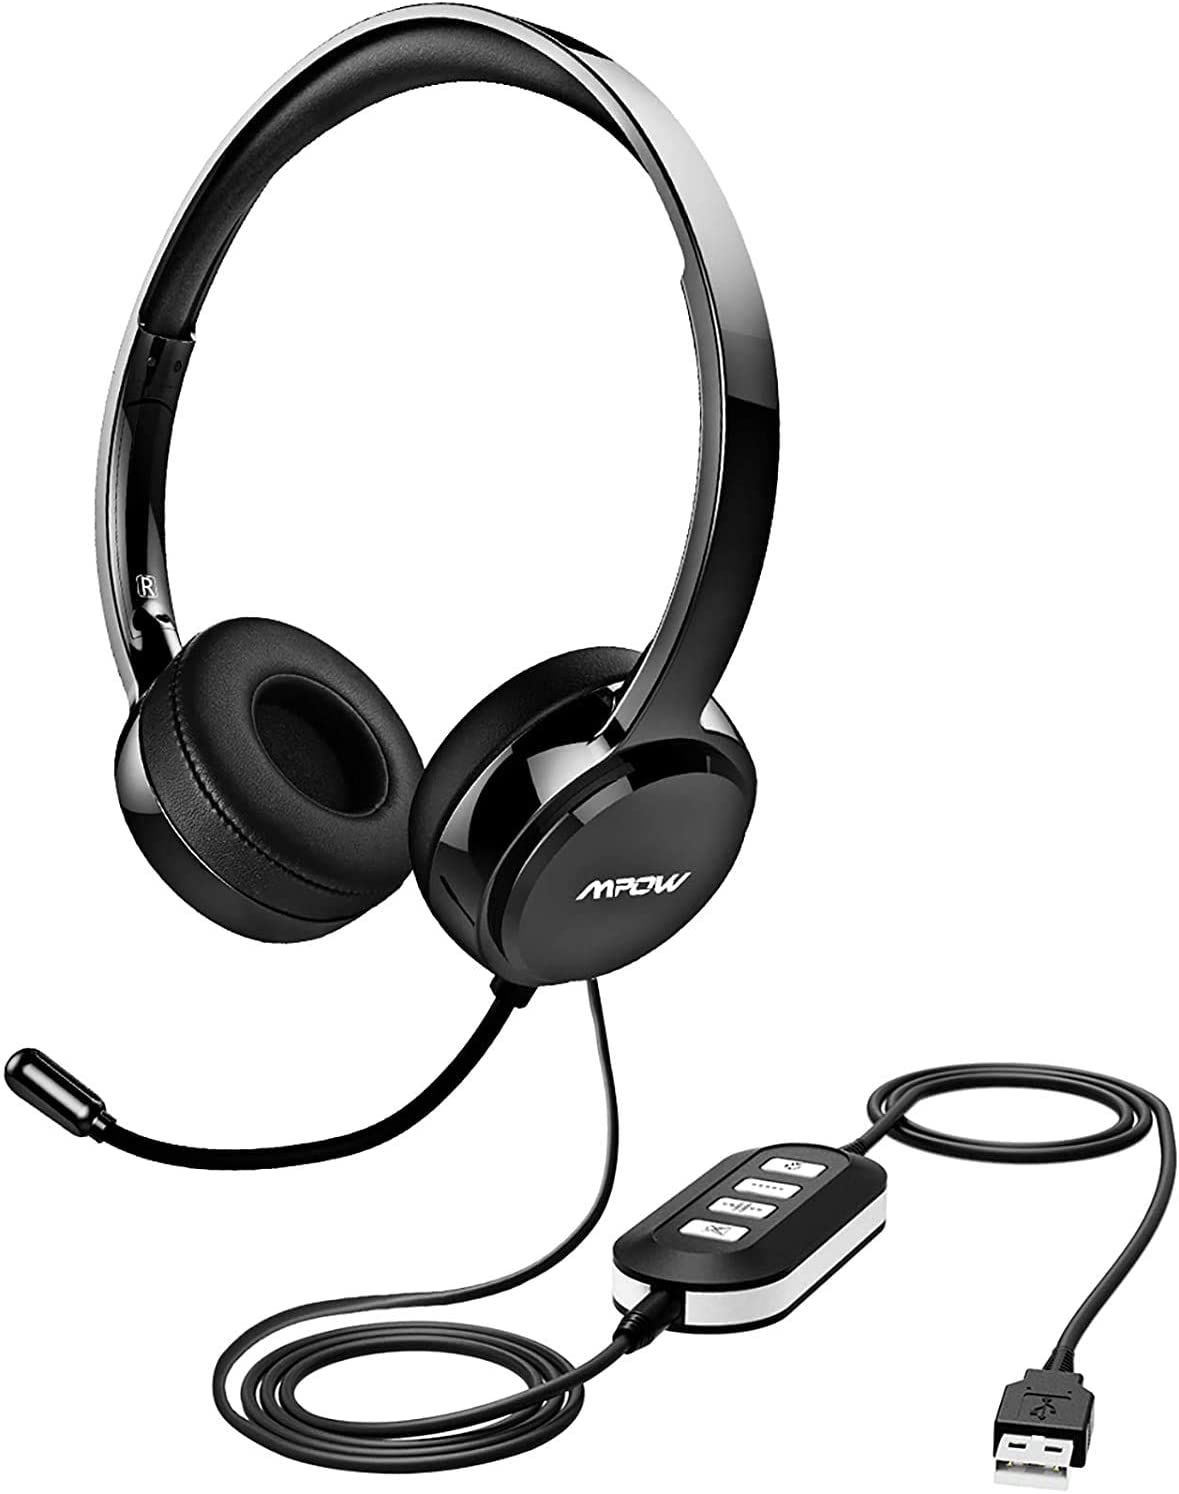
When you’re using a microphone such as MPOW attached to your computer, you may be frustrated as the microphone is not picking up your voice and you cannot be heard on calls. But since you’ve come across this article, you don’t have to be scratching your head asking why your headset microphone isn’t working. We’ve put together some methods to help you troubleshoot the issues.
Before getting started, you should do a restart. A simple reboot can resolve many issues almost immediately. But before restarting your computer, be sure to bookmark this page in case the restart didn’t help you fix your issues and you’ll need to follow the instructions below for further troubleshooting.
If restarting your computer didn’t do the trick, try to connect or pair your headset to another computer. If it isn’t working on the different computer, chances are your microphone or headset is malfunctioning or damaged. In this case, you need to reach out to the manufacturer for further assistance. You can send it for repairs or replacement if it’s still under warranty.
If you’re quite sure that your headset isn’t broken, try these fixes:
- Run the audio troubleshooter
- Update your audio driver
- Set your microphone as the default device
- Make sure apps have access to your microphone
- Make sure your microphone is enabled
- Download and install Windows updates
1. Run the audio troubleshooter
When you run into audio or sound issues, using the troubleshooting tool can help you identify what’s going on. To run the audio troubleshooter, take these steps:
1) In the search box on the taskbar, type audio troubleshooter. Then click Find and fix problems with playing sound from the results.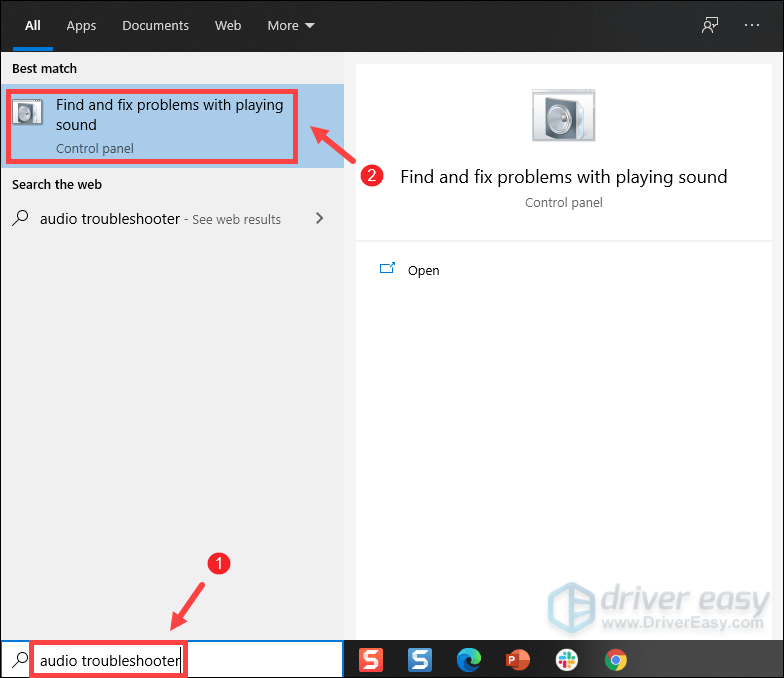
2) Select your device and click Next to start the troubleshooting process. Then wait for it to complete and you may be asked to restart your computer.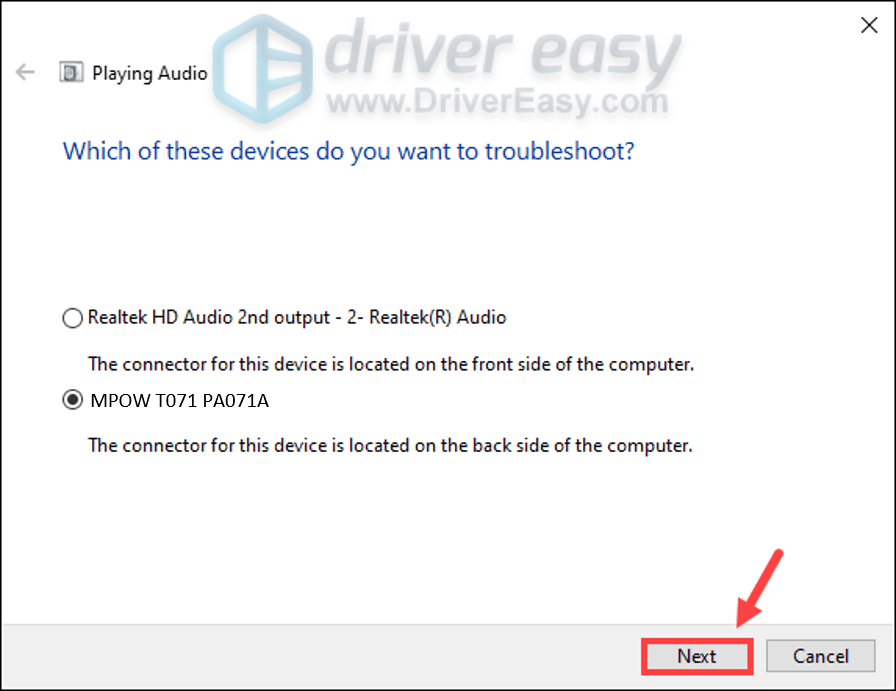
Now Windows will help you scan for issues. Simply follow the on-screen instructions to resolve your problems.
If running the audio troubleshooter didn’t get your microphone back to a working state, try the fixes above.
2. Update your audio driver
Most of the audio or sound issues are driver related. If you’re using an audio driver which is outdated or corrupted, your headset mic would not be working properly and the sound coming from your headset could be crackling, popping or static. In this situation, updating your audio driver becomes quite crucial as this may fix your issues immediately.
You can update your audio driver from the manufacturer’s website of your sound card and you may also need to update your MPOW driver corresponding with your product model from the download page. This requires a certain level of computer knowledge and you need to know the specifications of your PC.
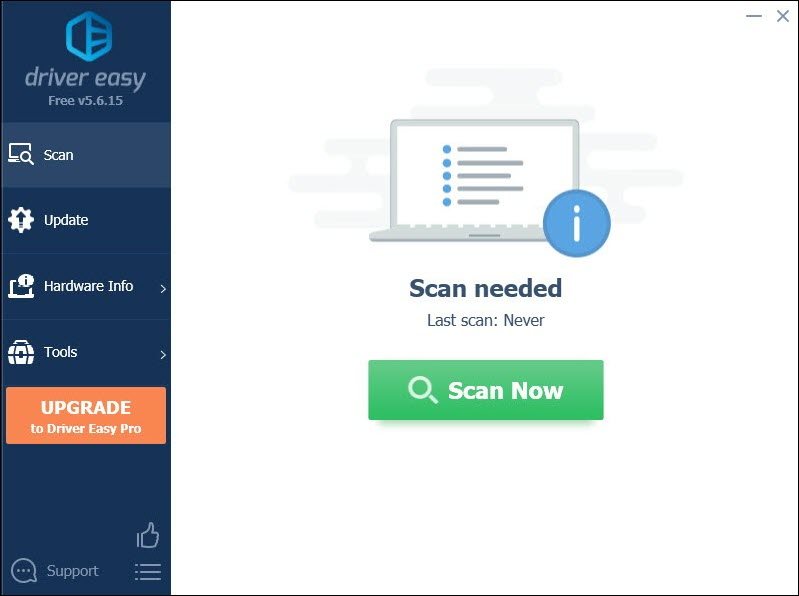
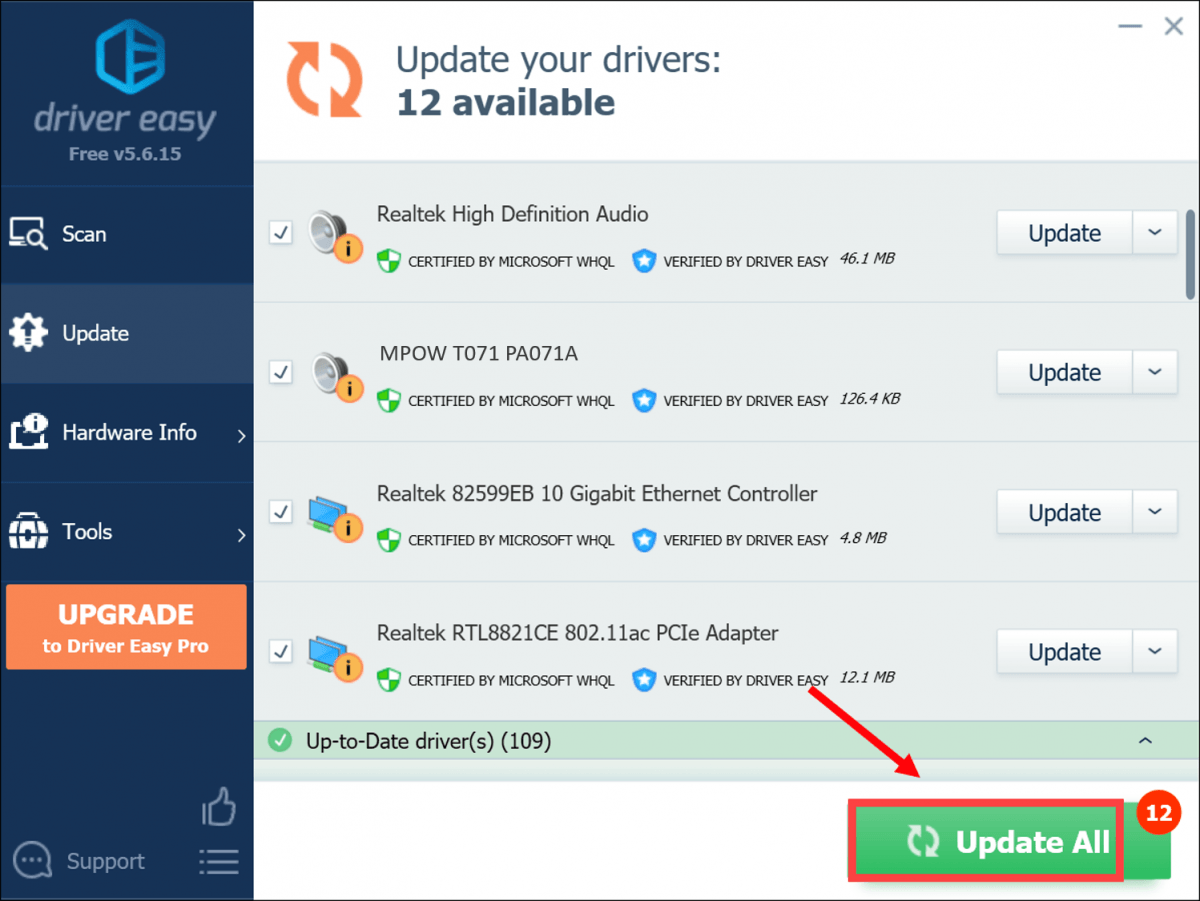
However, if you don’t have the time, patience or computer skills to update your audio driver manually, you can, instead, do it automatically with Driver Easy. Driver Easy will automatically recognize your system and find the correct drivers for your exact device, and your Windows version, and it will download and install them correctly:
1) Download and install Driver Easy.
2) Run Driver Easy and click the Scan Now button. Driver Easy will then scan your computer and detect any problem drivers.
3) Click Update All to automatically download and install the correct version of all the drivers that are missing or out of date on your system.
(This requires the Pro version which comes with full support and a 30-day money-back guarantee. You’ll be prompted to upgrade when you click Update All. If you don’t want to upgrade to the Pro version, you can also update your drivers with the FREE version. All you need to do is to download them one at a time and manually install them.)
After updating your drivers, restart your computer and then try to use the microphone to check if it’s working now. If not, try the next fix below.
3. Set your microphone as the default device
Normally, when your microphone is connected, Windows can automatically detect it and set it as the default input device. But you may have multiple input or recording devices connected. It would occur to you that your computer is using another device instead of the one you’re attempting to. In order to set your MPOW microphone as your input device, follow the instructions below:
1) At the bottom-right corner of your taskbar, right-click your speaker icon and select Open Sound settings.
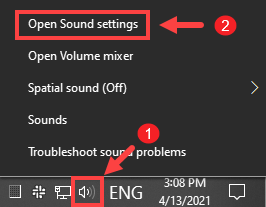
2) Scroll down to the section of Related Settings and click Sound Control Panel.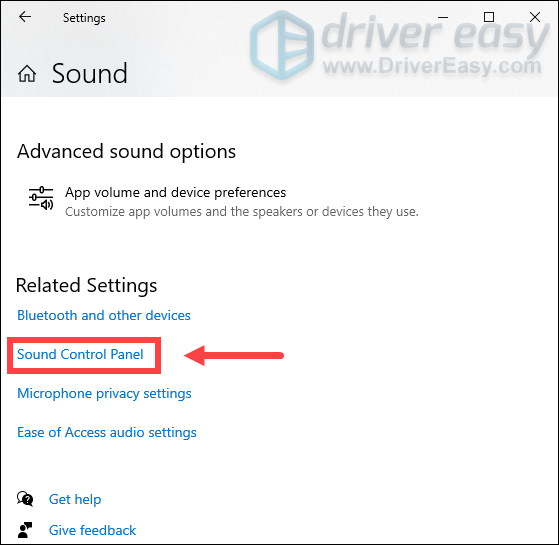
3) When the Sound window opens, select the Recording tab. Click on your microphone and then click Set Default > OK.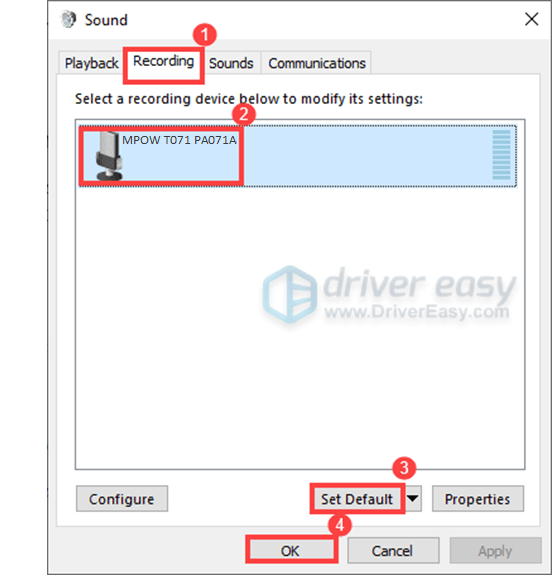
After you’ve saved the changes, use your microphone to check if your problems have been solved.
4. Make sure apps have access to your microphone
In order to access your microphone, the apps need permissions. To let apps access your microphone, take these steps:
1) Press the Windows logo key + R at the same time to open the Run dialog box.
2) Click Privacy.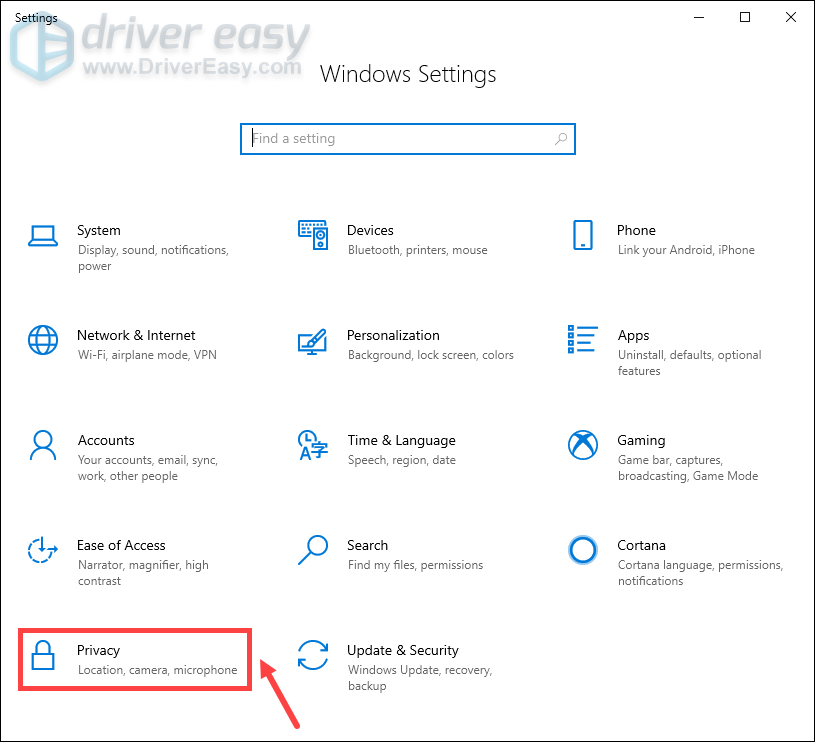
3) Click Microphone on the left pane. Then click on the Change button and make sure Microphone access for this device is turned on.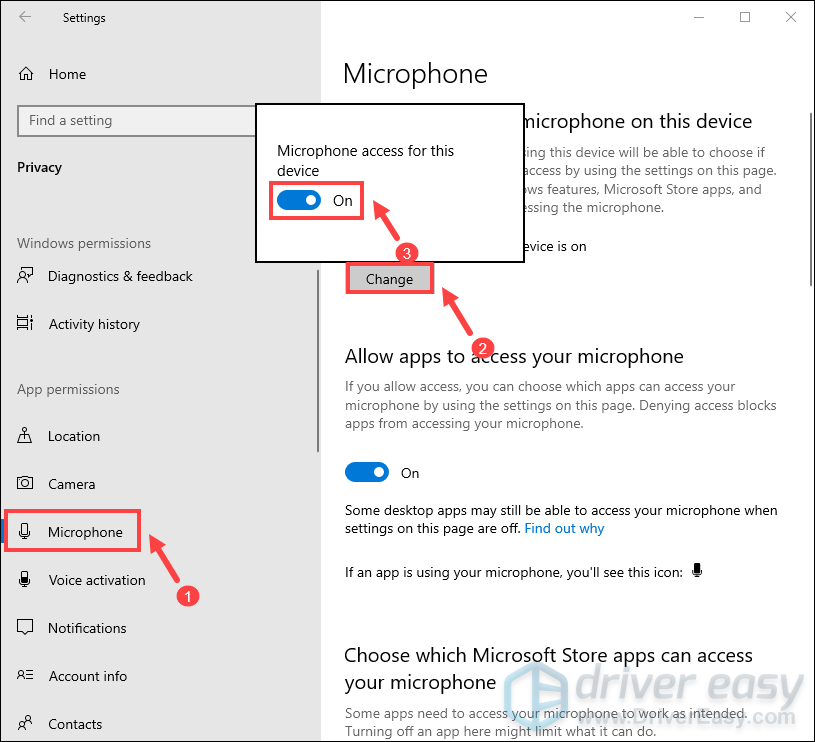
4) Under the Allow apps to access your microphone section, make sure it’s turned On.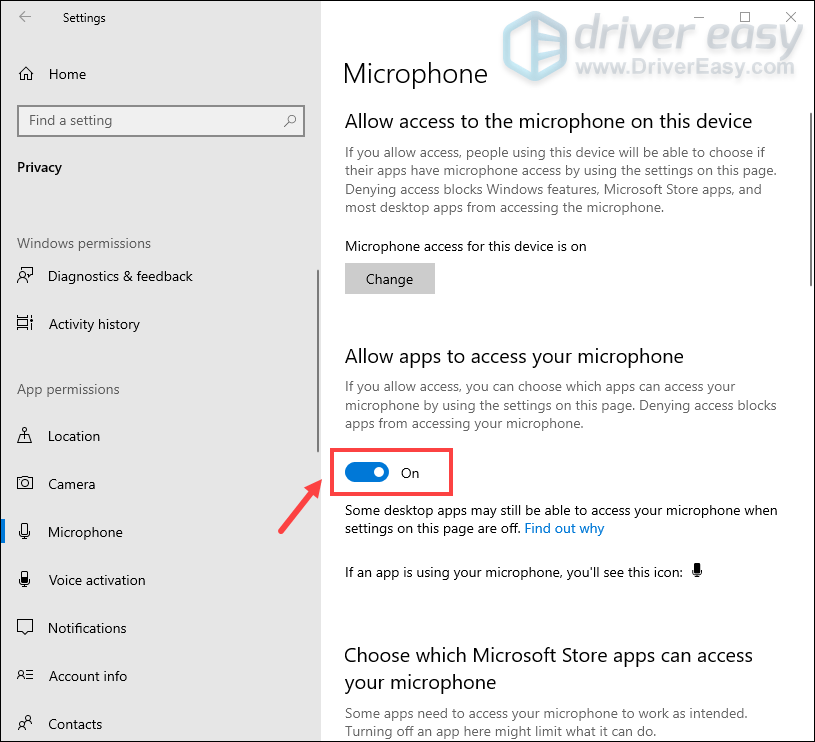
5) Once you’ve allowed microphone access to your apps, you can change the settings for each app. Simply head to the Choose which Microsoft apps can access your microphone, and turn on apps you want to use with it. For desktop apps, make sure that Allow desktop apps to access your microphone is turned On.
After you’ve confirmed the changes, try to make a recording or call to check if it’s picking up your voice.
5. Make sure your microphone is enabled
It may sound odd but there are just possibilities that your microphone has accidentally been disabled. If that’s your case, your microphone definitely wouldn’t be recording any sound. To make sure your mic is enabled, take these steps:
1) At the bottom-right corner of your taskbar, right-click your speaker icon and select Open Sound settings.
2) Under the Input section, make sure that your headset is selected as the input device. Then click Device Properties.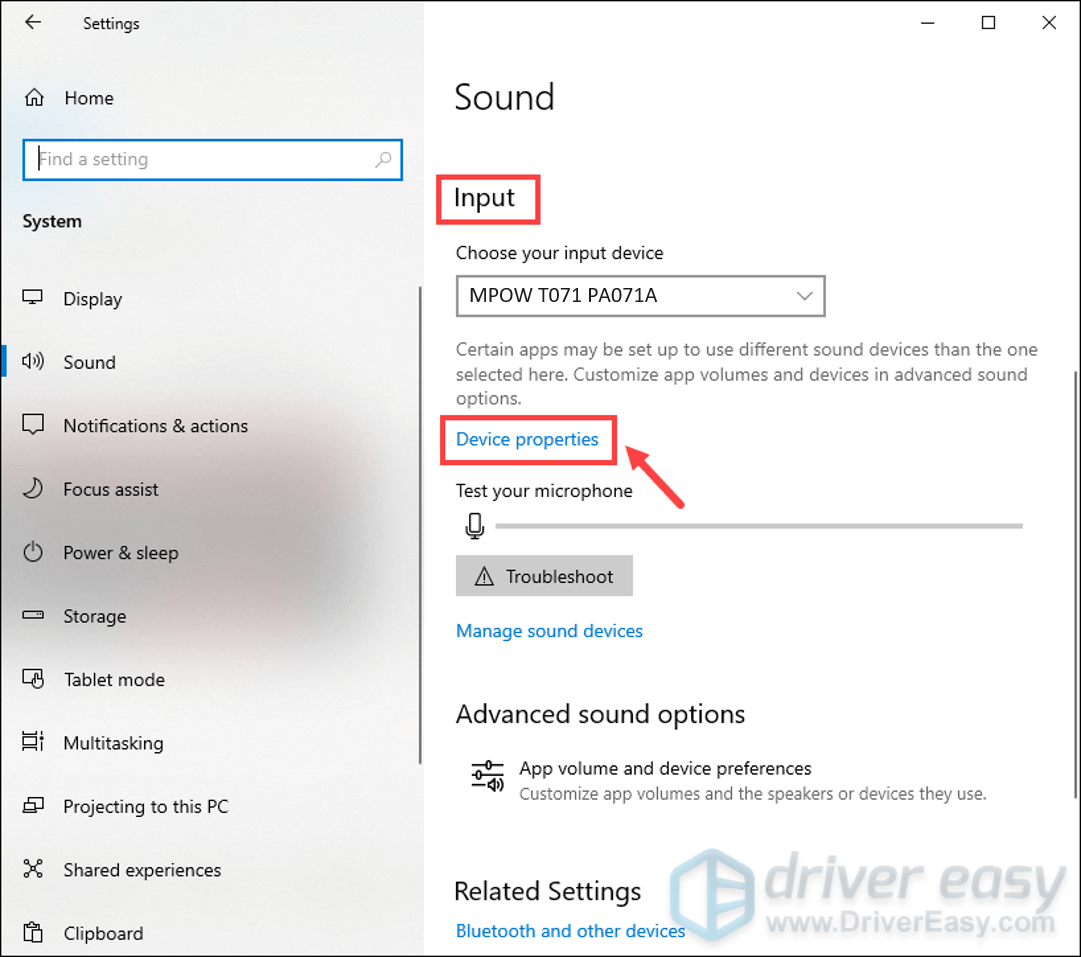
3) Make sure that your headset is not disabled. 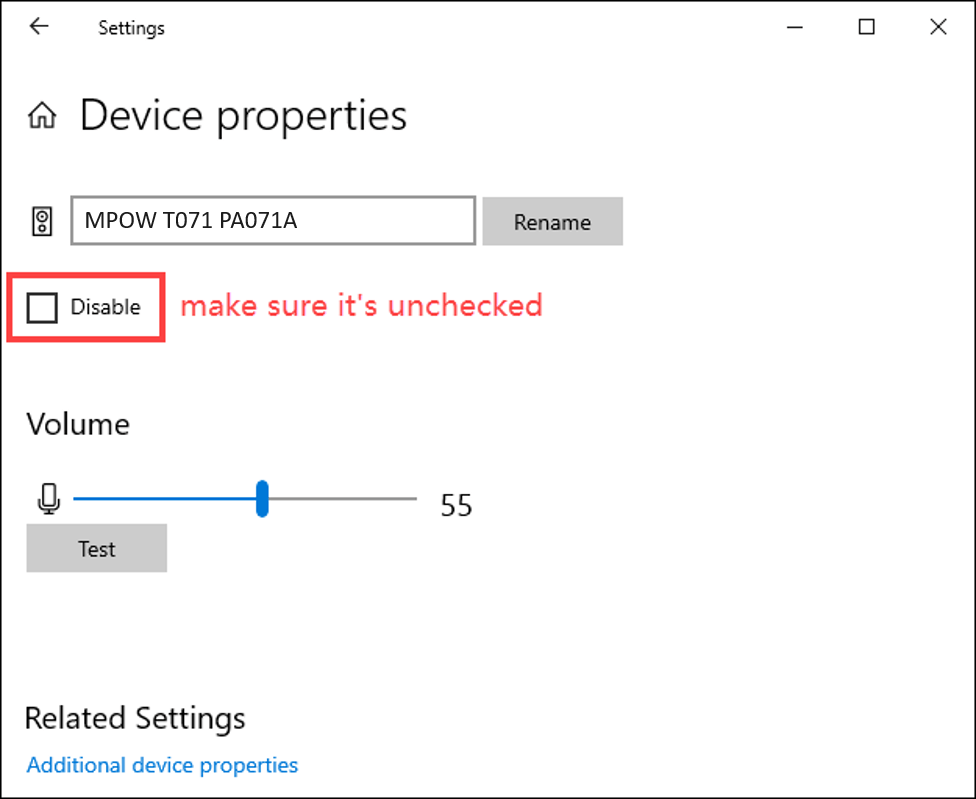
Once you’ve confirmed that your microphone has been enabled but it’s still not working, try the next fix below.
6. Download and install Windows updates
Windows updates come with bug fixes and bring new features. When your microphone isn’t working, it could be a compatibility issue. To take advantage of Windows new features and fix the compatibility issue, you should install all Windows updates:
1) In the Search box, type check for updates. Click Check for updates from results.
2) Click on the Check for updates tab. If there are any updates available, it’ll automatically start to download and install it.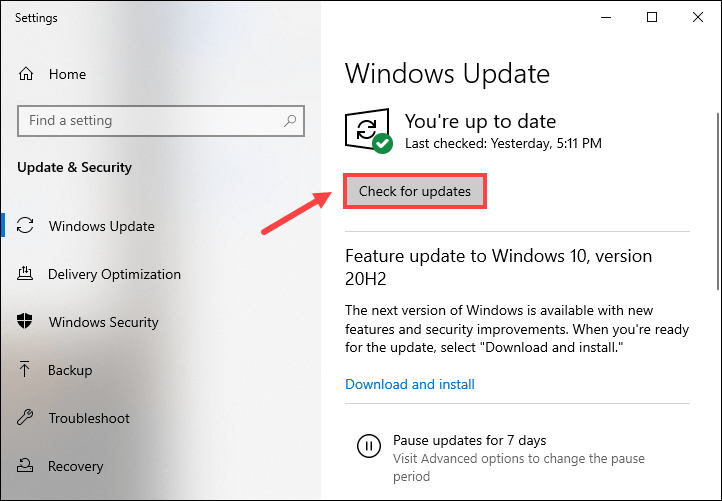
After installing the latest Windows updates, use your headset mic and it should be functioning now.
Hopefully this tutorial helped get your MPOW microphone back to the working state. If you have any suggestions or questions, don’t hesitate to leave us a comment below.