


The Razer Blade 17 is billed as a laptop of many talents. Its first-rate hardware and distinct features make it a magnet for a wide range of gamers.
If you own a Razer Blade 17, it’s important that you keep your drivers up-to-date to get rid of slowdowns, crashing and other issues, and to bring out its maximum performance. Here we offer three solutions on how to update your drivers to the latest versions. You can do it manually or automatically.
Table of Contents
Method 1: Update Razer Blade 17 Drivers from Razer Support
In this part, we will show you how to find the newest drivers via Razer Support for Razer Blade 17 and install them.
You can visit the Razer Support site to check for the latest versions of drivers, or search for a particular kind of driver that you need. Most of the device manufacturers will update their drivers at regular intervals via this website.
But before you start, you need to get information about your device model and the Windows operating system.
You’ll need some computer skills and patience to update your drivers this way because you need to find exactly the right driver online, download it and install it step by step.
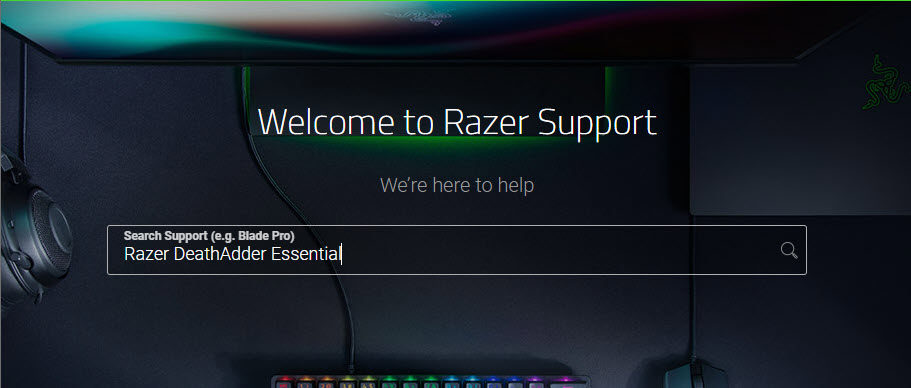
- Open Razer Support page.
- In the Search Support box, type the name of your device model and press Enter. For example, if you want to update drivers for Razer DeathAdder Essential, a kind of gaming mice, you can type and search the exact words Razer DeathAdder Essential.
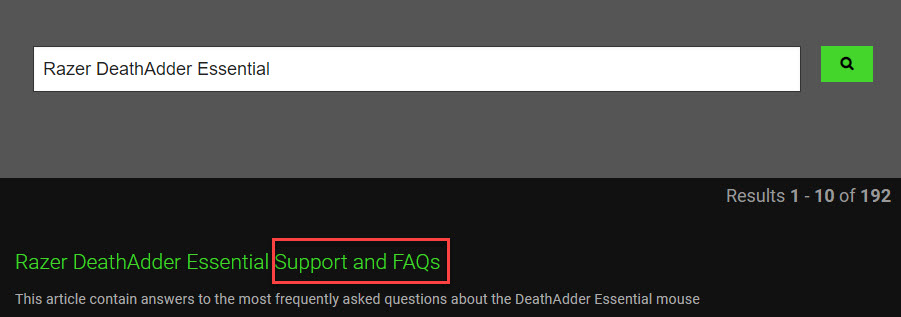
- A list of relevant results will show up, and you need to locate the one with Support and FAQs in its title.
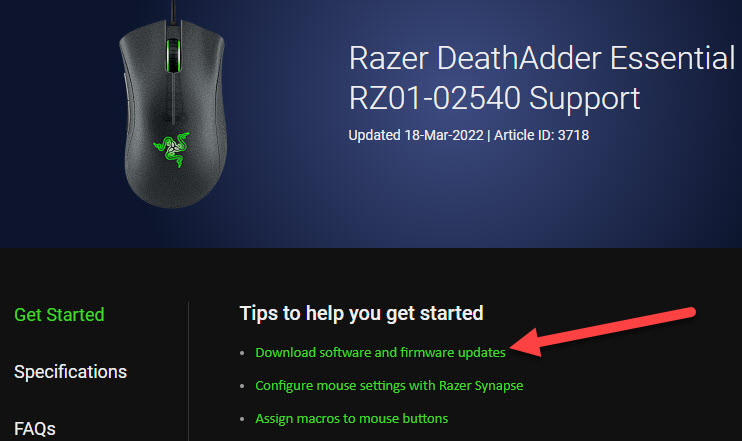
- On the page of Product Support, you can see the updating solution. Click Download software and firmware updates.
- Follow instructions and select your Razer device. Again, we take Razer DeathAdder Essential as an example. Click Download when you find your compatible updater.

- Close all other running applications before you proceed with this update, and run the downloaded files.
- Follow the on-screen instructions step by step until the updating process is complete.
Method 2: Update Razer Blade 17 Drivers from Windows Update
Another way to get updated drivers for Razer Blade 17 is utilizing Windows Update. It’s a Windows built-in tool used to download and install device drivers to Windows. Windows Update takes you less time to find and install the correct driver versions.
However, you’re not guaranteed to get the latest driver updates you need for your Razer laptop through this method because it remains difficult for manufacturers to get a driver into Windows Update.
If you don’t mind, you can still follow the steps below (taking Windows 10 as an example). But we recommend that you choose Method 3 to prevent underlying problems.
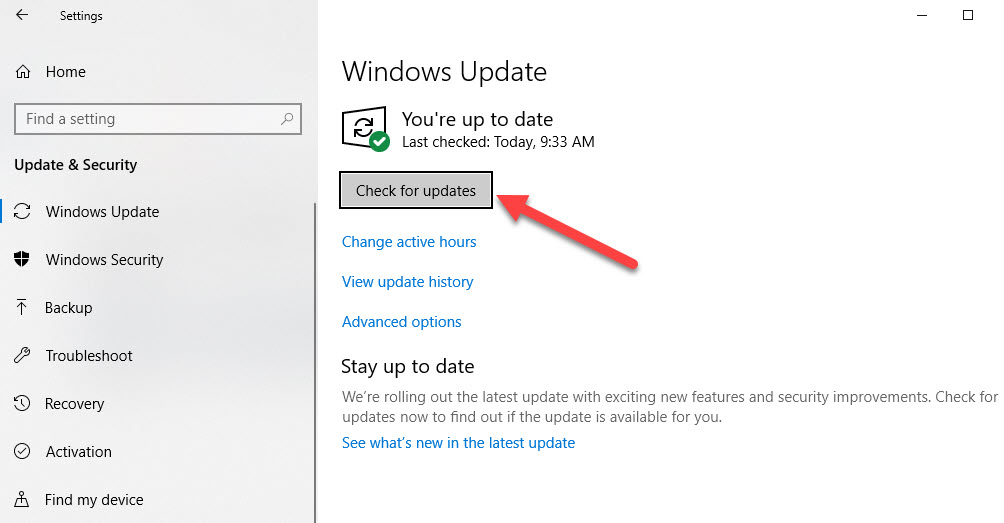
- On the left-end of your screen, click the Search icon and type Windows Update. Then click Check for updates as it pops up as a matching result.

- Click Check for updates and Windows will begin downloading and installing the available updates for your PC.
- Restart your computer for the changes to take effect.
Cannot find the driver you need? Don’t worry. Please move on to Method 3 below for possible newer drivers.
Method 3: Update Razer Blade 17 Drivers Automatically (Recommended)
This is the quickest and easiest option. It’s all done with just a couple of mouse clicks – easy even if you’re a computer newbie.
If you don’t have the time, patience or computer skills to update Razer device drivers manually, you can do it automatically with Driver Easy.
Driver Easy will automatically recognize your system and find the correct drivers for it. You don’t need to know exactly what system your computer is running, you don’t need to risk downloading and installing the wrong driver, and you don’t need to worry about making a mistake when installing.
You can update your drivers automatically with either the FREE or the Pro version of Driver Easy. But with the Pro version it takes just 2 clicks:
- Download and install Driver Easy.
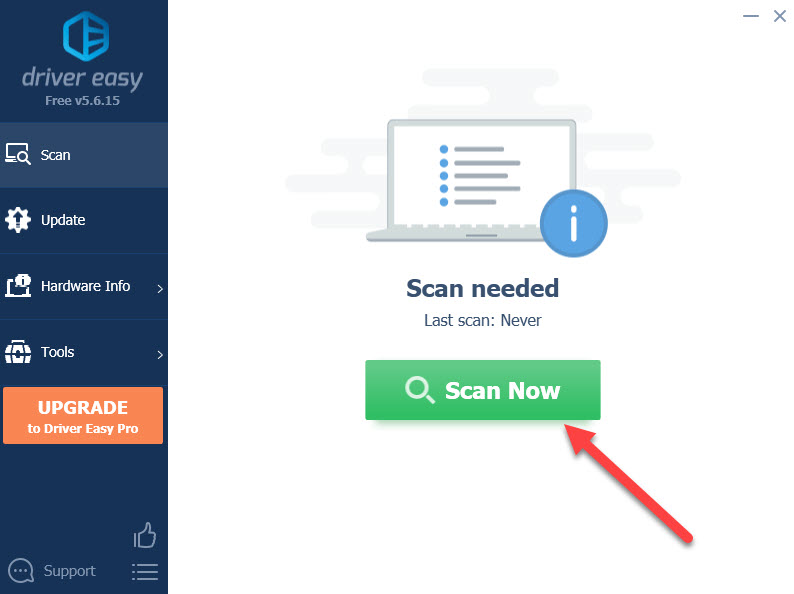
- Run Driver Easy and click the Scan Now button. Driver Easy will then scan your computer and detect any problem drivers.
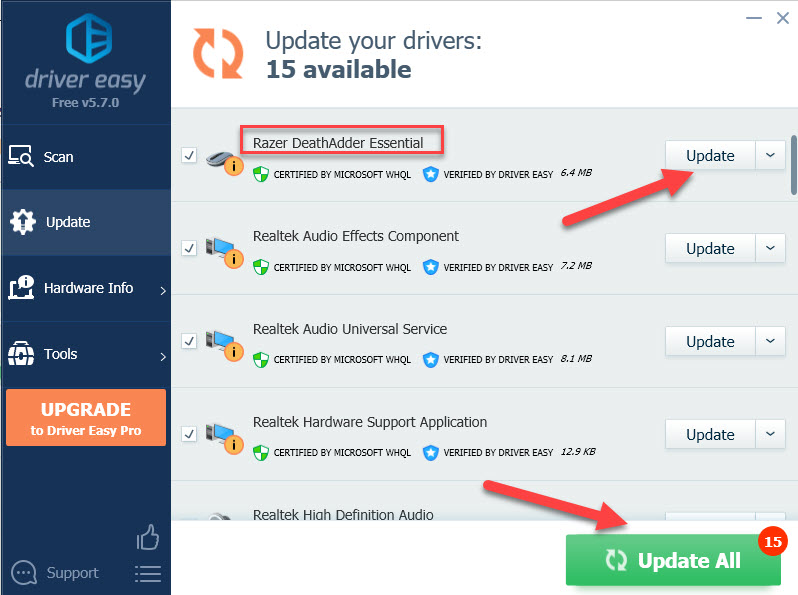
- Click Update All to automatically download and install the correct version of all the drivers that are missing or out of date on your system (this requires the Pro version – you’ll be prompted to upgrade when you click Update All).
- Restart your Razer laptop, and the updating will take effect.