


If you’re looking to update drivers for your Lenovo T520 laptop, then this post is written for you. No matter what drivers you need, you’ll be able to find the correct ones with a few simple steps.
How to update your Lenovo T520 drivers
There’re two ways you can update the Lenovo T520 drivers:
Option 1 – Manually – You’ll need some computer skills and patience to update your driver this way, because you need to find exactly the right driver online, download it and install it step by step.
OR
Option 2 – Automatically (Recommended) – This is the quickest and easiest option. It’s all done with just a couple of mouse clicks – easy even if you’re a computer newbie.
Option 1 – Update the drivers manually
Lenovo keeps updating drivers for the T520 laptops. To get them, you need to visit the support website of Lenovo, find the drivers corresponding with your specific flavor of Windows version (for example, Windows 8, 64 bit) and download the drivers manually. Here’s the details:
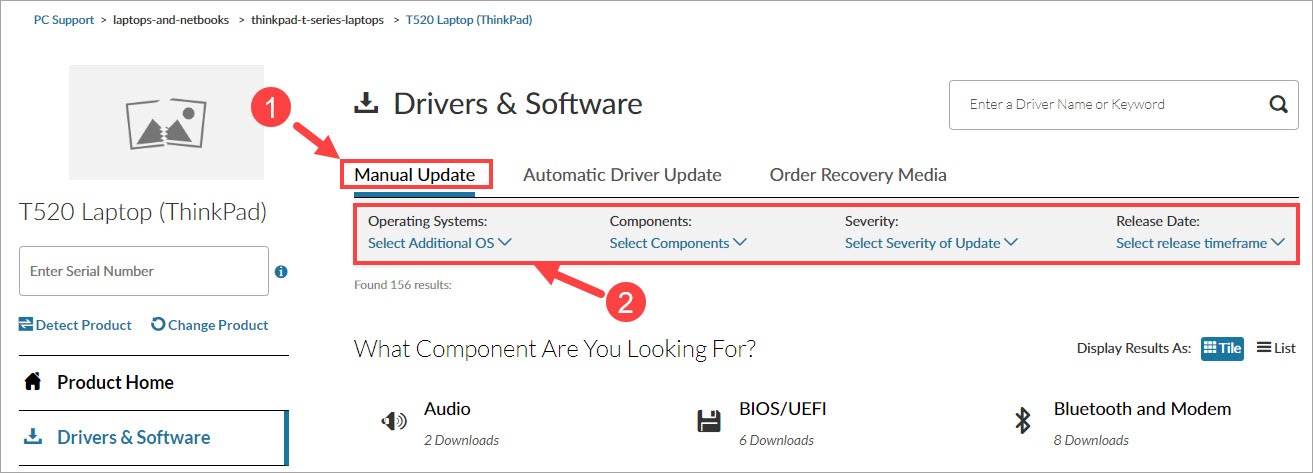
- Go to the Drivers & Software page of Lenovo T520 laptops.
- Under the Manual Update tab, select your operating system. You can also sort the drivers by Components, Severity, and Release Date if you want.
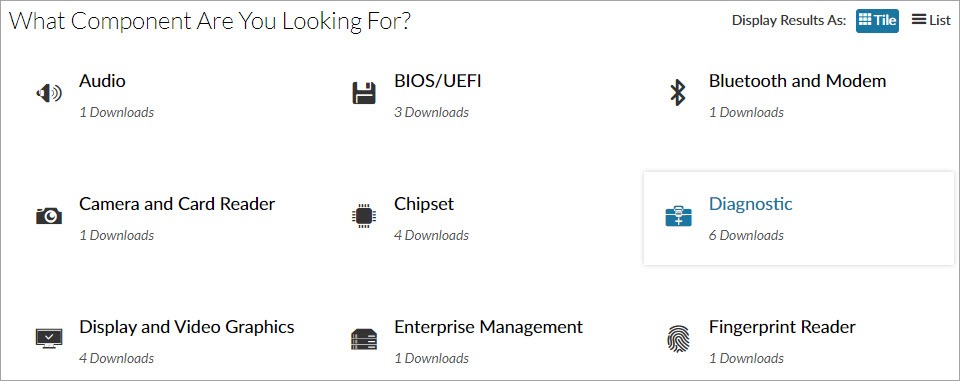
- Below you’ll be presented with a slew of component categories. Click the one whose drivers you need to update.
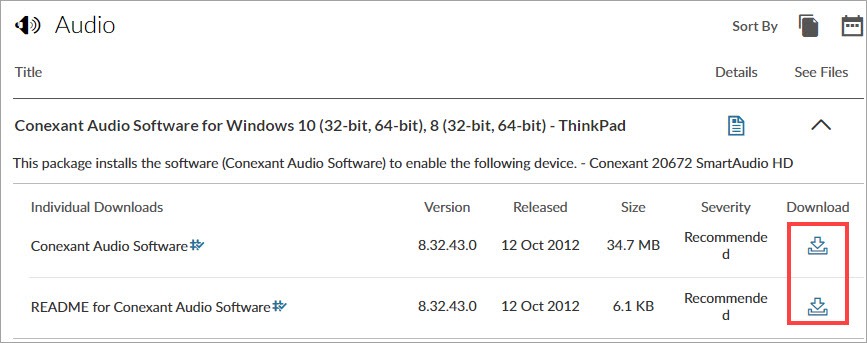
- Take the audio driver as an example. Click Audio and then you’ll see one or more drivers available for download on the pop-up page. Once you find the one you’d like to download, simply click the down arrow button which represents “Download.”
- Once you’ve downloaded the correct driver for your system, double-click on the downloaded file and follow the on-screen instructions to install the driver.
- Reboot your computer for the changes to take effect even if you’re not asked to.
Repeat Step 3 through Step 6 until you finish downloading and installing all the drivers you need. This may seem a bit time-consuming and error-prone, though. If you’re interested in the benefits of updating drivers automatically with a driver updater tool, read on and find out how.
Option 2 – Automatically update the drivers
If you don’t have the time, patience or computer skills to update your Lenovo T520 drivers manually, you can do it automatically with Driver Easy.
Driver Easy will automatically recognize your system and find the correct drivers for it. You don’t need to know exactly what system your computer is running, you don’t need to risk downloading and installing the wrong driver, and you don’t need to worry about making a mistake when installing. Driver Easy takes care of everything.
You can update your drivers automatically with either the FREE or the Pro version of Driver Easy. But with the Pro version it takes just 2 clicks:
- Download and install Driver Easy.
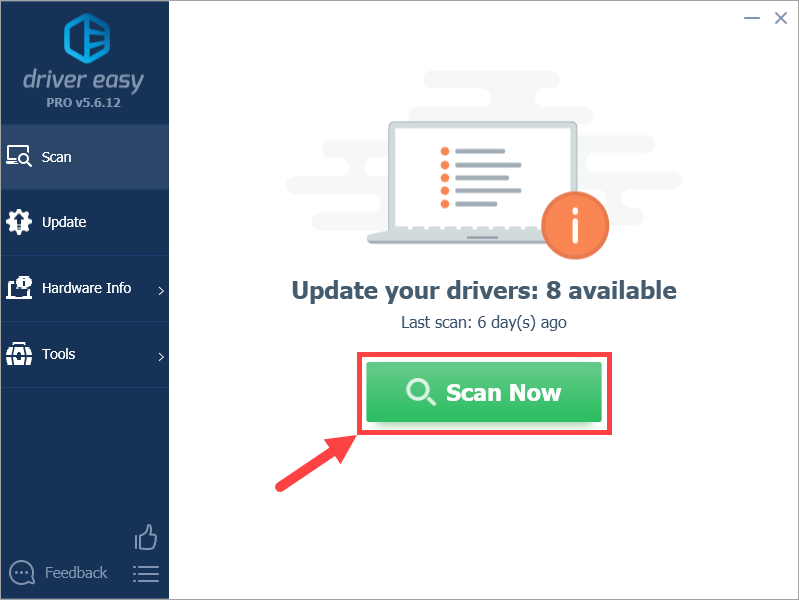
- Run Driver Easy and click the Scan Now button. Driver Easy will then scan your computer and detect any problem drivers.
- Click the Update button next to a flagged driver to automatically download the correct version of that driver, then you can manually install it (you can do this with the FREE version).
Or click Update All to automatically download and install the correct version of all the drivers that are missing or out of date on your system. (This requires the Pro version which comes with full support and a 30-day money back guarantee. You’ll be prompted to upgrade when you click Update All.)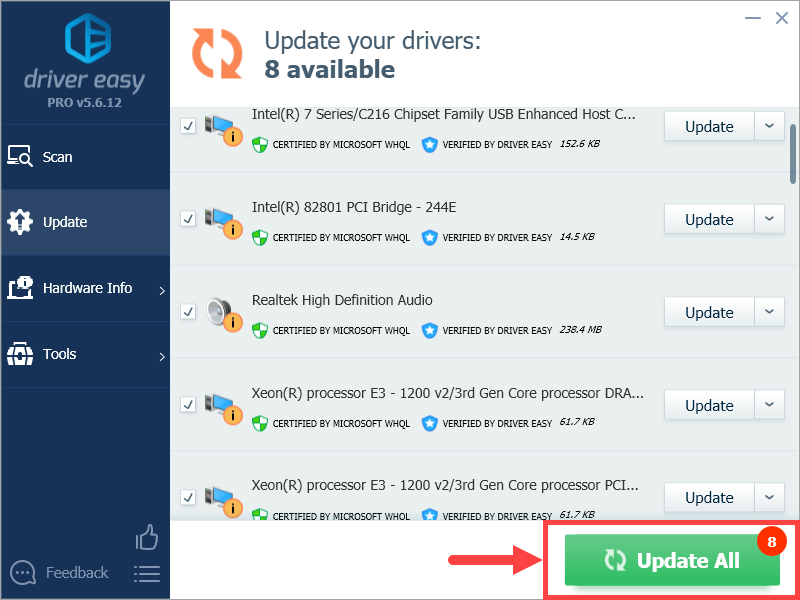
Hopefully you found this post helpful. Please feel free to leave a comment below if you have any further questions or ideas. Thanks for reading!