


Solution 1: Test all hardware devices
The problem would be caused by broken hardware devices. Test the related hardware devices in following order.
1. Test if the cable works properly. Use another cable to connect the display monitor to your PC.
2. Test if the output port has problem. If your PC has more than one HDMI output ports, plug the cable to another port and see if the problem persists.
3. Test if the monitor works fine. Check and make sure the monitor’s speaker volume is not turned down or muted. If no problem is found there, connect the monitor to another PC.
Solution 2: Update Audio Drivers
The audio would not work if there is problem with the sound drivers or the display audio drivers. So you can try updating the drivers to resolve the problem. You can go to your PC’s manufacturer’s website to download the latest drivers. Before you get started, ensure that you know the PC model name and the specific operating system (Windows 7 32-bit or Windows 7 64-bit).
If you have problem downloading drivers manually, click here to download Driver Easy to help you. Driver Easy will detect all problem drivers in your computer and recommend new drivers. You can use it to download and install new audio drivers easily.
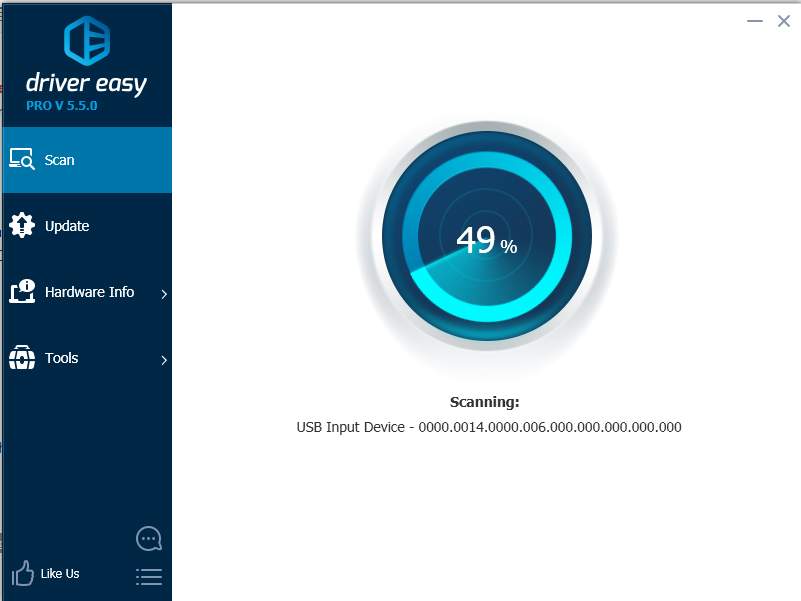
Driver Easy has Free version and PRO version. You can download the Free version for a try. If you find it helpful, you can consider upgrading to PRO version. With PRO version, you can enjoy free technical support guarantee. You can contact us for further assistance regarding the HDMI problem. And you will have 30-day money back guarantee. You can ask for a full refund if you are not satisfied with the product.
Soution 3: Set HDMI Device as Default Output
Follow these steps:
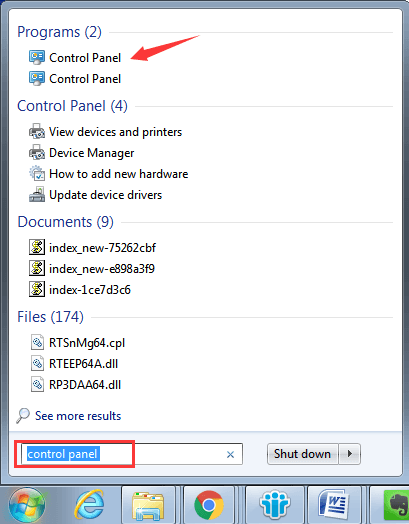
1. Click Start Menu at the bottom left corner of desktop.
2. Put Control Panel in the search box and click “Control Panel” on the menu. Then Control Panel window will open.
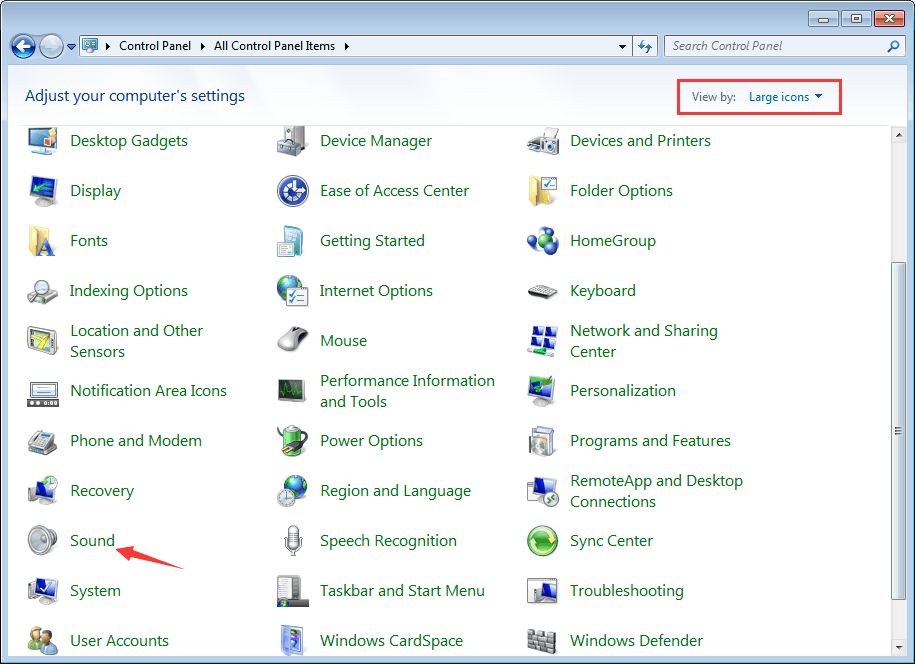
3. View by Large icons and click on Sound option.
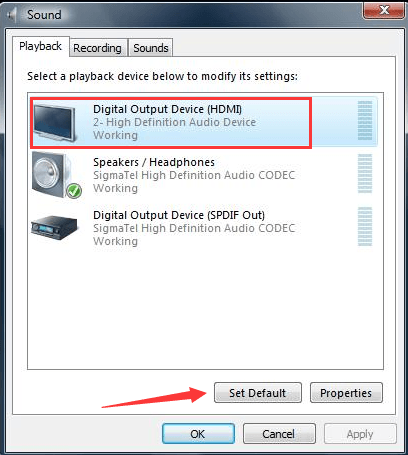
4. Go to Playback tab. Select Digital Output Device or HDMI option. Click Set Default and Press OK button to apply the change. Then the HDMI sound output will be set as default.
Solution 4: Enable High Definition Audio Controller
If High Definition Audio Controller is disabled, the HDMI audio would not work. Follow steps below to check and make sure it is enabled.
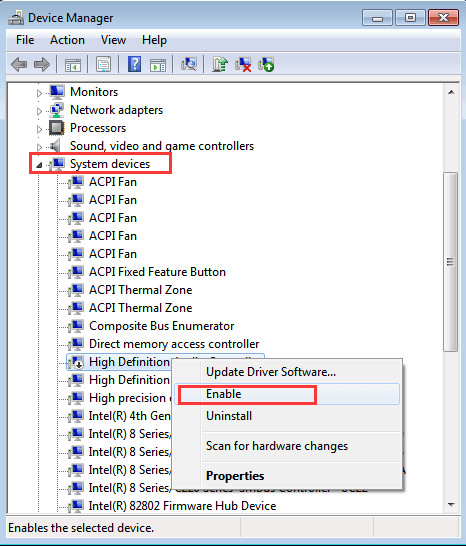
1. Go to Device Manager.
2. Expand category System devices and you will see two identical items called High Definition Audio Controller under this category. If they are disabled, you can see there is an arrow mark next to the device name. In this case, right-click on the one which is disabled and click Enable on the context menu.
Try solutions above to resolve your HDMI sound not working issue in Windows 7. One should work for you.