


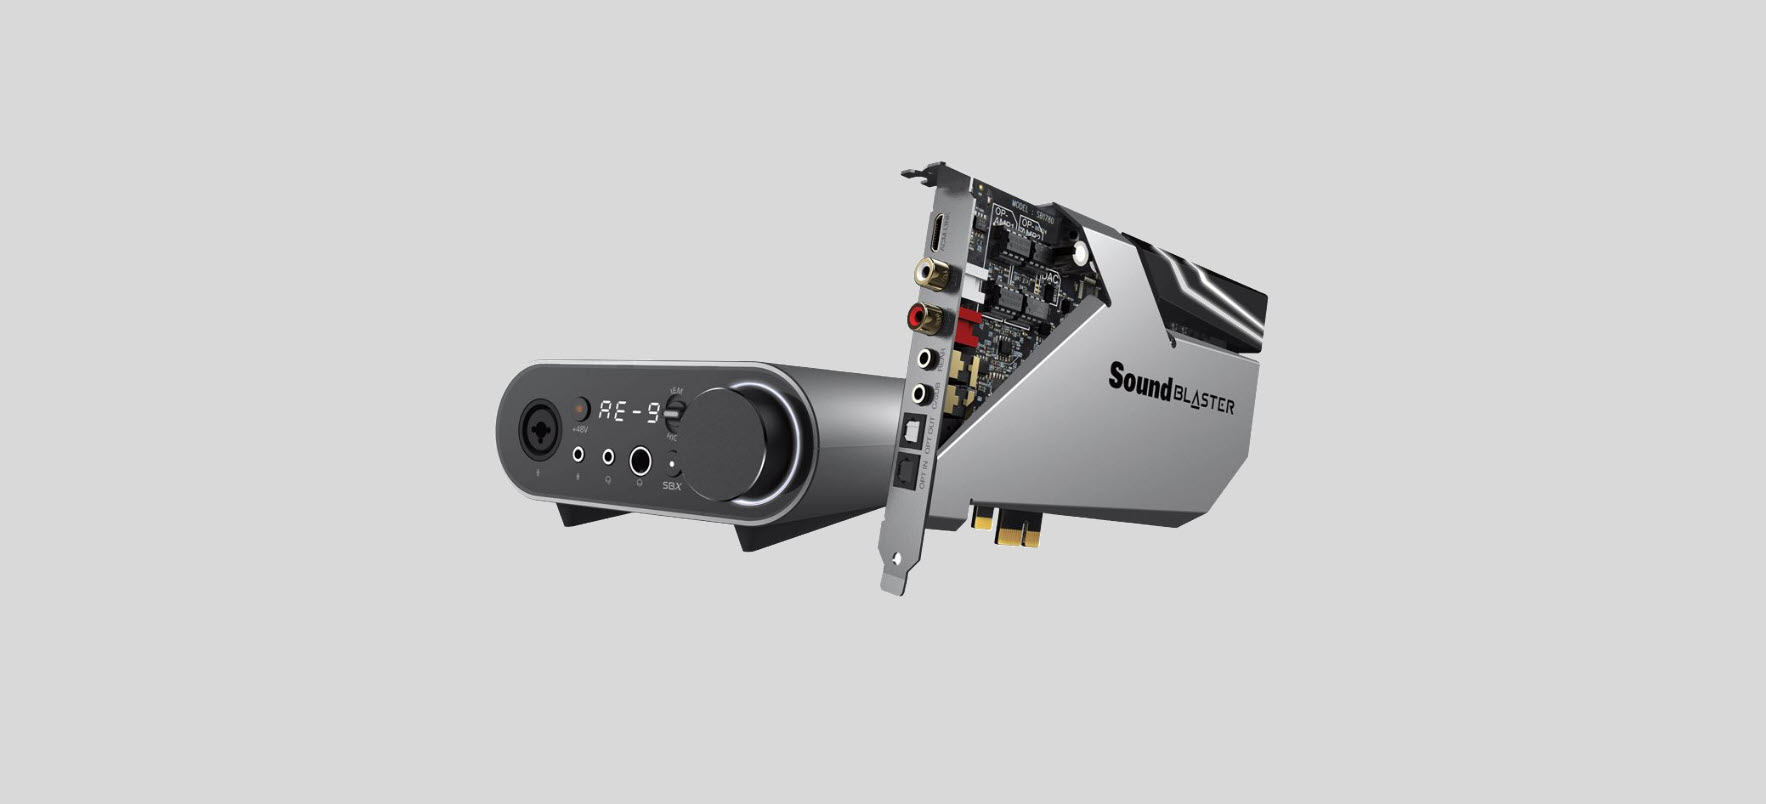
You care about stunning sound quality but find that you can’t use the microphone. If you’re one of those who’re experiencing Sound Blaster microphone not working issues, you’ll learn how to fix it in this post.
Try these fixes
- Make sure your mic is not muted
- Allow your device and apps to access the microphone
- Disable Direct Mode
- Adjust Windows sound settings
- Update audio drivers
- Reinstall Sound Blaster Command
1. Make sure your mic is not muted
To begin with, you should make sure your microphone’s volume has turned up to a proper level so that it can record your voice. You can skip this step if you have already done this.
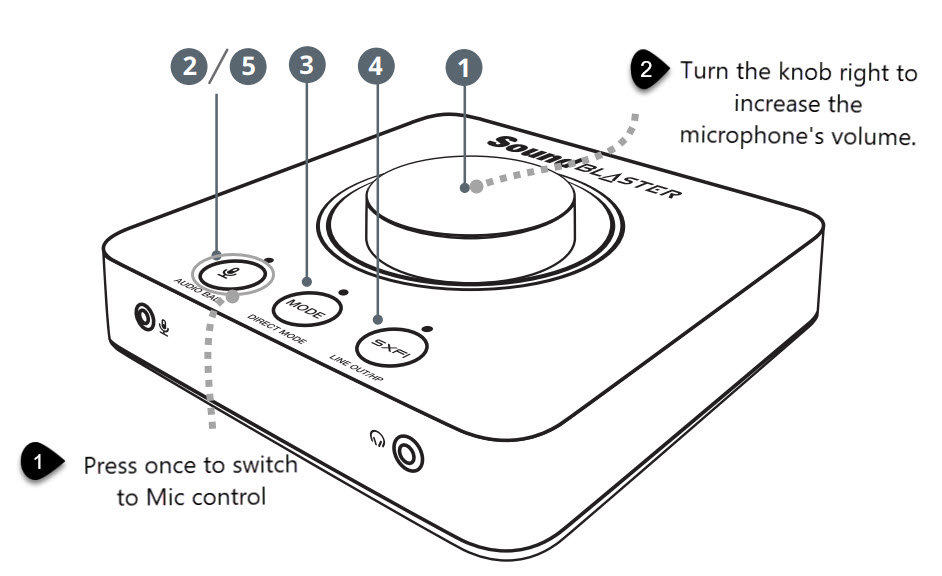
1) Press the Microphone Control Button once, and turn the Volume Control Knob (Red Light) right to increase the microphone’s volume.
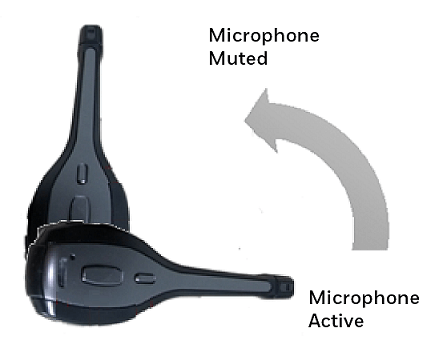
2) Check if your microphone is physically muted on your headset switch or inline mute. Sometimes you may accidentally flip mute.
3) If you’re using a 6.3mm microphone, make sure that there’s no microphone connected to the 3.5mm microphone port and vice versa.
4) Now you can test your microphone again.
2. Allow your device and apps to access the microphone
Another cause of the Sound Blaster mic not working is that your PC can’t access your microphone. Here’s how to allow microphone access for your device:
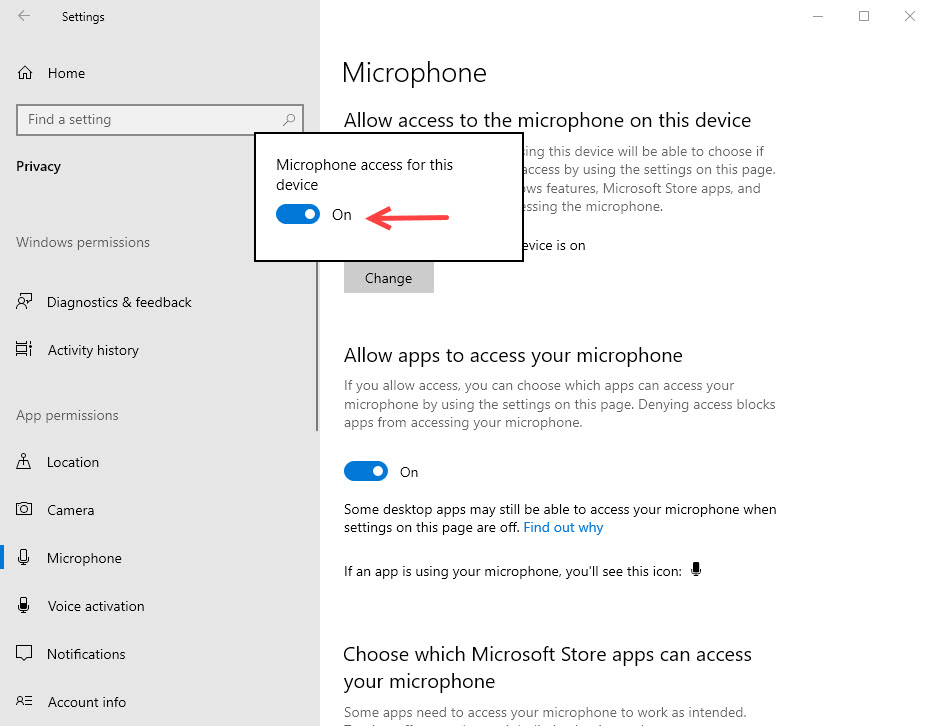
1) Open the Settings app.
2) Go to Privacy > Microphone.
3) Under Allow access to the microphone on this device, click Change and make sure it’s turned on.
4) Scroll down to make sure the app you want to use can access your microphone.
5) Test your microphone again.
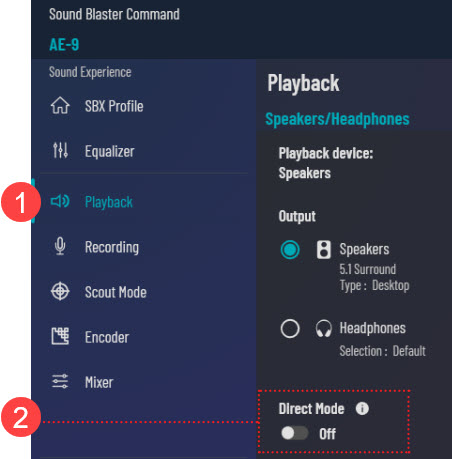
3. Disable Direct Mode
Enabling Direct Mode allows audio to output in its original form, directly from its original source, but your Mic doesn’t work in this mode. When direct mode is enabled it bypasses the SoundCore 3D chipset and therefore the mic path is not operational.
1) If your Mode Button indicates Orange, you know it’s on Direct Mode. You can press and hold the Mode Button to quit.
Or you can check Playback > Direct Mode in Sound Blaster Command software, and make sure it’s turned Off.
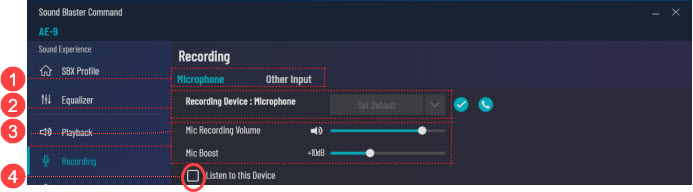
2) Go to the Recording tab, make sure the microphone is not muted in Sound Blaster Command and has an adequate volume level. Tick Listen to this device under Microphone/Headset (Mic) to verify Mic function.
4. Adjust Windows sound settings
Many Sound Blaster users have fixed this issue by changing the default frequency for the microphone. Here’s how:
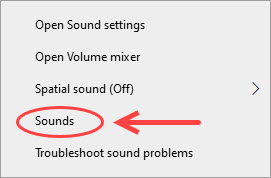
1) In the notification area, right-click the volume icon, and select Sounds.
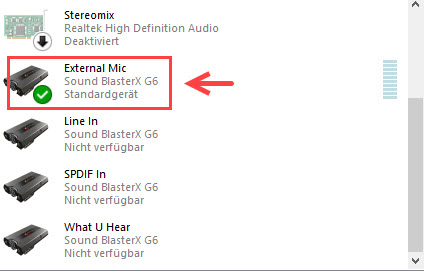
2) Go to the Recording tab, choose External Mic. Set Line In as the default device if you’re using a Line-in source.
3) Right-click and select Properties.
4) First go to the Levels tab, and make sure it’s set to a proper volume.
5) Then go to the Advanced tab, and select 2 channel, 16 bit, 48000 Hz (DVD Quality) for the Default Format.

6) Check all the boxes below.
7) Click OK to save the changes. Now you can test you microphone again.
5. Update audio drivers
If you have tried these methods above but to no avail, you should update all your audio drivers. This can be done with the latest Windows Updates. However, you can’t rely on Windows to update (Learn Why…) to do the job for you. So to make sure all your audio drivers are up to date, you can do it in the following two ways:
Option 1 – Manually – To update your graphics driver to the latest version, you’ll need to visit the manufacturer’s website, download the exact driver, and then install it manually.
Option 2 – Automatically (Recommended) – If you don’t have the time, patience or computer skills to update your drivers manually, you can, instead, do it automatically with Driver Easy. Driver Easy will automatically recognize your system and find the correct drivers for your sound card and headset, and it will download and install them correctly:
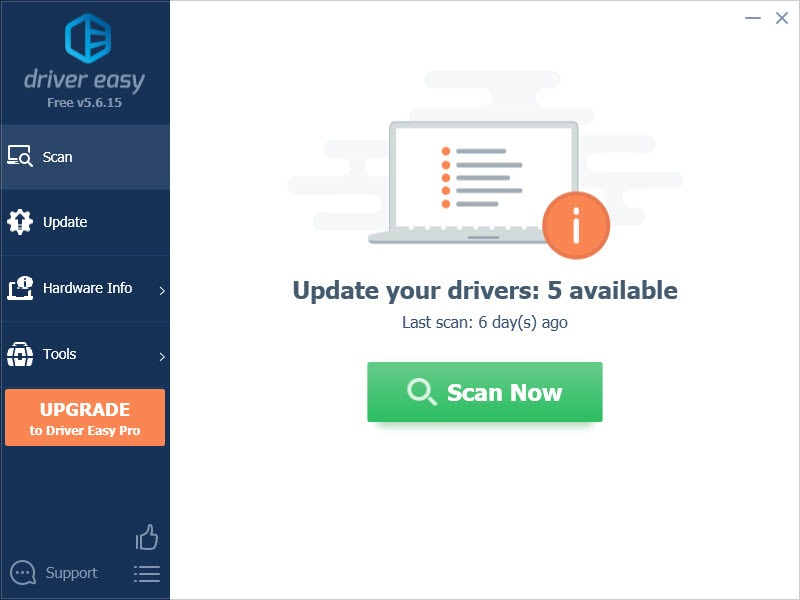
1) Download and install Driver Easy.
2) Run Driver Easy and click the Scan Now button. Driver Easy will then scan your computer and detect any problem drivers.
3) Click the Update button next to the flagged network adapter driver to automatically download the correct version of that driver, then you can manually install it (you can do this with the FREE version).
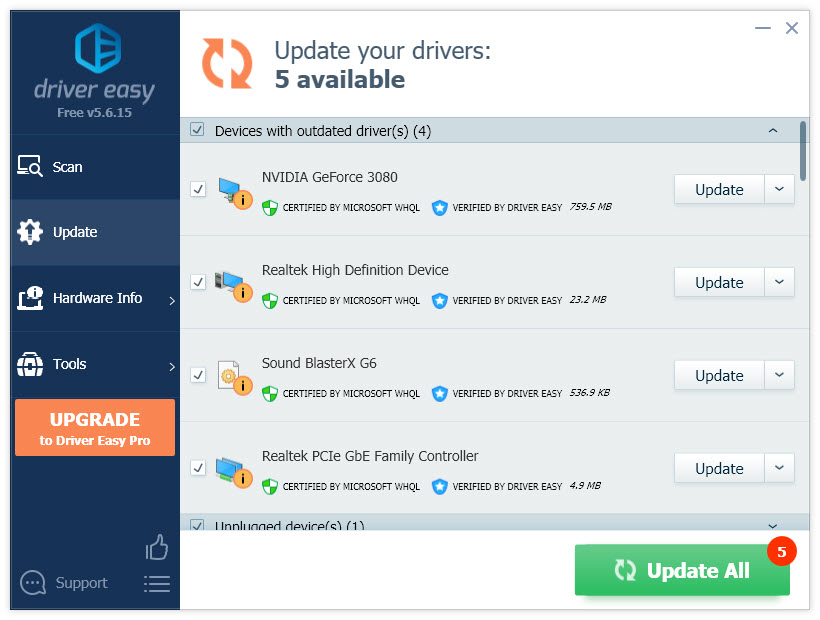
Or click Update All to automatically download and install the correct version of all the drivers that are missing or out of date on your system. (This requires the Pro version which comes with full support and a 30-day money back guarantee. You’ll be prompted to upgrade when you click Update All.)
4) Restart your PC for the changes to take effect.
6. Reinstall Sound Blaster Command
If the Sound Blaster mic not working persists, there might be some issues with your software.
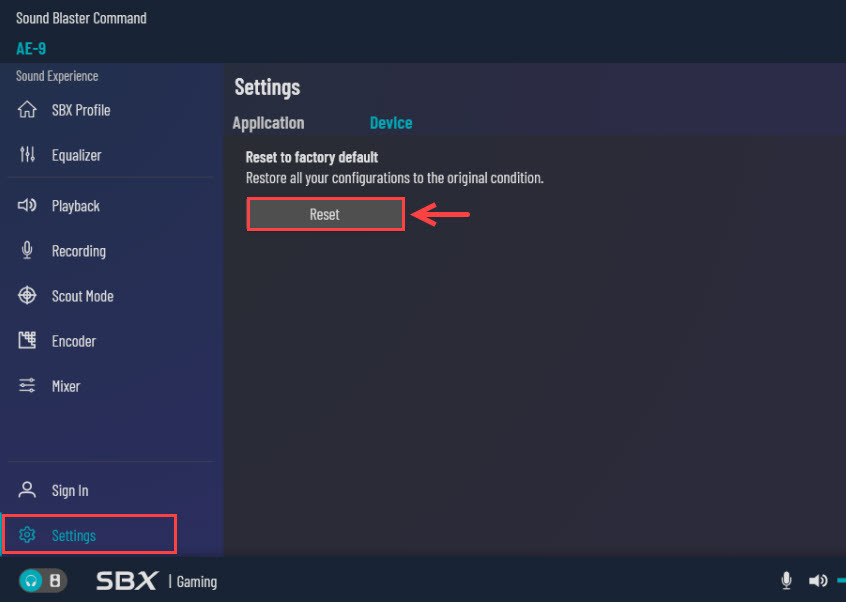
1) Before reinstalling your software, you can try resetting to factory default. Go to your Sound Blaster Command, and select Settings > click Reset.
2) If the microphone issue persists, you can uninstall Sound Blaster Command.
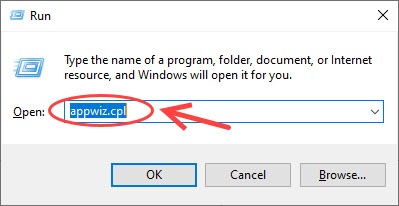
3) Press the Windows key + R to open the Run box, and enter appwiz.cpl.
4) Right-click Sound Blaster Command and select Uninstall.
5) Download the latest software from the Creative official website.
Does your Sound Blaster microphone work now? If unfortunately not, you can isolate the problem by trying another headset, microphone, or even the mic/audio splitter. Or you can disconnect the ACM, connect your microphone or headset to the sound card for trouble isolation. If you need assistance, you can contact Creative.