


It’s sometimes necessary to adjust the speeds of a video. In this post, we’re showing you 2 easy ways to speed up or slow down your videos so that they play at a more desirable pace. Read on and find out…
2 options to speed up or slow down a video
- Speed up or slow down a video with Movavi Video Editor (Recommended)
- Speed up or slow down a video with a built-in app
Option 1: Speed up or slow down a video with a Movavi Video Editor (Recommended)
Movavi Video Editor is a smart video editor tool that helps you edit your videos like a pro. With a simple and easy-to-navigate interface, it allows you to quickly access its stock of features, touch up your video and make it shine.
To adjust your video speeds, just think about how you want the effect and Movavi Video Editor will take care of the rest. Here’re 3 quick guides to adjusting video speeds for different needs, check them out…
- Adjust the speeds of a video (in fast motions or in slow motions)
- Adjust the video track only
- Adjust the audio track only
1. Adjust the speeds of a video (in fast motions or in slow motions)
With Movavi Video Editor, you can make fast motion or in slow motion videos in only a couple of clicks.
Here’s how to do it:
1) Download and install Movavi Video Editor from Movavi’s official website.
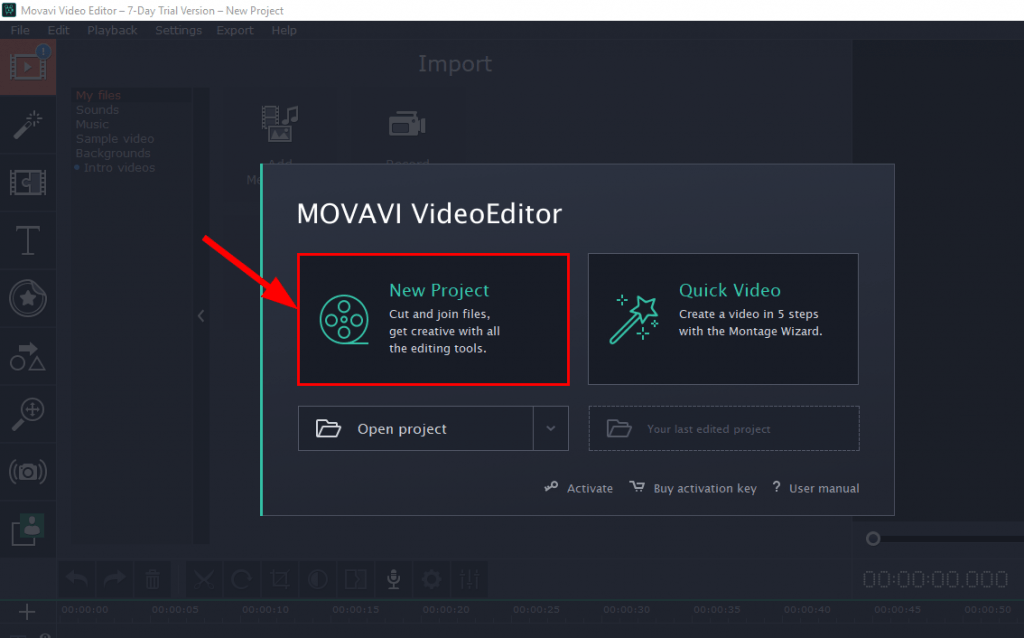
2) Launch Movavi Video Editor and click New Project.
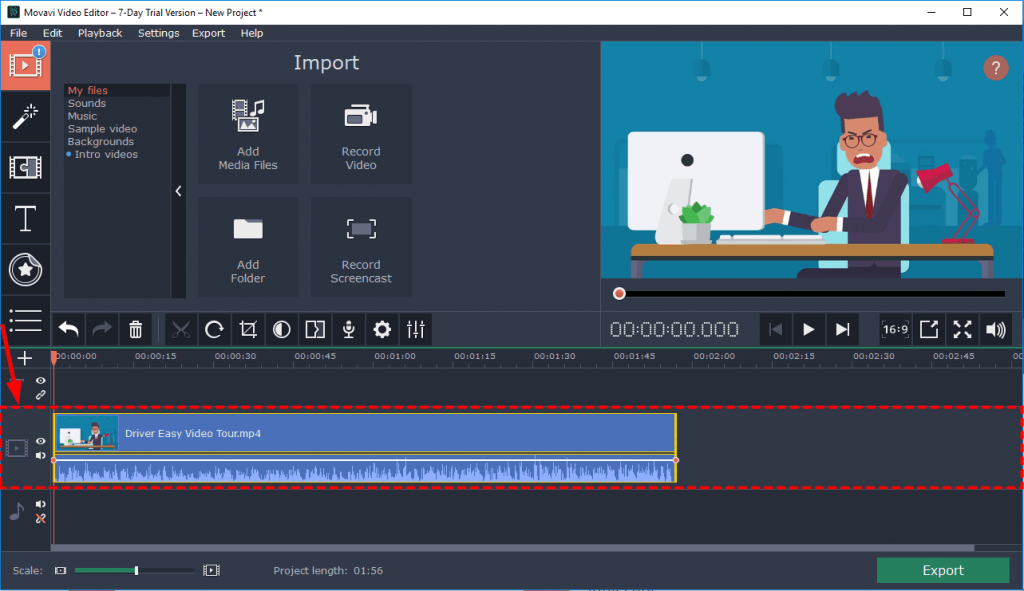
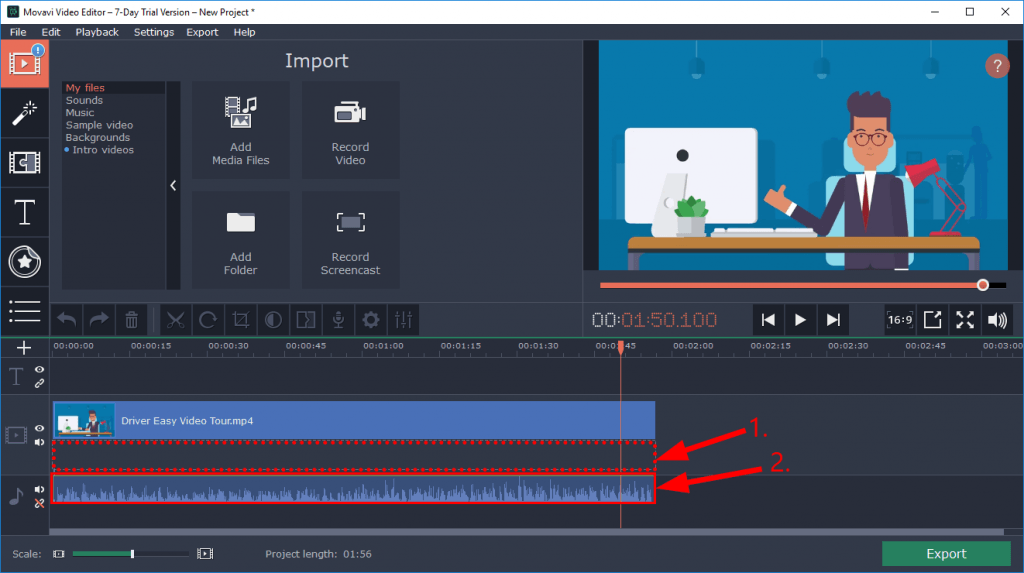
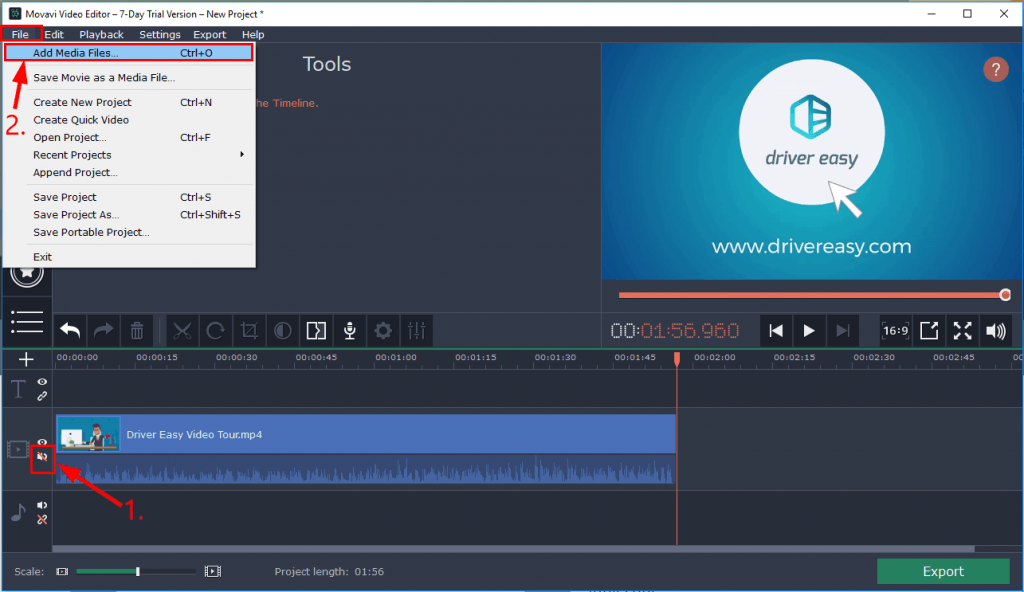
3) Click Add Media Files, open the video file from its path and you’ll see that the video file is automatically added to the video section timeline.
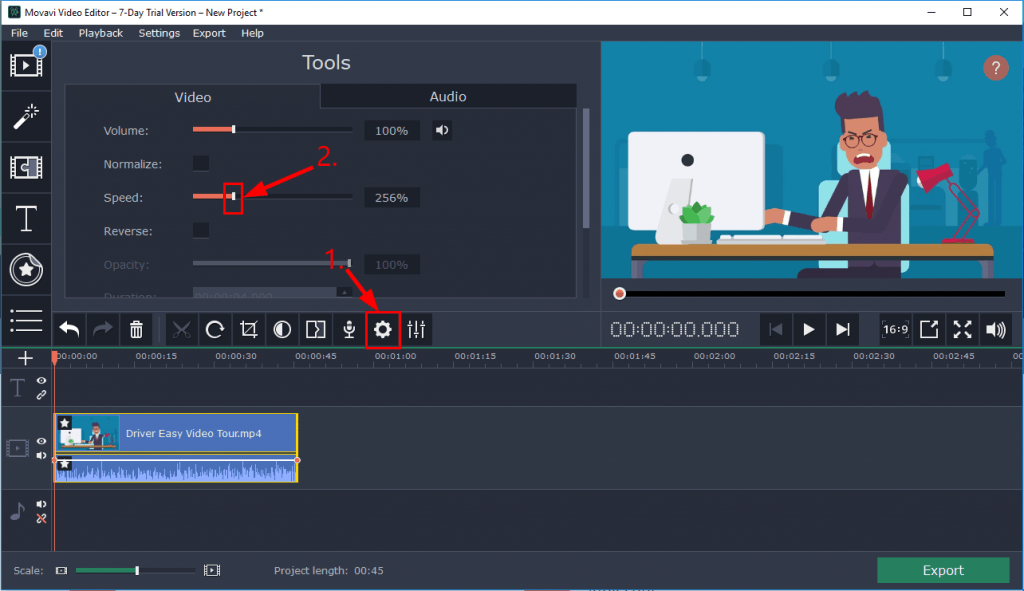
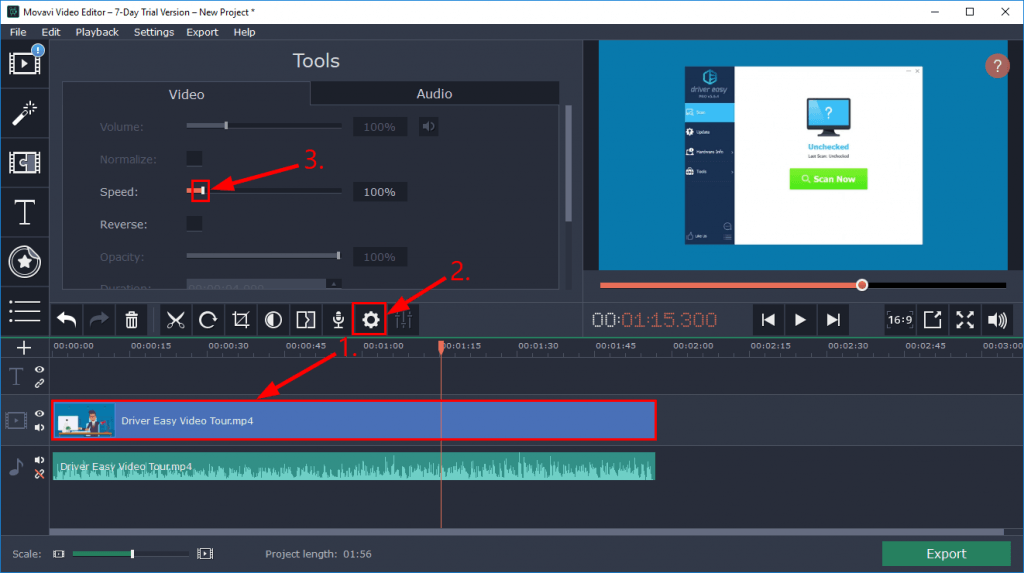
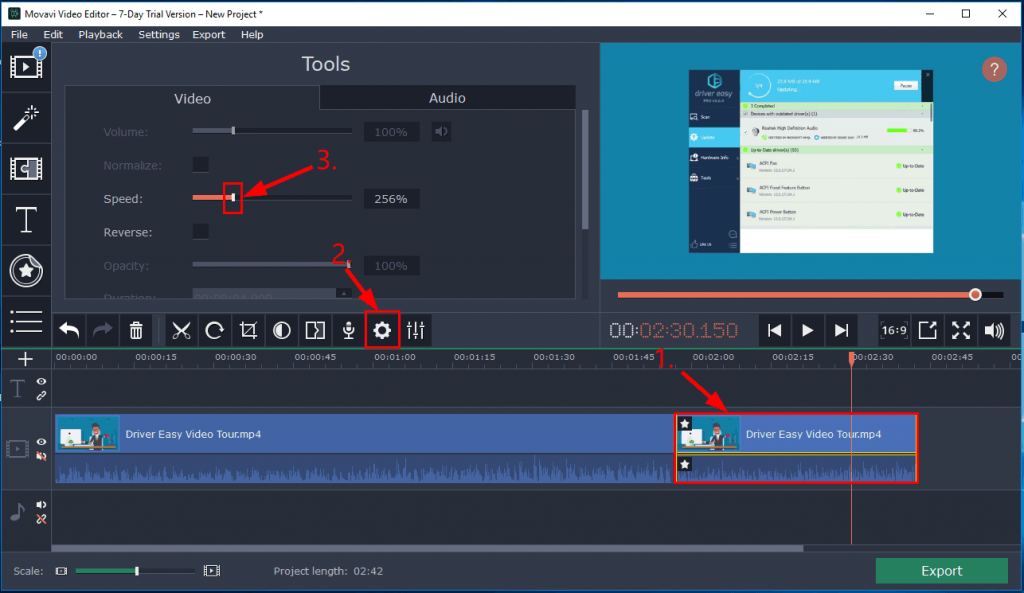
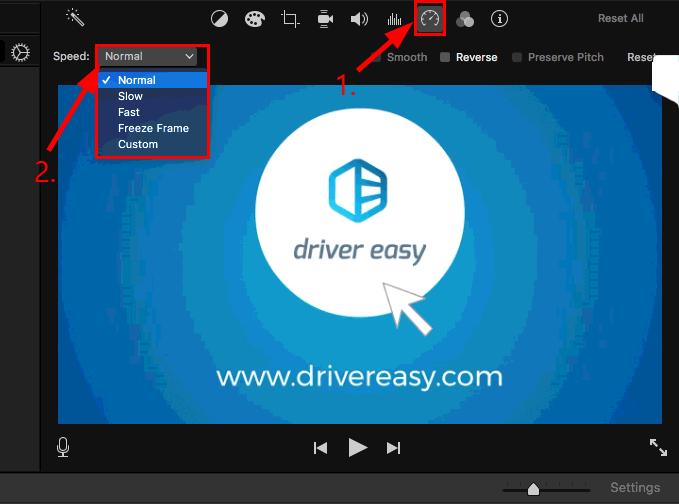
4) Click the cog icon, then in Speed, adjust the slider until you find the proper speed.
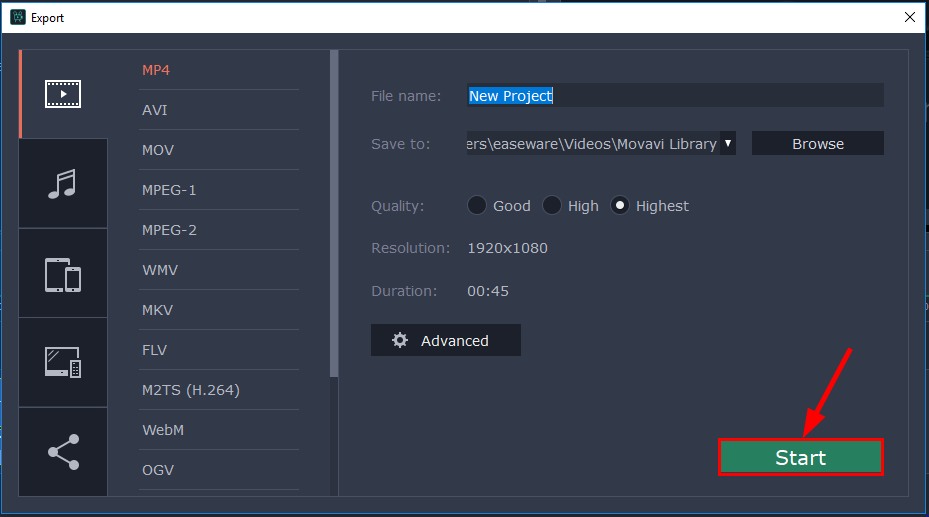
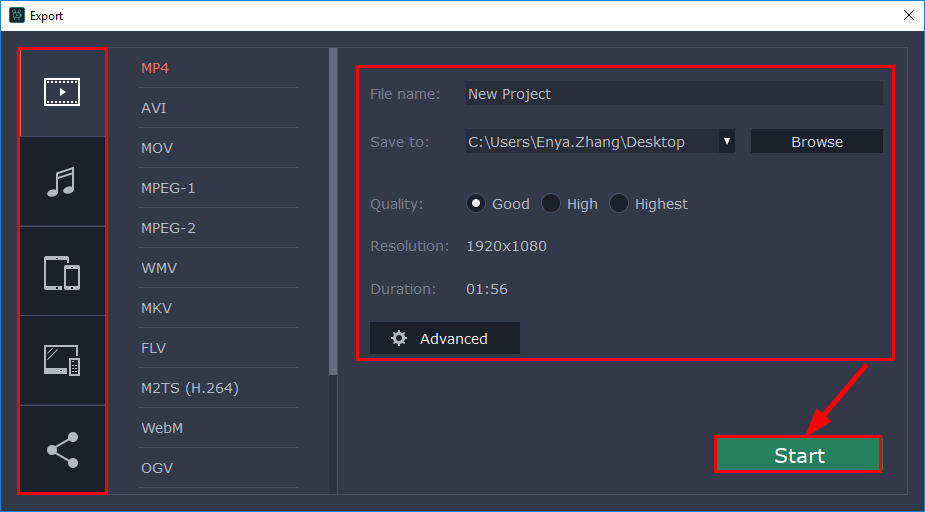
5) Click Export. Then choose the output video format, the viewing device and/or the upload platform. Finally, click Start to save the final video.
Now congrats – you’ve already adjusted your video the way you wanted!
2. Adjust the video track only
There’re also situations where you want to speed up or slow down the video without the audio sounding too funny. In this case, you can adjust only the video track of the video while keeping the audio track at its original pace.
Here’s how to change the speed of the video track only:
1) Download and install Movavi Video Editor.
2) Launch Movavi Video Editor and click New Project.
3) Click Add Media Files, open the video file from its path and you’ll see that the video file is automatically added to the video section timeline.
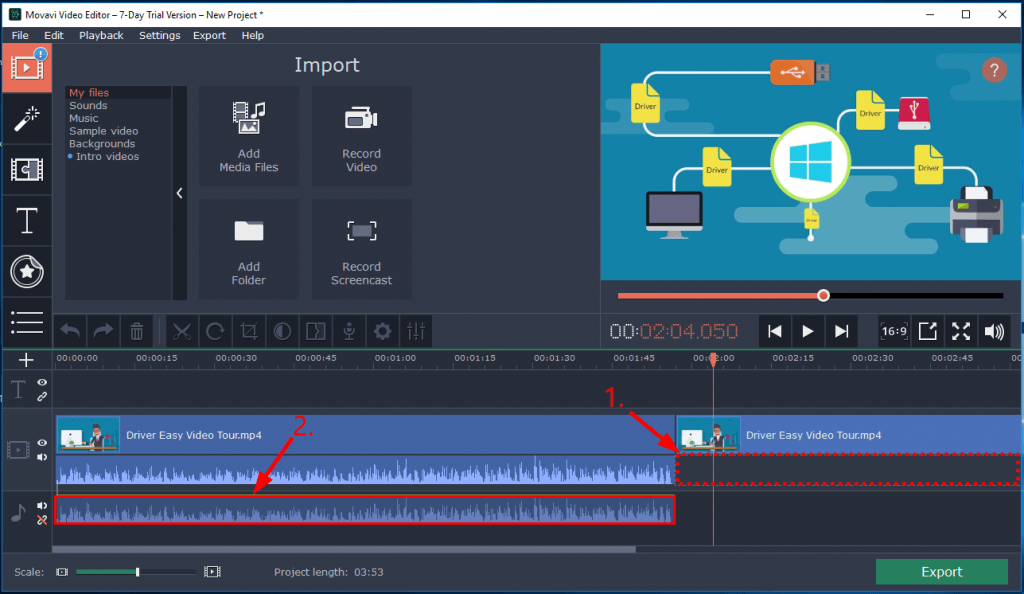
4) Click on the audio of the video file and drag it to the audio section.
5) Click on the video, then click the Clip Properties icon and adjust the slider of the Speed button to the desired speed.
6) Click Export. Then choose the output video format, the viewing device and/or the upload platform. Finally, click Start to save the final video.
Now congrats – you’ve already adjusted the speed of your video the way you wanted!
3. Adjust the audio track only
There are also cases when you just want to adjust only the audio track of your video.
Here’s how to do it:
1) Download and install Movavi Video Editor.
2) Launch Movavi Video Editor and click New Project.
3) Click Add Media Files,open the video file from its path and you’ll see that the video file is automatically added to the video section timeline.
4) Click the sound icon to mute the audio, then click File > Add Media Files to open the same video file a second time.
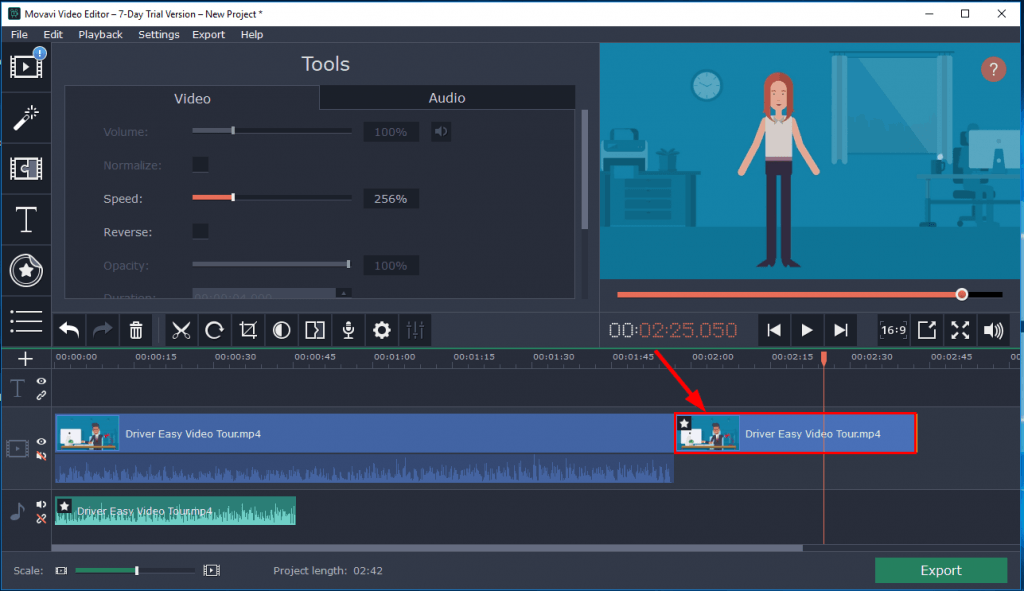
5) You’ll see that the second video file is automatically added in the timeline next to the first video file. Click on the second video file, then click the Clip Properties icon and adjust the slider of the Speed button to the desired speed.
6) Click on the audio of the second video file and drag it to the audio section.
7) Click on the second file, then on your keyboard, press the Del key to delete it.
8) Click Export. Then choose the output video format, the viewing device and/or the upload platform. Finally, click Start to save the final video.
Now congrats – you’ve already adjusted the speed of your video the way you wanted!
Option 2: Speed up or slow down a video with a built-in app
Typically, if you just want to change the speed of your videos so that they play in fast or slow motions, you don’t need a third-party video editor program. The built-in app will do just fine:
I’m using Windows:
Although Windows Media Player is no longer the default music player for Windows, it’s still a built-in app in some versions of Windows and nails its job in speed adjusting.
So firstly check if you have Windows Media Player on your system. If you do, follow the instructions below to speed up or slow down your video:
1) Open the video file in Windows Media Player.
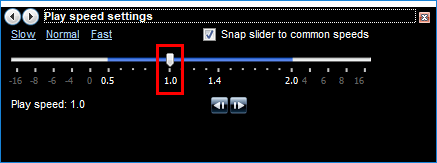
2) Right-click on any space of the video, then click Enhancements > Play speed settings.

3) Adjust the speed slider until you find the right speed.
Now congrats – you’ve already adjusted your video the way you wanted!
I’m using Mac:
If you’re a Mac user, you can use the pre-installed iMovie app on your computer to adjust the speeds of your videos and even some basic editing.
Here’s how to adjust the speeds of your video:
1) Drag the video to the timeline in iMovie.
2) In the top-right corner of the screen, click the speed icon, then choose/customize a proper speed from the drop-down menu.
Now congrats – you’ve already adjusted your video the way you wanted!
There you have it – 2 quick and easy ways to help you change the speeds of your video. Hope this helps and feel free to drop us a comment if you have any follow-up questions.
You may also like:
https://www.drivereasy.com/knowledge/make-a-slow-motion-video-quickly-easily/
https://www.drivereasy.com/knowledge/make-a-slideshow-with-music-quickly-easily/