


SteelSeries Arctis Prime gaming headset is the new release of the Arctis line. It features the Hi-Fi audio drivers from Arctis Pro, and provides decent sound quality at a reasonable price. But some users have been reporting their mics aren’t working. The good news is there are some known fixes available. Read on and find out what they are…
Try these fixes…
You don’t have to try them all; just work your way down until you find the one that does the trick!
1: Set your headset as the input device
2: Enable your mic for recording
4: Turn on the microphone access on your PC
5: Install the latest SteelSeries Engine software
Before we dive into anything advanced…
1: Check your cable connection. Arctis Prime uses a detachable 3.5mm cable for PCs with a single headset jack, and also provides a mic splitter for PCs that use separate jacks for mic audio and headphone audio.
So, if your PC has a single headset jack, simply plugging it in should connect your headset to your PC right away. If your PC has separate audio jacks, make sure you connect the cables correctly.
2: Unmute your mic. On the left earcup of your Arctis Prime, there are two controls, one for muting/unmuting your pic, and one for volume control. You need to make sure your mic is unmuted by pressing the mic mute button and test your audio. 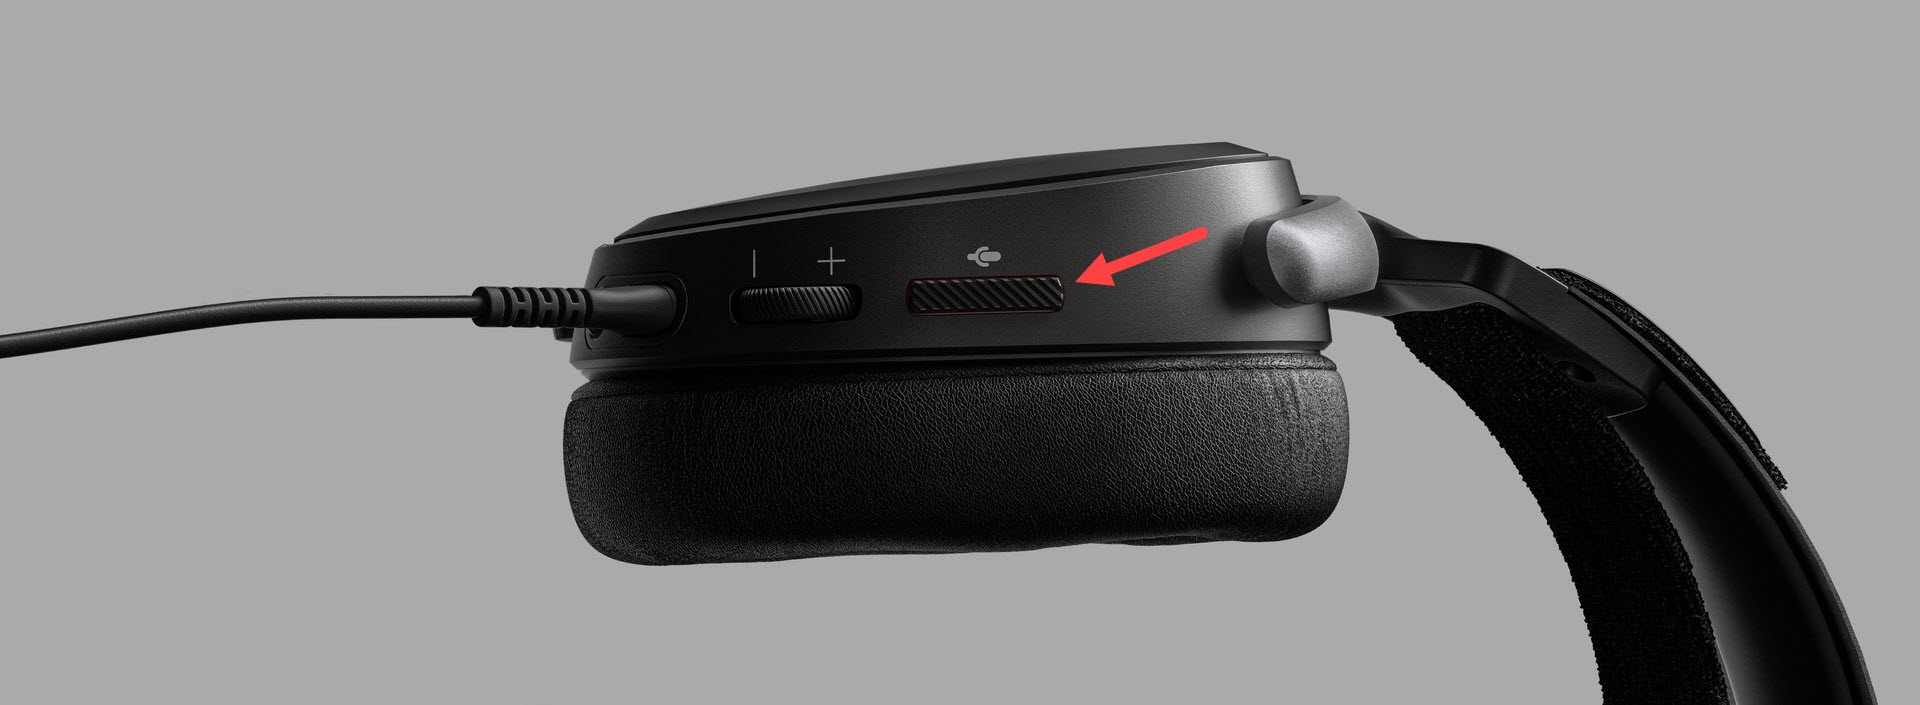
3: Bonus discounts! SteelSeries Coupons are now available on DE coupon site. Don’t miss the deal and remember to grab your promo code before you make the purchase!
Fix 1: Set your headset as the input device
If it’s your first time connecting your Arctis Prime to your PC, your PC may fail to recognize the headset as the input device. You can manually set up the input device on your PC as below:
- Next to your Start button, type sound input in the search bar, then click Sound input device properties.
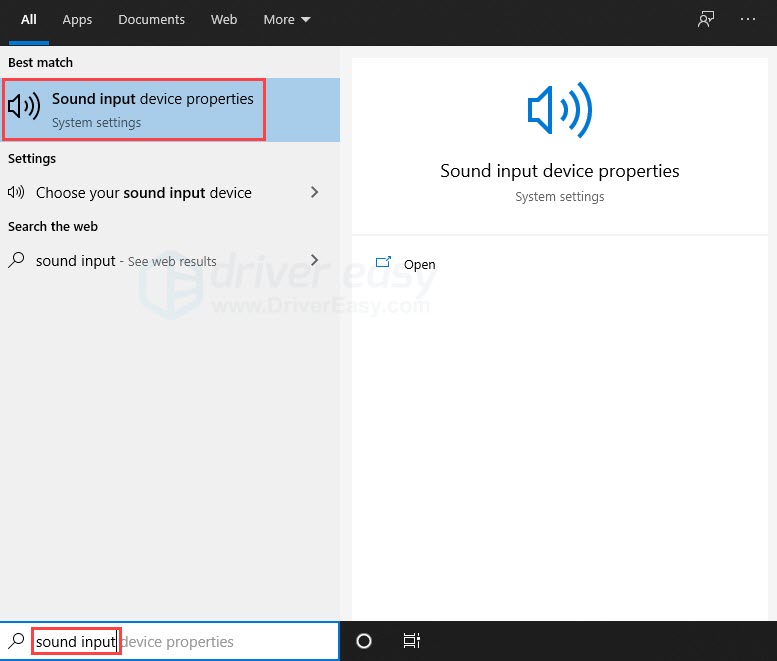
- Choose your Arctis Prime headset as the input device.
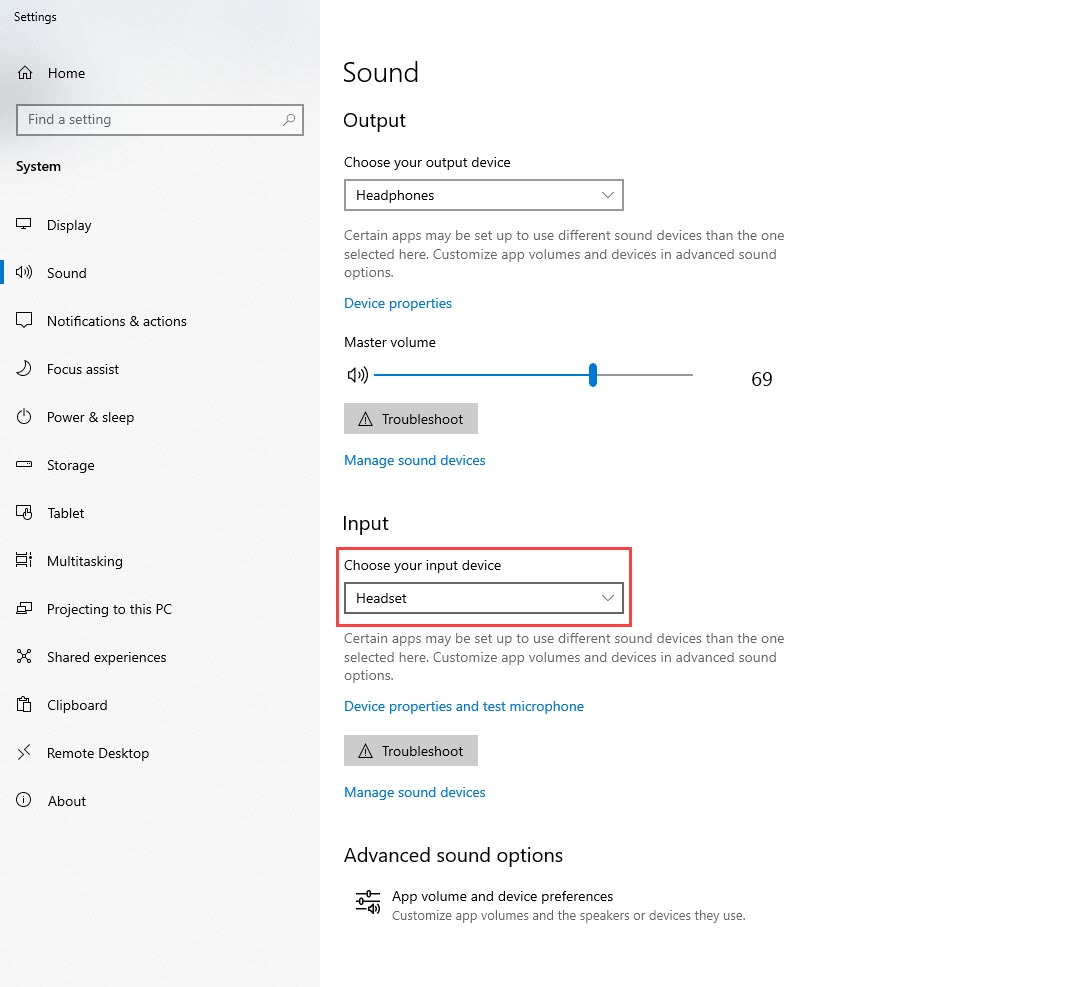
- Test your microphone.
If the input device on your PC has been set as your headset but your mic still doesn’t work, try the next fix.
Fix 2: Enable your mic for recording
When your headset is connected to your PC, it doesn’t necessarily mean the recording feature of your mic is turned on. Here’s how to set up your Arctis Prime microphone for recording:
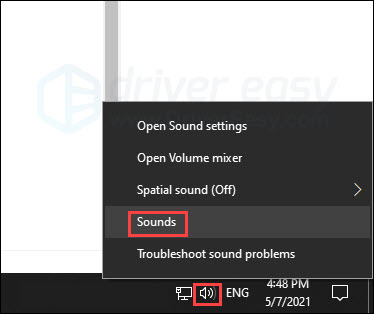
- Right-click the speaker icon on the right side of your taskbar, then click Sounds.
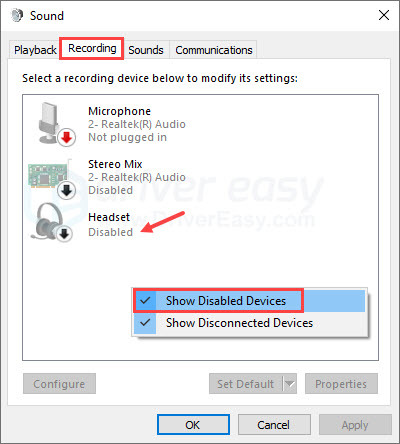
- Switch to the Recording tab and look for your headset. If you don’t see it, right-click an empty area then select Show Disabled Devices.
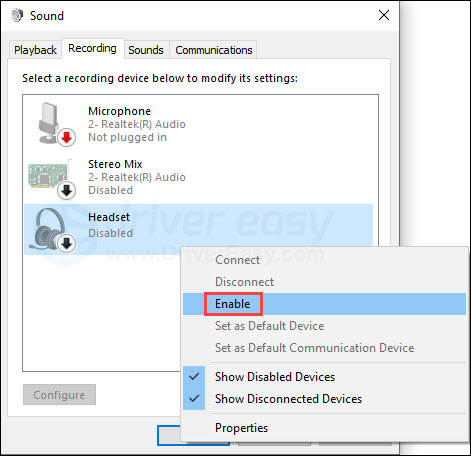
- Right-click your headset device, then click Enable.
- Click Apply then OK.

If your headset mic is enabled for recording but it still won’t pick up your voice in-game, move on to the next fix.
Fix 3: Update your audio driver
A faulty or outdated audio driver is a common cause for the mic not working problem. If your mic is down, you may want to make sure your audio driver is up-to-date and functioning properly.
There are two ways you can get the right audio driver: manually or automatically.
Manual driver update – You can update your audio driver via Device Manager. Notice that although Windows will automatically scan for your driver’s available updates, it doesn’t update its database very often. You may need a new version of the driver but Device Manager won’t detect any.
Automatic driver update – If you don’t have the time, patience, or computer skills to update your driver manually, you can, instead, do it automatically with Driver Easy. Driver Easy will automatically recognize your system and find the most recent driver for your exact audio card as well as your Windows version. Then it will download and install the driver correctly:
- Download and install Driver Easy.
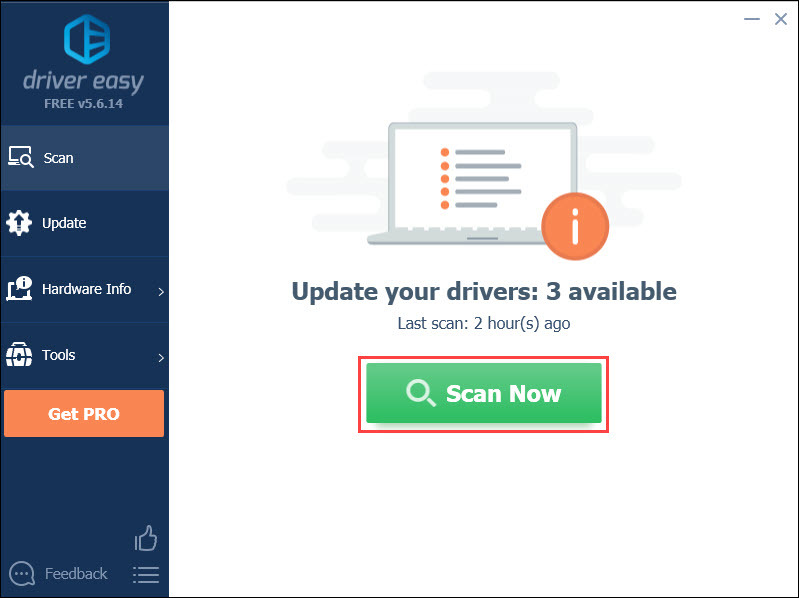
- Run Driver Easy and click the Scan Now button. Driver Easy will then scan your computer and detect any problem drivers.
- Click the Update button next to the flagged audio driver to automatically download the correct version of the driver, then you can manually install it (you can do this with the FREE version).
Or click Update All to automatically download and install the correct version of all the drivers that are missing or out of date on your system. (This requires the Pro version which comes with full support and a 30-day money-back guarantee. You’ll be prompted to upgrade when you click Update All.)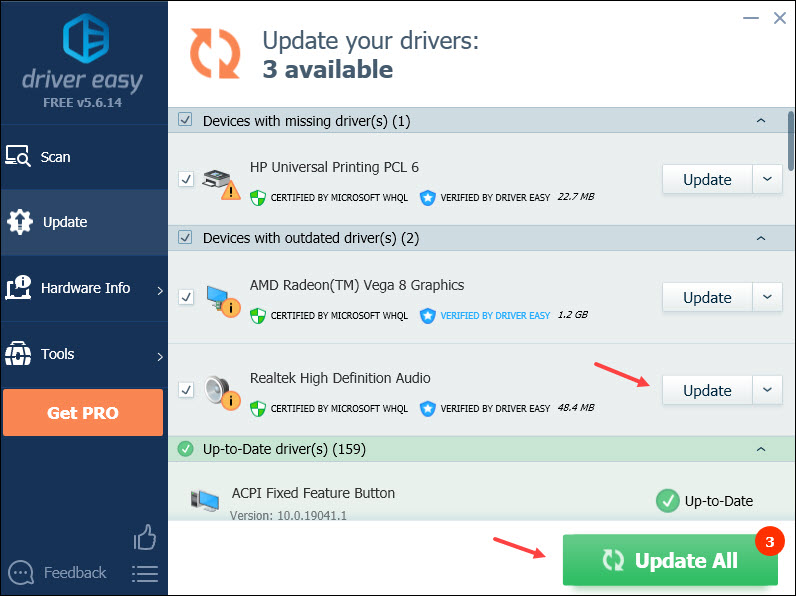
Fix 4: Turn on the microphone access on your PC
Although less likely, sometimes your microphone isn’t allowed to record audio even when it’s connected to your PC. In this case, you’ll need to turn on the access of your headset mic on your PC. Here’s how:
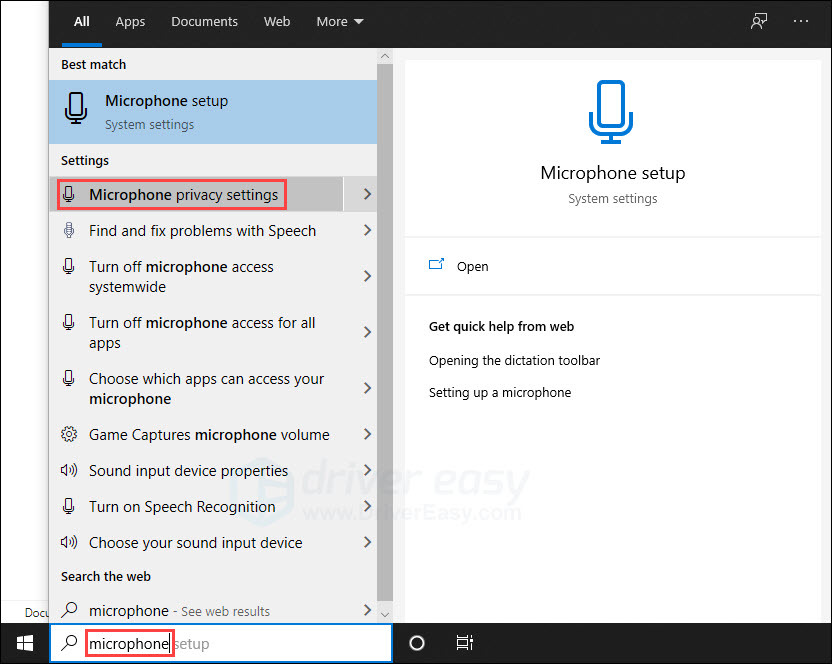
- In the search bar next to the Start button, type microphone then click Microphone privacy settings.
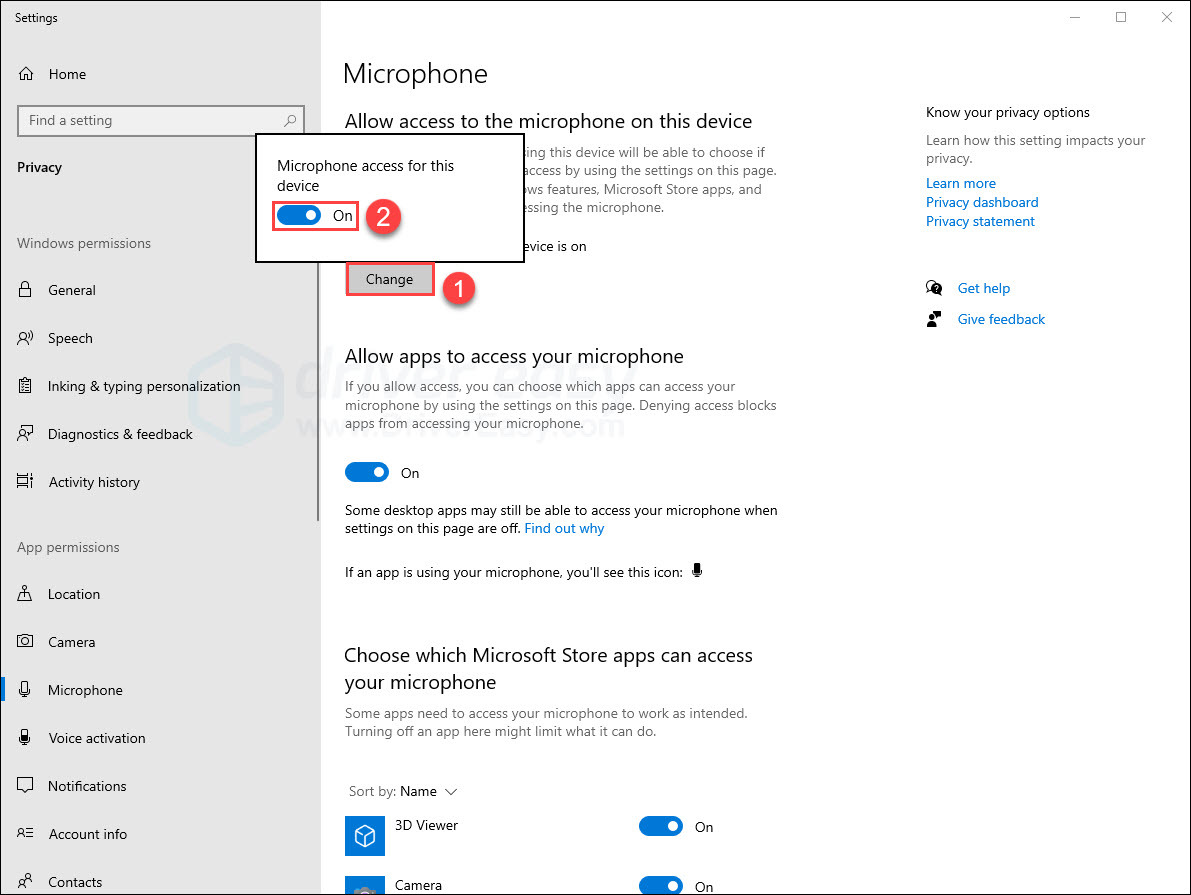
- Click Change, then turn on the microphone access for this device.
If your Arctis Prime microphone is still not working, try the last fix.
Fix 5: Install the latest SteelSeries Engine software
SteelSeries Engine is a software that’s recommended for customization and configuration for Steel Series products. If the fixes above don’t solve your problem, you can try to install the latest SteelSeries Engine and test your microphone:
- Go to the SteelSeries Engine official site and download the software.
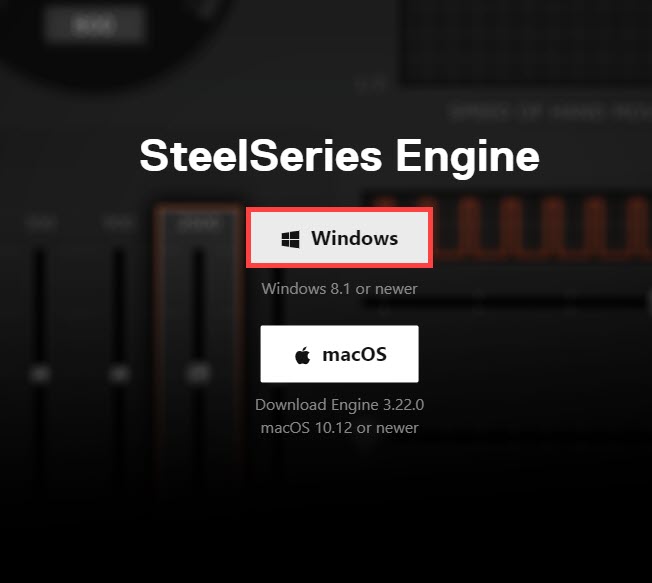
- Run the SteelSeries installer, and follow the on-screen instructions to finish the installation.
- Once SteelSeries Engine is installed on your PC, run the software and it’ll automatically detect your Arctis Prime headset.
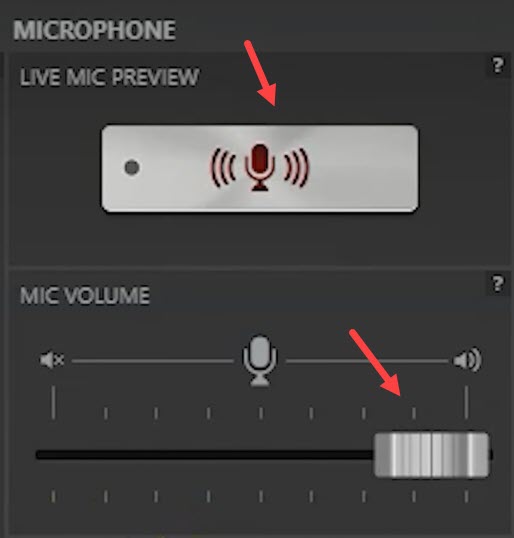
- Go to the headset page, and you can test your microphone using the LIVE MIC PREVIEW feature. You can also adjust your mic volume below.
Hopefully this article solves your problem and your Arctis Prime mic is working now! Please leave a comment if you have any questions or suggestions.