


If your new graphics card has no display or all you see is a black screen, no fret, it’s probably a simple connection issue. We have here a troubleshooting process that’ll help to identify the culprit to your new GPU no display issue. So if this is also bothering you, look no further and read to get this problem sorted.
Try these fixes for the new graphics card black screen or no display problem
The following troubleshooting process is listed by difficulty: so you should start from the top, and work your way down until you find the one that does the trick to fix or pinpoint the culprit to the new GPU no display problem for you.
- Check the cable and PCIe connections
- See if an additional power supply is required
- Ditch any converter
- Boot with the integrated display card
- Make sure your computer can recognize your GPU
- Force a clean install of the GPU driver
- See if the problem is with your graphics card
1. Check the cable and PCIe connections
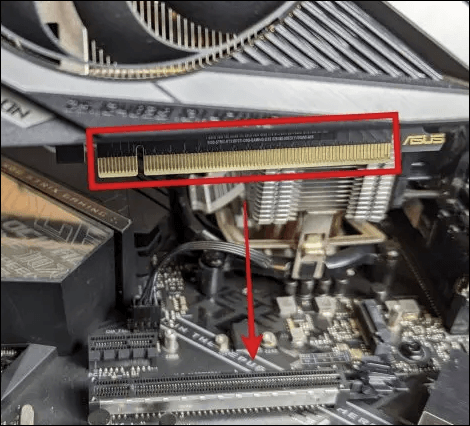
When your newly installed GPU has no display, the first thing you check is to ensure that the display cable you’re using is securely and safely inserted into the right ports on the motherboard, and that it’s working just fine.
Then please ensure that the new graphics card is improperly installed by making sure that the gold PCIe connector of your graphics card lines up with the PCIe x16 slot perfectly.
2. See if an additional power supply is required
If there’s still no display on your screen when you’ve checked the cable and the PCIe slot connection, please see if the new GPU requires an additional power supply.
Some graphics cards have a rather high requirement for overall computer power, especially gaming GPUs. So if you have an extra PSU (power supply unit), or a more powerful PSU than the one you’re using now, try to use it for the new graphics card to see if an additional power supply helps to light up that screen.
If this is not the problem, please move on.
3. Ditch any converter
If you’re using any display converter (like HDMI to DP, VGA to HDMI, etc.) for the new GPU and your monitor, please stop using them, as the new GPU no display problem could also relate to the converter.
If your new graphics card can’t connect to your monitor without a converter, please buy a new cable instead.
4. Boot with the integrated display card
If you have an integrated display card (like an Intel display or an AMD display), your computer might be set to boot with the new graphics card (which has no driver available) when it’s installed, and therefore with the black screen or no display issue.
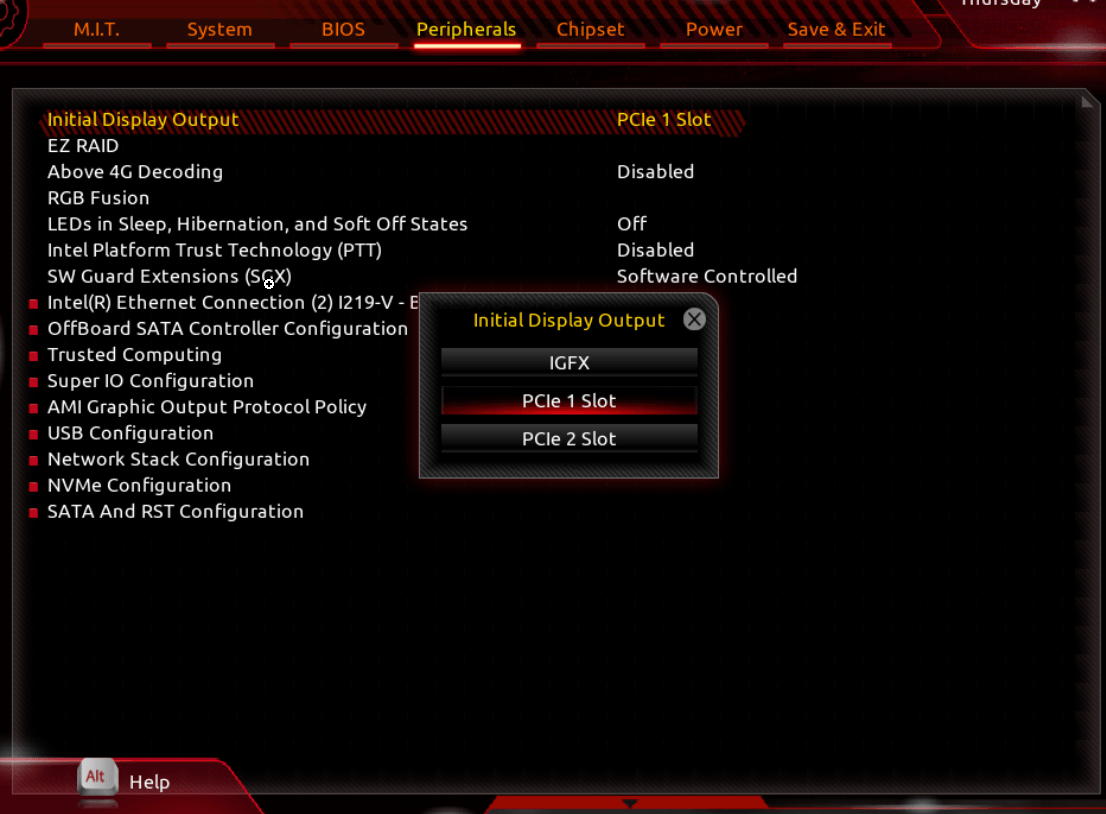
To see if this is your case, you’ll need to unplug the new GPU, then start your computer into BOS, and set the display card to your integrated one when booting.
This is a screenshot taken from a Gigabyte BIOS, and you should usually find the booting option by checking items like Peripherals, then selecting IGFX as the Initial Display Output.
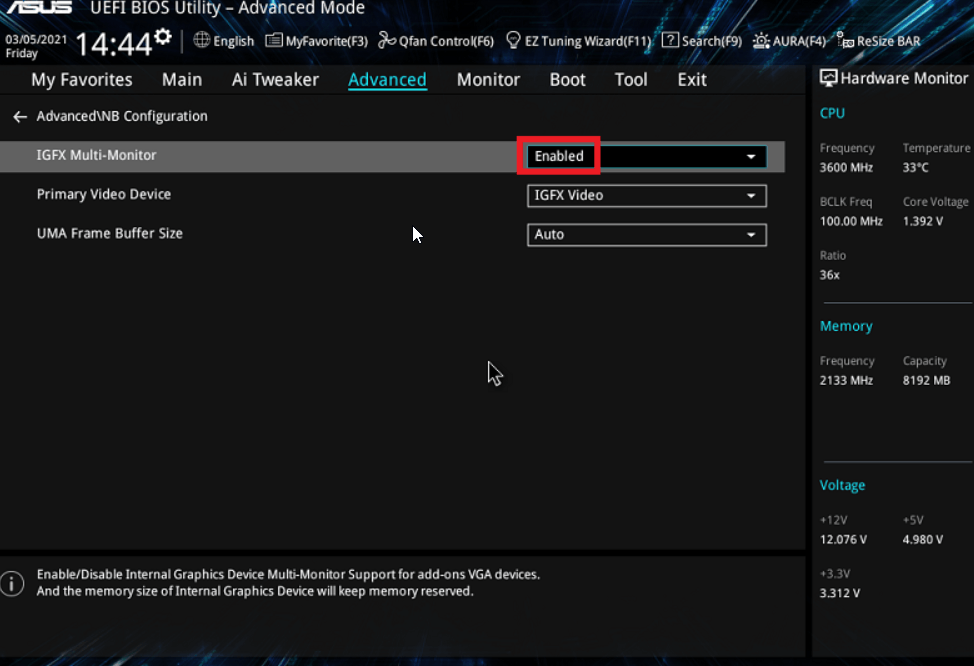
On an ASUS motherboard, you could see something like Enabled IGFX Multi-monitor:
When you have the monitor display back when booting with the integrated display card, update the display card driver to fix the no display with the new GPU problem.
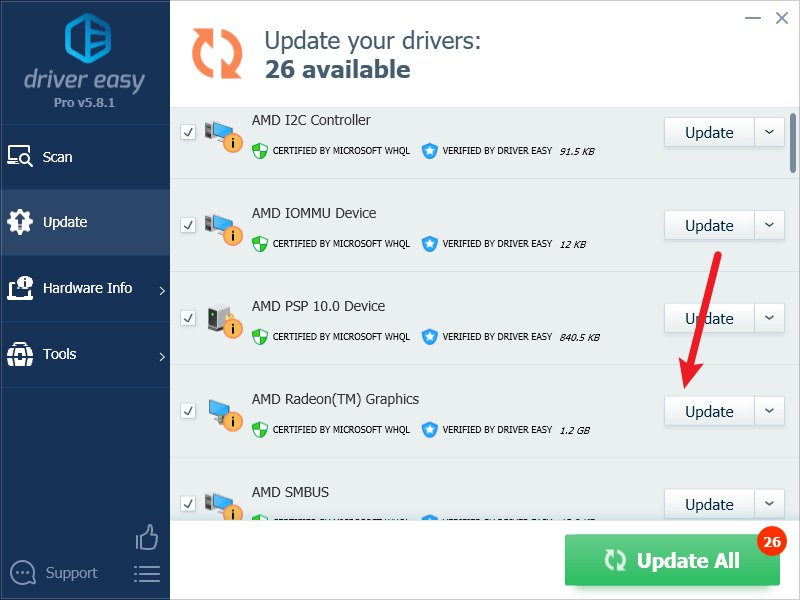
If you don’t have the time, patience or skills to update the driver manually, you can do it automatically with Driver Easy. Driver Easy will automatically recognize your system and find the correct drivers for it. You don’t need to know exactly what system your computer is running, you don’t need to be troubled by the wrong driver you would be downloading, and you don’t need to worry about making a mistake when installing. Driver Easy handles it all.
You can update your drivers automatically with either the FREE or the Pro version of Driver Easy. But with the Pro version it takes just 2 steps (and you get full support and a 30-day money back guarantee):
- Download and install Driver Easy.
- Run Driver Easy and click the Scan Now button. Driver Easy will then scan your computer and detect any problem drivers.

- Click Update All to automatically download and install the correct version of all the drivers that are missing or out of date on your system. (This requires the Pro version – you’ll be prompted to upgrade when you click Update All.)
Note: You can do it for free if you like, but it’s partly manual. - Restart your PC for the changes to take effect.
5. Make sure your computer can recognize your GPU
If the above doesn’t help to fix the new graphics card black screen issue for you, please make sure that your computer can recognize your new GPU at this stage.
To do so, you can use a third-party tool named GPU-Z, which can be downloaded from here.
When this tool is downloaded, install it as per the on-screen instructions. Then launch it to check your GPU status and information like this:
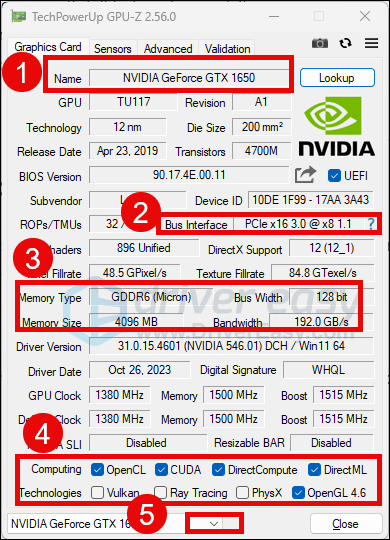
Here are the things you should pay extra attention to:
- If the graphics card is fake, the name shown here should be marked with a [FAKE] symbol. So the no display issue with the new graphics card should be with the card itself.
- Keep an eye on the Bus Interface information: if it doesn’t show PCIe x 16 or PCIe x 8, it could mean that the problem is with the card’s gold connector.
- The Memory Type and Memory Size shouldn’t be empty or null.
- If the Computing and Technologies sections have no ticks, or the OpenGL detected is only Open 1.0, the graphics card is at fault.
- Last but not least, if you have more than one GPU found in your computer, you should be able to select it from the drop-down menu.
Check the list of things to see if the problem is with your display card. If all is checked out but your monitor still has no display, please move on.
6. Force a clean install of the GPU driver
The new GPU has no display or black screen issue could also be caused by a faulty display card installed.
To fix it, you should force a clean install of the graphics card driver. To do so:
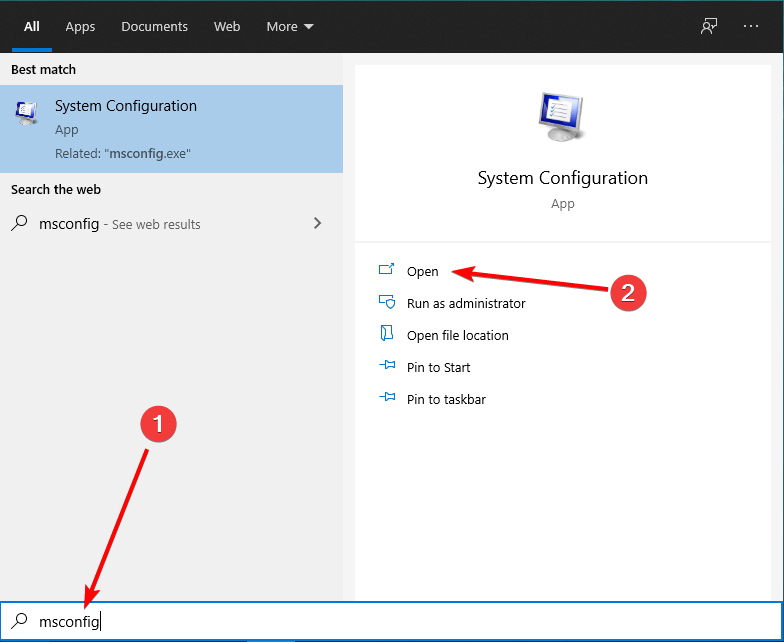
- Click the Windows start menu and type msconfig, then click Open:
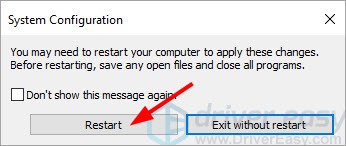
- Select the Boot tab, then check Safe boot and Network and click Apply and OK.

- When you’re prompted to restart your computer to apply these changes, click Restart and you’ll boot into Safe Mode.
IMPORTANT: Your computer will always boot into Safe Mode with Networking after this. To exit this mode, please refer to this post: How to Exit Safe Mode on Windows 10 - On your keyboard, press the Windows key and the R key at the same time, then type devmgmt.msc and hit Enter.

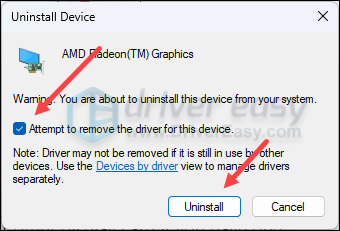
- Double-click to expand the Display adapters category, then right-click your display card and select Uninstall device.
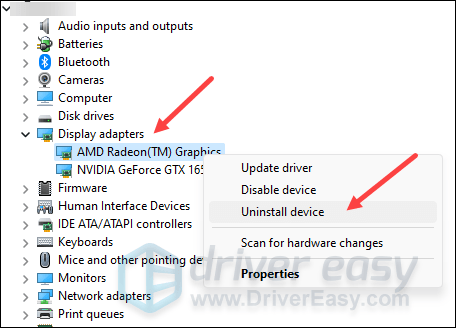
- Tick the box for Attempt to remove the driver for this device and click Uninstall.
- Then update your graphics card driver with Driver Easy Pro.
7. See if the problem is with your graphics card
At this stage, if the new GPU still has no display on your monitor, you may need to consider if the problem is with the graphics card itself.
If you have a second computer with working cables, monitors and PCIe slots, you can use this new graphics card on that computer to see if the same problem is seen. If so, then the new GPU is very likely at fault.
If you don’t have a second device for the test, you can always seek help from a hardware technician, as they usually have some hardware testing kit that can easily identify the problem.
Thanks for reading the post. If you have other suggestions, please feel free to leave a comment below.